Follow these instructions to use the Informatica PowerCenter Designer client to create a Greenplum Database loader target and mapping to load data into Greenplum Database.
Prerequisites
- Install the VMware Greenplum Connector for Informatica components to the Informatica PowerCenter server and client machines. See Installing the Connector.
- Configure and start GPSS in the Greenplum Database cluster. See Installing and Configuring GPSS in Greenplum Database.
- (Optional) Deactivate verbose logging as described in Deactivating Verbose Session Logging.
Process
- Step 1: Create a Mapping Between Source and Target Tables
- Step 2: Create and Configure a Data Loading Workflow
Step 1: Create a Mapping Between Source and Target Tables
Follow these steps to use PowerCenter Designer to map columns in a source table to columns in a target Greenplum Database table:
-
Start the Informatica PowerCenter Designer client application.
-
In the Repositories list, right-click the name of the repository where you installed the Connector server components, and select Connect.
-
Enter your credentials to access the repository, and click Connect.
-
Right-click an available database in the repository and click Open to open its data in the analyzer view.
-
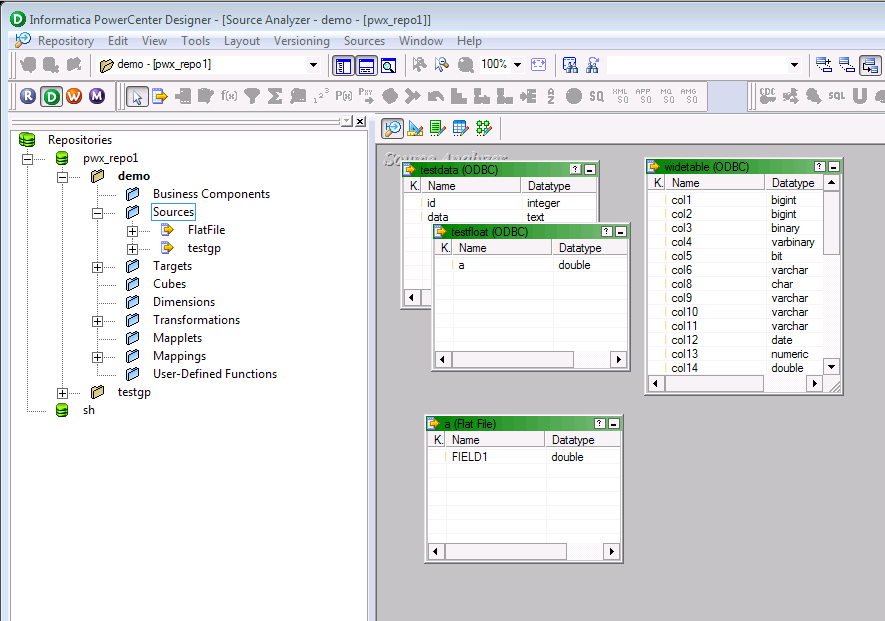
Expand the Sources node to show the source tables that are available for mapping. If necessary, use the Sources menu to identify a new source table to map into Greenplum Database. Ensure that available source tables appear in the Sources folder and Source Analyzer view before you continue. For example:
-
Click the Target Designer icon to begin creating a Greenplum Database target table for loading data.
-
Select Targets > Import from Greenplum5 to display the Establish Connection window:

-
Enter the following information in the Establish Connection window to connect to your Greenplum Database cluster:
- Loader host address, Loader host port: Enter the host name and port number where the GPSS service is listening for connections. These values must correspond to the listen address
HostandPortproperties in the JSON configuration file used to start GPSS. See Installing and Configuring GPSS in Greenplum Database. - Greenplum master address, Greenplum master port: Enter the host name and port number of the Greenplum Database master host.
- Database Name: Enter the name of the database that contains the table(s) where you want to load data from Informatica.
- Greenplum Database Username, Password: Enter the Greenplum Database user name and password to use for loading the data.
- Use SSL: Select this check box to use if you configured GPSS to use
httpscommunication between Informatica and the GPSS service. Leave this box unchecked if you configured GPSS to use unencryptedhttp. - Path of Certificate Authority File: If you chose to use SSL with certificates, enter the path to the local Certificate Authority file on the Informatica client machine. This file must contain the Certificate Authority that signed the certificate for the GPSS service (see Installing and Configuring GPSS in Greenplum Database).
- Schema: Enter the Greenplum Database scheme that contains the table(s) where you want to load data from Informatica.
- Loader host address, Loader host port: Enter the host name and port number where the GPSS service is listening for connections. These values must correspond to the listen address
-
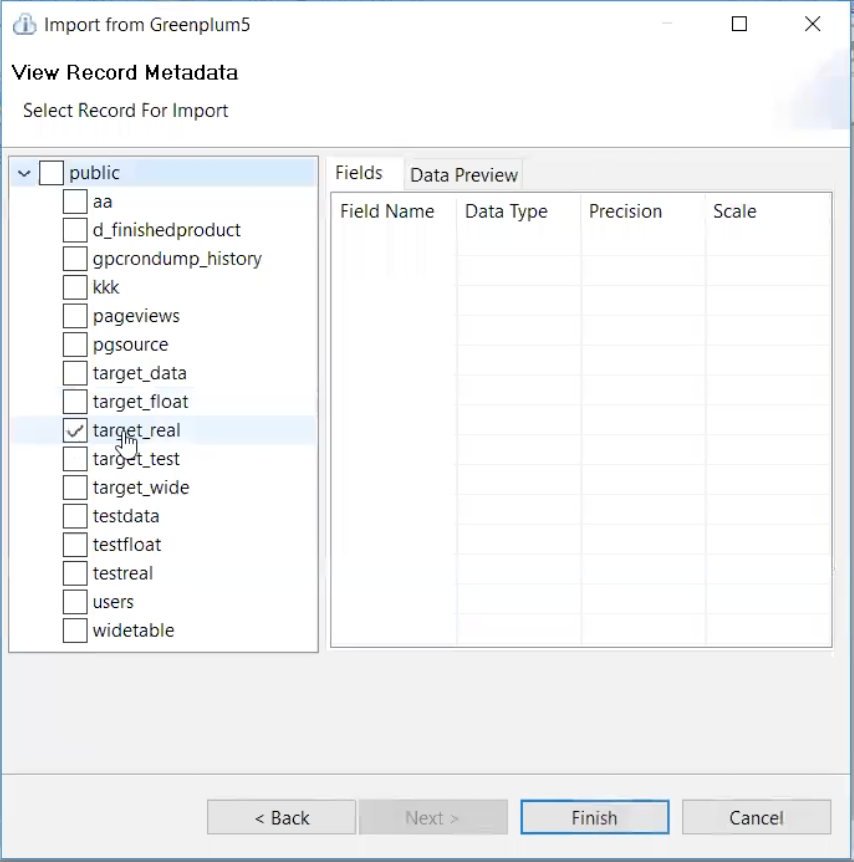
Click Connect to verify the connection parameters you entered. If the connection is successful, click Next to display the View Record Metadata screen:
-
Click the name of a table to display its schema in the preview pane. Use the check boxes to select one or more tables to use as a target for load operations.
-
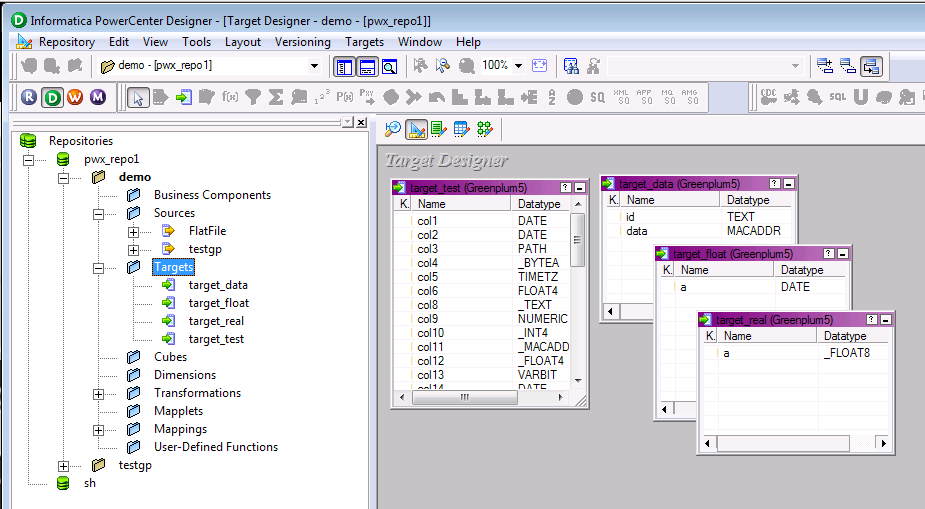
Click Finish to add the target tables to the Target Designer window. For example:
-
Click the Mapping Designer icon to begin creating a mapping between a source table and a Greenplum Database target table.
-
Drag the name of a source table from the Repositories list to the Mapping Designer pane. Enter a name for the new mapping if PowerCenter prompts you to name the mapping.
-
Drag the name of a target table from the Repositories list to the Mapping Designer pane. At this point, the Mapping Designer pane should show the Source Definition and Source Qualifier windows, as well as the Target Definition window. For example:

-
Using the Source Qualifier window, drag from the name of an available column in the source table to the column you wish to map in the Target Definition window. Repeat this step to map multiple columns between the source and target tables as needed.
Step 2: Create and Configure a Data Loading Workflow
Follow these steps to create a workflow for loading data between the source and target tables:
-
While still in PowerCenter Designer, click the Workflow Manager button to launch Informatica PowerCenter Workflow Manager.
-
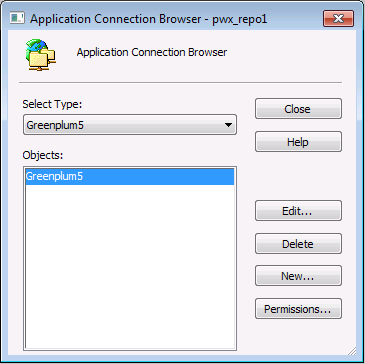
Select Connections > Application… to open the application connection browser:
-
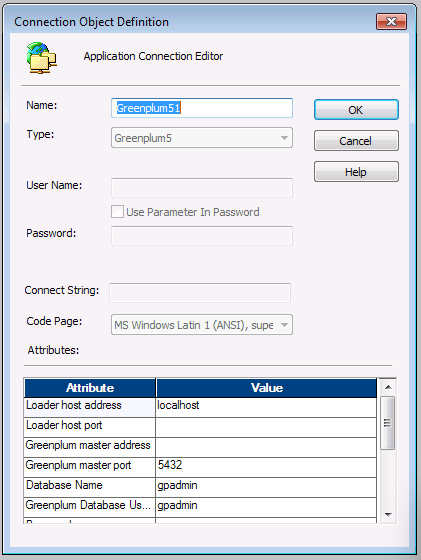
Select Greenplum5 from the Select Type menu, then click New… to show the Connection Editor window:
-
Use the Attributes fields to enter GPSS connection parameters for the Greenplum Informatica Connector. These attributes use the same names as the fields provided in the Establish Connection window of the PowerCenter client:
- Loader host address, Loader host port: Enter the host name and port number where the GPSS service is listening for connections. These values must correspond to the listen address
HostandPortproperties in the JSON configuration file used to start GPSS. See Installing and Configuring GPSS in Greenplum Database. - Greenplum master address, Greenplum master port: Enter the host name and port number of the Greenplum Database master host.
- Database Name: Enter the name of the database that contains the table(s) where you want to load data from Informatica.
- Greenplum Database Username, Password: Enter the Greenplum Database user name and password to use for loading the data.
- Use SSL: Select this check box to use if you configured GPSS to use
httpscommunication between Informatica and the GPSS service. Leave this box unchecked if you configured GPSS to use unencryptedhttp. - Path of Certificate Authority File: If you chose to use SSL with certificates, enter the path to the local Certificate Authority file on the Informatica client machine. This file must contain the Certificate Authority that signed the certificate for the GPSS service (see Installing and Configuring GPSS in Greenplum Database).
- Schema: Enter the Greenplum Database scheme that contains the table(s) where you want to load data from Informatica.
- Loader host address, Loader host port: Enter the host name and port number where the GPSS service is listening for connections. These values must correspond to the listen address
-
Click OK and then Close to create the connection to GPSS.
-
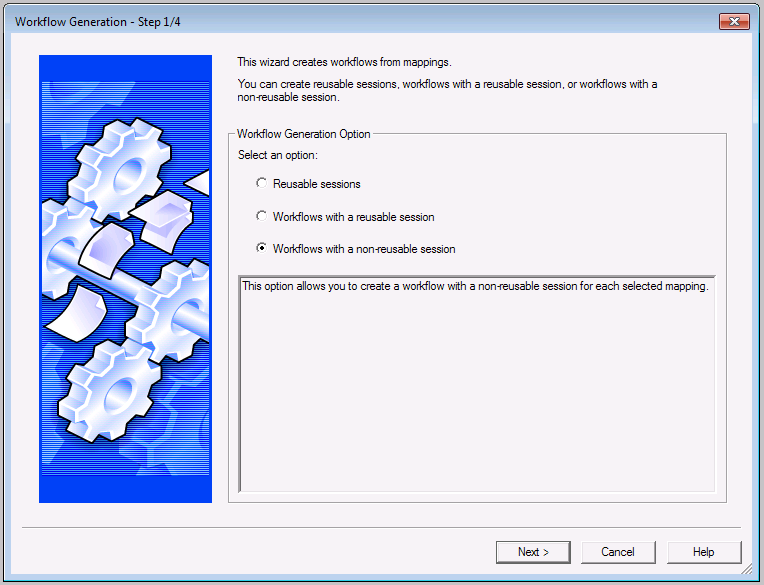
Return to the PowerCenter Designer Client, and locate the new mapping you just created. Right-click the mapping name and select Generate Workflow… This displays the Workflow Generation wizard:
-
Select a session option for the workflow, then click Next.
-
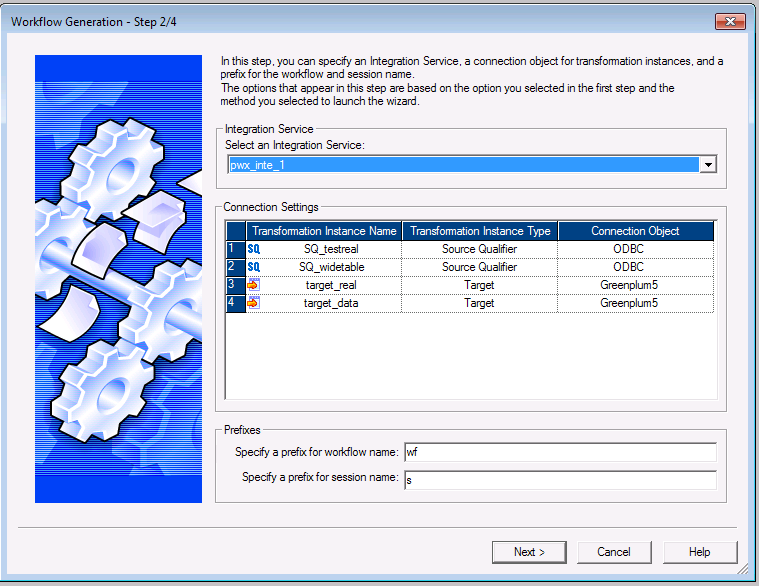
Verify that the Connection Object value for the target columns show “Greenplum5,” and also that connections exist for the source tables. (Create connections for the source tables in Informatica PowerCenter Workflow Manager if necessary.) Click Next to continue. For example:
-
Click Next, and then click Finish to create the new workflow.
-
Return to Informatica PowerCenter Workflow Manager and locate the new workflow that you just created.
Note: You may need to Disconnect and then Connect to the repository database before the new workflow appears in PowerCenter Workflow Manager.
-
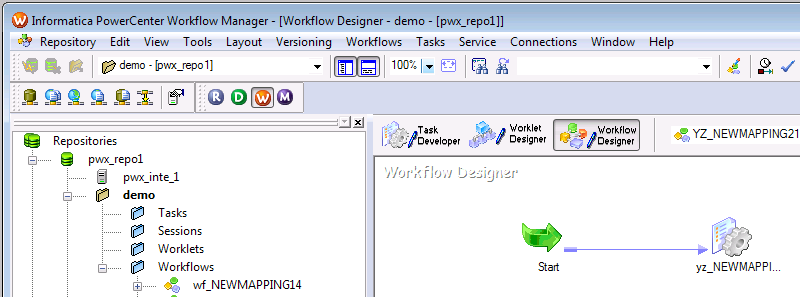
Right-click the name of the new workflow and select Open to open it in the Workflow Designer pane. The WorkFlow Designer should show a start button and the name of the new workflow, as follows:
-
In the Workflow Designer pane, right-click the name the workflow and select Edit.. to configure required parameters. This displays the Edit Tasks window.
-
In the left pane, select the name of the target in your mapping. Then select the Mapping tab.
-
In the properties list, locate Operation Type and ensure that it matches the operation you want to perform (Insert for inserting data from the source table into Greenplum.).
-
In the properties list, also ensure that the check-box option for the operation type is selected. For example, if the Operation Type shows the value Insert, also scroll down and select the check box next to the INSERT property. For example:

-
Consider changing other properties, such as ErrorLimitRows as necessary for the target table. See Configuring Greenplum Target Session Properties for more information.
-
Click Apply, then click OK to dismiss the window.
-
Right-click anywhere in the Workflow Designer space, and select Start Workflow to load from the source to the target table. You can click the Workflow Monitor icon to view detailed logging and stastics about the workflow operations.