This task describes how to install Horizon Version Manager (HVM)
Procedure
- Deploy the Horizon Version Manager OVA in vCenter.
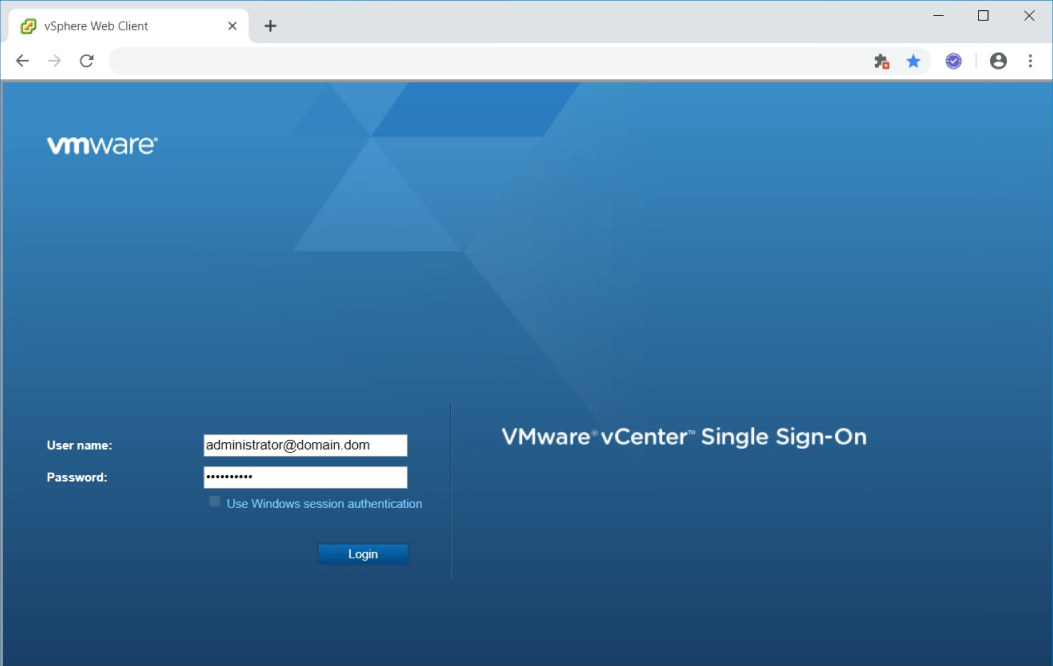
- Open a browser and log into your management vCenter.
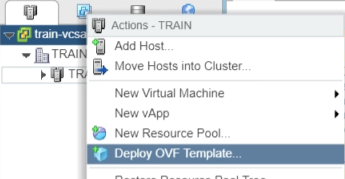
- Right click the cluster and click Deploy OVF Template…
- Select the VM folder to which to deploy the appliance and name the appliance according to the details in the Service Provider Installation Worksheet.
- Select the cluster, click Next, and wait for the validation to be finished.

- Click Next on the Review details screen.
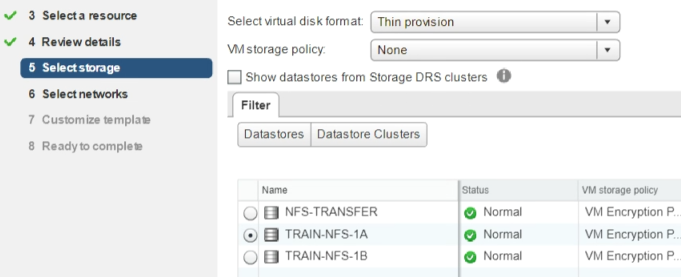
- Select the datastore and click Next.
- Select the destination network and click Next.

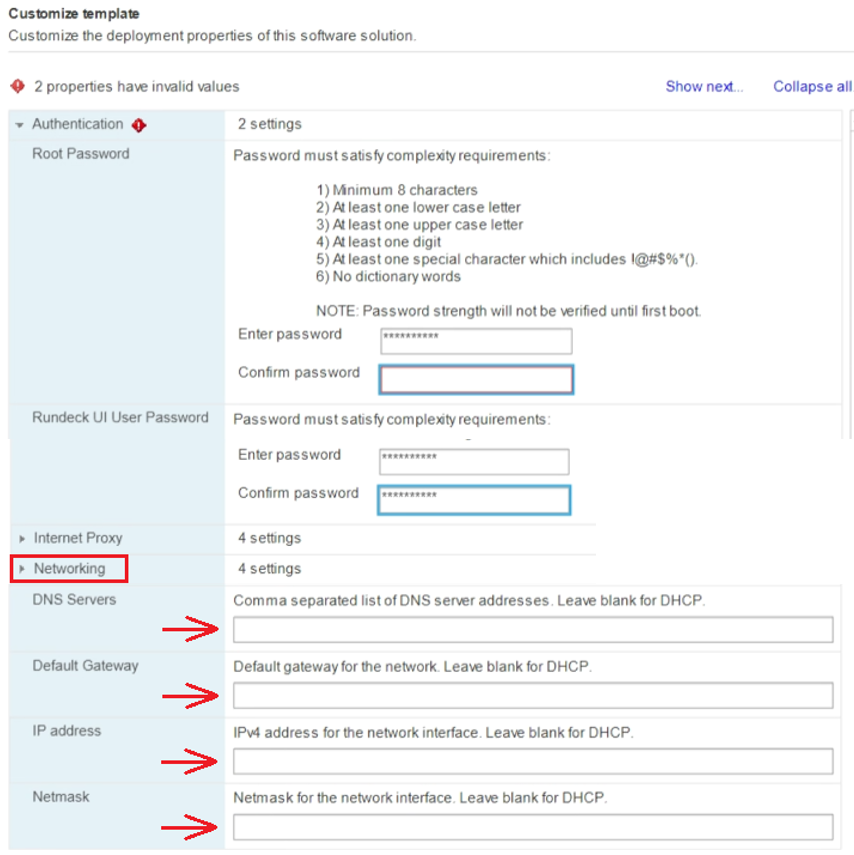
- On the Customize template screen, fill out the four Root and Rundeck UI password text boxes, expand the Networking drop-down, fill out the four remaining text boxes, and click Next.
- On the Ready to complete screen, click Finish to begin the deployment.
- Open a browser and log into your management vCenter.
- Change the permissions on the JSON manifest.
- Right click the node-manifest.json file in WinSCP, click Properties, and change the permissions so that Owner, Group, and Others have full Read/Write/Execute.
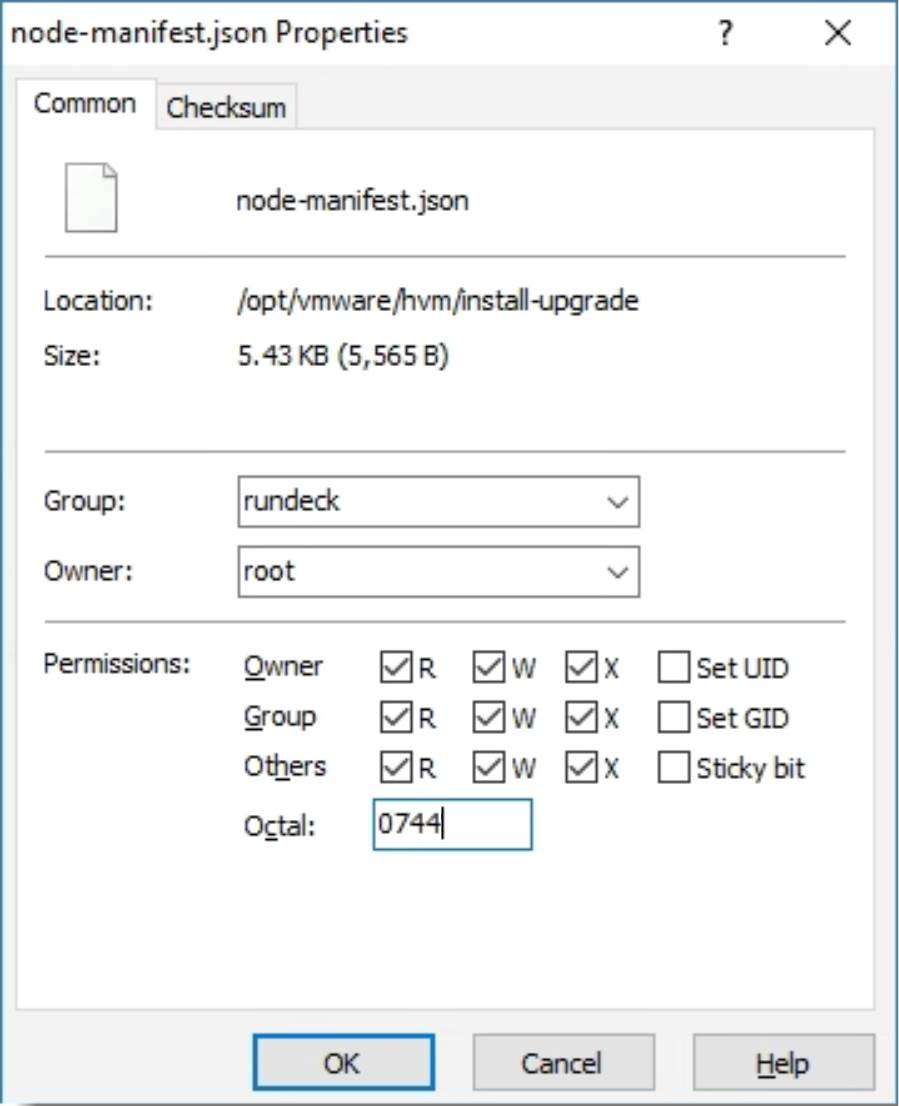
- Click OK.
- Right click the node-manifest.json file in WinSCP, click Properties, and change the permissions so that Owner, Group, and Others have full Read/Write/Execute.
- Log into Horizon Version Manager RunDeck, proceeding past any SSL warnings.
- In a browser, navigate to
https://HVM_IPADDRESS:4443/ - Log in with user name
rundeckand the password you set previously.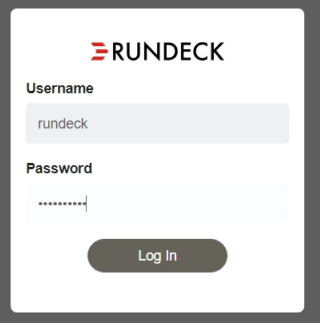
- In a browser, navigate to
- Click .
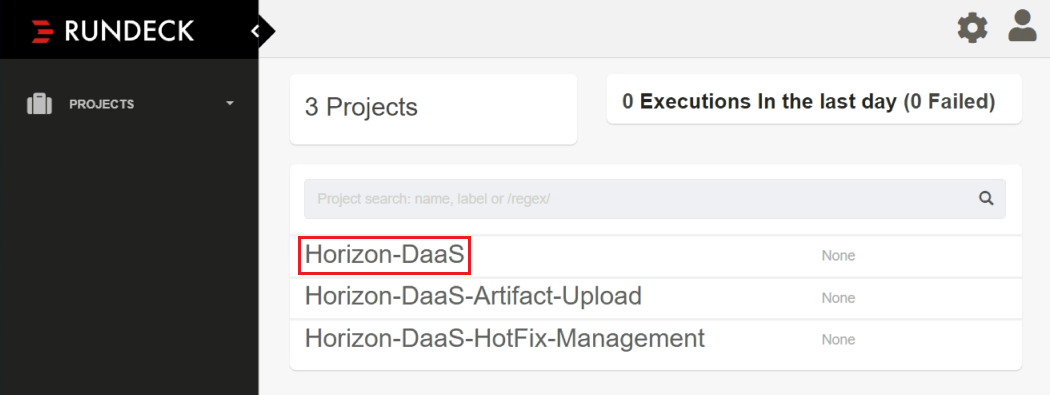
- Click .

- Fill out information based on the details in the Service Provider Installation Worksheet. All text boxes are case-sensitive
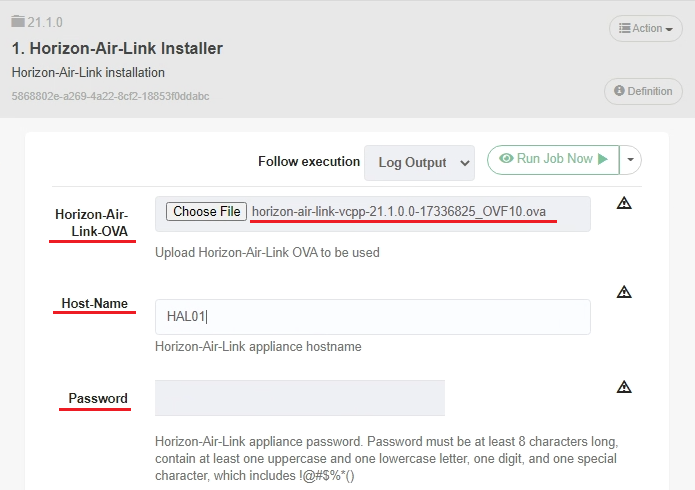
Note the following:
- Make sure to select the HAL OVA, not HVM.
- You can skip the Route-Gateway, Webproxy-Server, and Webproxy-Port text boxes.
- If you are reattempting this step, you must change the Force-Deploy text box to
Yesto overwrite the previous failed appliance deployment. - For VXLAN, use the full network name that displays in vCenter/Networking.
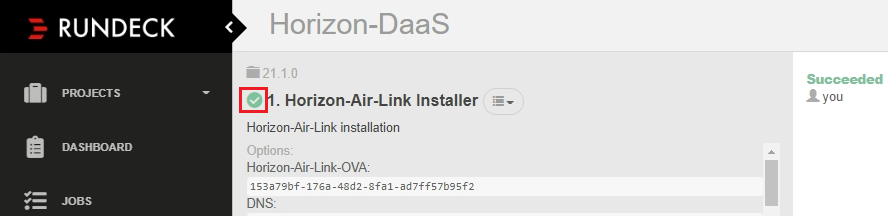
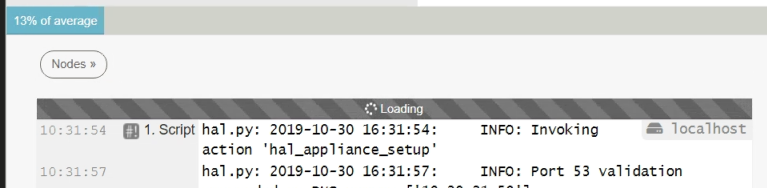
- On the next screen, click the Log Output button and monitor progress.

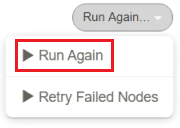
- If the job fails and you must rerun it for any reason, scroll to the top of the page and click the Run Again… button and click Run Again. This action takes you back to the previous page so you can make corrections.
- Once the upgrade is finished, the following appears in the log output:

You can also scroll to the top of the page and verify that the job has a green check next to the job name.