Get familiar with the VMware Lab Platform instructor interface. Learn how to use the instructor interface, manage, and monitor a class.

  1. To view the instructor interface, go to Class Management > Classes, click the three ellipses next to a class name, and click Open Instructor Interface.


Menu options

Description

A - Class Overview

The default dashboard provides an overview of the class, lab manual, timer for the class, help requests, and a list of action options to manage the class.

When a Raised Hand help request occurs, a counter appears with the help request.

B - Student's Lab View

Displays a tile for each student in the course. Each tile includes the following information:

  • Student name and photo, if available.

  • The stop/start status for the lab.

  • Tiles are outlined in green when the student starts the lab. Otherwise, the tile is dimmed and the status says "not started".

  • A progress bar displaying how much of the lab the student has finished. Refer the lab manual page count for each student to view the lab progress.

  • Click the + icon to add more lab capacity and resources for the class.

    Click the filter icon to view the status of active and inactive labs.

    Use the tile view or list view to display the details of students and student lab console in the instructor interface.

  • Click the vertical ellipses to see the action options for an individual student lab. You can perform the following actions:

    • Explore Console—Lets you to view the student's console view. To open each lab console as a new tab with the student name, click the three ellipses on the student tile, and then right-click Explore console and select Open in a new tab. This feature helps in navigation and visibility in each student's lab console.

    • Take Over Machine—Allows you to take over the student's machine so that you can resolve any issues or troubleshoot an issue that a student might be experiencing with the lab.

    • End Lab—Ends the student lab.

    • Clone Lab—Clones the existing student lab.

    • Copy Quick Launch URL—Copies the Quick launch URL of the lab.

C- Action Menu

You can perform the following actions from the instructor interface for a class:

  • Start—Starts, enables, and provisions the selected classes. Also sets the statuses of the selected class to “Active”. You can also edit the start time of a started class. The new start time of the class will be effective from the following day.

  • End—Ends a class. Sets the status of the selected class to “Complete” which will archive them and prevent further updating.

  • Create Entitlements—Allows you to create entitlements for your students in the selected class, but does not enable them. Until activated, a student’s lab console will not list the entitlements in the Enrollments tab.

  • Provision Entitlements—Powers up the lab templates and lab resources for each entitlement (manually triggered prepop) for the selected classes.

    Note:

    If a class does not have a lab template or deployment pool with a lab template, a warning message is displayed for the class.

  • Enable Entitlements—Enables entitlements for a class.

  • Recreate Completed Entitlements—Recreates a completed entitlement for a class.

  • Send Notification Email—Sends notification email to students such as class is starting, or reminder to log in for the class and so on.

D- Timer

The timer helps you to monitor and manage the time of the class. If your students need more time to complete a lab, you can also extend the class time.

Note:

The following settings must be activated, if you want to modify or update a class.

  • Allow Instructors to Manage Lab and Entitlements of a Class

  • Allow Instructors to Clone vApps

Click the vertical ellipses, and select Extend Class.

Zoom App

If your class has the Zoom app integrated for the lab, you can view the details of the Zoom conference in the left-navigation pane of the instructor interface.

Speed Tests

You can use speed tests to help diagnose a slow or intermittent connection for a lab.

Speed tests measure network bandwidth and network latency for VMware Lab Platform and for your cloud, if you are using a hybrid configuration.

Running a Speed Test

To run a speed test, open a browser with a URL of the form http://labplatform.vmware.com/account_name/speed-test/ where account_name is the unique name given to your organization or account, and click Start Test.
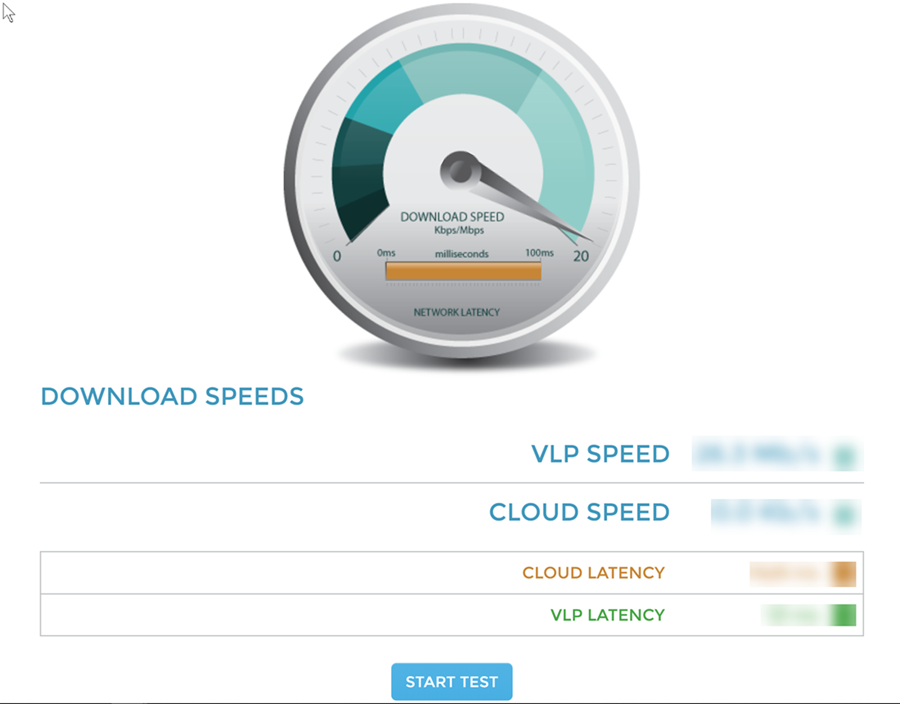
Speed test screen to test the speed bandwidth.

Speed Test Results

After you run the test, the speed test screen displays results for VMware Lab Platform and cloud speed, and for VMware Lab Platform and cloud network latency. Network latency results are color coded.

  • Results less than 300 ms are shown in green

  • Results greater than 300 and less than 450 ms are shown in amber

  • Results greater than 450 ms are shown in red

  • A good speed score is 1.5 MB/s or greater

  • A good latency score is 300 ms or less