You can edit a lab template while it is in a draft state using the Lab Builder.
Once you publish a lab template, you cannot edit it. You can only clone, delete, rename, or create a draft of the published lab template and modify it.
Procedure
- To open the Lab Templates page to edit, select Lab Management > Lab Builder.
- On the Lab Templates page, open the cloud drop-down menu and select the cloud you want to use for the lab template you are building. (Only available if you have more than one cloud).
The first cloud in the drop-down menu is the Default cloud.
- To open the Edit Lab Template form, select an unpublished lab template and click Actions > Edit.
On the Edit Lab Template form, you can update or modify the lab template. Specify a name, a description, add or remove VMs and change the advanced properties for the lab template.
- To add VMs to the lab template:
- Click the Virtual Machines tab, and click Add VM(s) .
- To add a VM from a template, click Add VM From Template. Select the VMs from the list and click Add.
- To create a new VM and add to the template, click Create New VM. Fill the details in the page and click Add.
- (Optional) To power on the VMs, click the three ellipses next to the VM, and click Power On. Additionally, you can use the Power Off option to power off the individual VMs. To power on all the VMs associated with a lab, check the Select/Deselect All check box, and click the ellipses to perform the required action.
- To add media files to the lab, on the Virtual Machines page, click Upload File and add the required files for the lab.
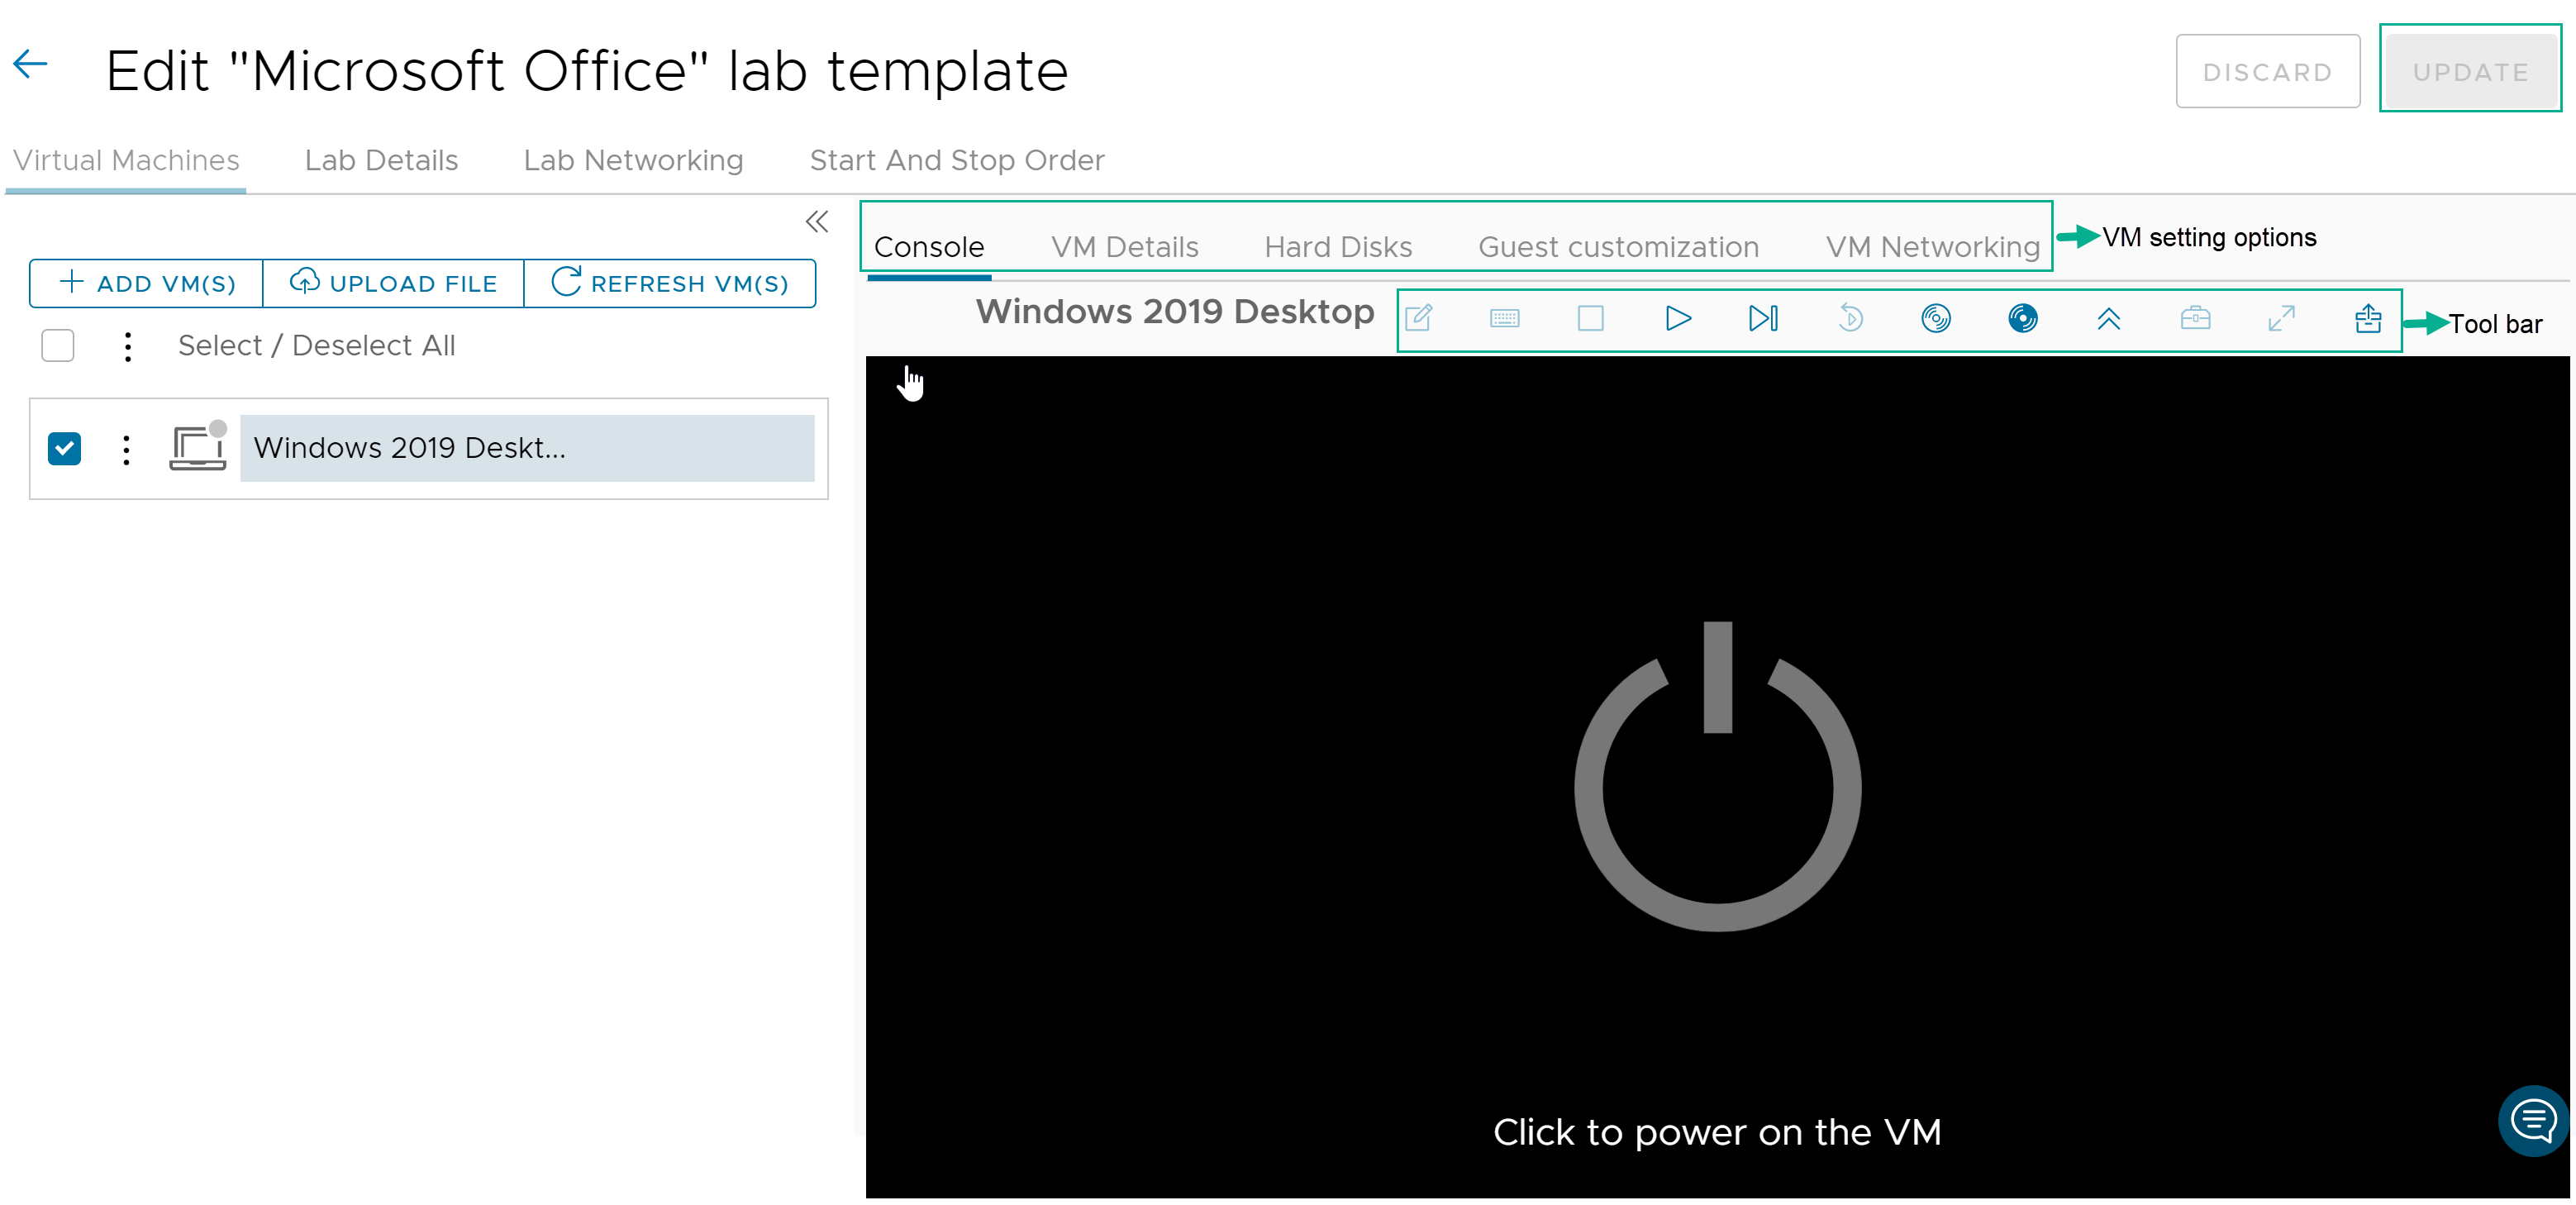
- To access the VM console, and view or modify the VM settings, click on the VM name on the Edit Lab Template form. The console view and VM settings options are displayed.
Figure 1. VM Console view 
Actions
Description
Console
Use the tool bar on the Console page to perform an action for the console. Hover the mouse on the icons to view the name of the action option on the toolbar.
Send Text: Send text or notes. Enter text (copy and paste from your terminal into the console.
CTRL+ALT+DEL: Sends the CTRL+ALT+DEL key combination to the virtual machine (VM). The result of sending the key combination is operation-system dependent.
Power Off: Power off the VM.
Power On: Power on the VM.
Power on and force customization: You can include the Guest OS Customization information necessary for the virtual machine to join a Windows domain.
Reset: If you reset a lab, all its virtual machines (VMs) are restored to their original state. You are not able to recover any work you have done.
Reset VM And Enter BIOS: Reset a virtual machine (VM) of a lab, and start the BIOS and make changes to the boot order.
Insert CD/DVD from cloud catalog: Insert an ISO or media file.
Eject CD/DVD: Remove a media file.
Upgrade VM hardware version: Upgrade the hardware version.
Install VMware tools: VMware Tools is a suite of utilities that enhances the performance of the virtual machines guest operating system and improves management of the virtual machine. For more information on VMware Tools, see the knowledge base article.
Expand: Expand the console view.
Undock: Undock the console and go full screen mode.
VM Details
You can view and edit VM details such as VM name, VM description, modify CPU capacity and memory capacity, change the Guest OS of the VM.
Hard Disks
You can add or remove hard disks from a VM. To remove multiple hard disks from a lab template, select the hard disks from the list, and click the Delete icon.
Guest Customization
The Guest Customization tab includes the information necessary for the virtual machine to join a Windows domain. An organization administrator can specify default values for a domain that Windows guests in that organization can join. Not all Windows virtual machines must join a domain, but in most enterprise installations, a virtual machine that is not a domain member cannot access many of the available network resources.
For more information on the Guest Customization settings, see Change the Guest OS Customization Properties of a Virtual Machine.
VM Networking
To view or modify VM network settings, click VM Networking. You can add, delete, or modify the NIC settings for a VM.
- To specify a VM name, and add description for the VM, click Lab Details.
- To add or edit the network information for the VM, click the Lab Networking tab, and click Add Network. Enter the network specifications and click Save. By default, lab_builder_net template is selected.
- If you have more than one VM and want to define the order of booting up your VMs and resources, click the Start and Stop Order tab. Set the power on and power off order for your VMs. Make the necessary changes and click Save.
- To view the visual depiction or diagram of network connections for a lab, click the Diagram option on the Lab Networking page. You can add, modify, or delete NIC cards, network configurations in the Diagram view.
- If you have local files or VMs that you want to add to your lab, click Upload File, and click Attach File to add resources, add files from your local system to the lab template.
Once the file is uploaded to a temporary repository, you can download the file from the Copy Link option to your lab environment. The file link expires after an hour.
- To save your changes, click Update.
- To close the editing form and to go back to Lab Builder, click Discard.
- To publish and use your lab template, click Update and Publish.