


This topic outlines the steps necessary to enable OneLogin as the IdP.
NSX Advanced Load Balancer as SP and OneLogin as IDP

Login to OneLogin with admin access of the developer account and click Add App.
Search for SAML in the search tab. In this case, SAML Test Connector (IdP) is selected.
Once you select the option as mentioned above, the following screen will appear.
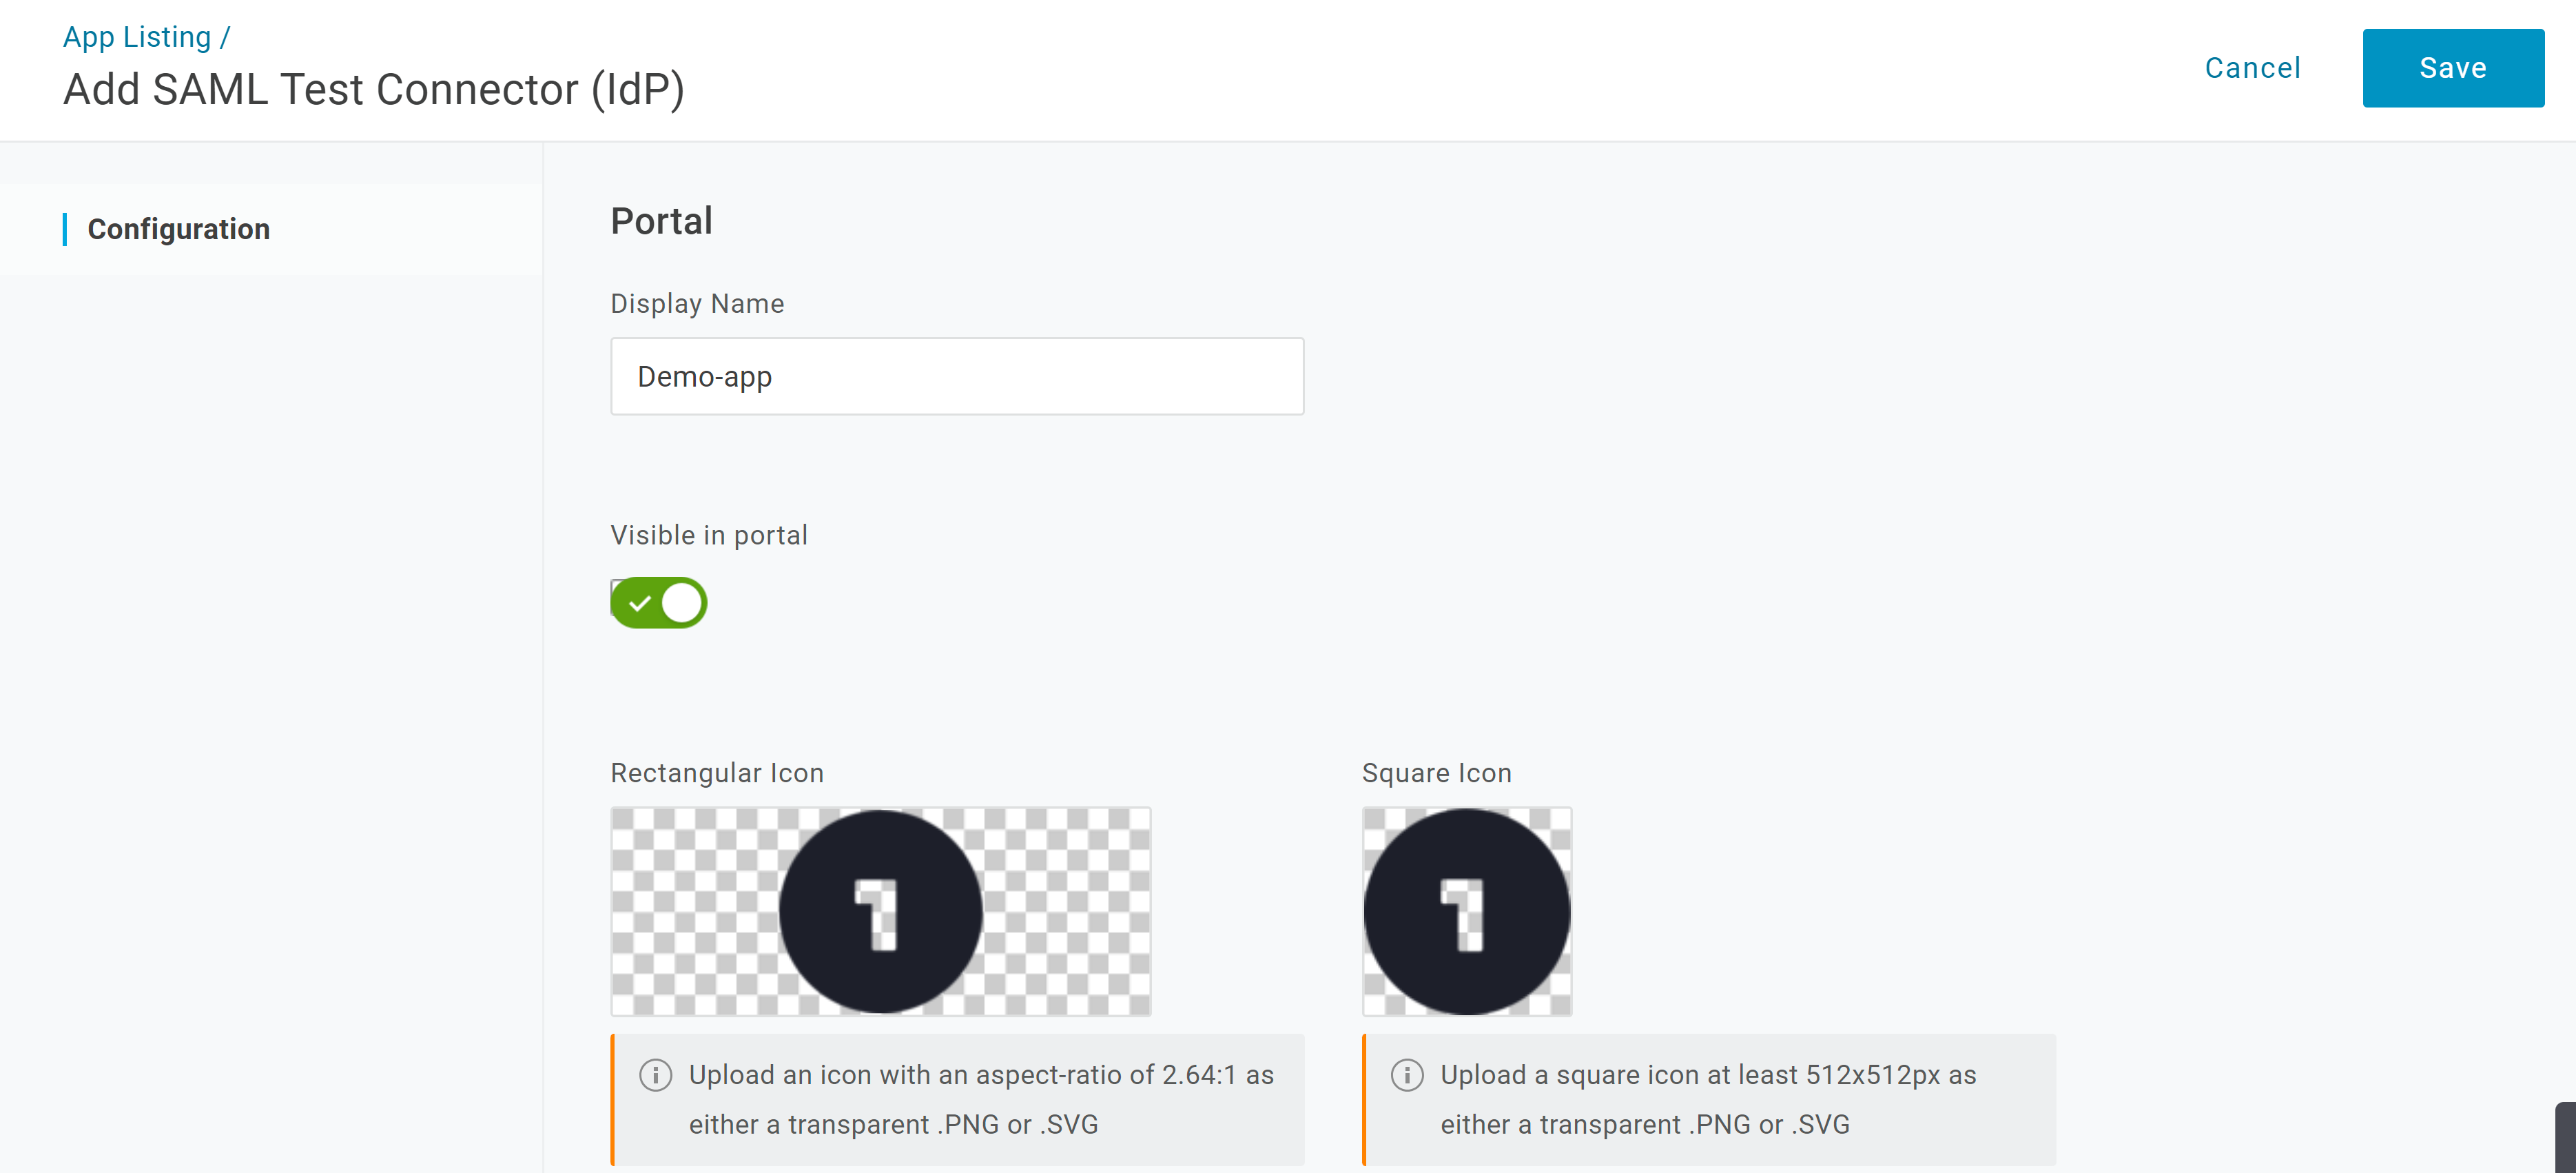
Click Save.
Click Configuration and add the details as shown below.
Audience must be same as Entity ID on NSX Advanced Load Balancer.
ACS (Consumer) URL must be same as the SSO URL on NSX Advanced Load Balancer.
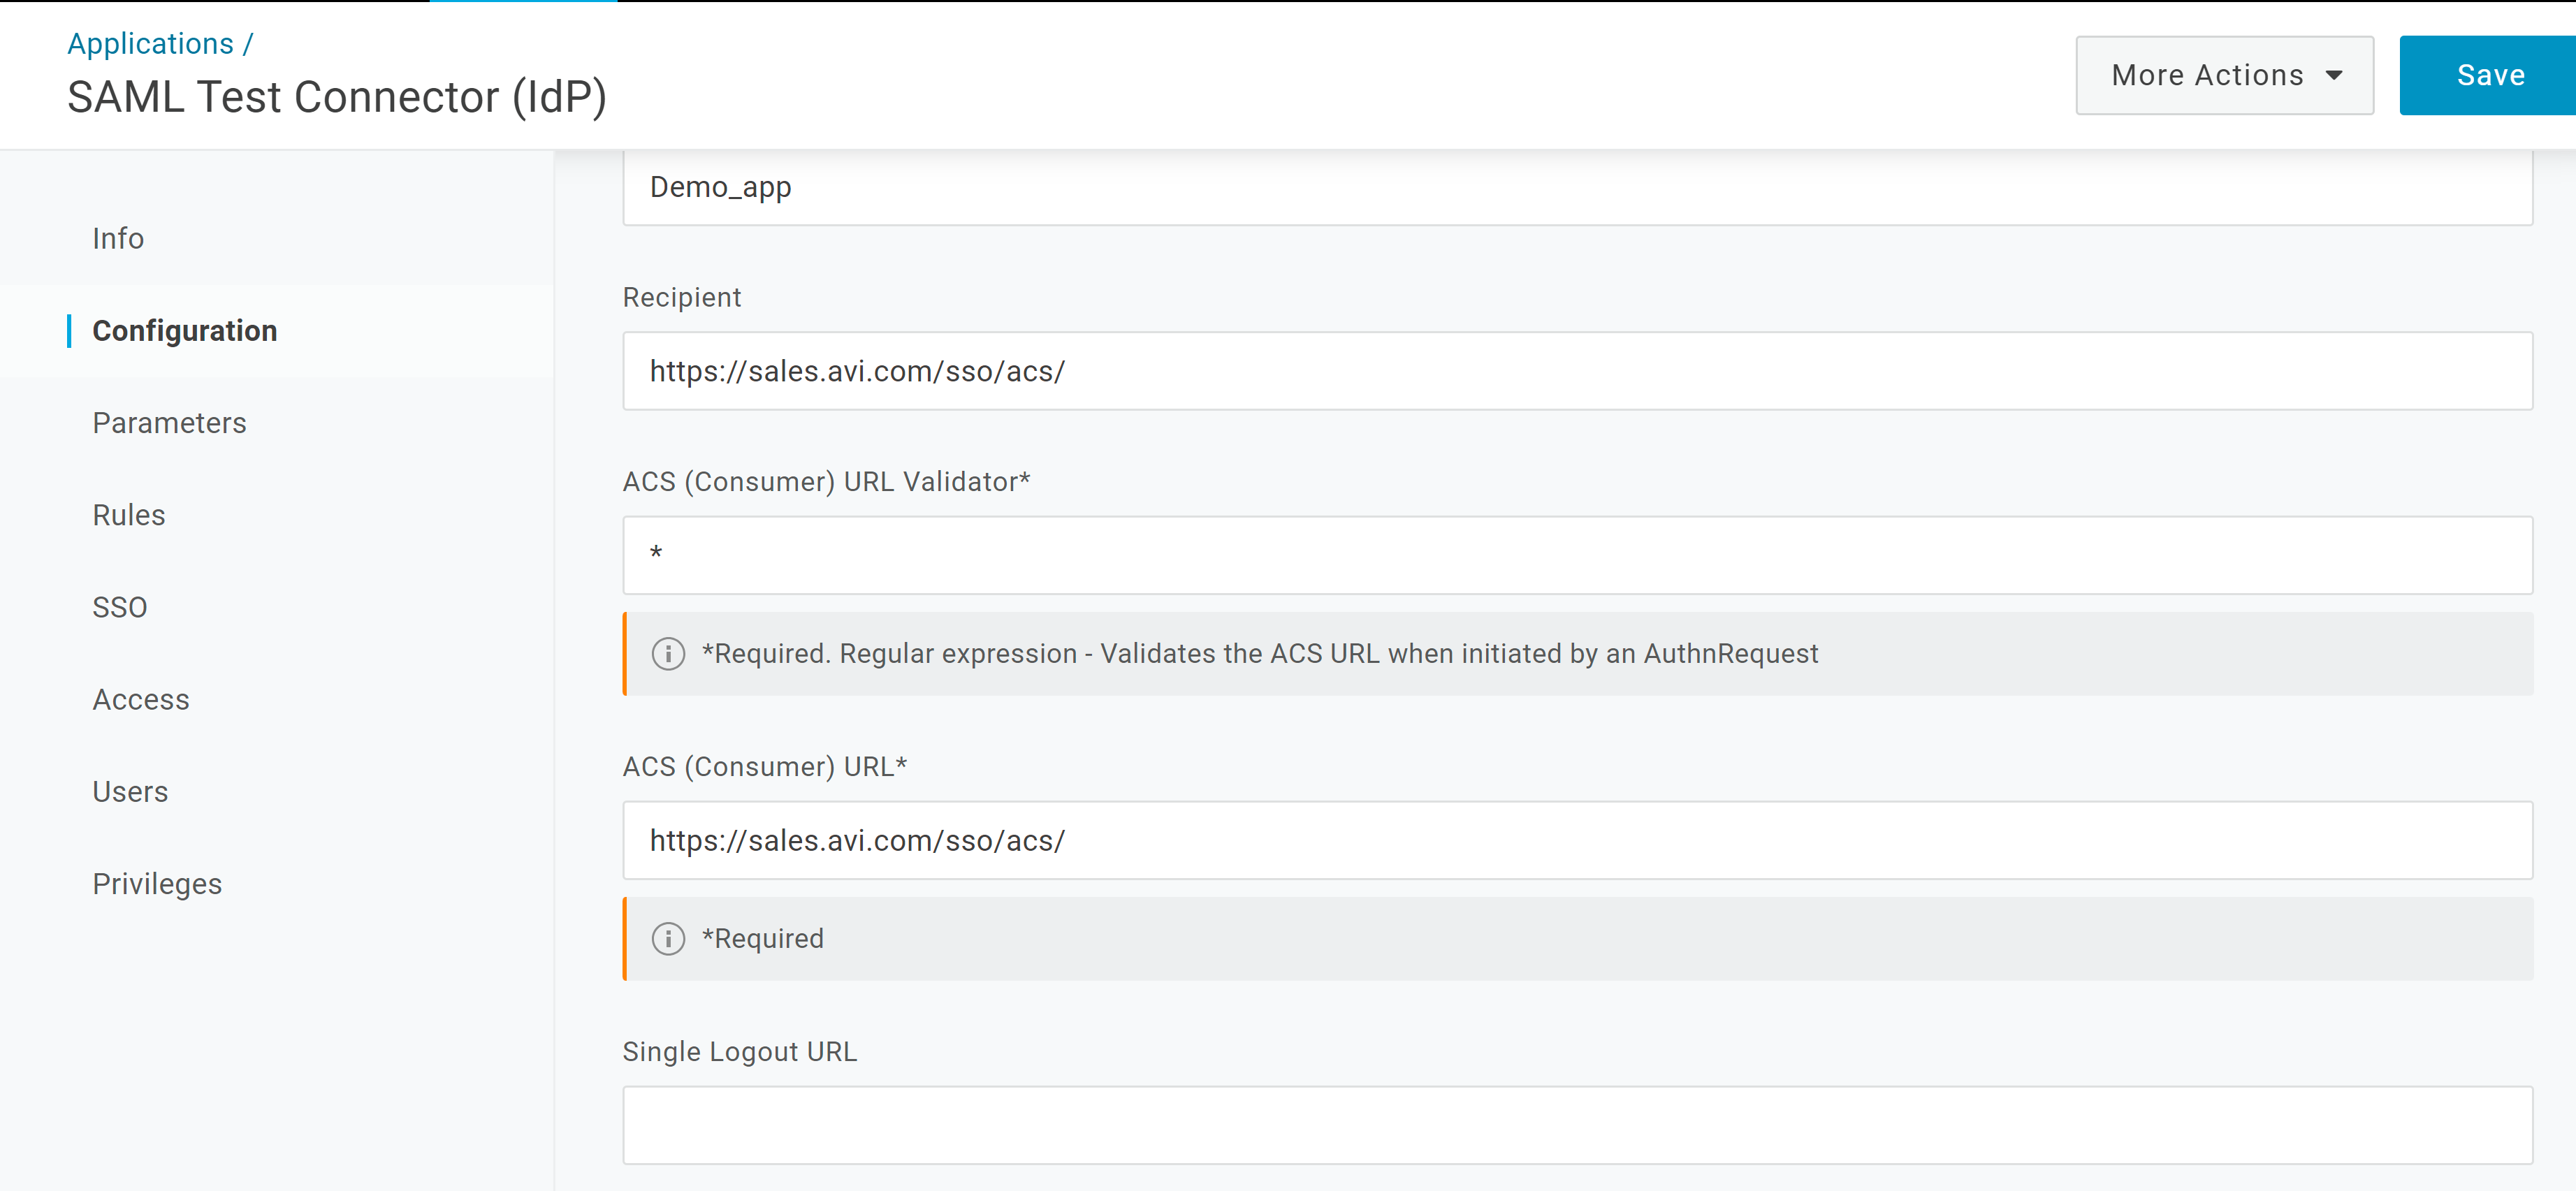
Click Save.
6. On the next screen retain the default parameters or configure the parameters as required.
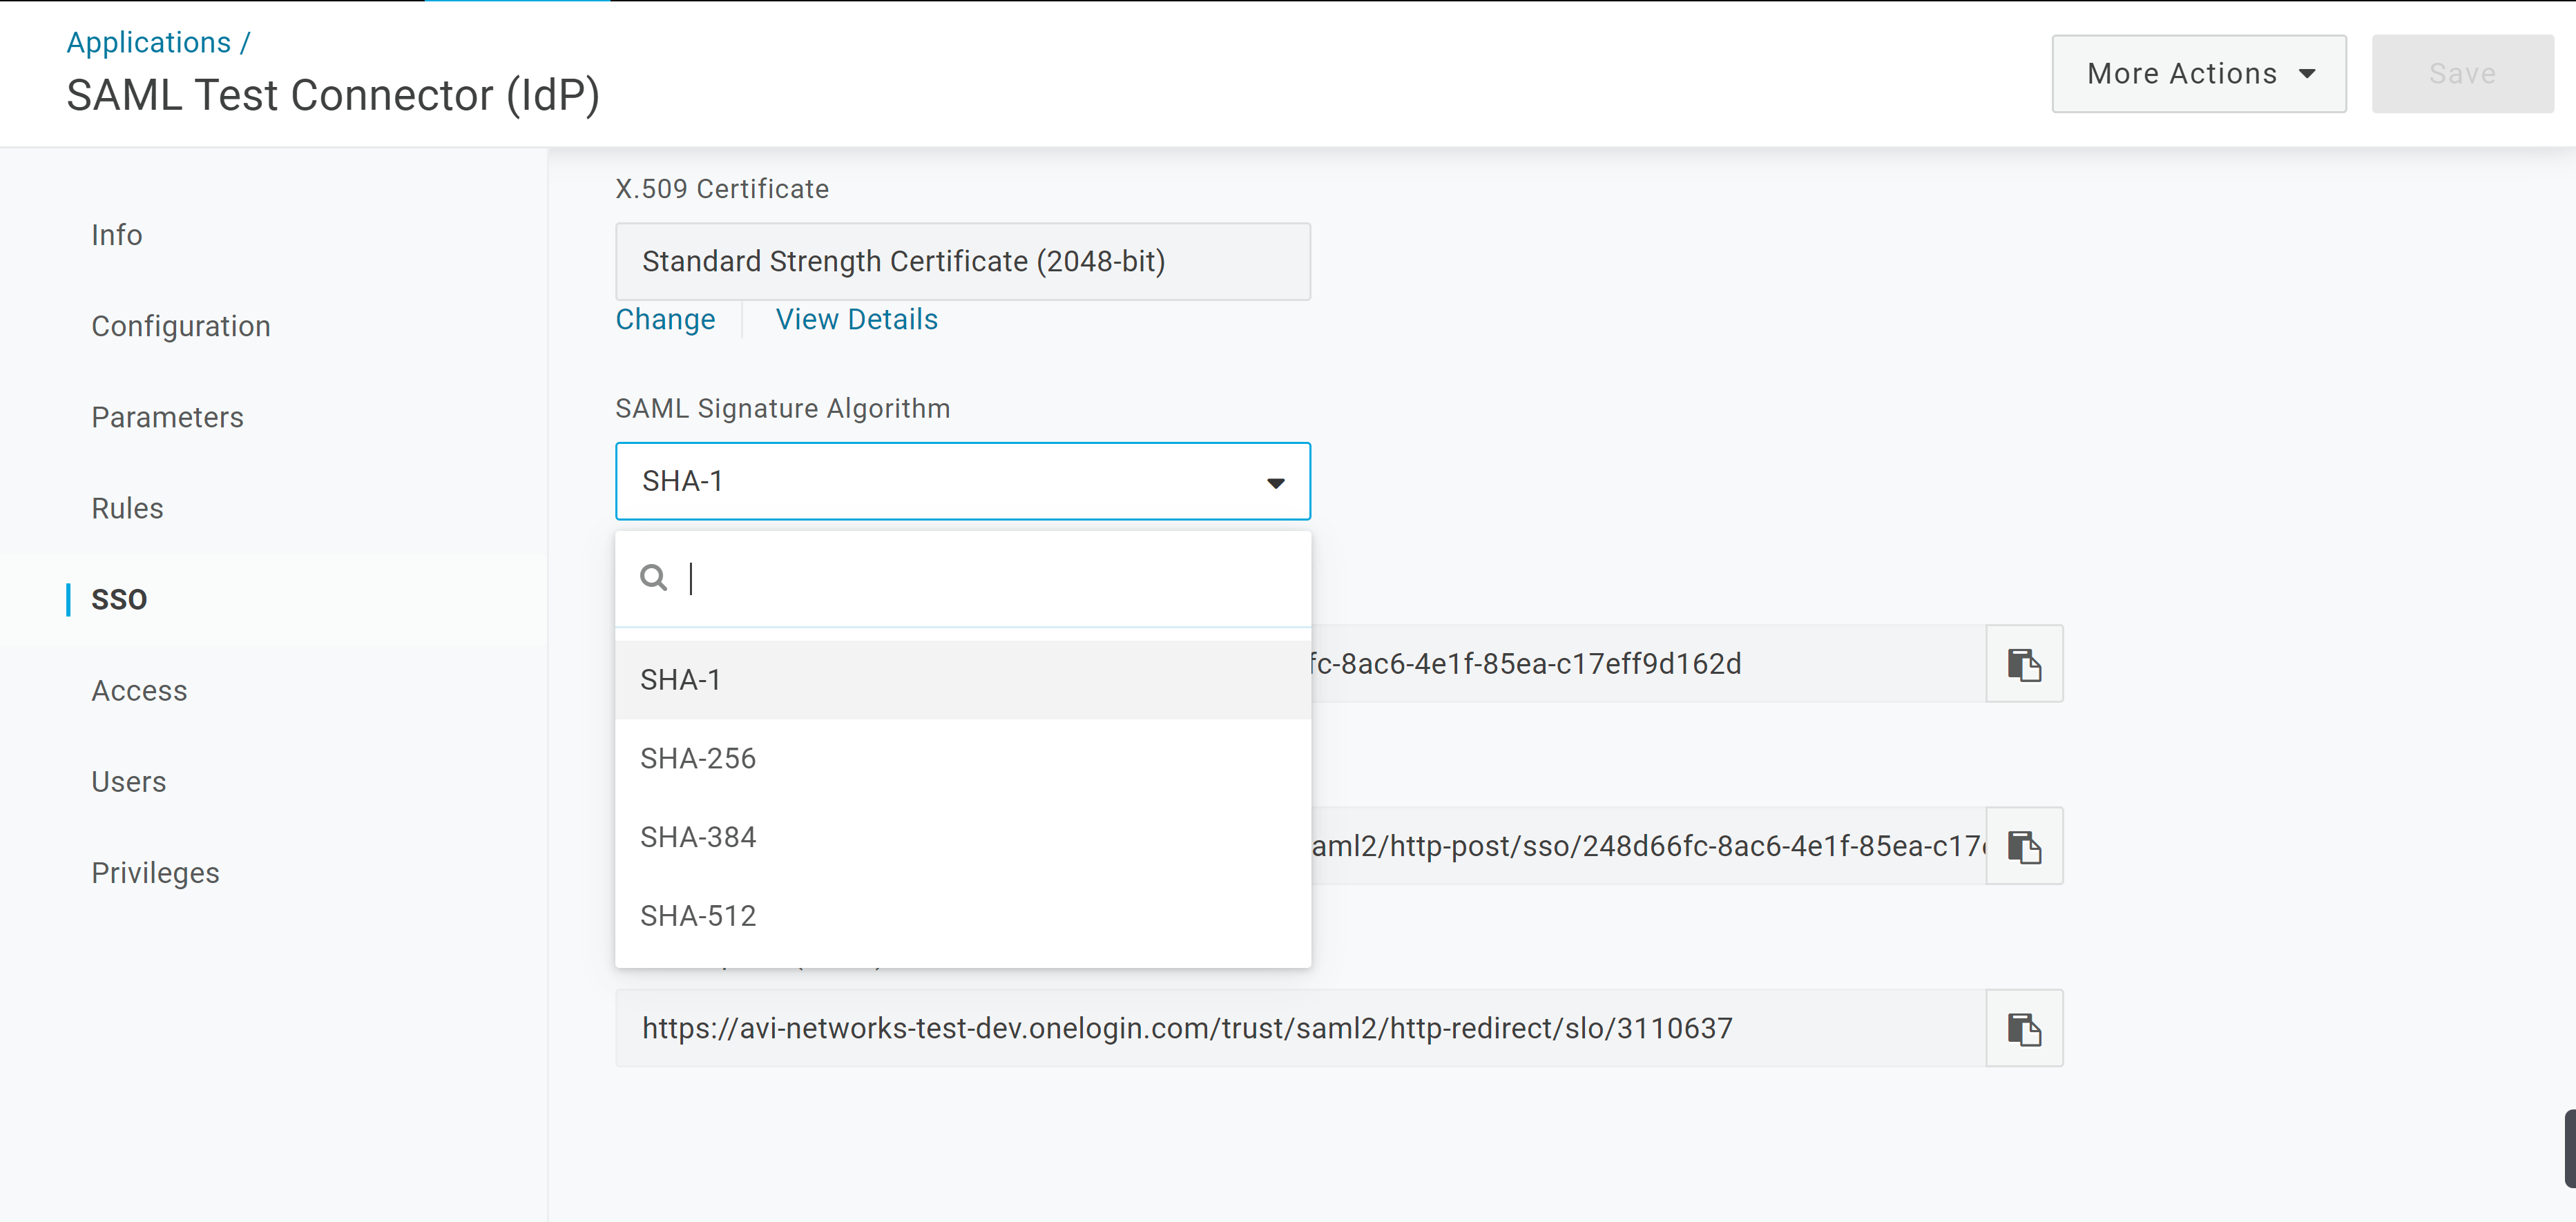
7. Click the SSO tab to change the certificate from SHA-1 to one of the options in the SHA-2 family, if required.
8. From Access, Users, and Policies assign the app to the users and provide the required permissions.
The app will not be accessible to users unless it has been assigned to them.
9. Click Save.
Accessing and Using the Metadata
To download the metadata, click More Actions and select SAML Metadata.
-
Click the downloaded .xml file to open it.

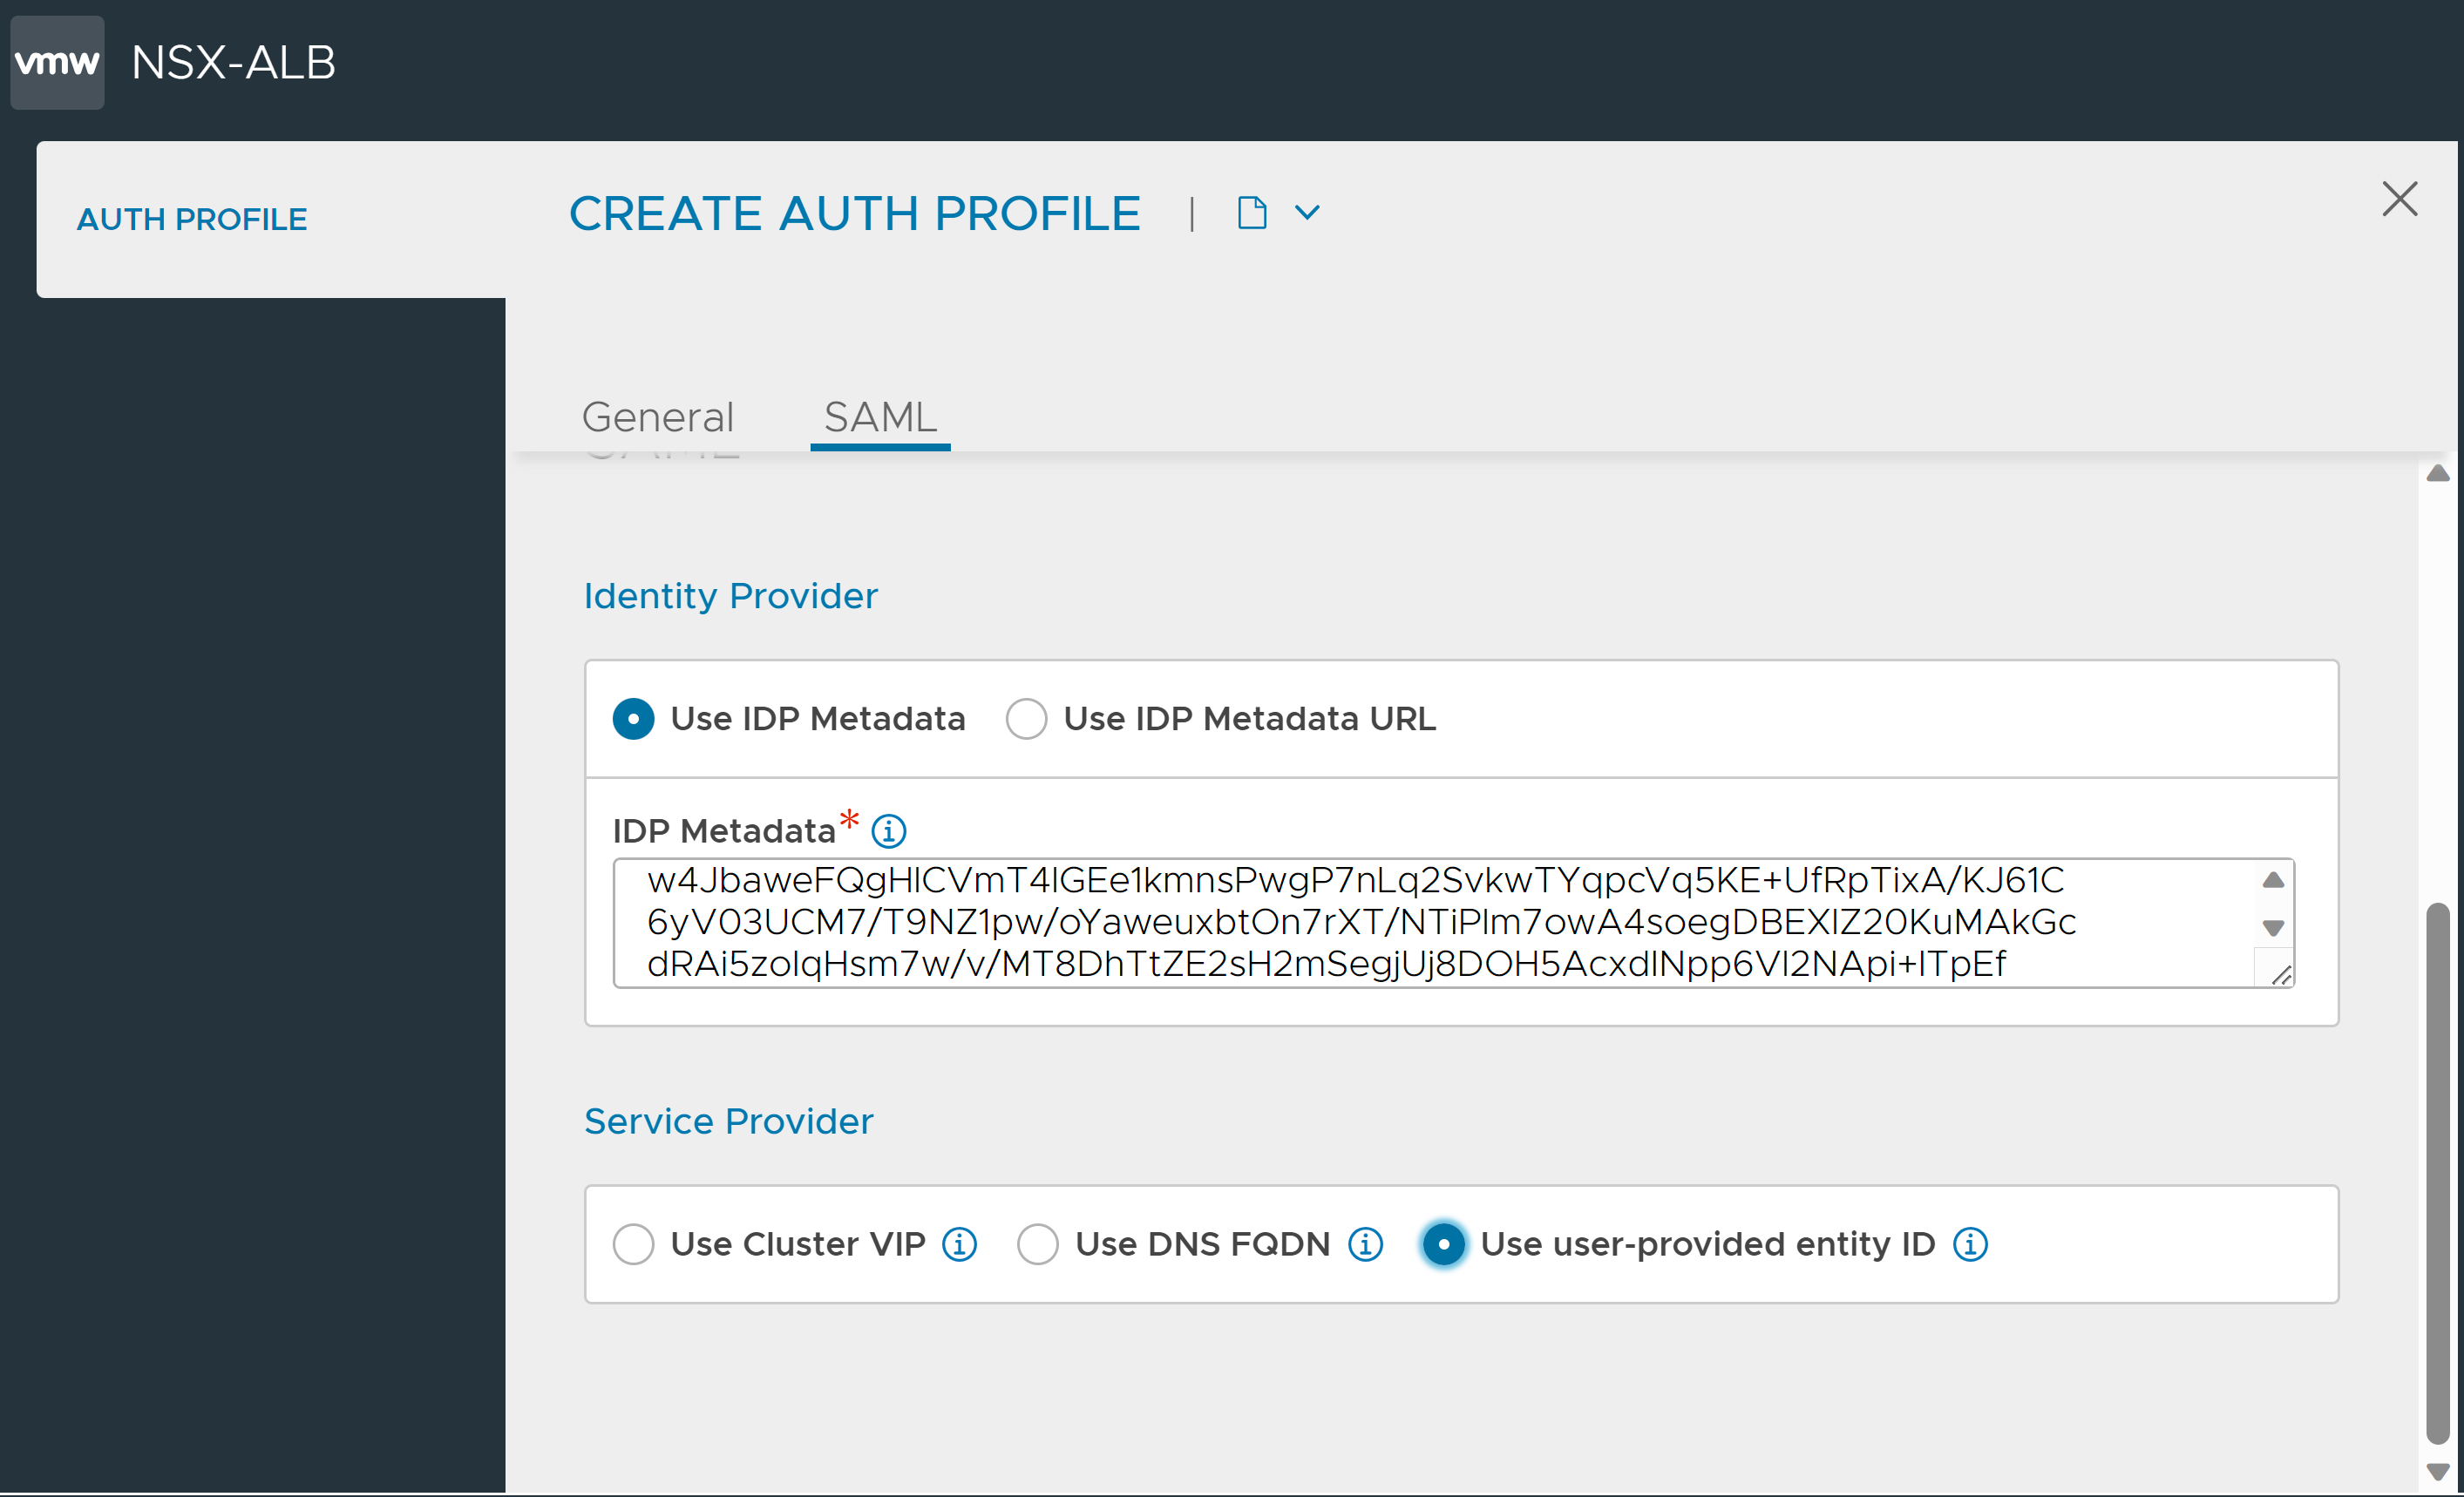
Copy the metadata from the file and paste it as the IDP Metadata as shown below:
Configure a virtual service on NSX Advanced Load Balancer to act as service provider. For more information, see SAML Configuration on NSX Advanced Load Balancer.
