This section discusses the different steps in configuring NSX Advanced Load Balancer for Exchange 2016 which includes creating the health monitor, SSL certificate, configuring the pool, HTTP Policy, and creating the virtual service.
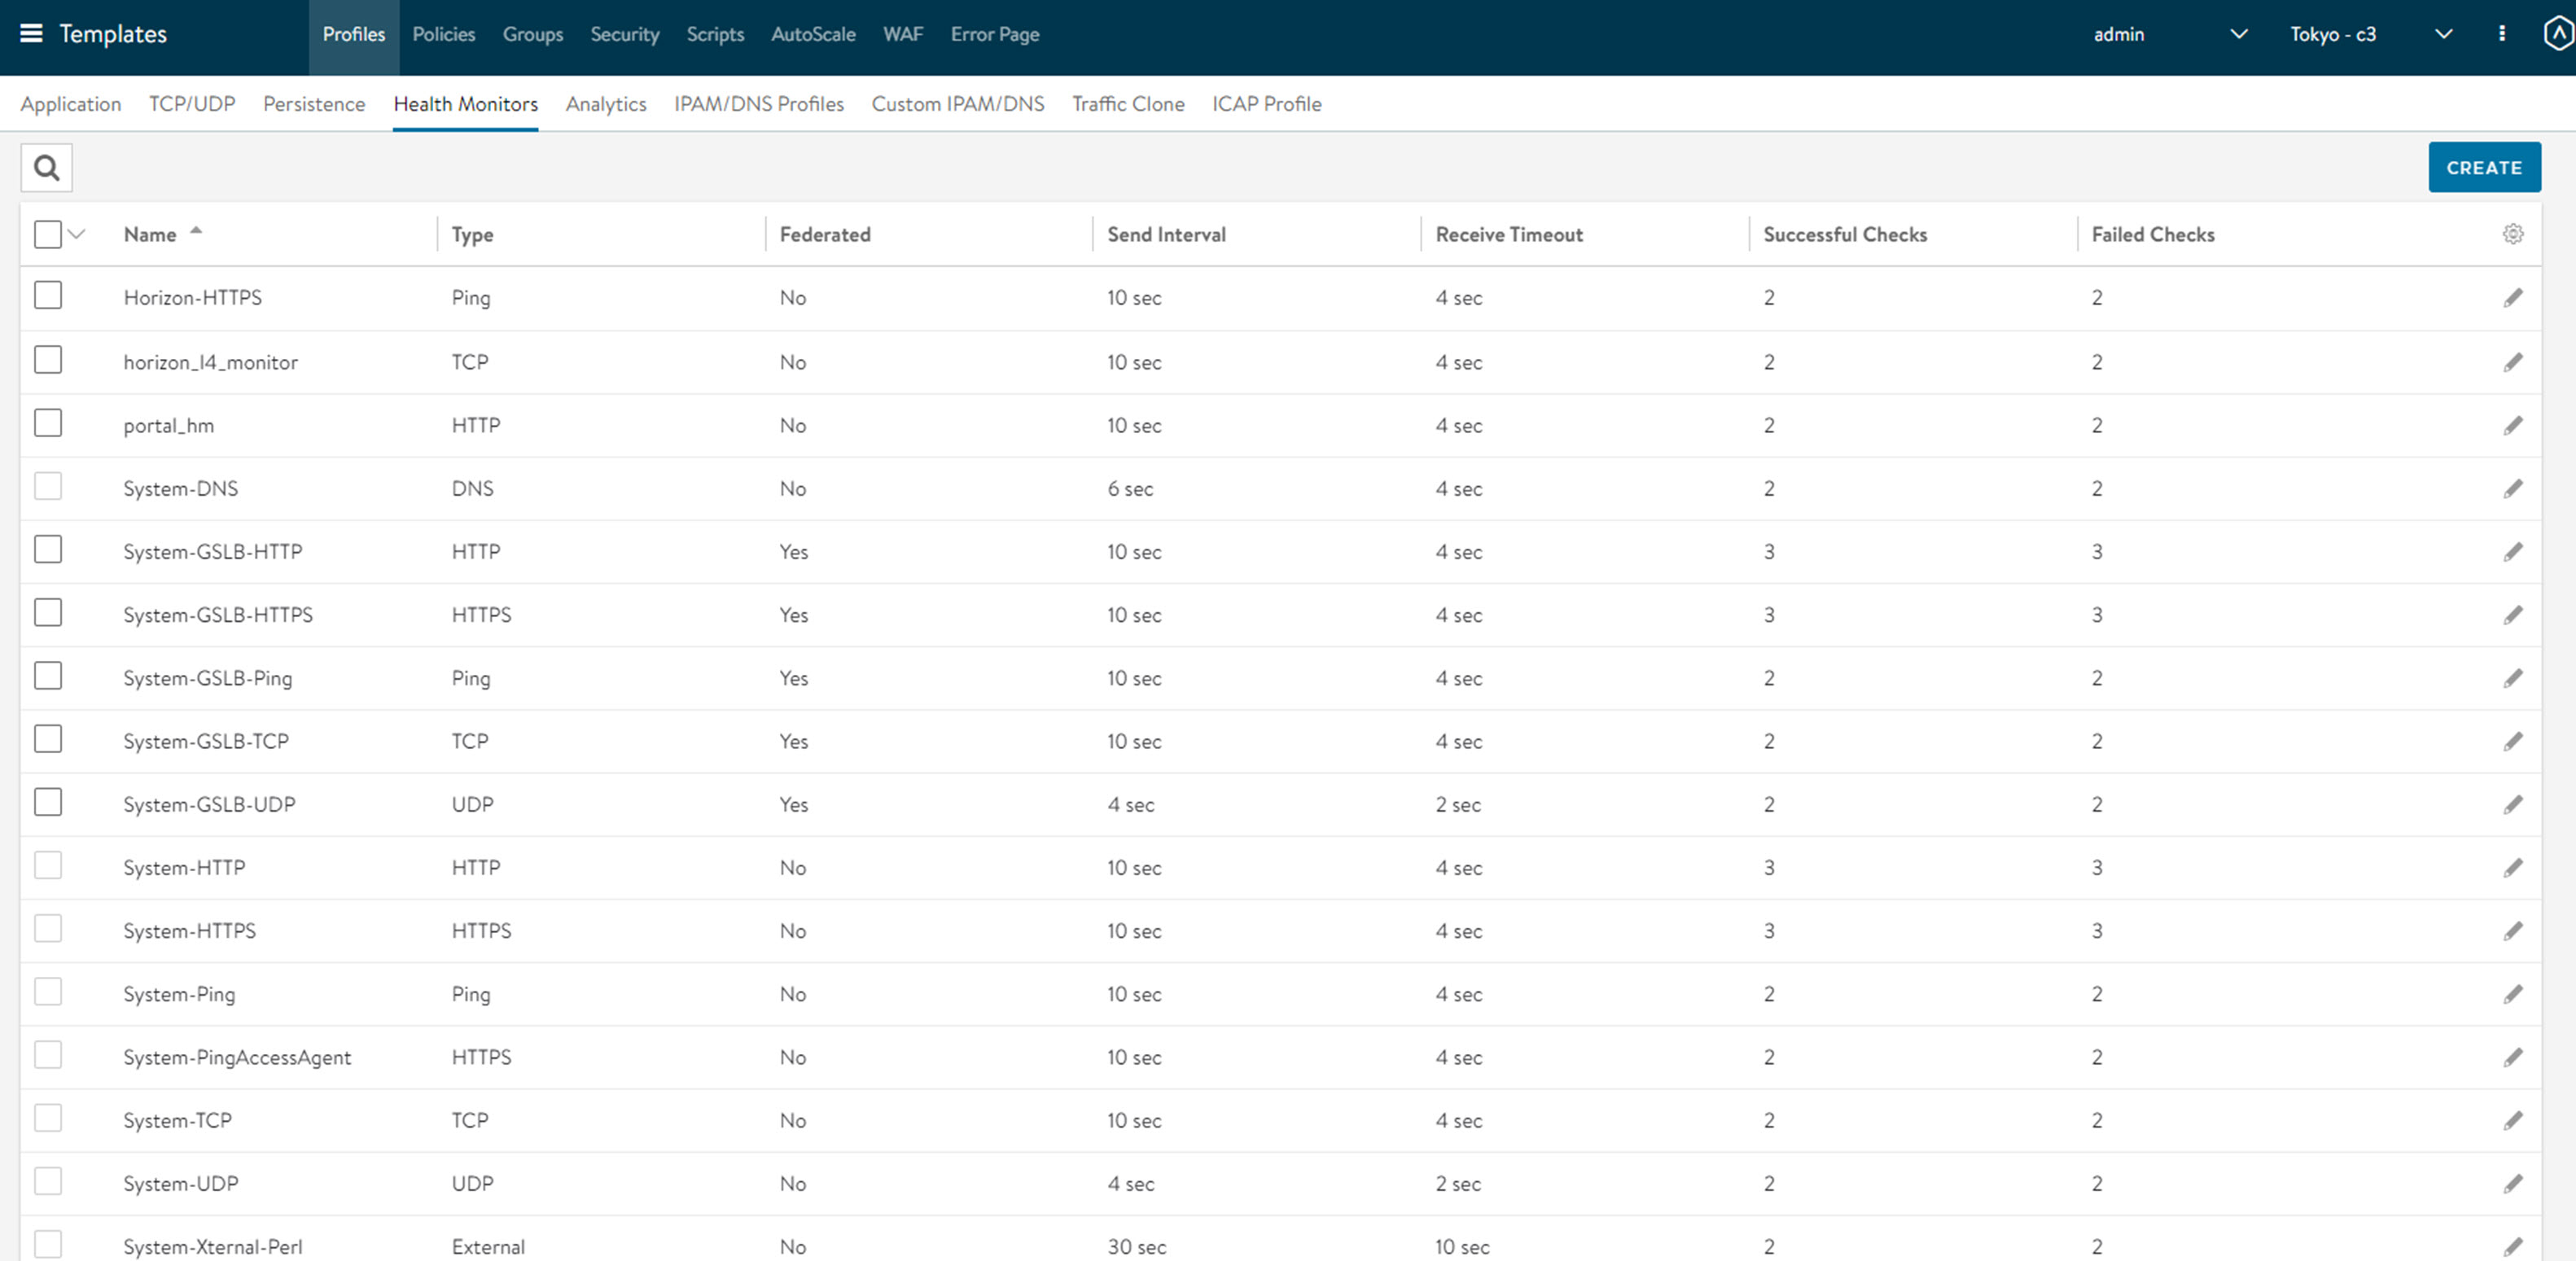
Health Monitor
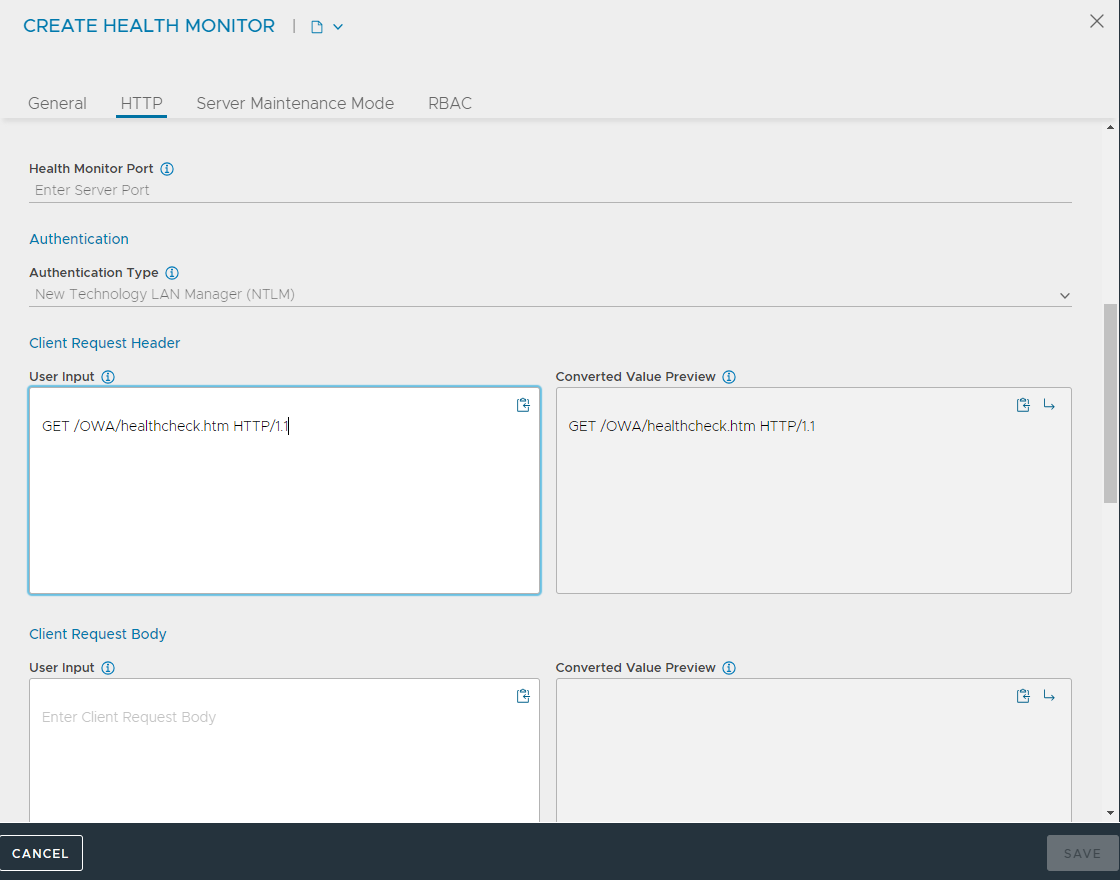
Create an HTTP health monitor for each Exchange service (8 in number). Use URLs listed in table 1. Client Request Header needs to be set to GET //healthcheck.htm HTTP/1.1. As an example, this one is set for OWA as GET /OWA/healthcheck.htm HTTP/1.1.
Navigate to .
Click Create.
In the Create Health Monitor screen, Enter a Name for the HTTP health monitor.
Select the Type as HTTP.
Click HTTP tab.
Enter Client Request Header as GET /OWA/healthcheck.htm HTTP/1.1.
Similarly, create a TCP health monitor each for POP3, IMAP4, and SMTP on specific port numbers as shown in table 1.
SSL Certificate
Navigate to .
Click .
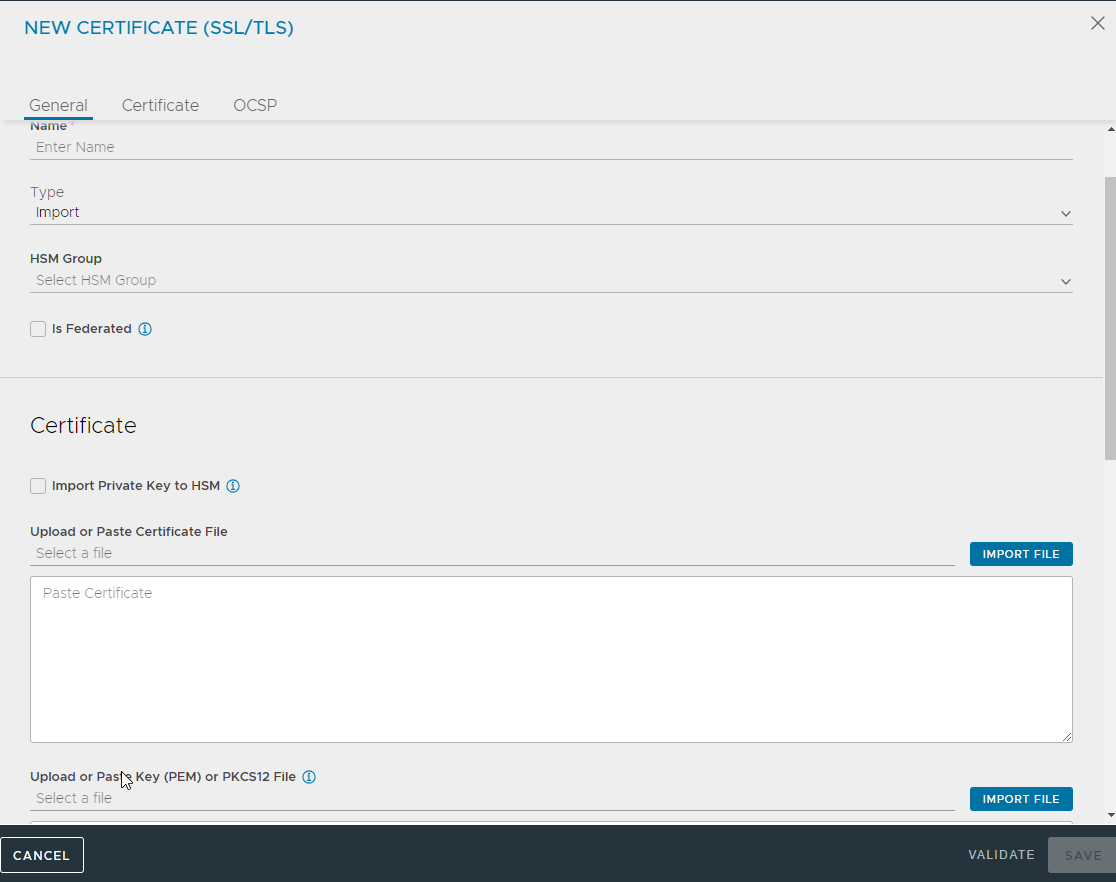
Change the Type to Import.
Import the self-signed certificate that was exported when the CSR was created on Exchange Server. The Exchange Server that is exported is in PFX format and needs to be converted to .pem format to be imported into the NSX Advanced Load Balancer UI. This can be achieved as “openssl pkcs12 -in cert.PFX -out cert.pem -nodes”.
Virtual Service
Navigate to . Create an L7 Virtual Service for Exchange service and associate it with other objects, such as an application profile, health monitor, SSL, and more.
For HTTPS, use System-Secure-HTTP and System-TCP-Proxy for Application Profile and TCP/UDP Profile. Note: When HTTPS or the System-Secure-HTTP profile are used, deactivate the Secure Cookies and HTTP-only Cookies options in the Security tab for that HTTP profile.
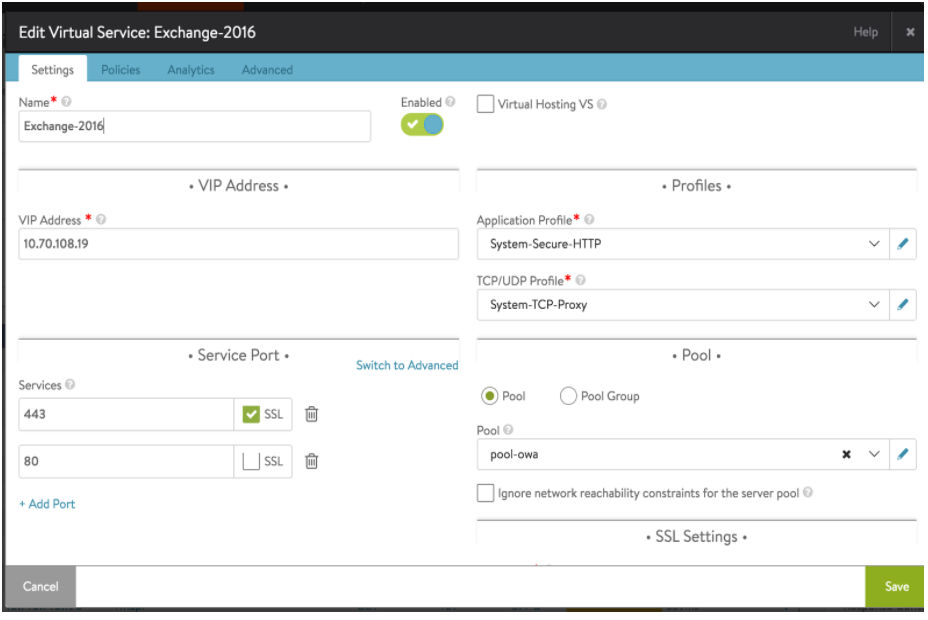
Create three L4 Virtual Services each for POP3, IMAP4, and SMTP, use System-L4-Application and System-TCP-Proxy with the same IP address as the L7 VS (optional) but with different service port numbers than the L7 VS.
You can create a shared virtual service using different ports.
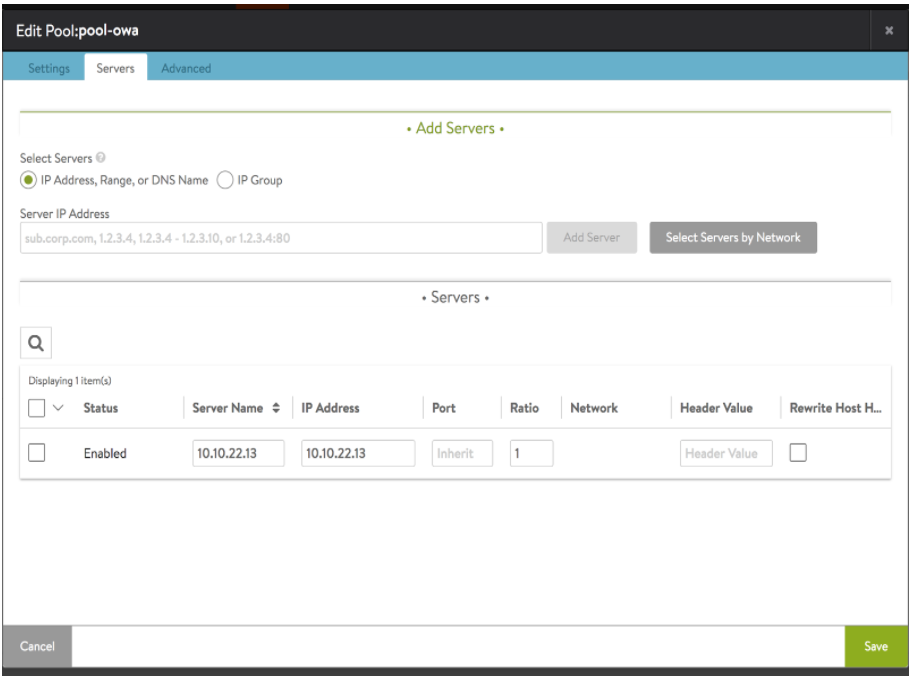
Pool
This can be accessed separately or from the Virtual Services configuration wizard. The pool is a construct that includes servers, load balancing method, persistence method, and health monitor. Add servers across which load is to be balanced and choose Least-Connections for the load balancing method. Below is an example of a pool created for the Outlook Web Access (OWA) service.
The active health monitor is chosen as the one created above. In this case, it’s the OWA health monitor which is chosen.
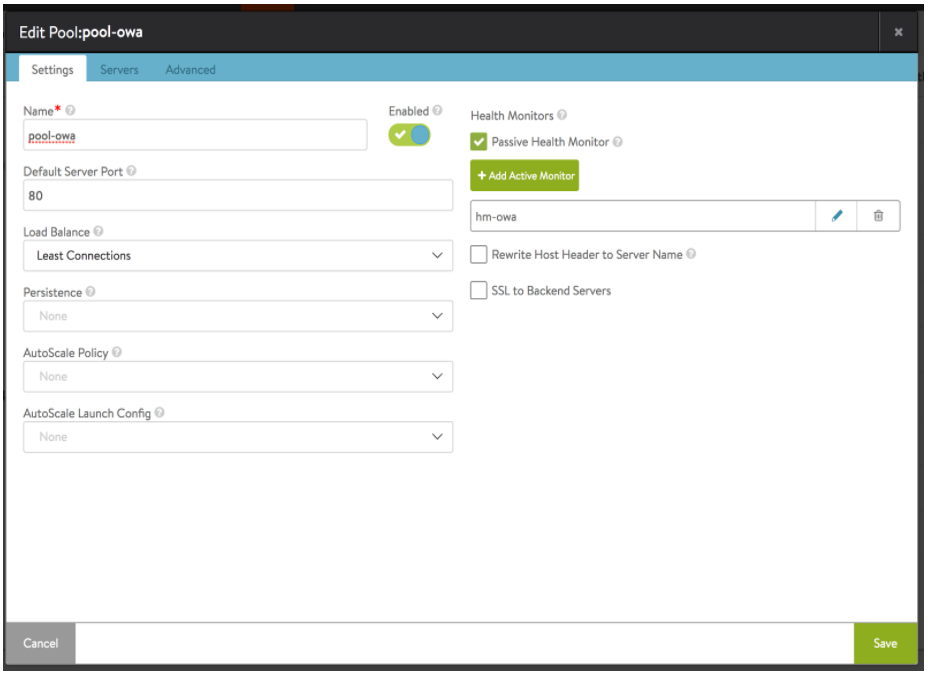
The server IP address is the IP of the Exchange server which resolves to lab-dc01.avitest.com.
Create 12 pools with names based on table 2.

HTTP Policy
An HTTP Policy can be selected after creating a virtual service, in the edit mode, or from the Create Virtual Service screen. Create an HTTP policy and it includes 8 HTTP request rules, each rule corresponding to an Exchange service.
To create the HTTP policy, follow the steps below:
Navigate to . Click the virtual services edit icon. This will pop up in the Edit Virtual Service menu.
Navigate to .
Click Add HTTP Request Rule.
Enter a rule name, for example, rule-pool-oa.
Select Path and Begins With for Matching Rules. Then, enter /rpc.
Select Content Switch and Pool for Action. Then, select a corresponding pool, e.g., pool-oa.
Click Save Rule.
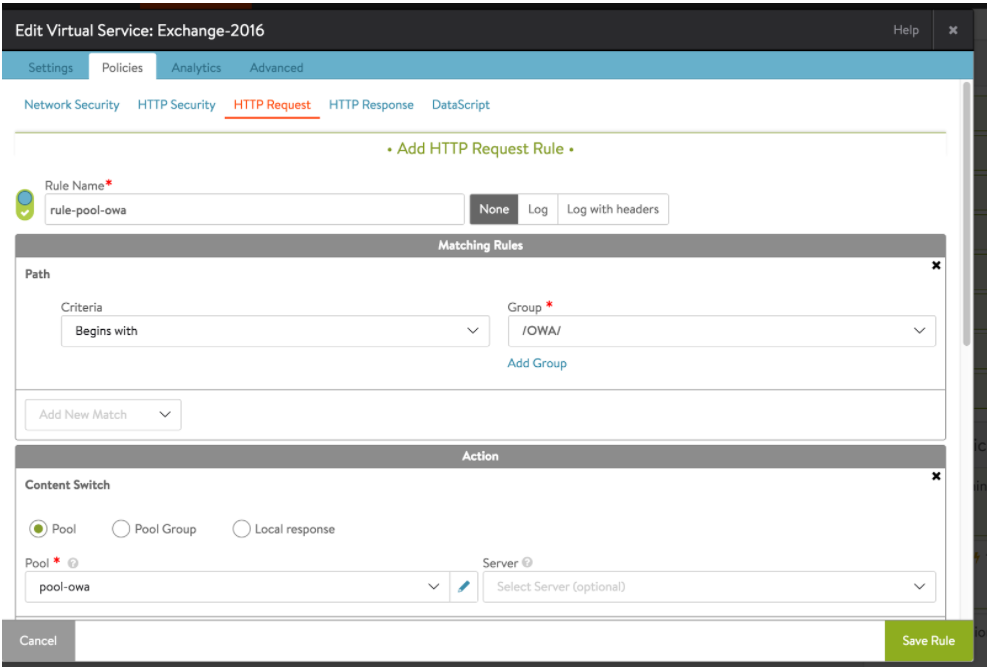

Repeat the steps for each Exchange pool. Refer to table 2 for URLs and pools.
CAS Service |
Pool Name |
Ports on Pools |
Path |
|---|---|---|---|
Outlook Anywhere |
pool-oa |
80/HTTP |
/rpc/ |
Outlook Web Access |
pool-owa |
80/HTTP |
/owa/ |
Exchange Web Service |
pool-ews |
80/HTTP |
/ews/ |
Exchange Administration Center |
pool-eac |
80/HTTP |
/ecp/ |
Exchange Management Shell |
pool-ems |
80/HTTP |
/powershell/ |
AutoDiscover |
pool-ad |
80/HTTP |
/autodiscover/ |
ActiveSync |
pool-as |
80/HTTP |
/microsoft-server-activesync/ |
Offline Address Book |
pool-oab |
80/HTTP |
/oab/ |
Messaging Application Programming Interface |
pool-mapi |
80/HTTP |
/mapi/ |
POP3 |
pool-pop3 |
995/POP3 with SSL |
- |
IMAP4 |
pool-imap4 |
993/IMAP4 with SSL |
- |
SMTP |
pool-smtp |
465/SMTP with SSL |
- |
Load Balancing
To support load balancing across Exchange Servers on a single VIP, choose the Load Balance Algorithm as Round Robin for all pools that have been configured.
Add the secondary exchange server IP under all pools. This is seen below for the owa-pool.
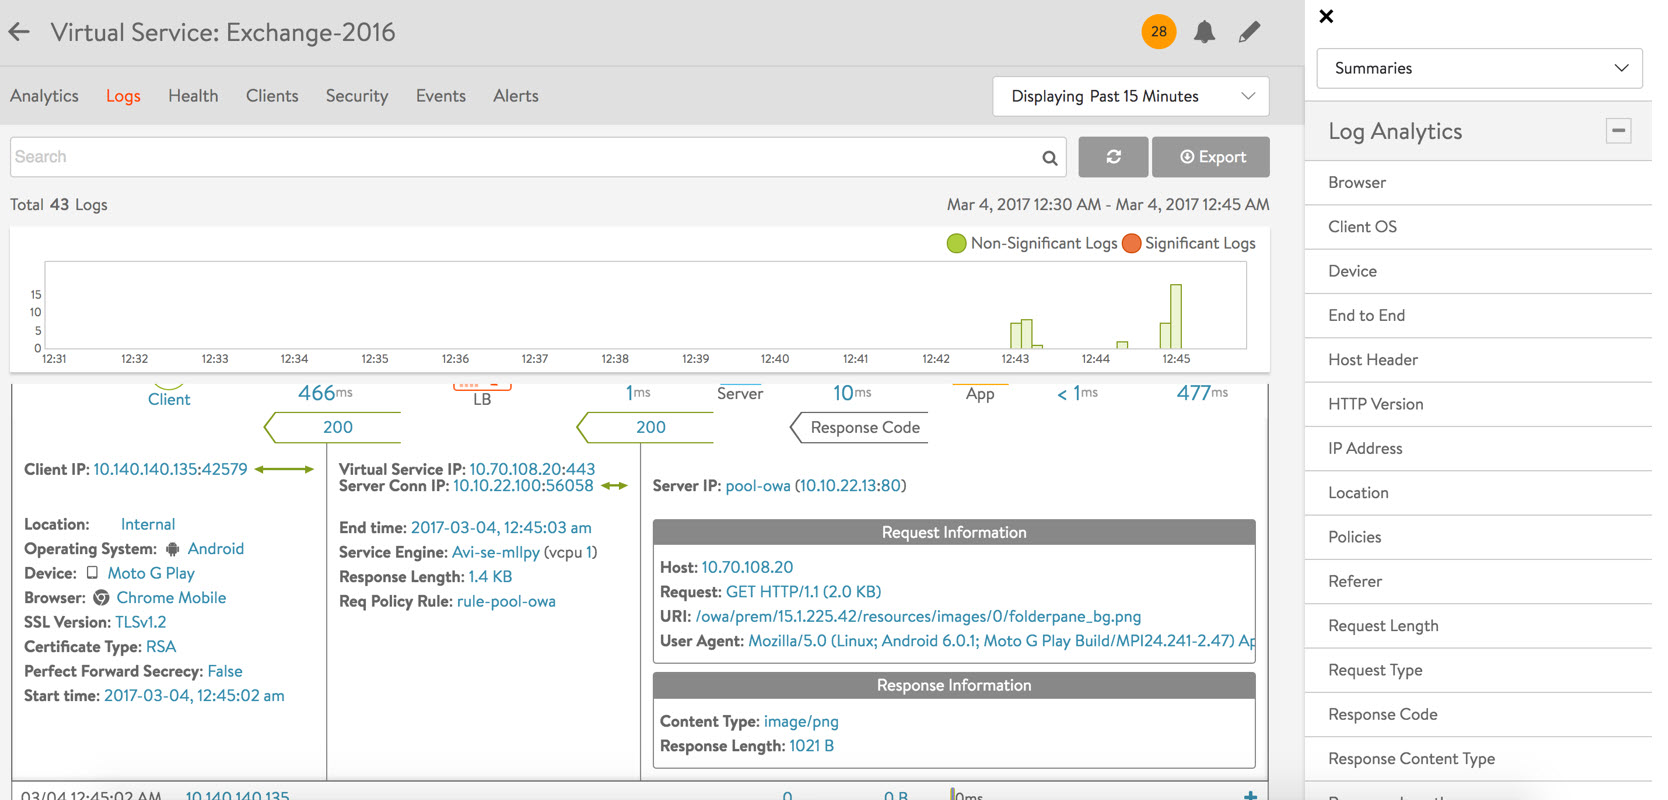
Verifying the Operation
The L7 service had a default pool pointing to pool-as (ActiveSync). The screenshot shown below confirms clients accessed the Exchange virtual service several times during the 15-minute timeframe depicted in the timeline.
Non-significant logs having been on, one observes a total of 43 log entries, including the successful ones (return code = 200). The most recent log entry is shown expanded. The other 42, collapsed into single-line rows, are not shown in the screenshot. The L7 virtual service successfully content-switched requests to the pool-owa pool as a result of the rule-pool-owa request policy rule.