


The ability of a virtual service in NSX Advanced Load Balancer to act as a service provider is key to support Security Assertion Markup Language (SAML). To fulfill this role, the virtual service sends authentication requests to an identity provider (IDP), responses from which govern user access to back-end applications running in NSX Advanced Load Balancer pools. Multiple third-party integrations have been implemented to give customers a choice of IDP. This topic outlines the steps necessary to enable Google as IDP.
NSX Advanced Load Balancer as SP and Google as IDP
To set up Google G-suite as your SAML Identity Provider, follow these steps.
Navigate to your Google G-suite admin page.
From the Admin console Home page, navigate to . To see Apps on the Home page, it might be necessary to click More controls at the bottom.
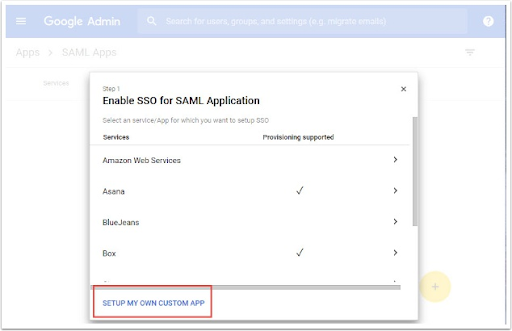
Click the plus (+) icon in the lower-right to add a new SAML app.
Click Set up my own custom app.
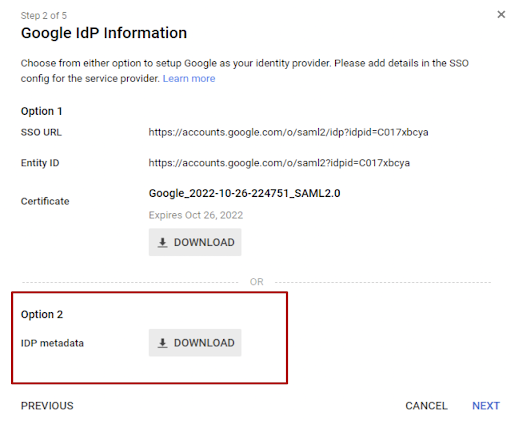
The Google IdP Information window opens and the SSO URL and the Entity ID fields automatically populate. Choose Option 2, download your IDP metadata.
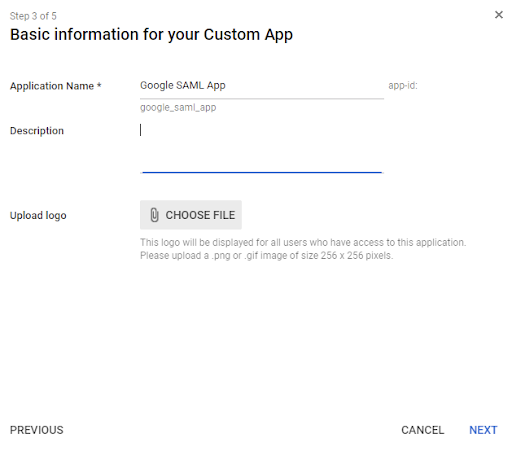
In the Basic Application Information window, enter an Application Name and Description.
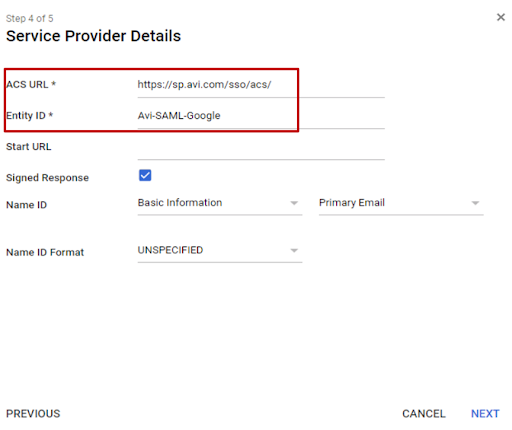
In the Service Provider Details window, add ACS URL and Entity ID. The ACS URL and the Entity ID are provided by the NSX Advanced Load Balancer. You can select EMAIL as the Name ID Format.
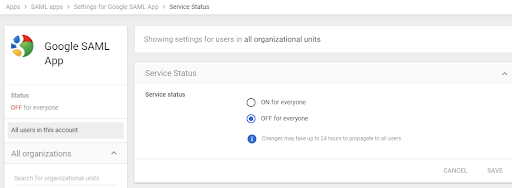
Switch the service status for SAML App from OFF to ON for everyone.
This completes the process of creating an application on Google. Once configuration is complete on Google, configure a virtual service in NSX Advanced Load Balancer to act as service provider. For more information, see SAML Configuration on NSX Advanced Load Balancer topic in the VMware NSX Advanced Load Balancer Configuration Guide.
