


A multihop iBGP configuration is similar to that of a normal iBGP peer. Once the proper peer placement subnet, peer IP, and other details are provided, the Service Engine will initiate peering with the router.
Using NSX Advanced Load Balancer UI
Login to NSX Advanced Load Balancer UI and navigate to and click CREATE.
Under BGP Peering tab, select the Enable BGP Peering check box. Select iBGP for Type.
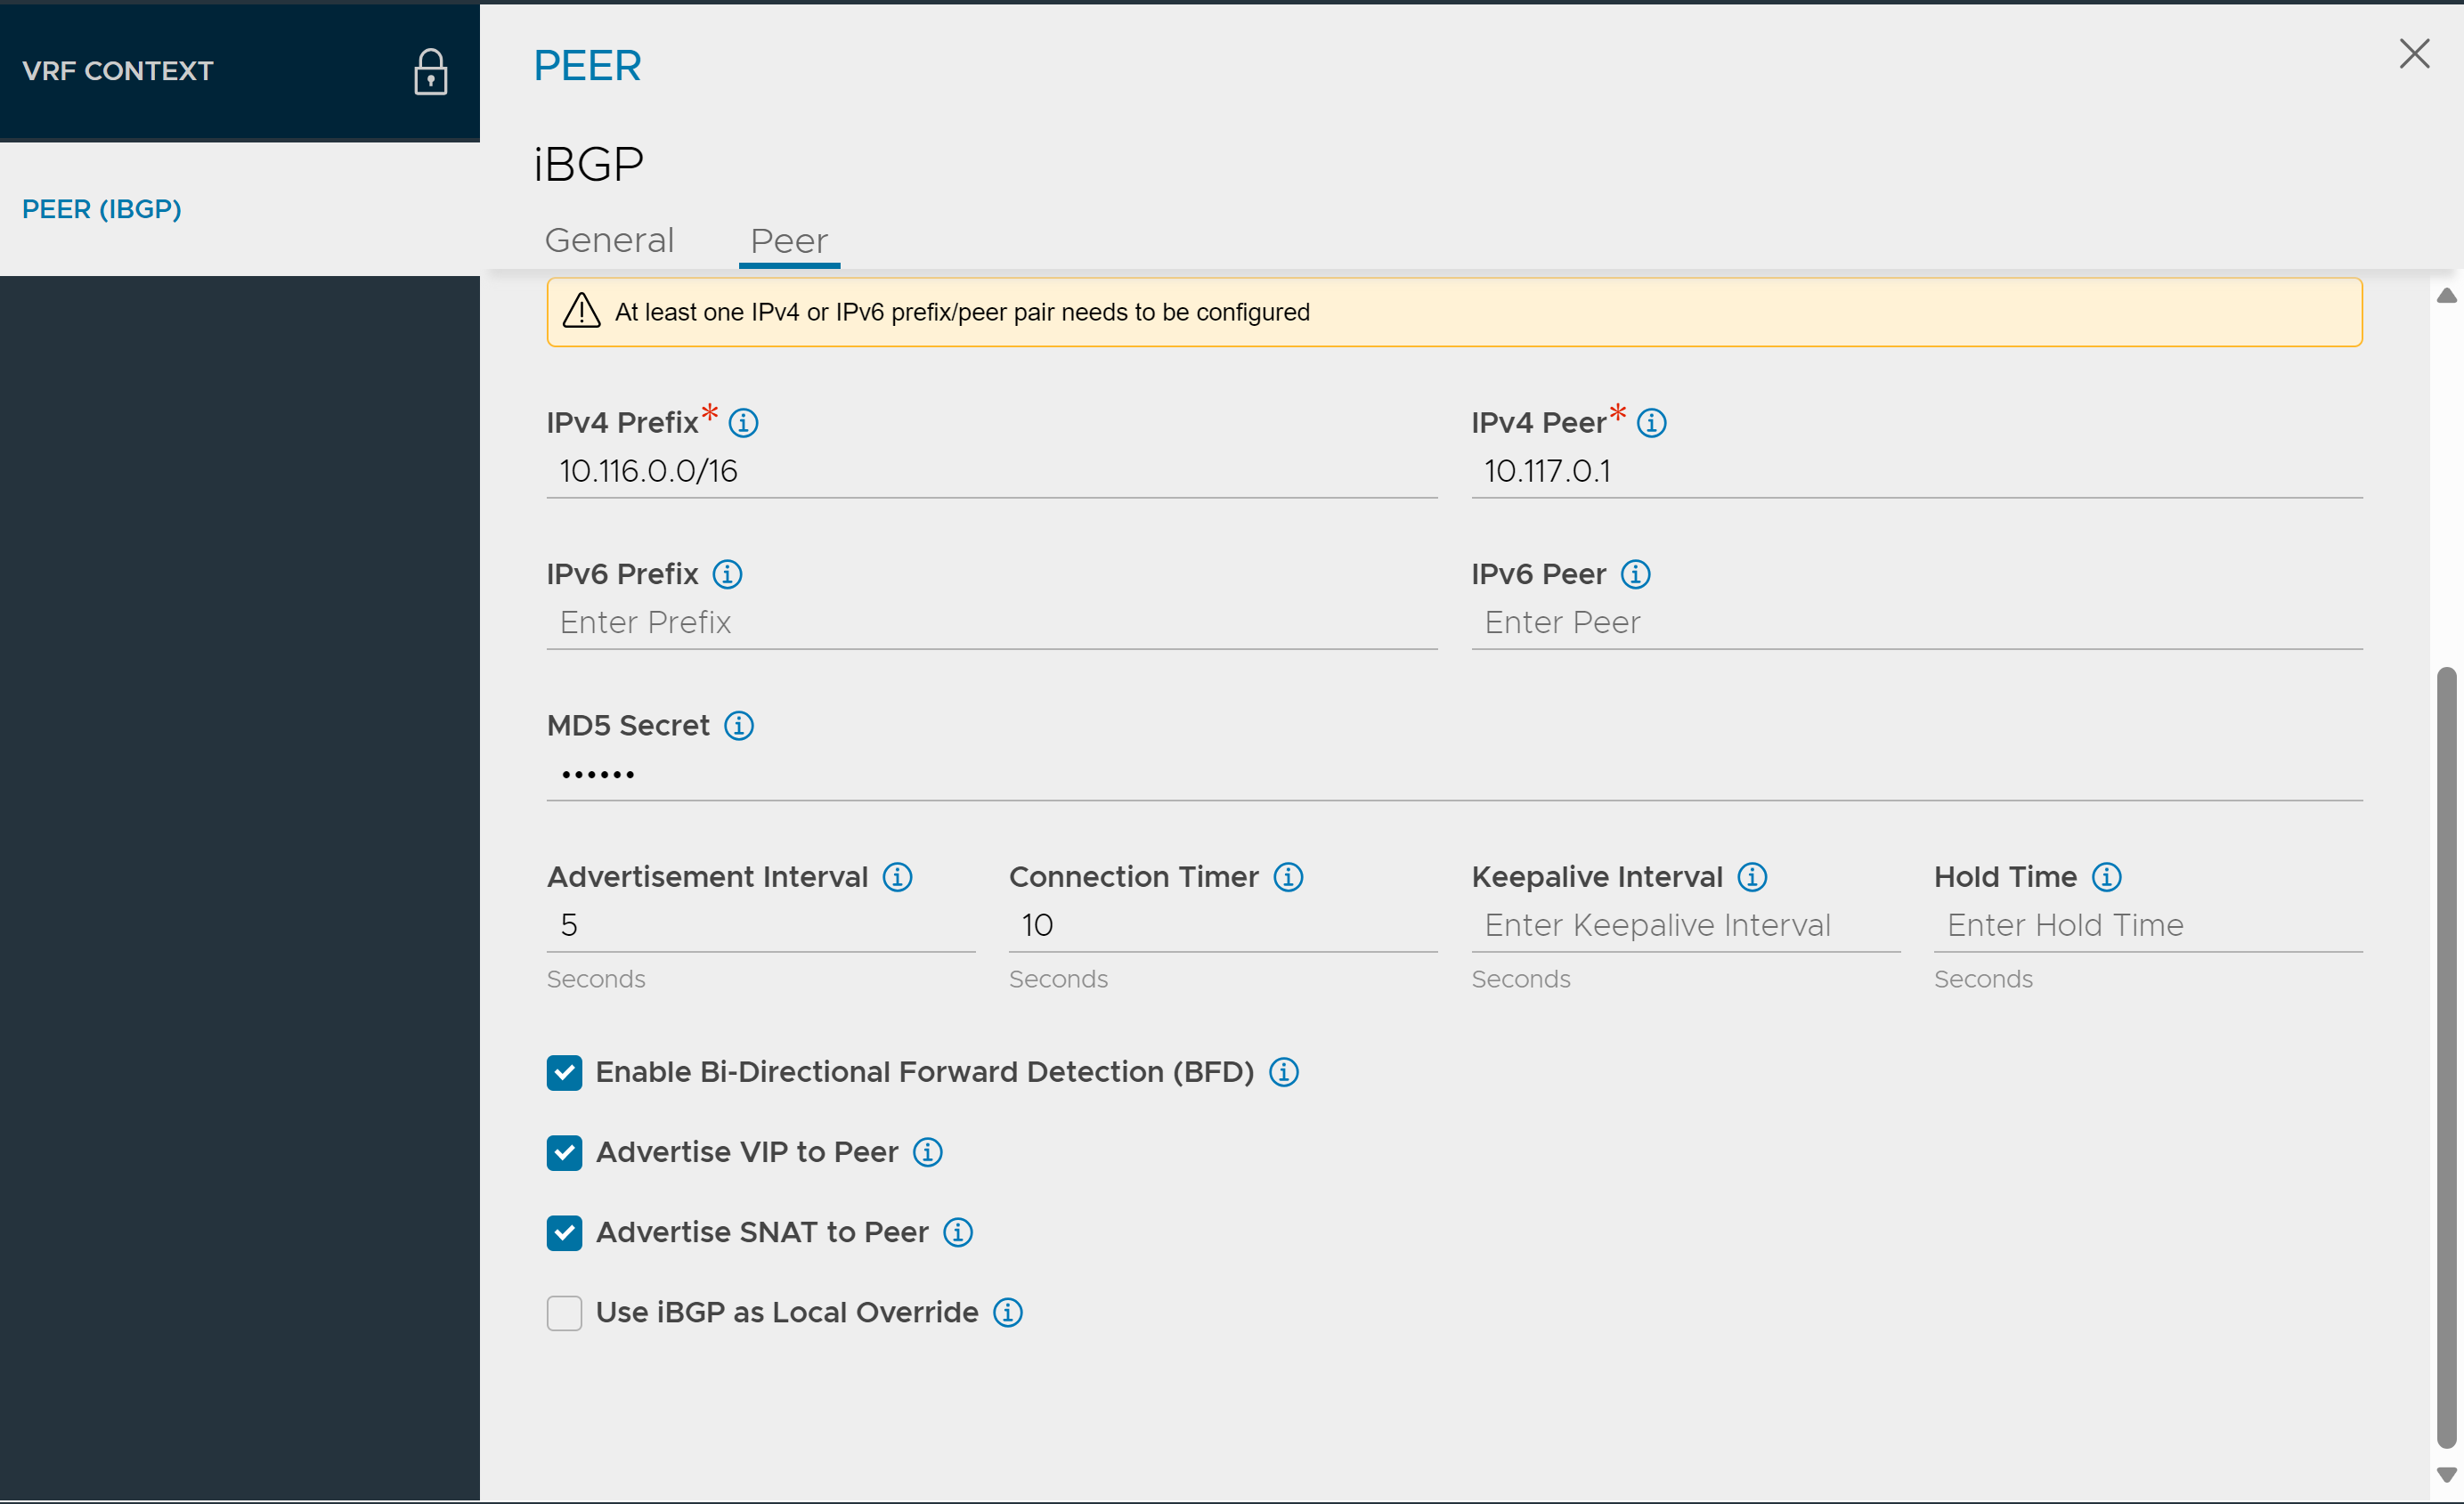
Under Peers section, click ADD.
Provide the following values to BGP AS, IPv4 Prefix, and IPv4 Peer:
Using NSX Advanced Load Balancer CLI Configuration
[admin-controller]: > configure vrfcontext management
Multiple objects found for this query.
        [0]: vrfcontext-52d6cf4f-55fa-4f32-b774-9ed53f736902#management in tenant admin, Cloud AWS-Cloud
        [1]: vrfcontext-9ff610a4-98fa-4798-8ad9-498174fef333#management in tenant admin, Cloud Default-Cloud
Select one: 1
Updating an existing object. Currently, the object is:
+----------------+-------------------------------------------------+
| Field          | Value                                           |
+----------------+-------------------------------------------------+
| uuid           | vrfcontext-9ff610a4-98fa-4798-8ad9-498174fef333 |
| name           | management                                      |
| system_default | True                                            |
| tenant_ref     | admin                                           |
| cloud_ref      | Default-Cloud                                   |
+----------------+-------------------------------------------------+
[admin-controller]: >: vrfcontext > bgp_profile
[admin-controller]: >: vrfcontext:bgp_profile > local_as 100
[admin-controller]: >: vrfcontext:bgp_profile > ibgp
[admin-controller]: >: vrfcontext:bgp_profile > peers peer_ip 10.116.0.1 subnet 10.115.0.0/16 md5_secret abcd
: vrfcontext:bgp_profile:peers > save
: vrfcontext:bgp_profile > save
: vrfcontext > save
