


After using the above steps to install the Thales Luna software bundle onto the NSX Advanced Load Balancer Controller, the Controller may be configured to secure virtual services with HSM certificates.
For more information on automated CSR workflow for Thales Luna HSM, see Certificate Management Integration for CSR Automation.
Step 1: Create the HSM Group and add the HSM devices to it
To begin, use the following commands on Controller bash shell to fetch the certificates of the HSM servers. The example below fetches certificates from two servers 1.1.1.11 and 1.1.1.13.
username@avi:~$ sudo scp [email protected]:server.pem hsmserver11.pem
username@avi:~$ sudo scp [email protected]:server.pem hsmserver13.pem
The contents of these certificates are used while creating the HSM Group. NSX Advanced Load Balancer supports trusted authentication for all nodes in the system. This can be done by providing IP addresses of Controllers and Service Engines which will interact with HSM. Use the below options of the HSM Group editor. The Thales Luna server certificates can also be provided by the security team managing the Thales Luna appliances. In either case, having access to these certificates is a pre-requisite to create any HSM configuration in NSX Advanced Load Balancer.
By default, SEs use the management network to interact with the HSM. On CSP, NSX Advanced Load Balancer also supports the use of a dedicated network for HSM interaction. Also, on the CSP platform, you can use a dedicated interface on the Controllers for HSM communication.
The following are the steps to create the HSM group from the GUI:
Switch to the desired tenant and navigate to .
Click Create and provide a suitable name in the Name field.
Select the Type as Thales Luna HSM.
In the HSM Address field, specify the IP addresses of the desired Thales Luna appliances and the respective server certificates obtained previously.
Enter the Serial Number and Password of the partition assigned to the client if the respective HSM partition passwords are available at this stage. Otherwise, this can be done after the client registration step discussed below.
Note:Serial numbers of HSM partitions are required for configuring High Availability (HA) across HSM devices.
Click IMPORT FILE and select the CA certificate of the server.
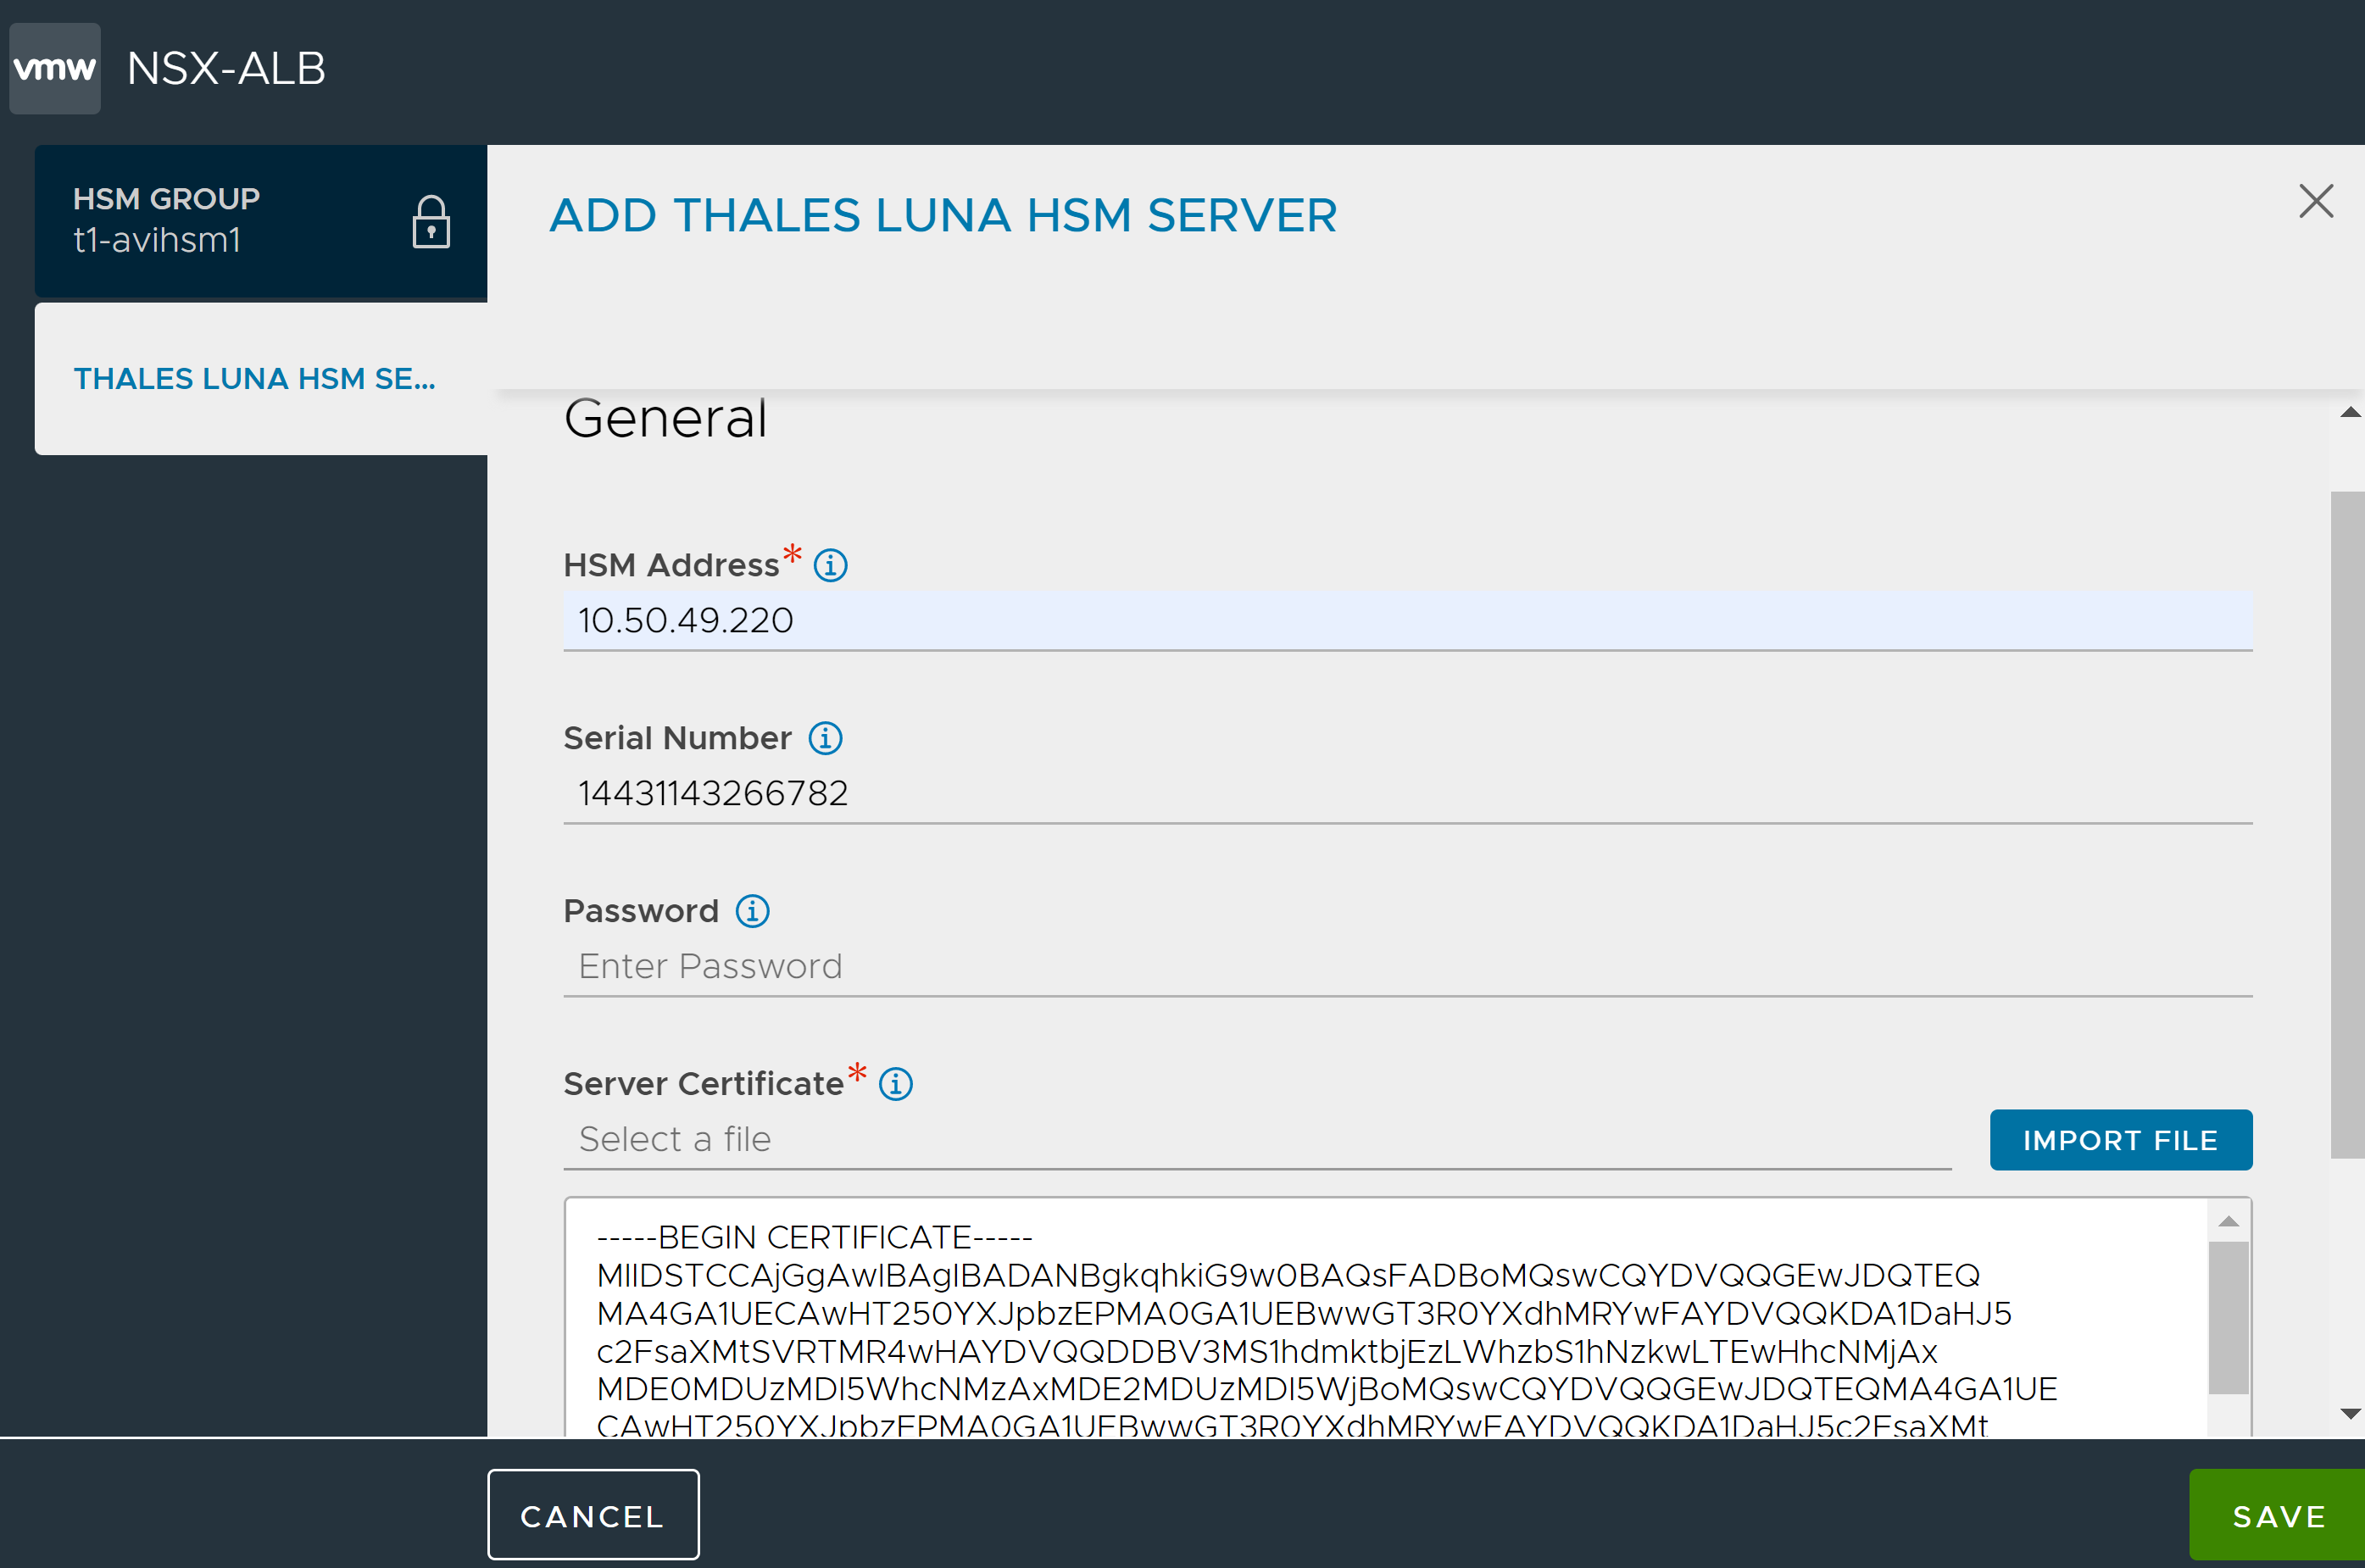
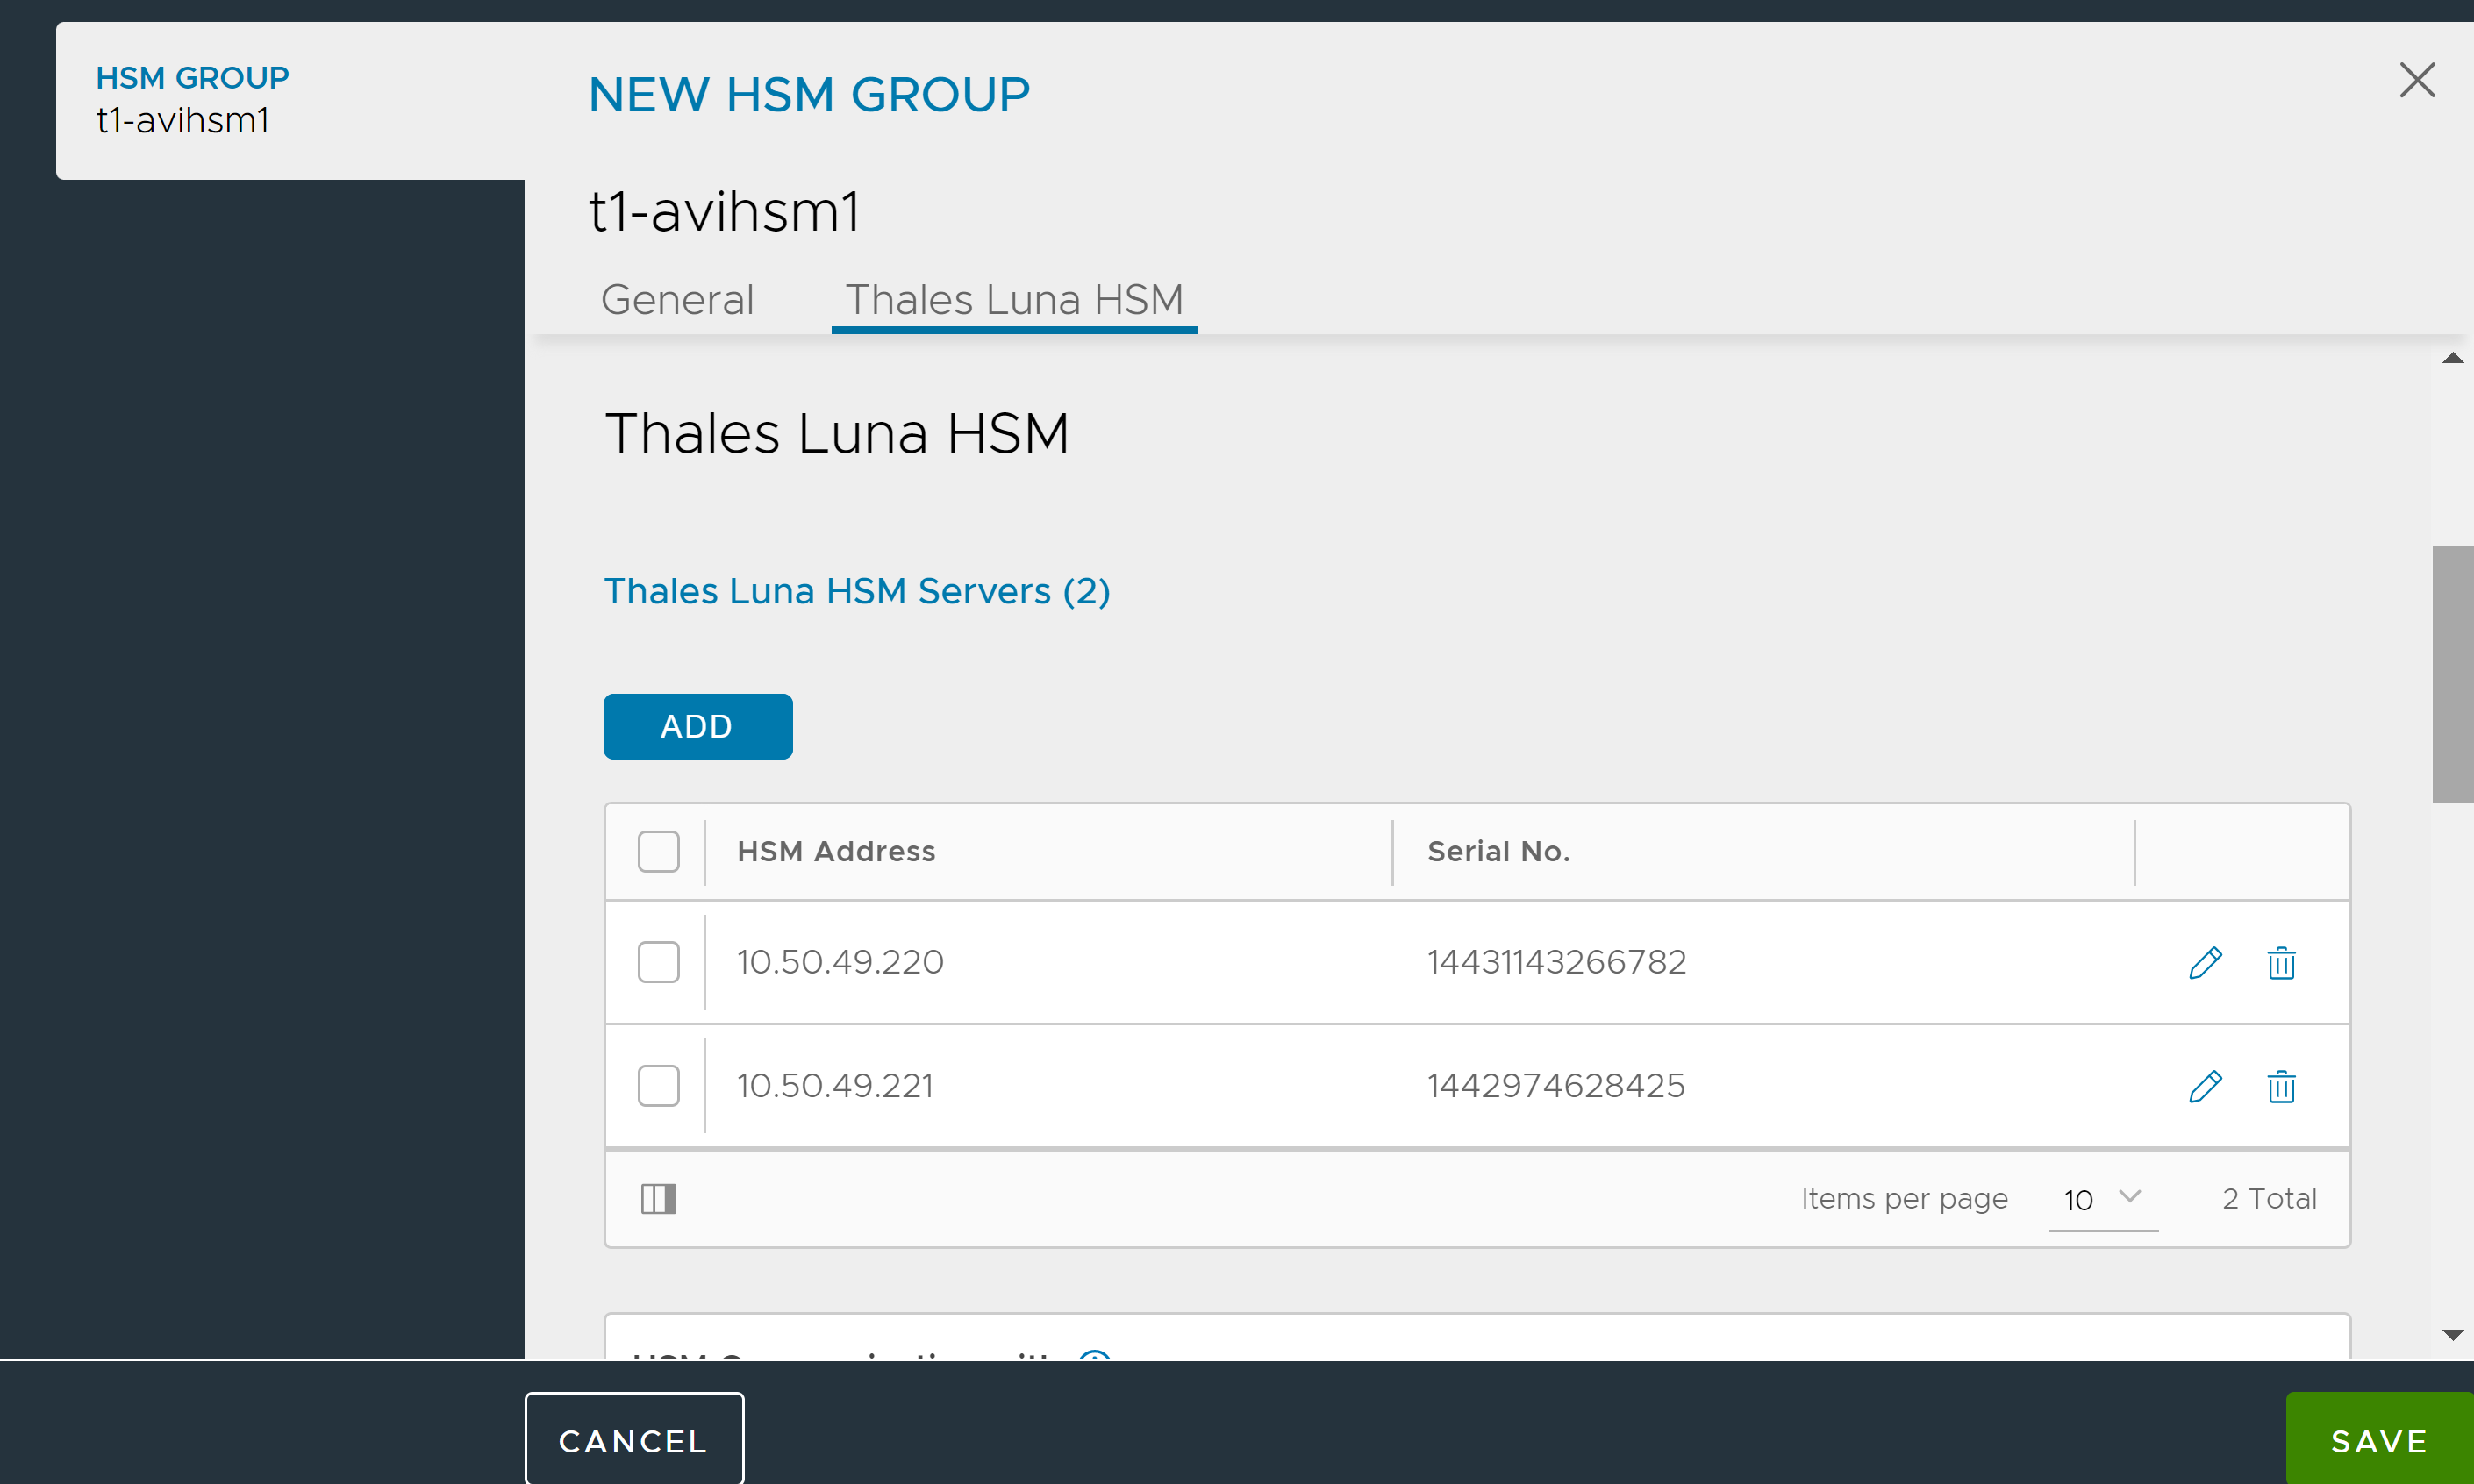
Click Add to include multiple HSMs in the group.
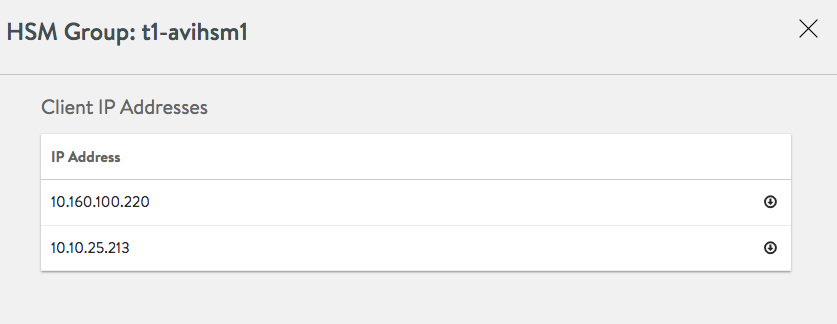
Select the network to be used to communicate with HSM and Add client IPs.
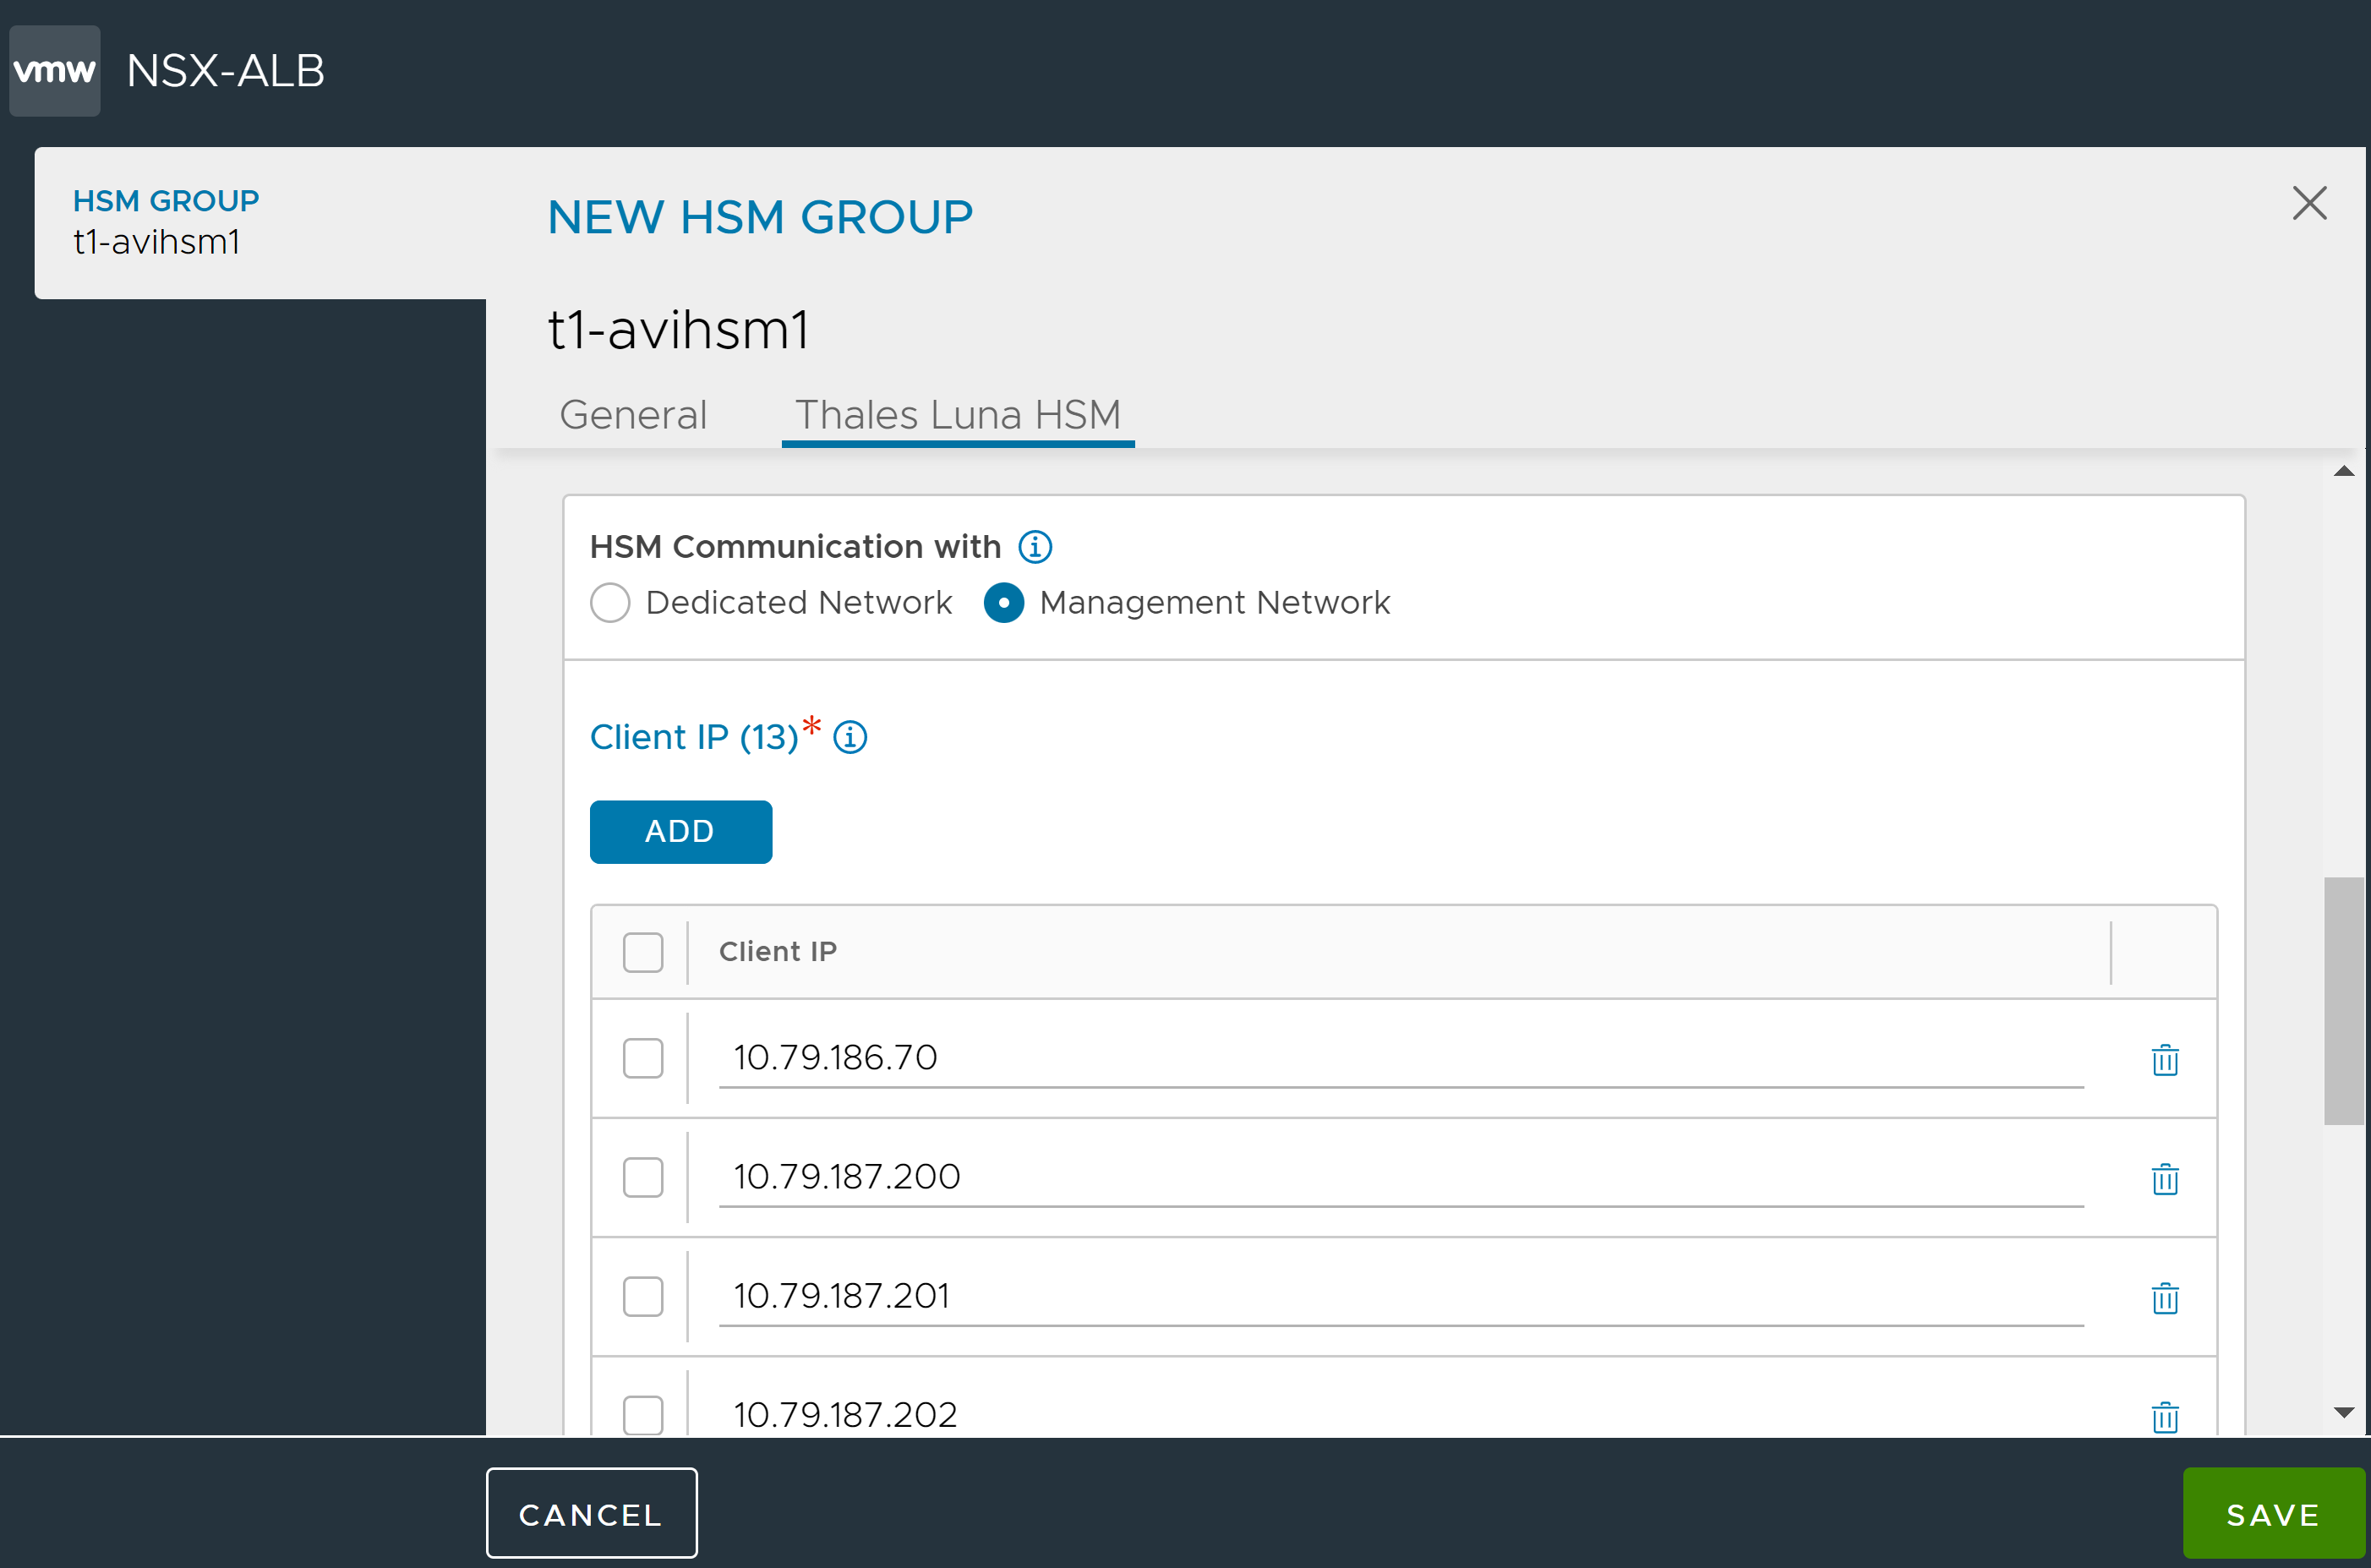
If any dedicated SE or Controller interfaces have been configured for HSM communication, check Dedicated Interface box and verify the IPs listed are those of the desired dedicated interfaces on the Service Engines and/ or Controllers.
Click Save once all client-IP addresses have been verified.
NSX Advanced Load Balancer Controllers and all Service Engines associated with the SE group must have at least one IP address in the list to ensure access to the HSMs. This step is extremely important since Thales Luna appliances will not allow communications from unregistered client-IP addresses.
Step 2: Register the Client with HSM Devices for Mutual Authentication
The clients in this case are NSX Advanced Load Balancer Controller's and Service Engines and the generated client certificates need to be registered with the Thales Luna appliances for purposes of mutual authentication. This can be done directly as shown in steps 3 and 4 below or by sending the client certificates to the concerned security team managing the HSM appliances.
The following are the steps to register the client with HSM devices:
Click the icon next to the Edit icon open the window for client certificate download generated certificates.
Click the download certificate icon.
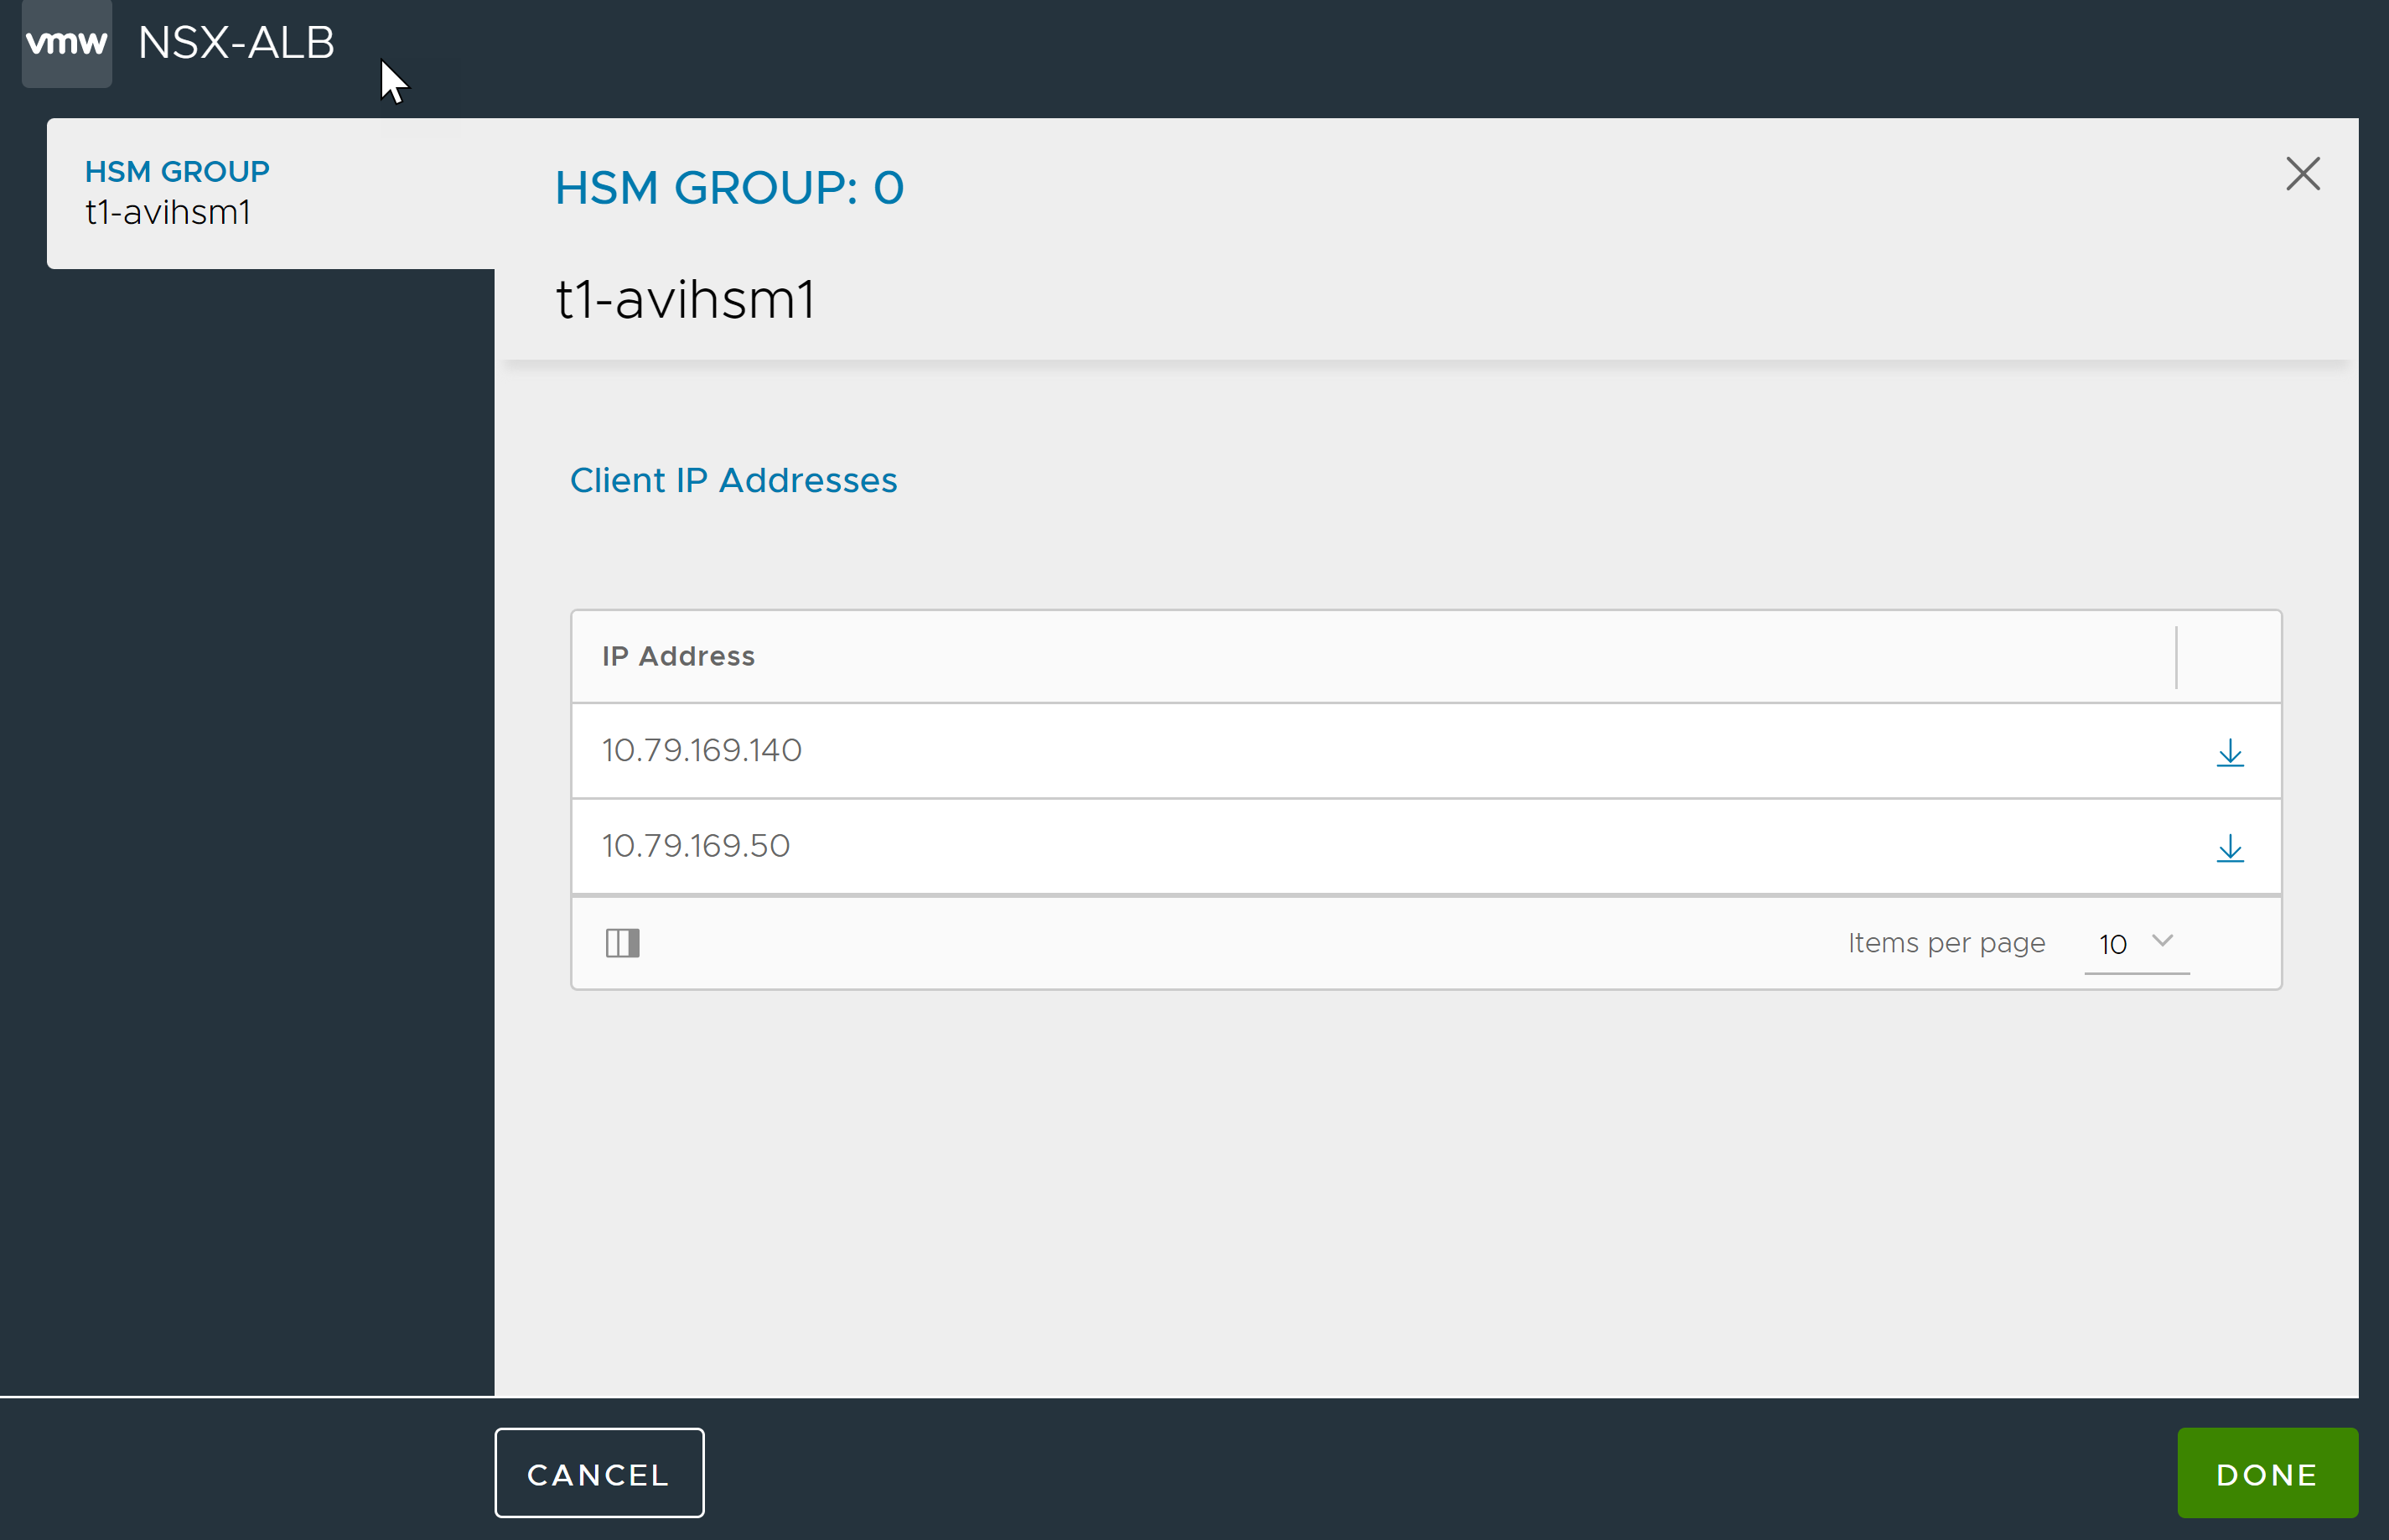
After download, save the certificate as .pem. In this example, the certificate needs to be saved as 10.160.100.220.pem before scp to HSM.
scp 10.160.100.220.pem [email protected]:
Register the client on HSM.
 username@avi:~$ ssh [email protected]
 [email protected]'s password:
 Last login: Thu May 12 19:52:00 2016 from 12.97.16.194
 Luna SA 7.3.3-7 Command Line Shell - Copyright (c) 2001-2014 SafeNet, Inc. All rights reserved.
 [1.1.1.11] lunash: client register -c 10.160.100.220 -i 10.160.100.220 'client register' successful. Command Result : 0 (Success)
 [1.1.1.11] lunash: client assignPartition -c 10.160.100.220 -p par43 'client assignPartition' successful. Command Result : 0 (Success)
 [1.1.1.11] lunash: exit
Repeat steps 1 and 2 for all HSM devices.
Note:Step 6 must only be performed after all client certificates are registered on all HSM appliances configured above to verify the registration. First ensure the (partition) password is populated in the HSM group by editing the same.
Once client registration is done, verify the output of the vtl verify command to ensure mutual Authentication is successful.
username@avi:~$ /opt/avi/scripts/safenet.py -p [HSM-GROUP] -i [CLIENT IP OF CONTROLLER REGISTERED WITH HSM] -t [TENANT_NAME] -c "/usr/safenet/lunaclient/bin/vtl verify
 The following Luna SA Slots/Partitions were found:

 Slot	Serial #        	Label
 ====	================	=====
    1	   1##########1 	par1
    2	   1##########3 	par1
Step 3: Setting Up HA across HSM Devices (Optional)
NSX Advanced Load Balancer automates configuration of HA across HSM devices. Before configuring HA, ensure that the clients are registered with the HSM using listSlots command. This command provides details about the HSM devices to be set up. The serial number provided in the output of this command is needed to set up HA across these devices.
Verify that the partition serial numbers listed below match the ones set up on the Thales Luna appliances or the ones provided by the security team. This must also match with the configuration in the HSM group object. Internally, the serial number is used to configure HA if the client is registered on more than one partition on the HSM.
username@avi:~$ /opt/avi/scripts/safenet.py -p [HSM-GROUP] -i [CLIENT IP OF CONTROLLER REGISTERED WITH HSM] -t [TENANT_NAME] -c "/usr/safenet/lunaclient/bin/vtl listSlots"

Number of slots: 5

The following slots were found:

Slot #        Description        Label           Serial #     Status
========= =================== ================== ========== ============
slot #1   LunaNet Slot         par43             156908040  Present
slot #2   LunaNet Slot         par40             156936072  Present
slot #3   -                    -                 -     Not present
slot #4   -                    -                 - Not present
slot #5   -                    -               -Not present
You can enable HA from the CLI as follows after switching to the appropriate tenant if required.
[username:avi]: > switchto tenant [TENANT_NAME]
[username:avi]: > configure hardwaresecuritymodulegroup safenet-network-hsm-1
[username:avi]: hardwaresecuritymodulegroup>  hsm type hsm_type_safenet_luna
[username:avi]: hardwaresecuritymodulegroup:hsm> sluna
[username:avi]: hardwaresecuritymodulegroup:hsm:sluna> is_ha
[username:avi]: hardwaresecuritymodulegroup:hsm:sluna> save
[username:avi]: hardwaresecuritymodulegroup:hsm:sluna> save
[username:avi]: hardwaresecuritymodulegroup> save
Alternatively, this can also be done in the web interface by selecting the HSM group and editing it to select the Enable HA check box. This option is available only while editing the HSM group with more than one server.
Once HA is set up, verify the output of the listSlots command to ensure the avi_group virtual card slot is configured.
[username:avi]: /opt/avi/scripts/safenet.py -p [HSM-GROUP] -i [CLIENT IP OF CONTROLLER REGISTERED WITH HSM] -t [TENANT_NAME] -c "/usr/safenet/lunaclient/bin/vtl listSlots"

Number of slots: 1

The following slots were found:

Slot #       Description           Label     Serial #   Status
========= ================= ==================== ========== ============
slot #1   HA Virtual Card Slot avi_group         1529532014 Present
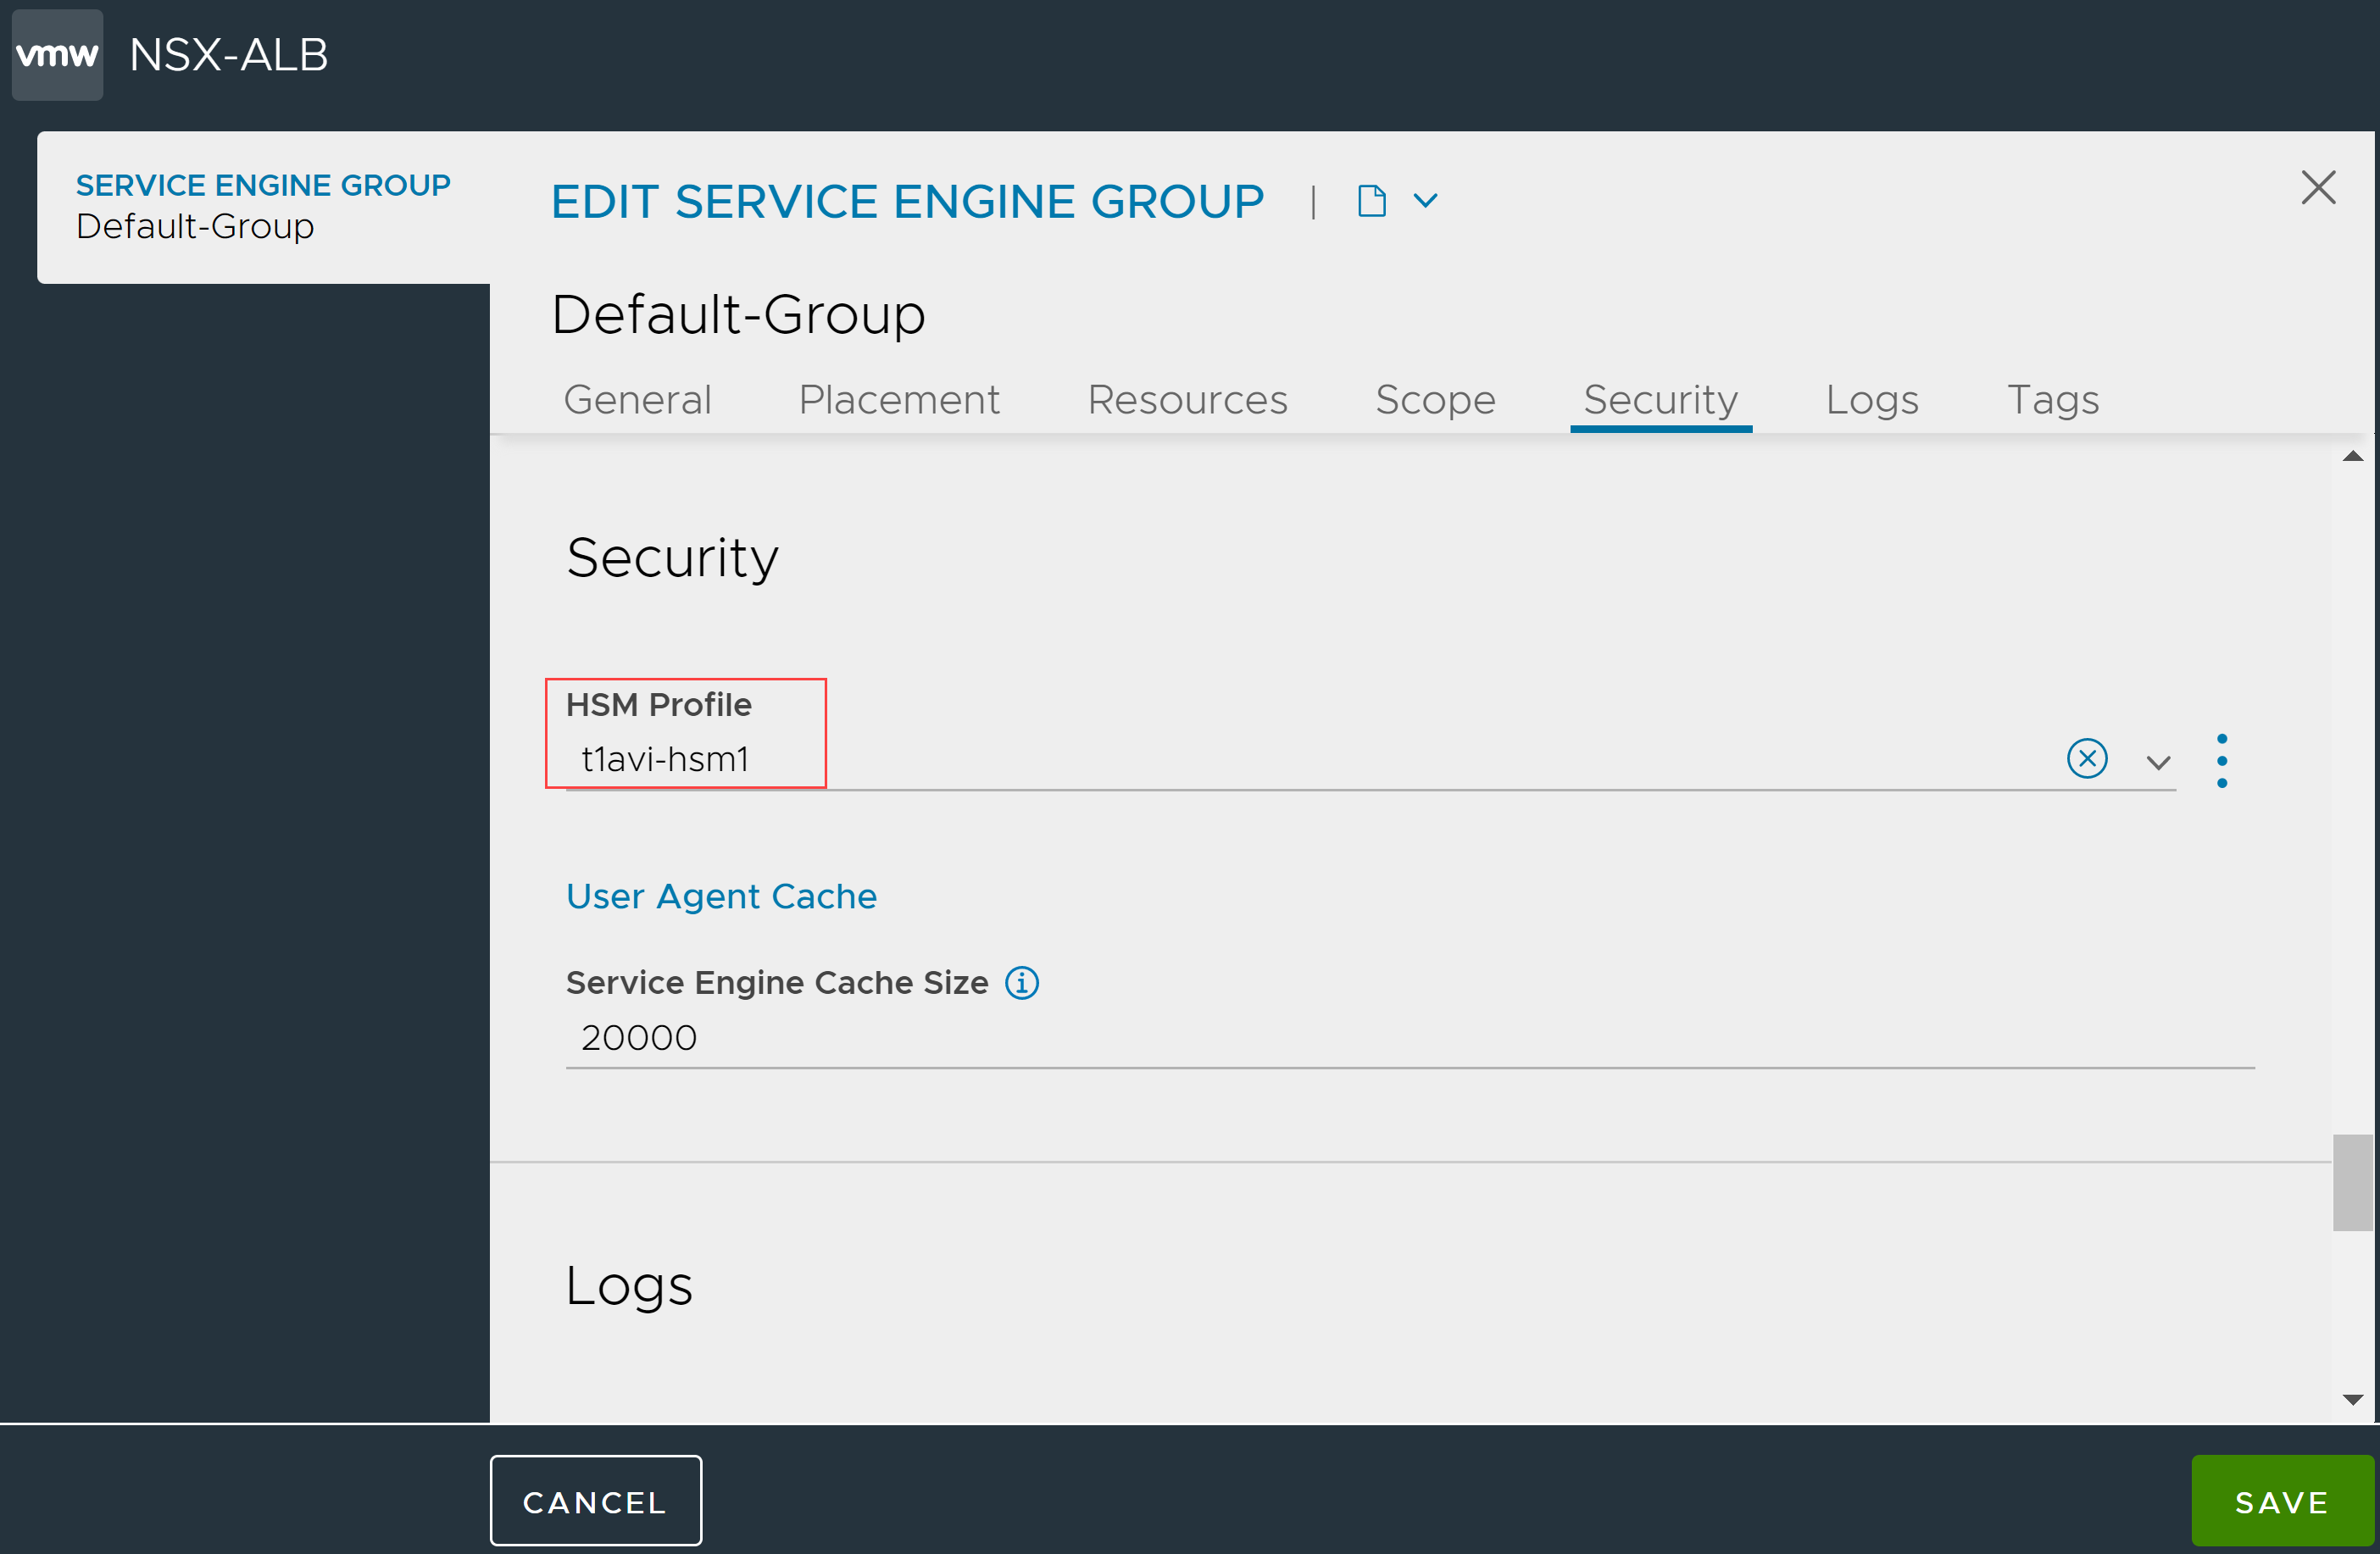
Step 4: Associate the HSM Group with an SE Group
The HSM group must be added to the SE group that will be used by virtual service.
Switch to appropriate tenant and navigate to .
Bring up the Service Engine Group editor for the desired Service Engine group.
Click Advanced tab.
Select the desired HSM group from the drop-down menu.
Click Save.
This also can be configured using the CLI shell:
[username:avi]: > switchto tenant [TENANT_NAME]
[username:avi]: > configure serviceenginegroup [SE-GROUP]
[username:avi]: hardwaresecuritymodulegroup_ref
Step 5: Add the Application Certificates and Keys
Create Application Certificate and Keys
The Controller is setup as a client of HSM and can be used to create keys and certificates on the HSM. Both the RSA and EC type of key/ certificate creation is supported.
Use a browser to navigate to the Controller’s management IP address. If NSX Advanced Load Balancer is deployed as a three-node Controller cluster, navigate to the management IP address of the cluster. Use this procedure to create keys and certificates. The creation process is similar to any other key/certificate creation. For a key/certificate bound to HSM, select the HSM group while creating the object.
Navigate to .
Click .
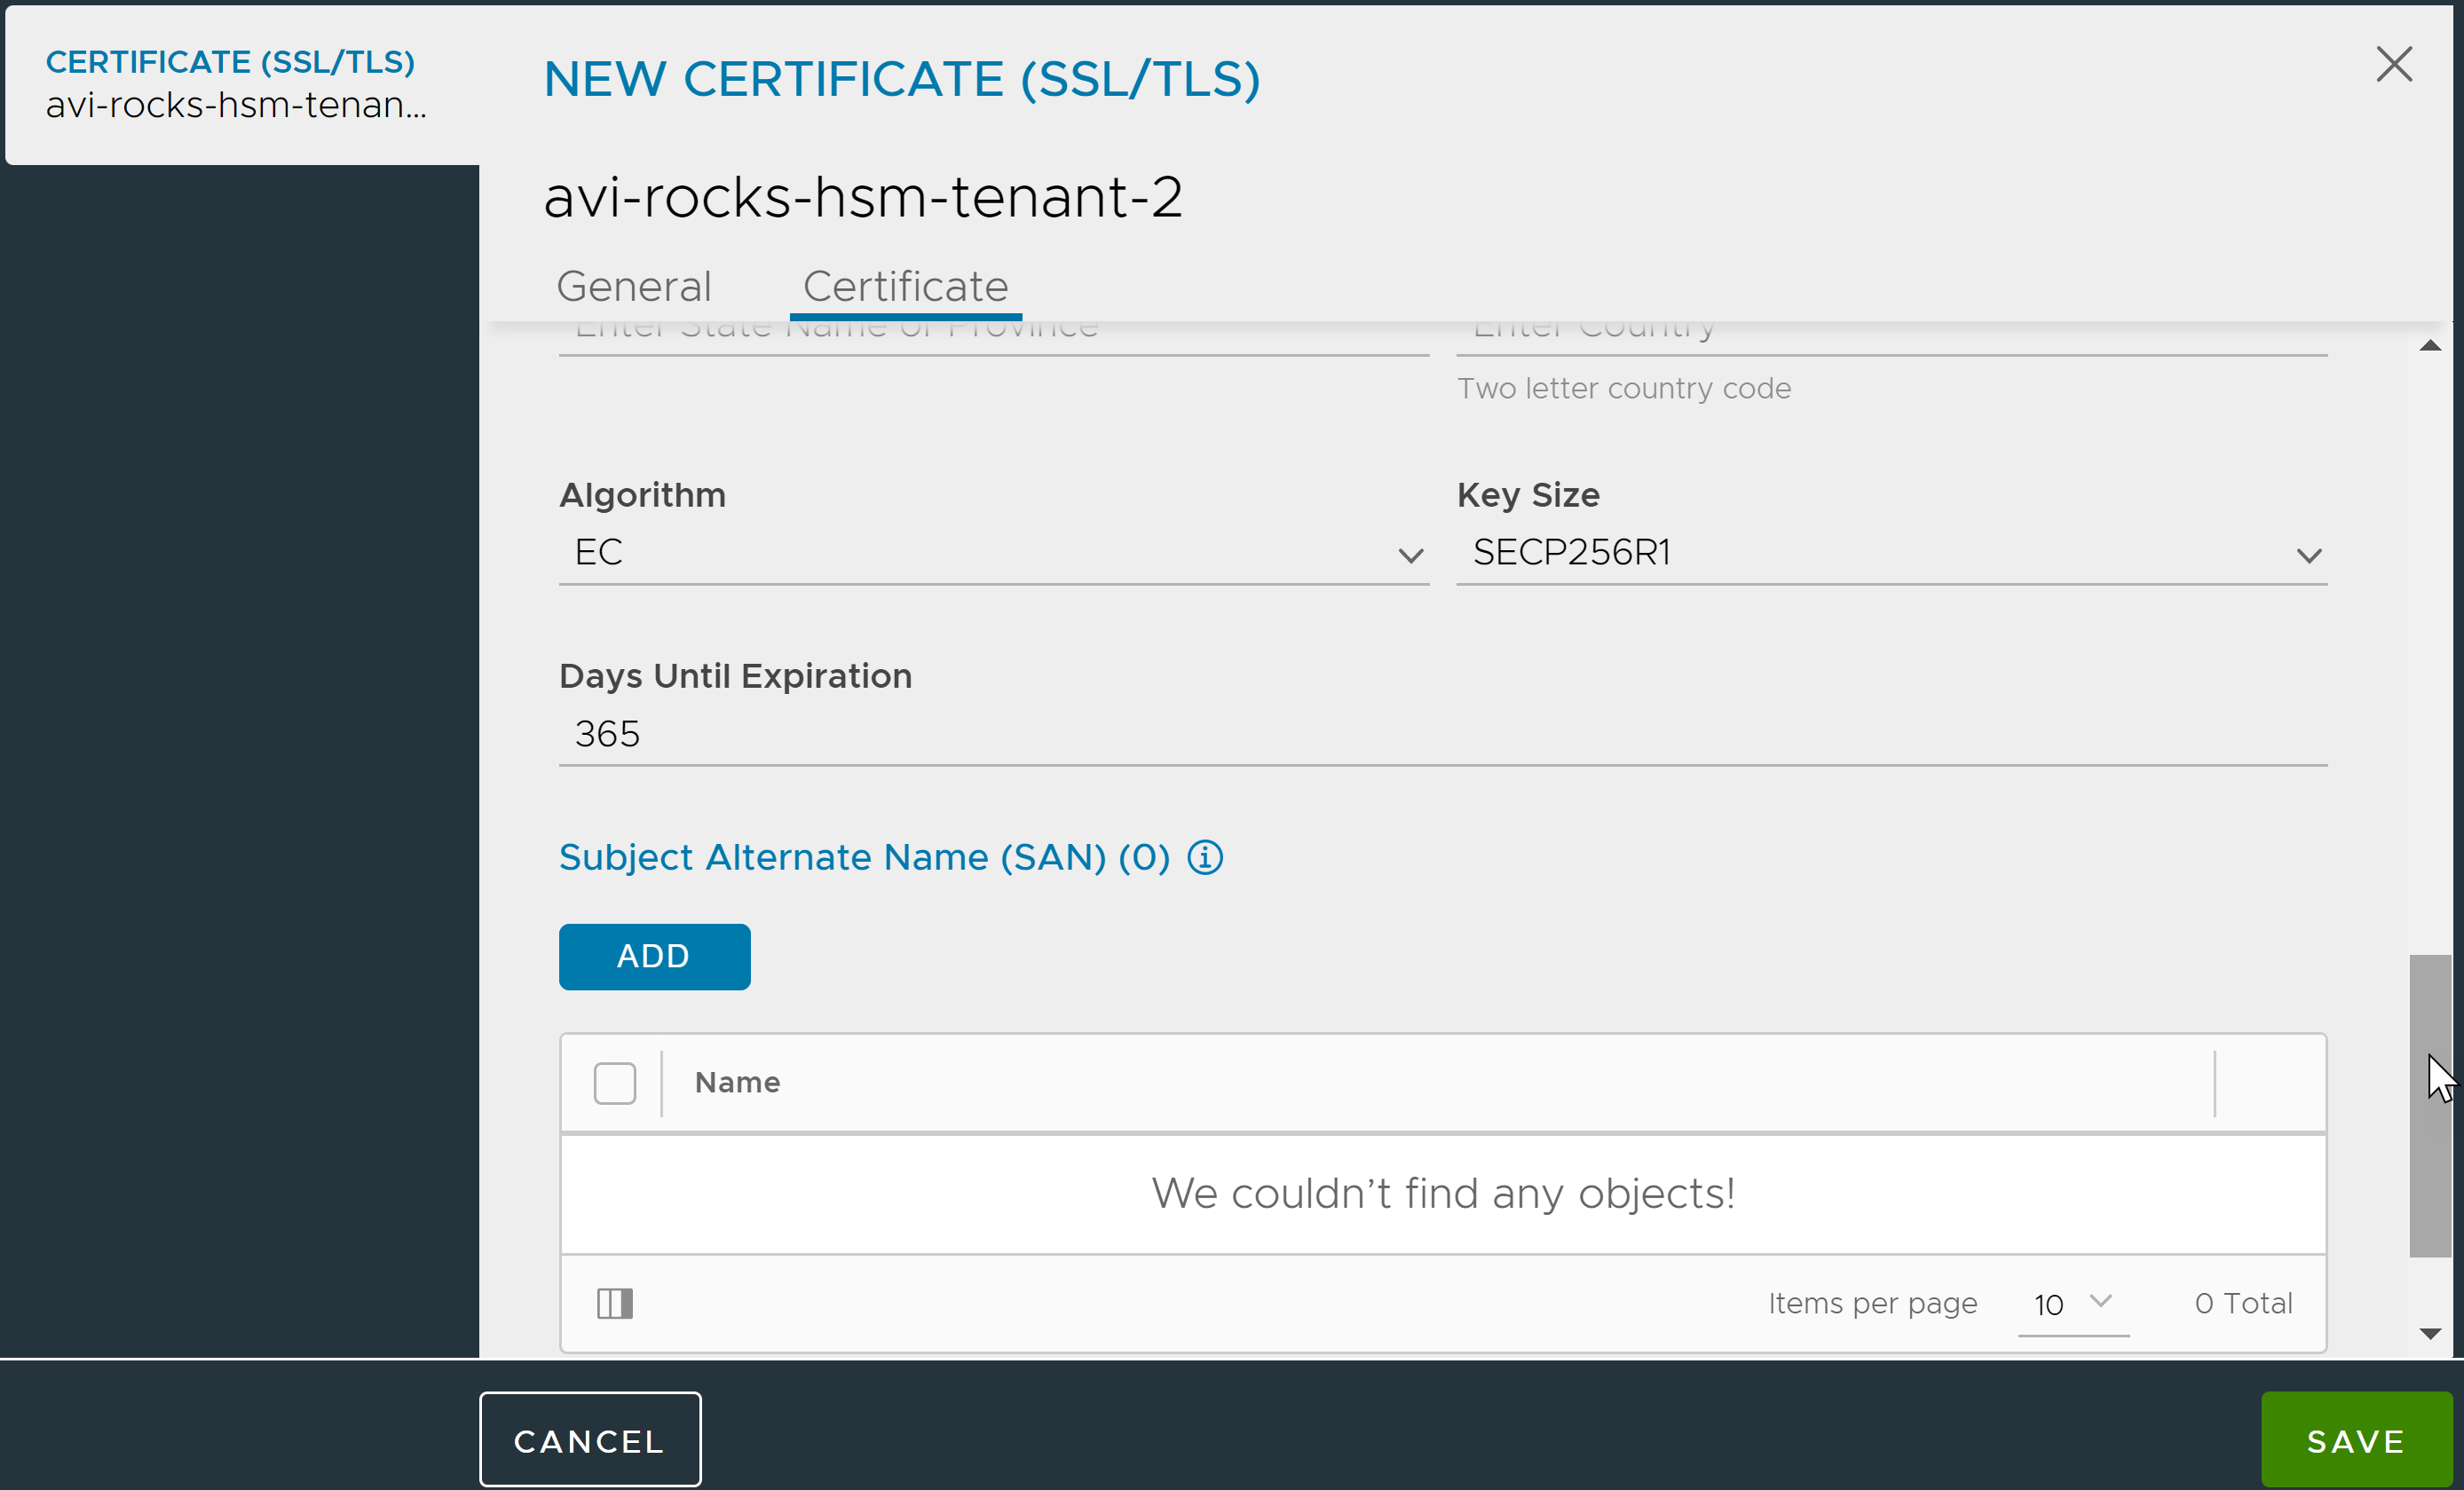
Enter the certificate Name and select the Type.
-
Select the HSM Group.

Configure the other fields as required and click Save to create the self-signed EC cert on HSM provided in the HSM Group selected here by clicking the Save button.
Import Application Certificate and Keys
NSX Advanced Load Balancer supports import of certificate and SSL key through the UI and CLI.
Using the UI:
Navigate to .
Click .
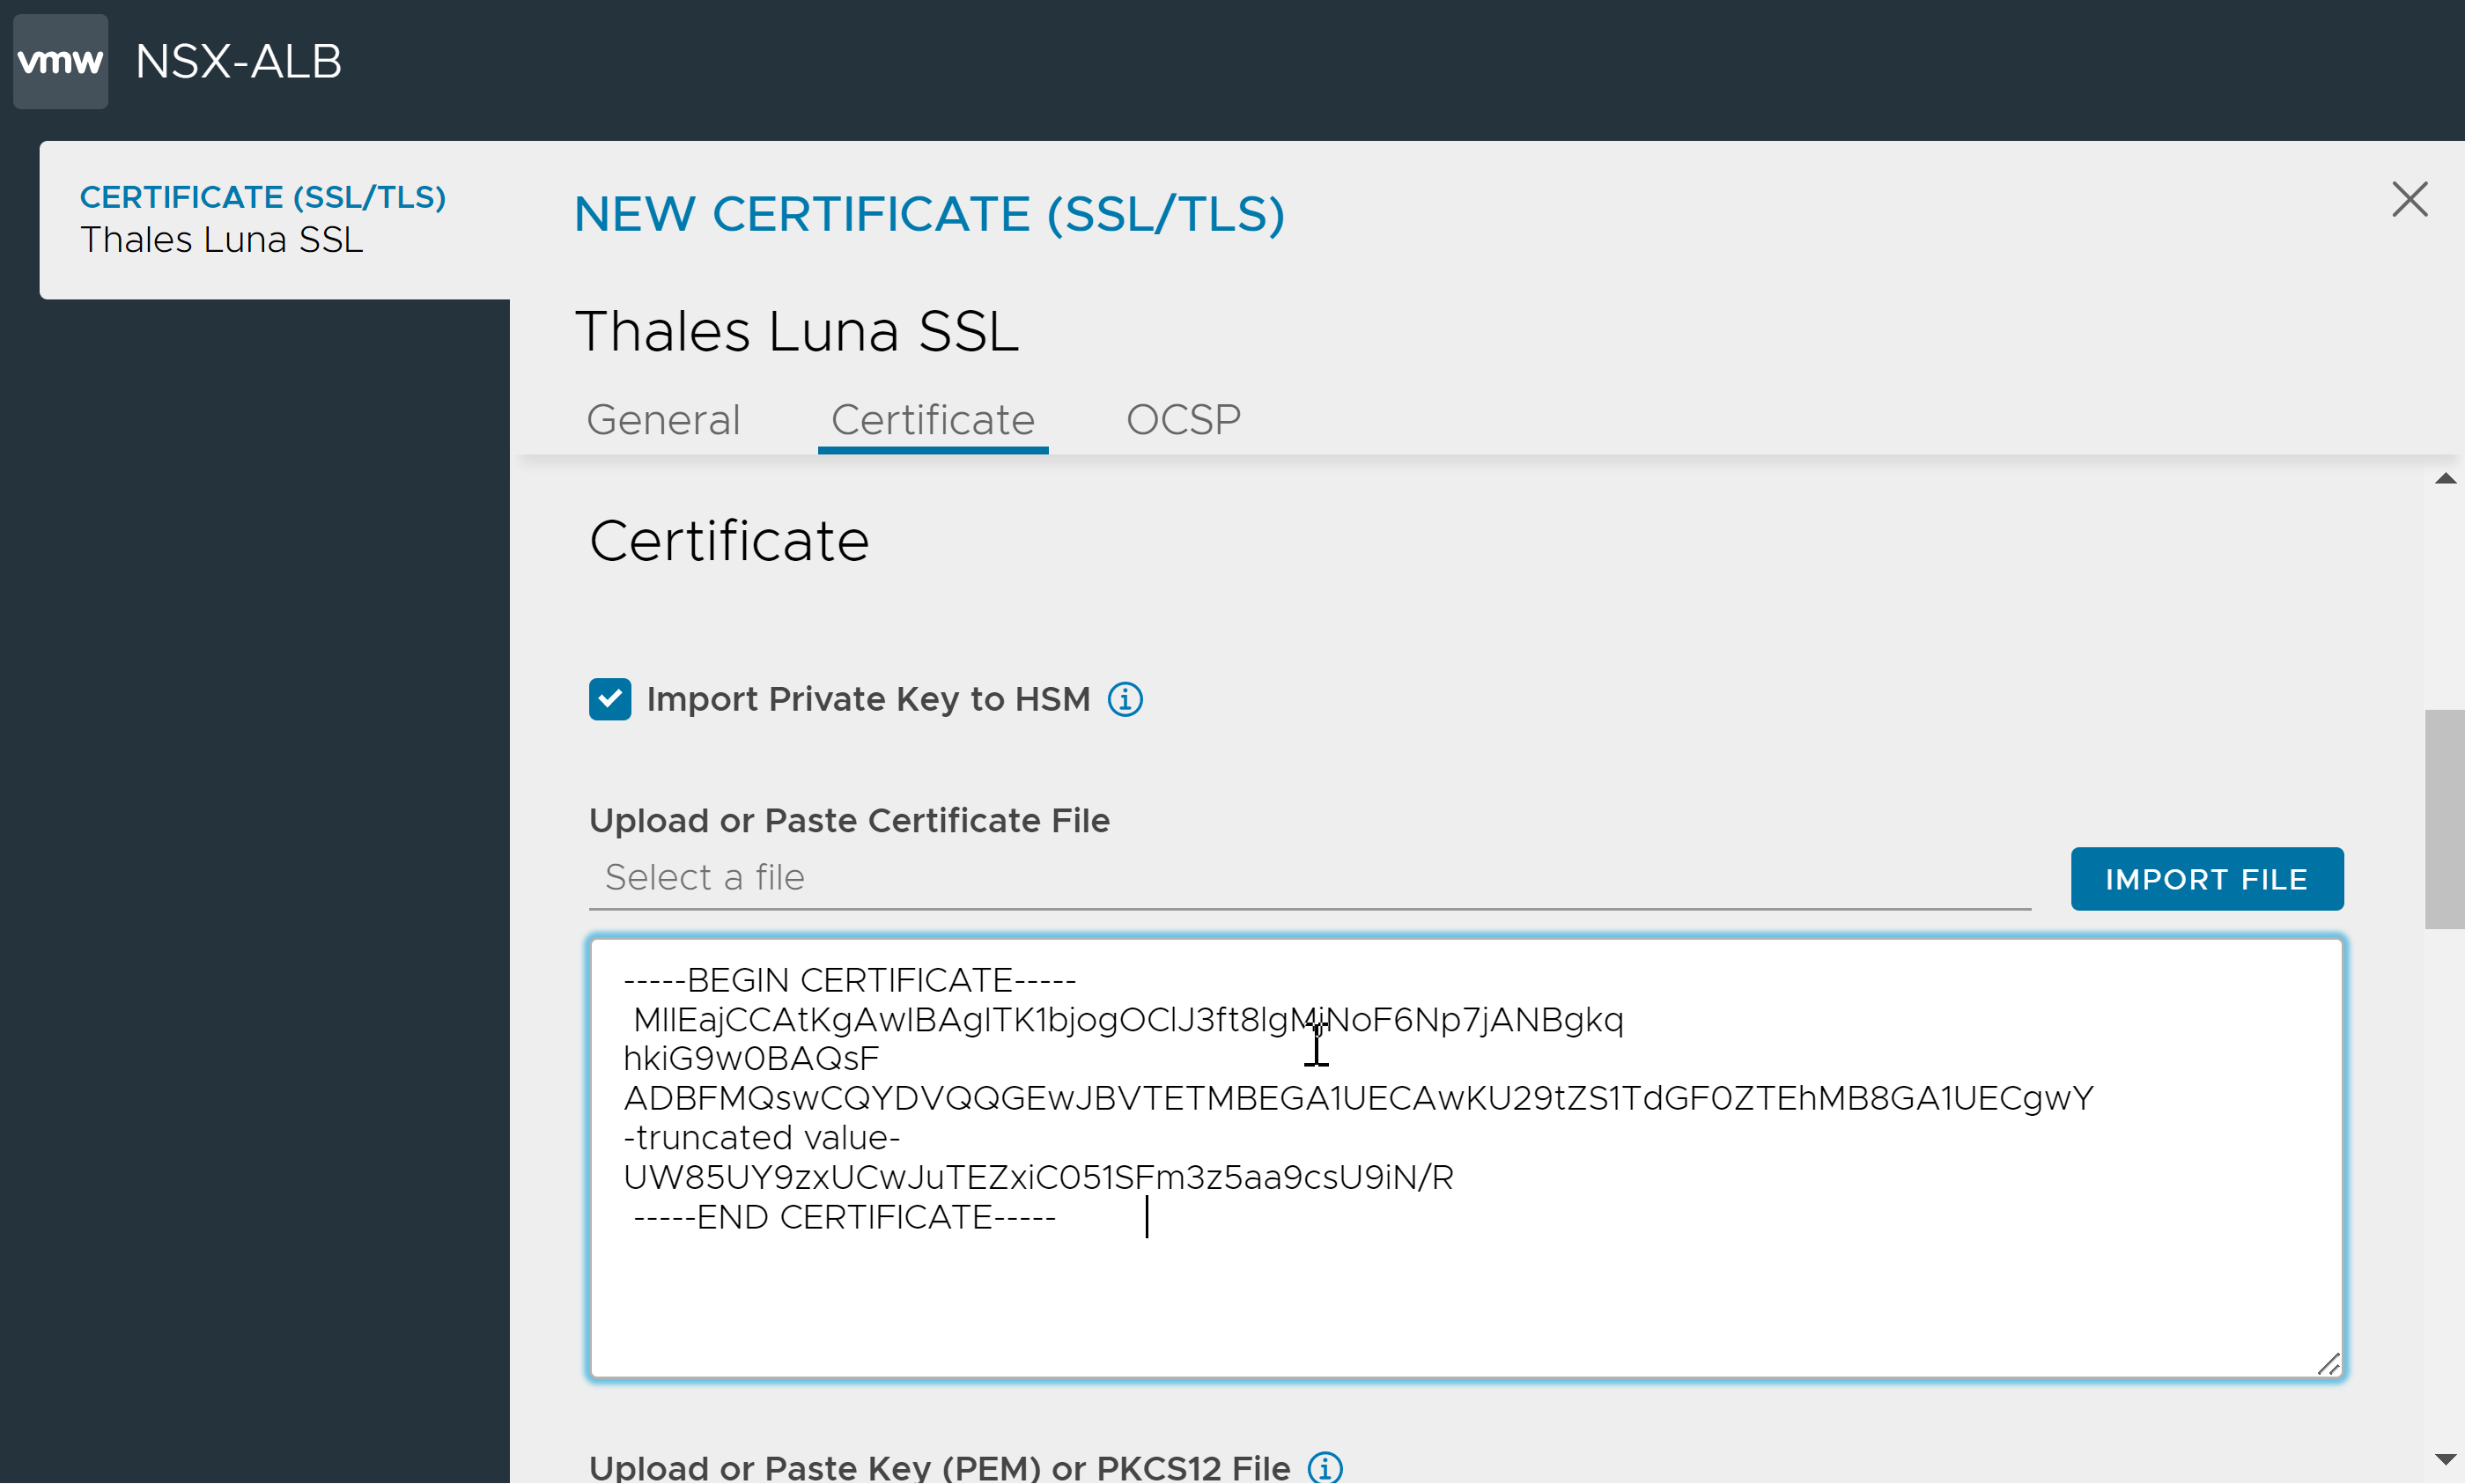
Enter the certificate’s Name and select the Type as Import.
Select the HSM Group.
Under Certificate, click Import Private Key to HSM.
Note:The option to enable private key import to HSM when importing the certificate is available.
Under Upload or Paste Certificate File, copy and paste the certificate in the text area or click IMPORT FILE.
Under Upload or Paste Key (PEM) or PKCS12 File, copy and paste the private key or click IMPORT FILE.
If the key file is secured by a passphrase, enter the SSL/TLS Key Passphrase.
Click Validate. The NSX Advanced Load Balancer checks the key and certificate files to verify their validity.
Click Save.
Using the CLI:
To import the certificate, through the CLI, set the field import_key_to_hsm to true to enable SSL private key import to Thales Luna HSM application using the NSX Advanced Load Balancer.
Ensure that the format is SSL_PEM, the type is ssl_certificate_type_virtualservice and the correct hardware security module group is referred.
[admin:10-79-169-143]: sslkeyandcertificate> import_key_to_hsm
[admin:10-79-169-143]: sslkeyandcertificate> hardwaresecuritymodulegroup_ref hsmgrp_smoke
[admin:10-79-169-143]: sslkeyandcertificate> where
Tenant: admin
Cloud: Default-Cloud
+---------------------------------+------------------------------------------------------------------+
| Field                           | Value                                                            |
+---------------------------------+------------------------------------------------------------------+
| name                            | hsmcertcli1                                                      |
| type                            | SSL_CERTIFICATE_TYPE_VIRTUALSERVICE                              |
| certificate                     |                                                                  |
|   certificate                   | -----BEGIN CERTIFICATE-----                                      |
|                                 | MIIEajCCAtKgAwIBAgITK1bjogOClJ3ft8lgMjNoF6Np7jANBgkq             |
|                                 | hkiG9w0BAQsF                                                     |
|                                 | ADBFMQswCQYDVQQGEwJBVTETMBEGA1UECAwKU29tZS1TdGF0ZTEhMB8GA1UECgwY |
|                                 |-truncated value-                                                 |
|                                 | UW85UY9zxUCwJuTEZxiC051SFm3z5aa9csU9iN/R                         |
|                                 | -----END CERTIFICATE-----                                        |
|                                 |                                                                  |
| key                             | -----BEGIN RSA PRIVATE KEY-----                                  |
|                                 | MIIG5AIBAAKCAYEA2iv7eOxO2dvpNSOkOXu17szzs06dTjDd                 |
|                                 | oWrDe5KpUSODASpw                                                 |
|                                 | MbOTewS5reEUXr9QFlJcNILV7p7t0QXVC9IaDiis/Zu9Vv6bAfwpX0lE0TKamWs  |
|                                 | -truncated value-                                                |
|                                 | MUUEW4O7E0U1nnyjGaZXUjc9og==                                     |
|                                 | -----END RSA PRIVATE KEY-----                                    |
|                                 |                                                                  |
| hardwaresecuritymodulegroup_ref | hsmgrp_smoke                                                     |
| format                          | SSL_PEM                                                          |
| certificate_base64              | False                                                            |
| key_base64                      | False                                                            |
| enable_ocsp_stapling            | False                                                            |
| import_key_to_hsm               | True                                                             |
+---------------------------------+------------------------------------------------------------------+
[admin:10-79-169-143]: sslkeyandcertificate>
[admin:10-79-169-143]: sslkeyandcertificate> save
The imported certificate and key are as shown below:
{
    "certificate": {
        "certificate": "-----BEGIN CERTIFICATE-----\nMIIEajCCAtKgAwIBAgITK1bjogOClJ3ft8lgMjNoF6Np7jANBgkqhkiG9w0BAQsF\nADBFMQswCQYDVQQGEwJBVTETMBEGA1UECAwKU29tZS1TdGF0ZTEhMB8GA1UECgwY\nSW50ZXJuZXQgV2lkZ2l0cyBQdHkgTHRkMB4XDTIyMDUxNjEyMTM1NloXDTIzMDUx\nMTEyMTM1NlowRTELMAkGA1UEBhMCQVUxEzARBgNVBAgMClNvbWUtU3RhdGUxITAf\nBgNVBAoMGEludGVybmV0IFdpZGdpdHMgUHR5IEx0ZDCCAaIwDQYJKoZIhvcNAQEB\nBQADggGPADCCAYoCggGBANor+3jsTtnb6TUjpDl7te7M87NOnU4w3aFqw3uSqVEj\ngwEqcDGzk3sEua3hFF6/UBZSXDSC1e6e7dEF1QvSGg4orP2bvVb+mwH8KV9JRNEy\nmplrEtdG65bcBi8qcwO3i5hoZ2v44JTTgNqxXU7VWJhwAKYp0sLiAibB2bCIoA4R\n6jS4tSGiPGAZ0MweISNjbNqWB2S0amDYOm4uNgDgfrmvoZQWzv7mfzxFZ0mlsmT4\ny0iI4+Q0Xb0aScFUhjbOBMp3lPK2fHwrVRN2jrxx73MhUT/5H9Qu43w+Bl1vm4Zq\nukI18BWsgY3xC0vGpKewOOSUC/G0ifrkj4AzNEEyTj0H0cuOSq13DqhYunklC3PT\nXvtaJ3UPEks2uKuf3WiJw694Tmj4/3Grsr0aSWASM8KAn1xWYFv/x7Py+S5sb/LU\n9i3tQ4OmzquuHsjM6TkhVXMGoG+MXxkjt0ORrpBRCZMQ47kftRDG5+irHUzMtb2M\nTG+Sv7C0rwlRqOiA12kE/wIDAQABo1MwUTAdBgNVHQ4EFgQUpMgAuXurOfm3/tco\npr5vcQ4XZlcwHwYDVR0jBBgwFoAUpMgAuXurOfm3/tcopr5vcQ4XZlcwDwYDVR0T\nAQH/BAUwAwEB/zANBgkqhkiG9w0BAQsFAAOCAYEAvzlt70zmImS+qc6D5rVltpaA\nJH7dFCqVI1l4rs8oB351JZEJTq2K/BWY/qbsu0Cj1NvgDXD1aIKdSDZRsgL8dzFd\nsh/R+gEdVnH4GxSwmw2UF05+y4PfAl0Wt3XMoT8klMpcTeiazqIqp3wBLJSOz9XR\n2aAbhOyYtanaCYjfv/lRpTPRpYWwmkfjQUXc35r4Er9LNx6aBnSf1Yx7fp+QPX2H\nfUB1ob33j9RfKP05juPPcTL9MCMNx47j76DGEIO+CxIDbGQFpB6Zc0zdmmbbksaQ\n3csvymx4kzlTjBTu+Hvjyc/8f3w5iYtaXjJ8Qkfq0Wp6ryCpQ2/0r0fBKjDSuadW\nMBKtHUrhZwjXC4mgQXHrVIE1FURjWhbIPnZ8STpUmzzbq2fTNaypO6mG6tS9d67U\nQgwdM5+cXD38VzYU9O3Rapkj1GGA5VERJNN0z98wwmjhFhp+CvYEZiffEeTdwF7e\nUW85UY9zxUCwJuTEZxiC051SFm3z5aa9csU9iN/R\n-----END CERTIFICATE-----\n"
    },
    "format": "SSL_PEM",
    "certificate_base64": false,
    "key_base64": false,
    "enable_ocsp_stapling": false,
    "type": "SSL_CERTIFICATE_TYPE_VIRTUALSERVICE",
    "name": "test_hsm_cert",
    "import_key_to_hsm": true,
    "hardwaresecuritymodulegroup_ref": "https://10.79.169.143/api/hardwaresecuritymodulegroup/hardwaresecuritymodulegroup-0913a0e7-80cc-4776-9239-f15f4aae5875",
    "key": "-----BEGIN RSA PRIVATE KEY-----\nMIIG5AIBAAKCAYEA2iv7eOxO2dvpNSOkOXu17szzs06dTjDdoWrDe5KpUSODASpw
     -truncated value
     \nwxRUASLZBLflLElHjigA73ealVNTMUUEW4O7E0U1nnyjGaZXUjc9og==\n-----END RSA PRIVATE KEY-----\n"
}
Step 6: Enable HSM Support on a Virtual Service
In the Controller web management interface, navigate to
Click New or Edit.
If configuring a new virtual service, specify the name of the VIP.
Select the HSM certificate from the SSL Certificate drop-down menu.
Specify the virtual service name and VIP address.
In the Service Port section, enable SSL.
Click Advanced. On the Advanced page, select the SE group to which the HSM group was added.
Click Save.
The virtual service is now ready to handle SSL/TLS traffic using the encryption/decryption services of the Thales Luna Network HSM device.
