


This section explains how IPAM and/or DNS profiles can be configured.
Using IPAM/ DNS in a Virtual Service Configuration
The following examples are cloud-independent:
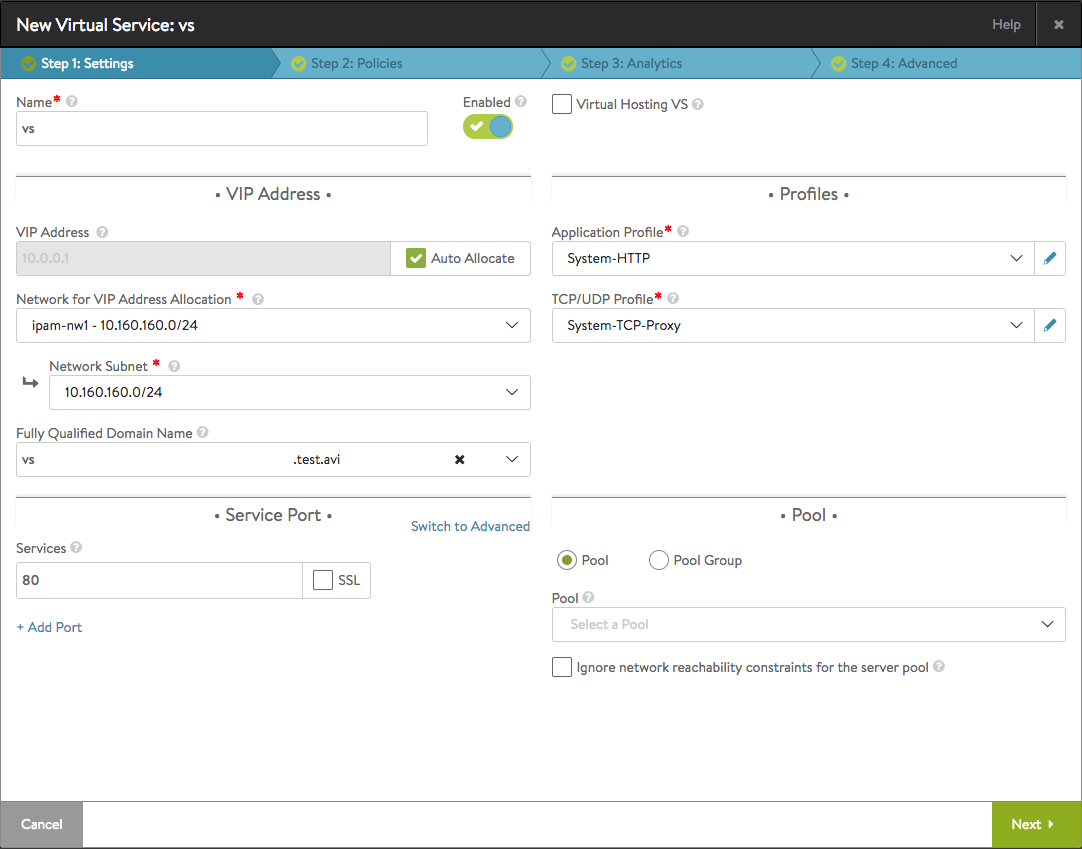
IPAM only: With IPAM in play, selecting the Auto Allocate check box causes the Network for VIP Address Allocation selection box to appear. From a list of displayed networks and subnets a choice can be made; in this case, either ipam-nw1 or ipam-nw2 can be selected. From the selected network (ipam-nw1) an address for the VIP will be auto-allocated.

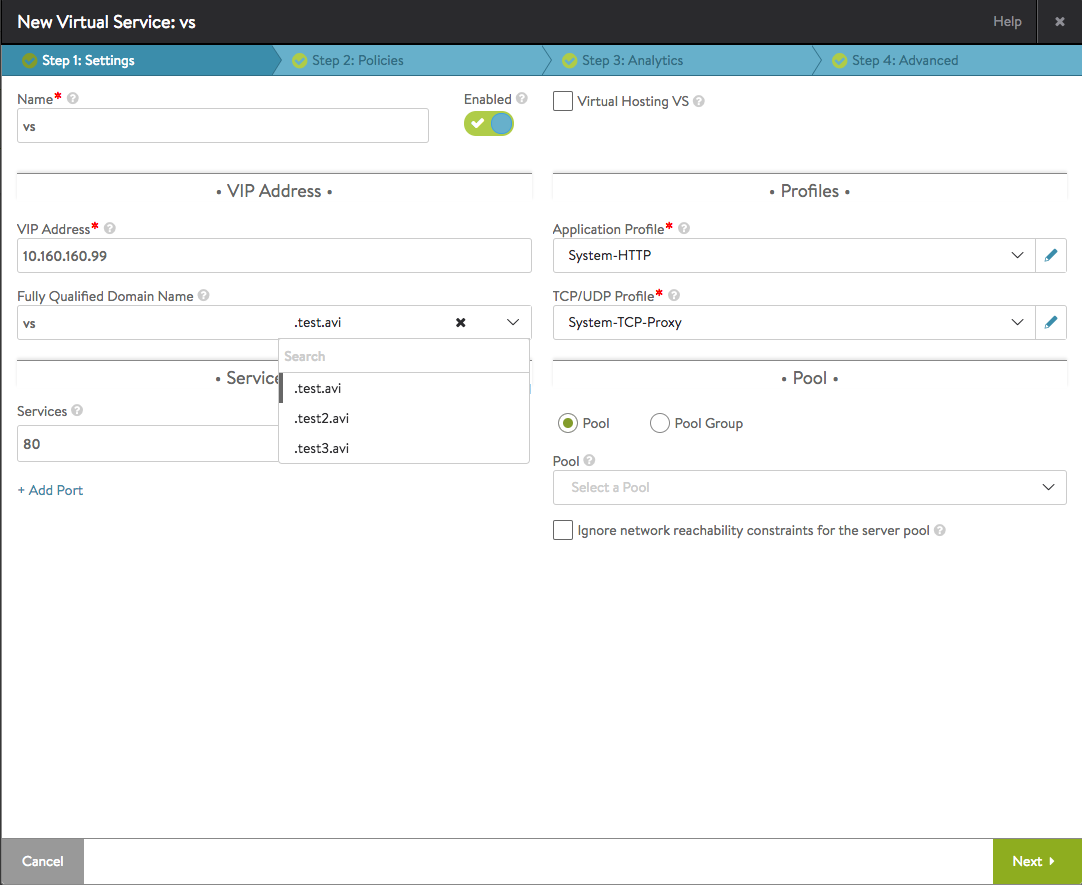
DNS only: With DNS in play, no list of networks is offered. Instead, one of several domains is offered. By selecting .test.avi from the list and accepting the default prefix (vs) in the Fully Qualified Domain Name field, the user is specifying vs.test.avi as the final FQDN.
IPAM and DNS: With both IPAM and DNS available, you can both specify a network from which to auto-allocate a VIP address and the FQDN (vs.test.avi) to which it will be associated.
If a DNS profile is configured under a cloud where the virtual service is being created, then the virtual service's IP cannot be determined from a fully qualified domain name; however, you can enter an IP address or select the Auto Allocate check box.
In the case of Infoblox, if there is a list of
usable_subnets/usable_domainsconfigured then the drop-down will consist only of those entries. If no such configuration is found, NSX Advanced Load Balancer will display the entire list of available subnets/ domains from Infoblox.VIP allocation through DHCP is not supported.
