


This topic provides detailed information on how PingFederate is configured as an IdP with NSX Advanced Load Balancer as SP for SAML authentication.
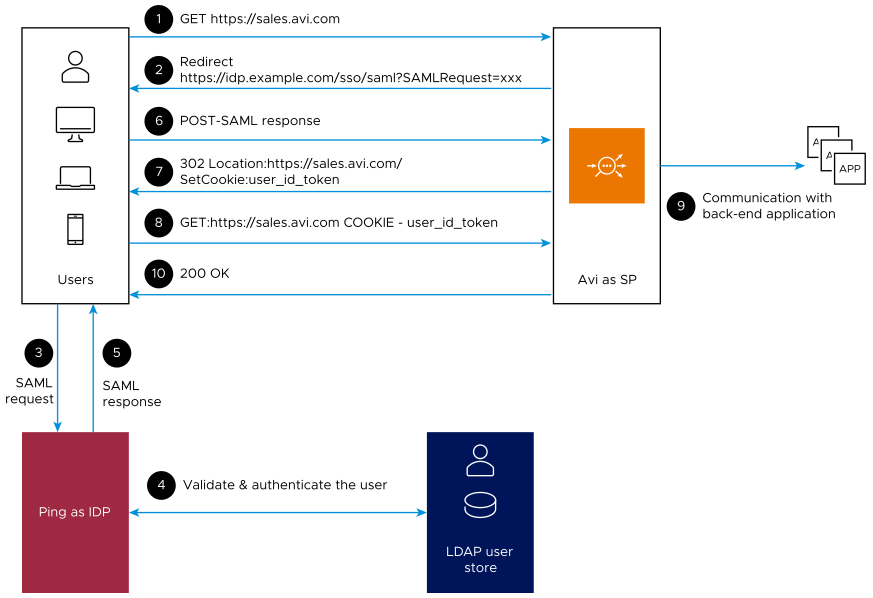
NSX Advanced Load Balancer as SP and PingFederate as IdP
The sequence of events from the user access request is illustrated here:
Configuring PingFederate as IdP
Create a new adapter instance by using the following steps.
To create a new adapter instance, follow the steps given below:
On the PingFederate Dashboard, navigate to IdP Configuration and click Adapters under Application Integration.
Under Manage IdP Adapter Instances, click Create New Instance.
Under the Type tab, enter an Instance Name and Instance ID. Click Next.
Under the IdP Adapter tab, click Add a new row to ‘Credential Validators’ to define a credential authentication.
Select a Password Credential Validator Instance and click Update.
Under the Extended Contract tab, click Next.
Under the Adapter Attributes tab, select the username option under Pseudonym and other attributes, if available, and click Next.
Under the Adapter Contract Mapping tab, click Next, verify the summary
Click Done.
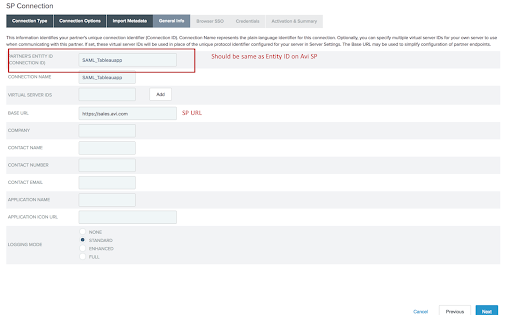
Configuring the SP Details
To configure the SP details, follow the steps given below:
Login to the PingFederate management console, navigate to and click Create New.
Navigate through the Connection Type, Connections Options and Metadata URL tabs by clicking Next.
Under the General Info tab, enter the information as shown below and click Next.
Configuring SP-Initiated SSO
To configure SP-Initiated SSO,
Under the Browser SSO tab, click Configure Browser SSO, select the SP-initiated SSO check box on the next screen and click Save.
On the Assertion Lifetime screen, click Next.
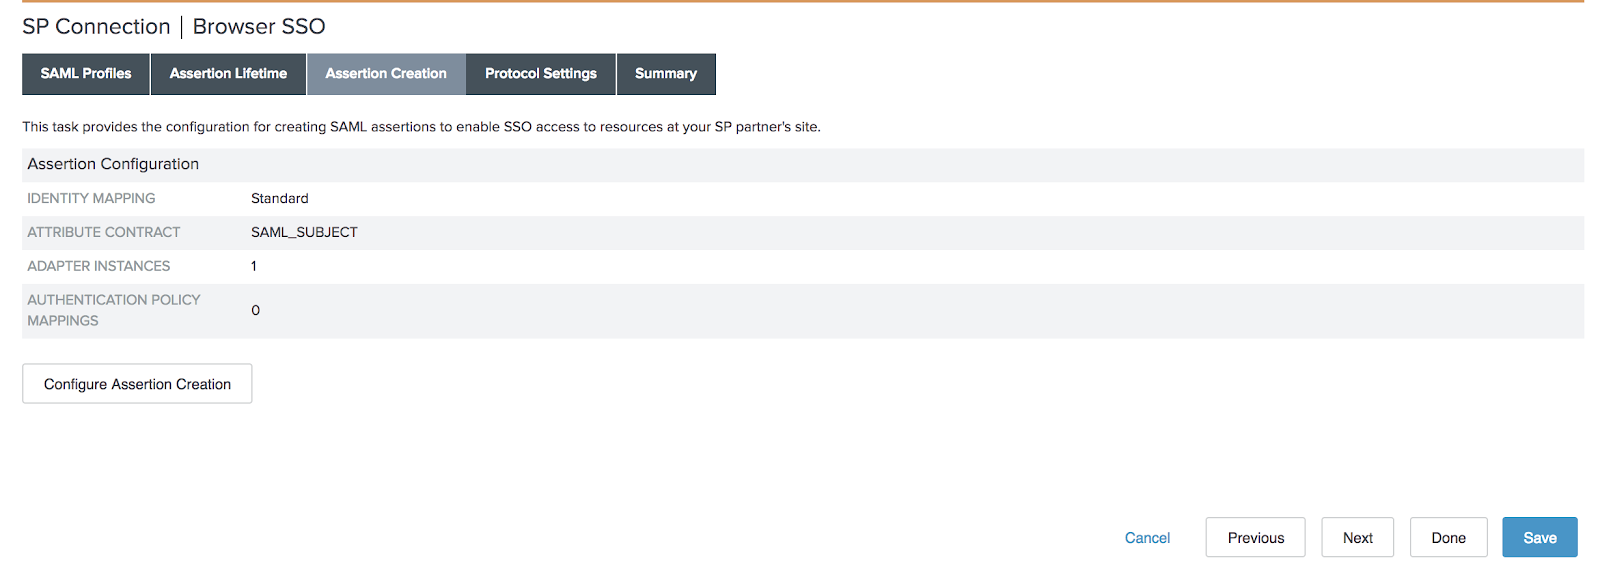
Browser SSO Assertion Creation
On the Assertion Creation screen, click Configure Assertion Creation.
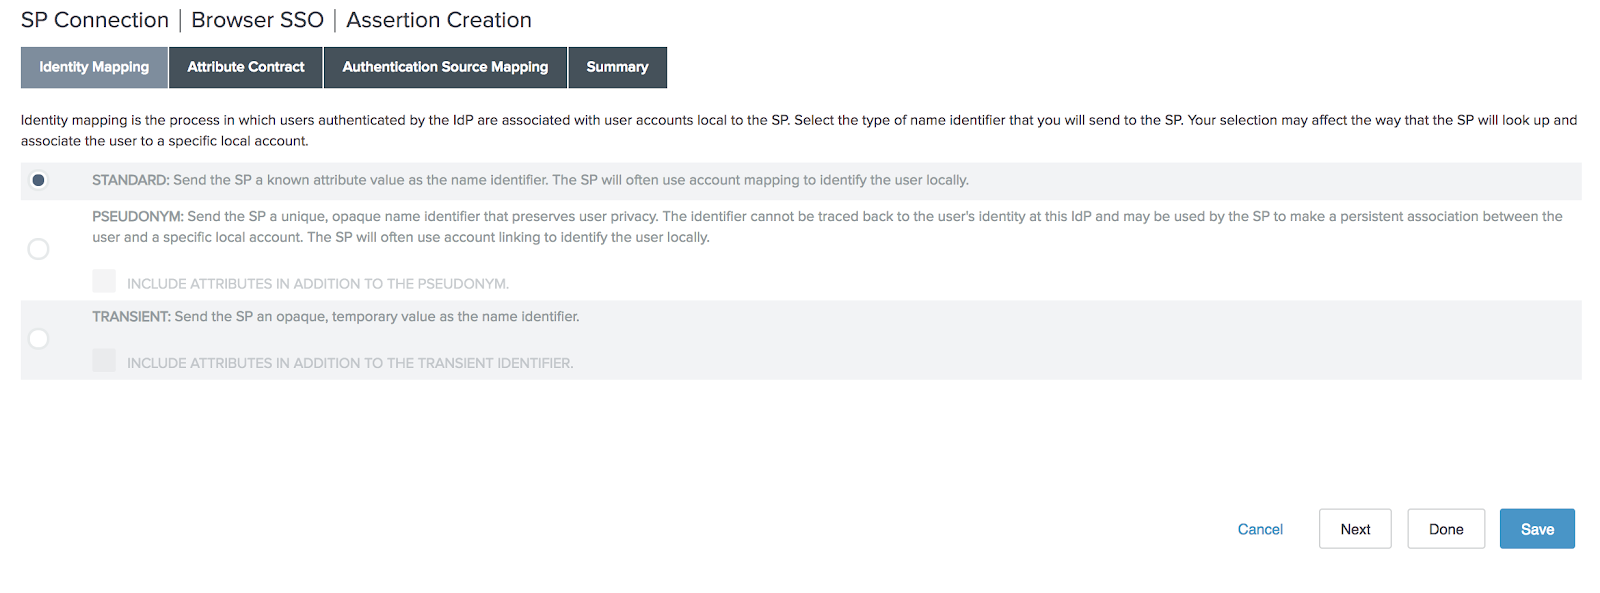
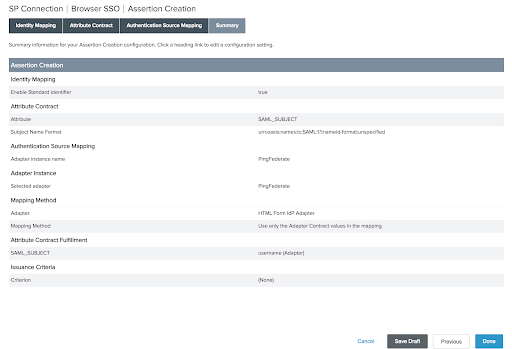
On the Identity Mapping tab, choose STANDARD and click Next.
On the Attribute Contract tab, you can choose the default contract or use the option to add custom user attributes in the assertion. Click Next.
On the Authentication Source Mapping tab, click Map New Adapter Instance to open the IdP Adapter Mapping screen.
IdP Adapter Mapping
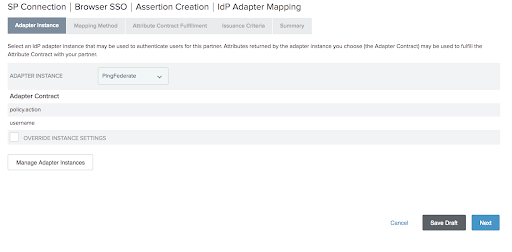
On the Adapter Instance screen, choose the adapter instance and click Next.
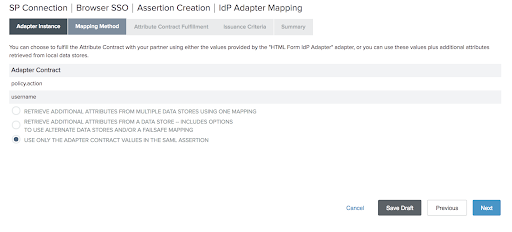
Click the third option if you do not want additional attributes.
Note:Skip Steps 2 to 4 if you want additional attributes and proceed directly to step 5.
On Attribute Contract Fulfillment screen choose the details and click Next.
Click Next on the Issuance Criteria screen, review the summary and click Done.
Note:If no attribute lookup is required, skip the next steps and proceed to step 10.
If you want additional attributes, choose the second option on Mapping Method screen instead of the third (as mentioned in step 2) and click Next.
On the Attribute Sources & User Lookup screen, click Add Attribute Source.
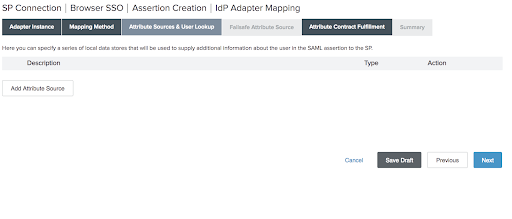
Select your data store on the next screen or click Manage Data Stores to add a new one. Add a new one, if you do not have an existing source.
Once the data store is added, click Next on Database table and Columns screen after choosing the required columns / On Database filter screen, you can add the filters using the where clause. Once it is added, click Next.
On Attribute Contract Fulfillment screen choose the details and click Next. Click Next on the Issuance Criteria screen, review the summary, and click Done.

The Authentication Source Mapping screen appears; click Next. It will take you to the Summary page. Click Done.
The Assertion Creation screen reappears. Click Next.
Browser SSO Protocol Settings
In the Protocol Settings section, click Configure Protocol Settings.
On the Assertion Consumer Service URL screen, enter the Endpoint URL.
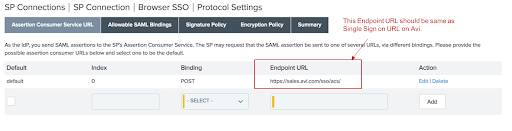
Note:The endpoint URL must be the same as single sign on URL on NSX Advanced Load Balancer.
On the Allowable SAML Bindings tab, select the binding for communication from SP to IdP, which must be REDIRECT.
Select the third option in Signature Policy screen and click Next.
Select the first option in the Encryption Policy screen and click Next.
If the summary looks OK, click Done.
The Protocol Settings screen will reappear; click Next. Review the summary and click Next.
The Browser SSO tab reappears. Click Next.
Configure Credentials
Under the Credentials tab, click Configure Credentials.
On the Digital Signature screen, select the signing certificate and click Next.
Check the Summary and click Save.
The Credentials page will reappear. Click Next. Validate the rest of the configuration, and click Save.
Download Metadata
Metadata can be downloaded using following steps:
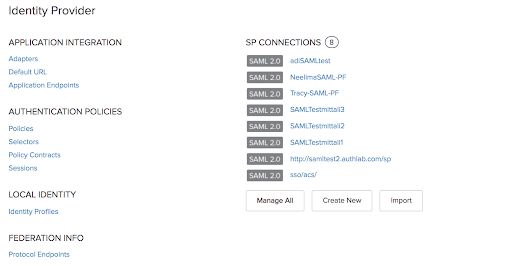
Click Identity Provider; it will take you to the Console.
Click Manage All under SP Connections.
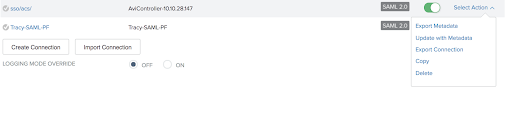
Click Select Action for the one you want to download metadata and click Export Metadata.
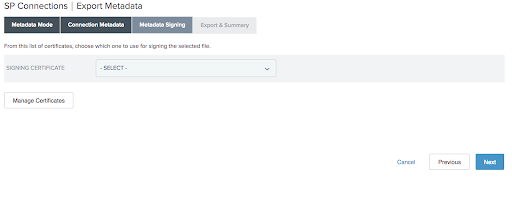
On the next screen, choose signing certificate and Click Next.
Click Export and then click Done.
The configuration is complete. This completes the process of creating an application on PingFederate.
On completing the configuration on PingFederate, configure an NSX Advanced Load Balancer virtual service to act as service provider by following the instructions given in SAML Configuration on NSX Advanced Load Balancer.
