


NSX Advanced Load Balancer supports single sign-on (SSO) to the NSX Advanced Load Balancer Controller’s UI using Security Assertion Markup Language (SAML). SAML is an XML-based markup language for exchanging authentication and authorization between an identity provider (IdP) and a Service Provider (SP).
NSX Advanced Load Balancer has verified interoperability with the Google, Okta, and OneLogin IDPs. Contact your NSX Advanced Load Balancer sales team if you require integration with other IDPs.
Configuring SSO with SAML through NSX Advanced Load Balancer UI
SAML settings can be configured in the authentication profile. Navigate to the . Enter a name for the profile and select SAML as Type.
Any node acting as a service provider must generate a metadata file for registration with the IdP. The file contains configuration and integration details for SAML single sign-on. Obtain the metadata file from your identity provider.
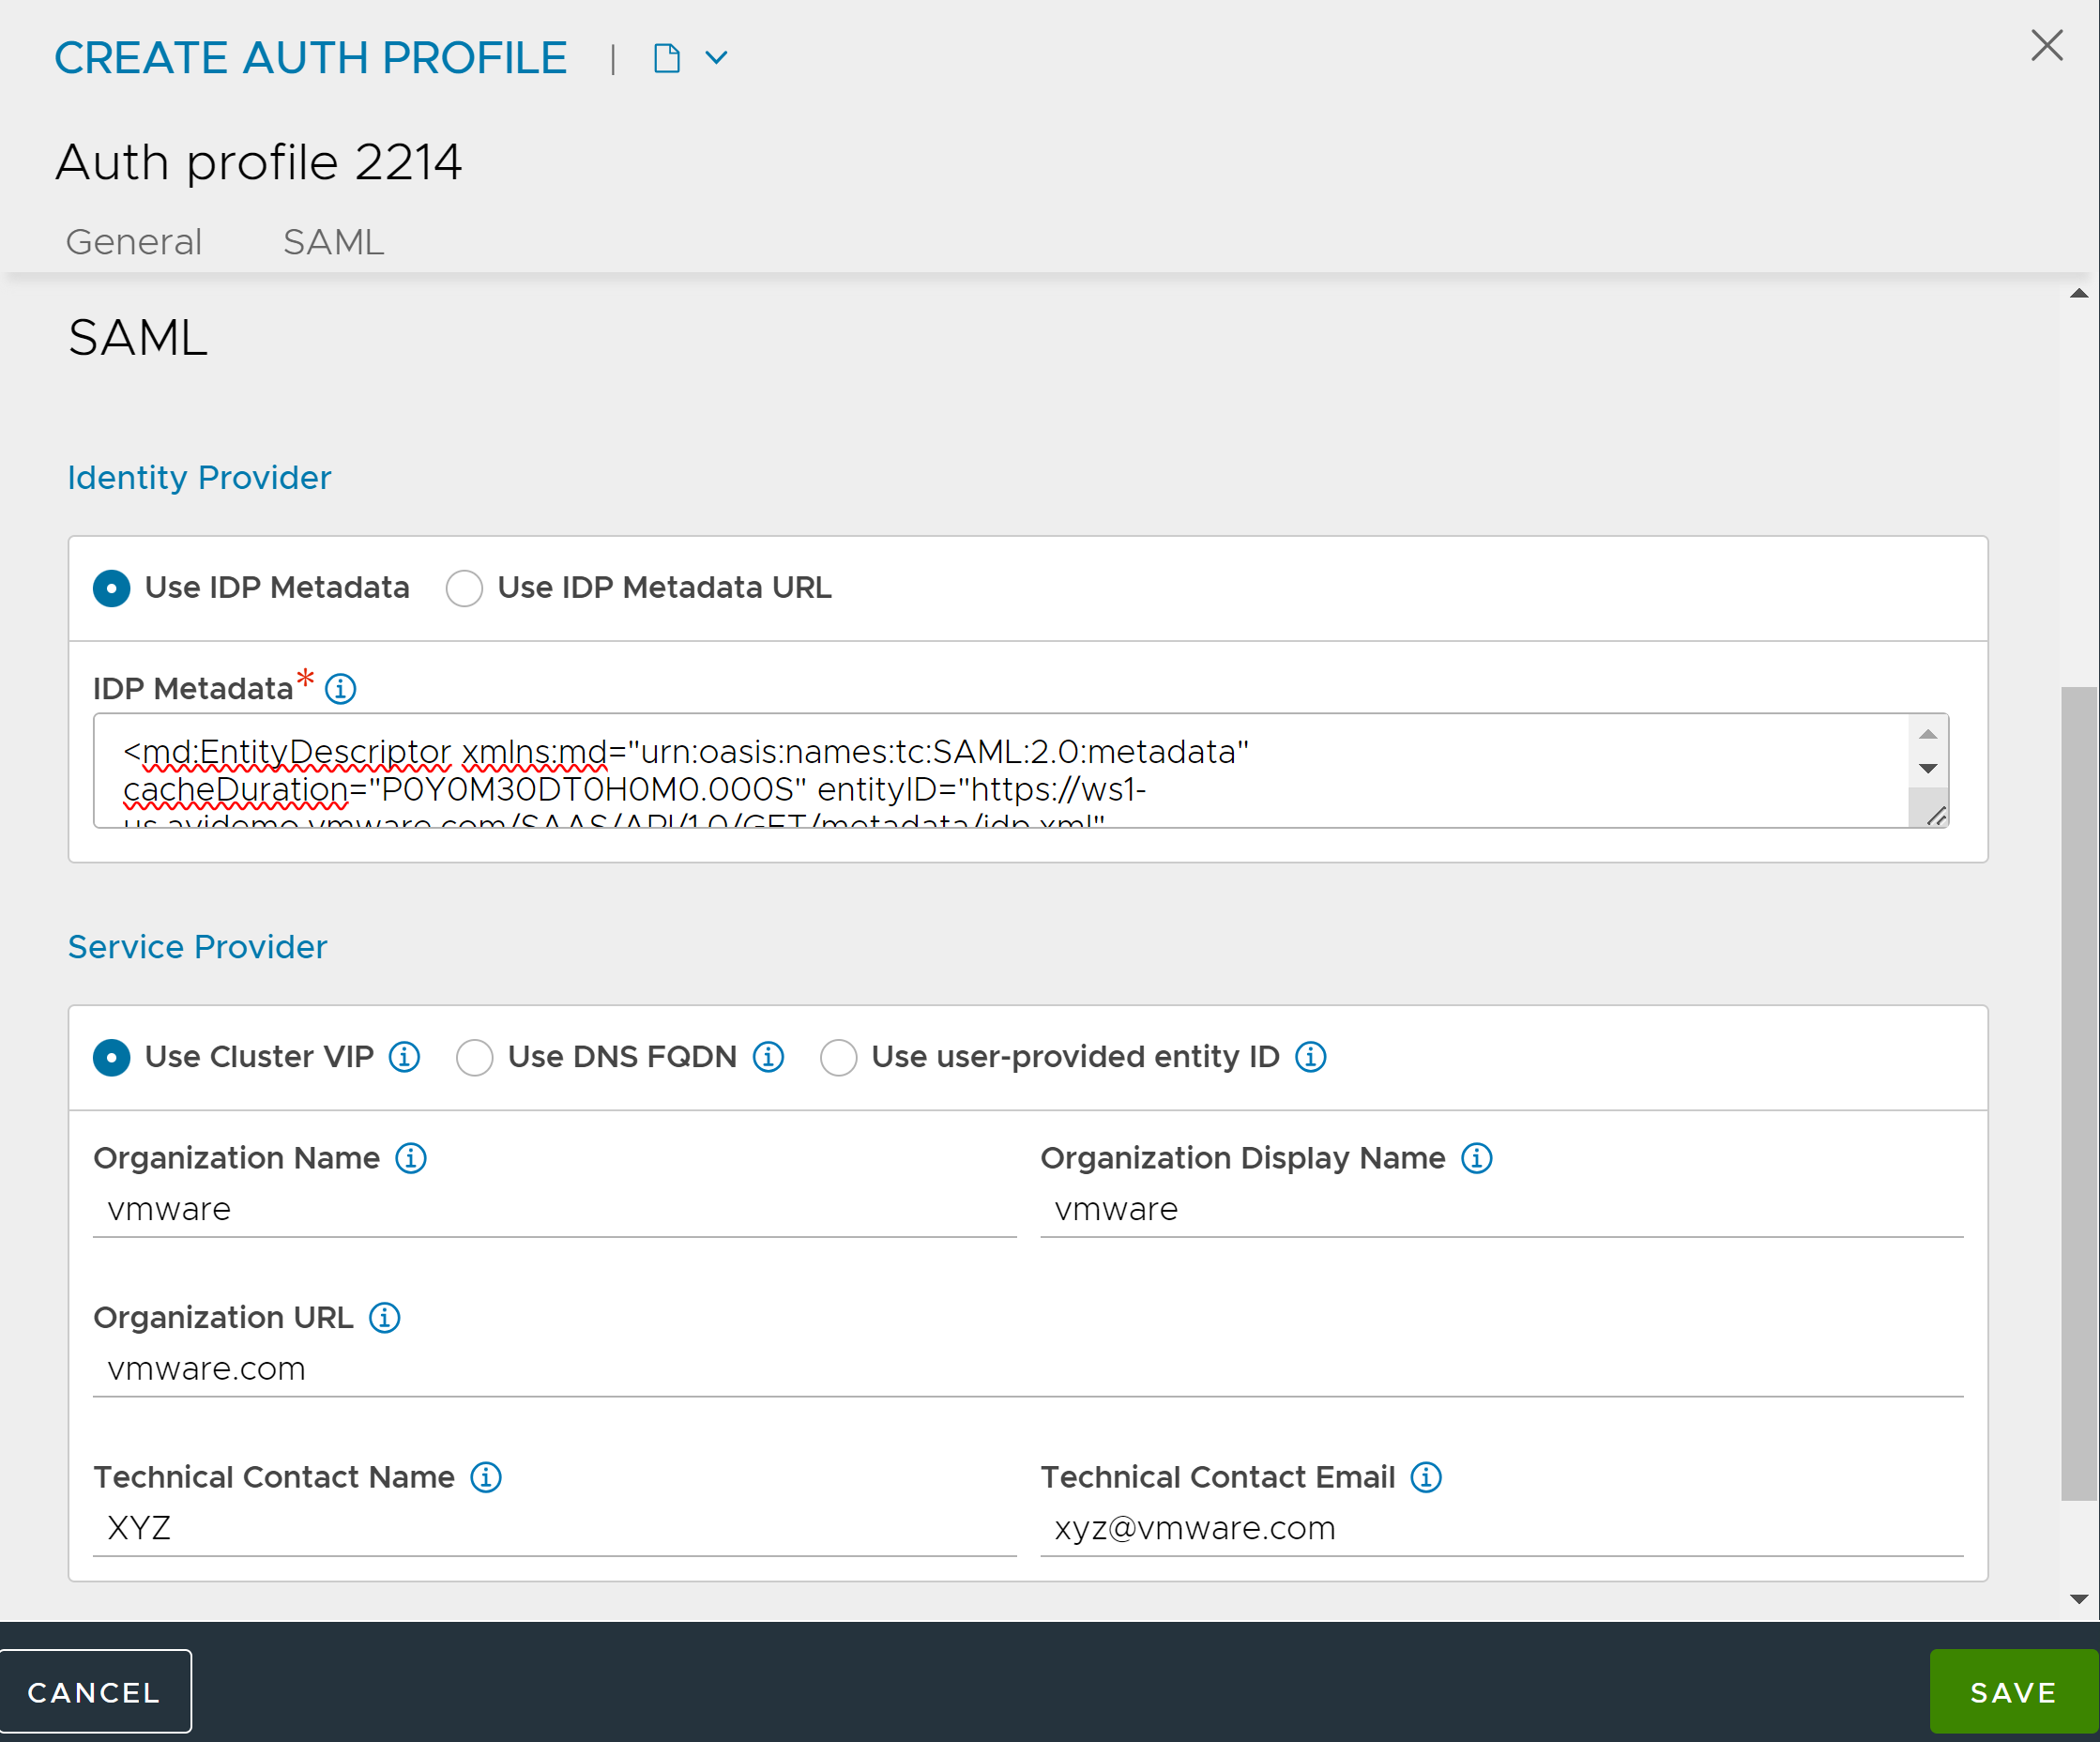
Service provider metadata contains keys, services, and URLs defining SAML endpoints of the NSX Advanced Load Balancer Controller. The Controller can be registered using its cluster IP or a DNS-resolvable FQDN. If Use Cluster IP is selected, then the cluster IP is picked up automatically. If Use DNS FQDN is chosen, NSX Advanced Load Balancer Controller prompts to provide an FQDN.

Service provider settings can be retrieved by clicking on the verify button () on the list page. This page contains the service provider Entity ID and the Single Sign on URL generated by the NSX Advanced Load Balancer Controller. The Signing Certificate is a self-signed certificate with common name set to the Entity ID. This certificate is used by the IdP for encrypting the assertion response.
Create Application on the IdP
A SAML application needs to be created on the IdP using this Controller-generated information. The Entity ID and the Single Sign on URL required while creating the application on IdP need to precisely match the NSX Advanced Load Balancer-generated configuration.
In the case of certain identity providers, IdP metadata can be retrieved after the SAML application has been created. In those cases, the recommended workflow is to create a SAML authentication profile on NSX Advanced Load Balancer without IdP metadata and then use the NSX Advanced Load Balancer-generated attributes to create the SAML application. Once the application has been created, the IdP metadata can be plugged into the authentication profile. The authentication profile cannot be attached to the system configuration without valid IdP metadata.
In NSX Advanced Load Balancer both SAML assertion and response signing are mandatory for successful SAML authentication.
Local Admin or User Logon
After SAML-based access is enabled, you can have the NSX Advanced Load Balancer web console display the logon UI without redirecting to the SAML authentication profile configured on the IdP logon page. To accomplish this, send a URL to the Controller or cluster IP address in one of the following two forms:
https://ControllerIP/#!/login?local=1
https://FQDN/#!/login?local=1
