


This section details the additional parameters available using the Advanced Setup option in the NSX Advanced Load Balancer UI.
To configure Advanced Setup of GSLB Service using the NSX Advanced Load Balancer UI:
Procedure
- Click Create, and select the Advanced Setup option.
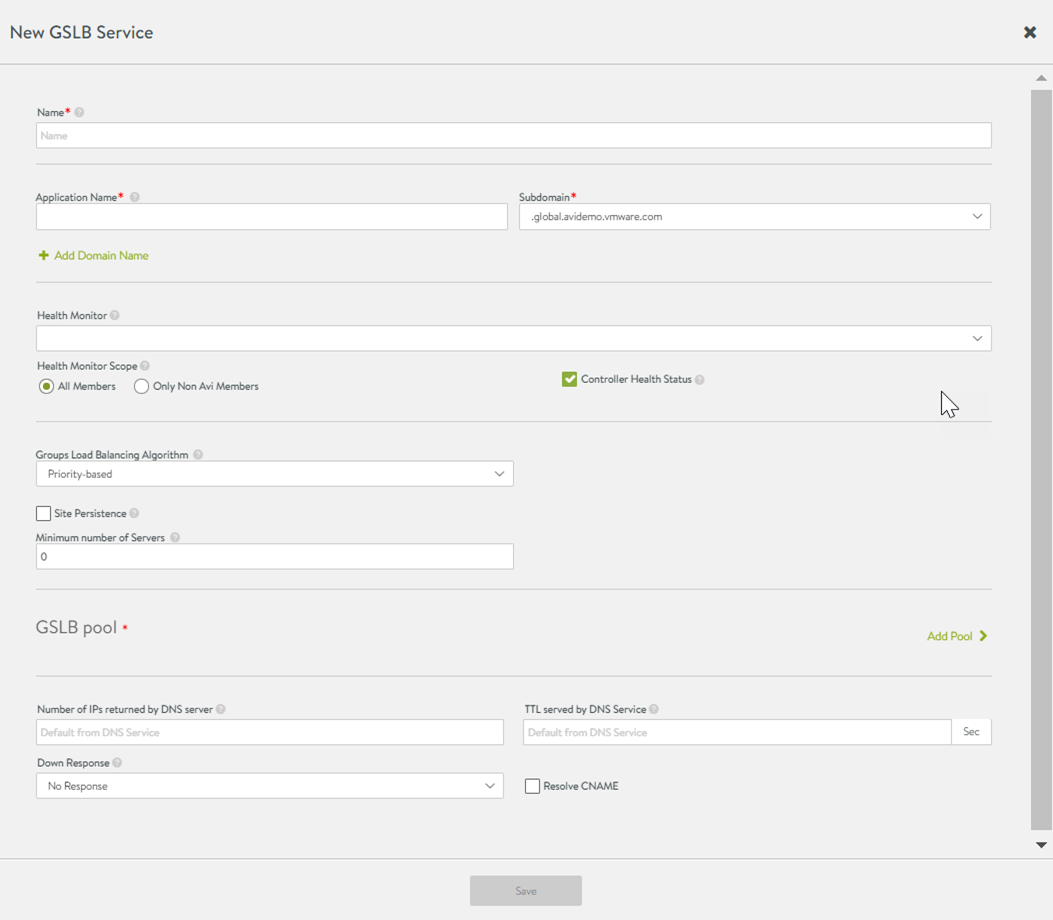
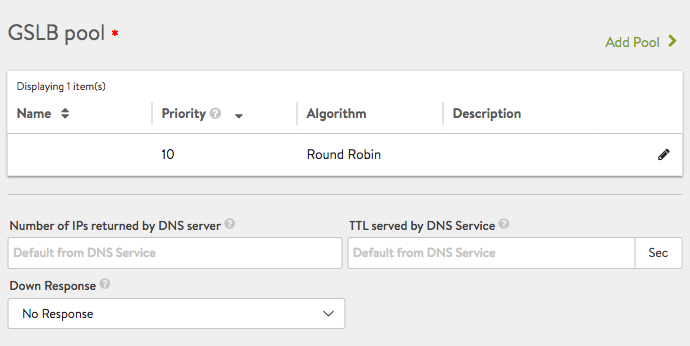
Notice that the Pool Member section of the basic setup editor has been replaced by the GSLB pools section as shown in the above screenshot.
The following fields are common for both Basic and Advanced Configuration.
Name
Application Name
Subdomain
Health Monitor
Health Monitor Scope
Controller Health Status
Groups Load Balancing Algorithm
Site Persistence
Minimum number of Servers
Topology Policy
For information on the above fields, see table under Basic Setup of GSLB Service using NSX Advanced Load Balancer UI.
For information on CLI configuration for GSLB Service, see Basic Setup of GSLB Services using NSX Advanced Load Balancer CLI.
Additional fields under GSLB Pools section in the Advanced Configuration are discussed below:
Field name
Description
Number of IPs returned by DNS server
If 0, all IP addresses are returned. You can specify a count between 1 and 20.
TTL served by DNS Service
If the default from the DNS service is not suitable, a value between 1 and 86400 seconds can be selected for all DNS records served on behalf of all GSLB pool members.
Down Response
When the service is down, this field defines the response from the DNS. You can select no response, an empty response, a fallback IP, or a response containing all records.
Resolve CNAME
When a DNS query is received for the GSLB service and the member configured with FQDN is selected, the NSX Advanced Load Balancer responds with a CNAME response, pointing to the FQDN of the pool member. The resolver needs to fully resolve the query by performing another lookup for the FQDN that was returned. The NSX Advanced Load Balancer can also add an A record in the response along with the CNAME response. Select or deselect this check box to activate or deactivate a record addition for a CNAME query.
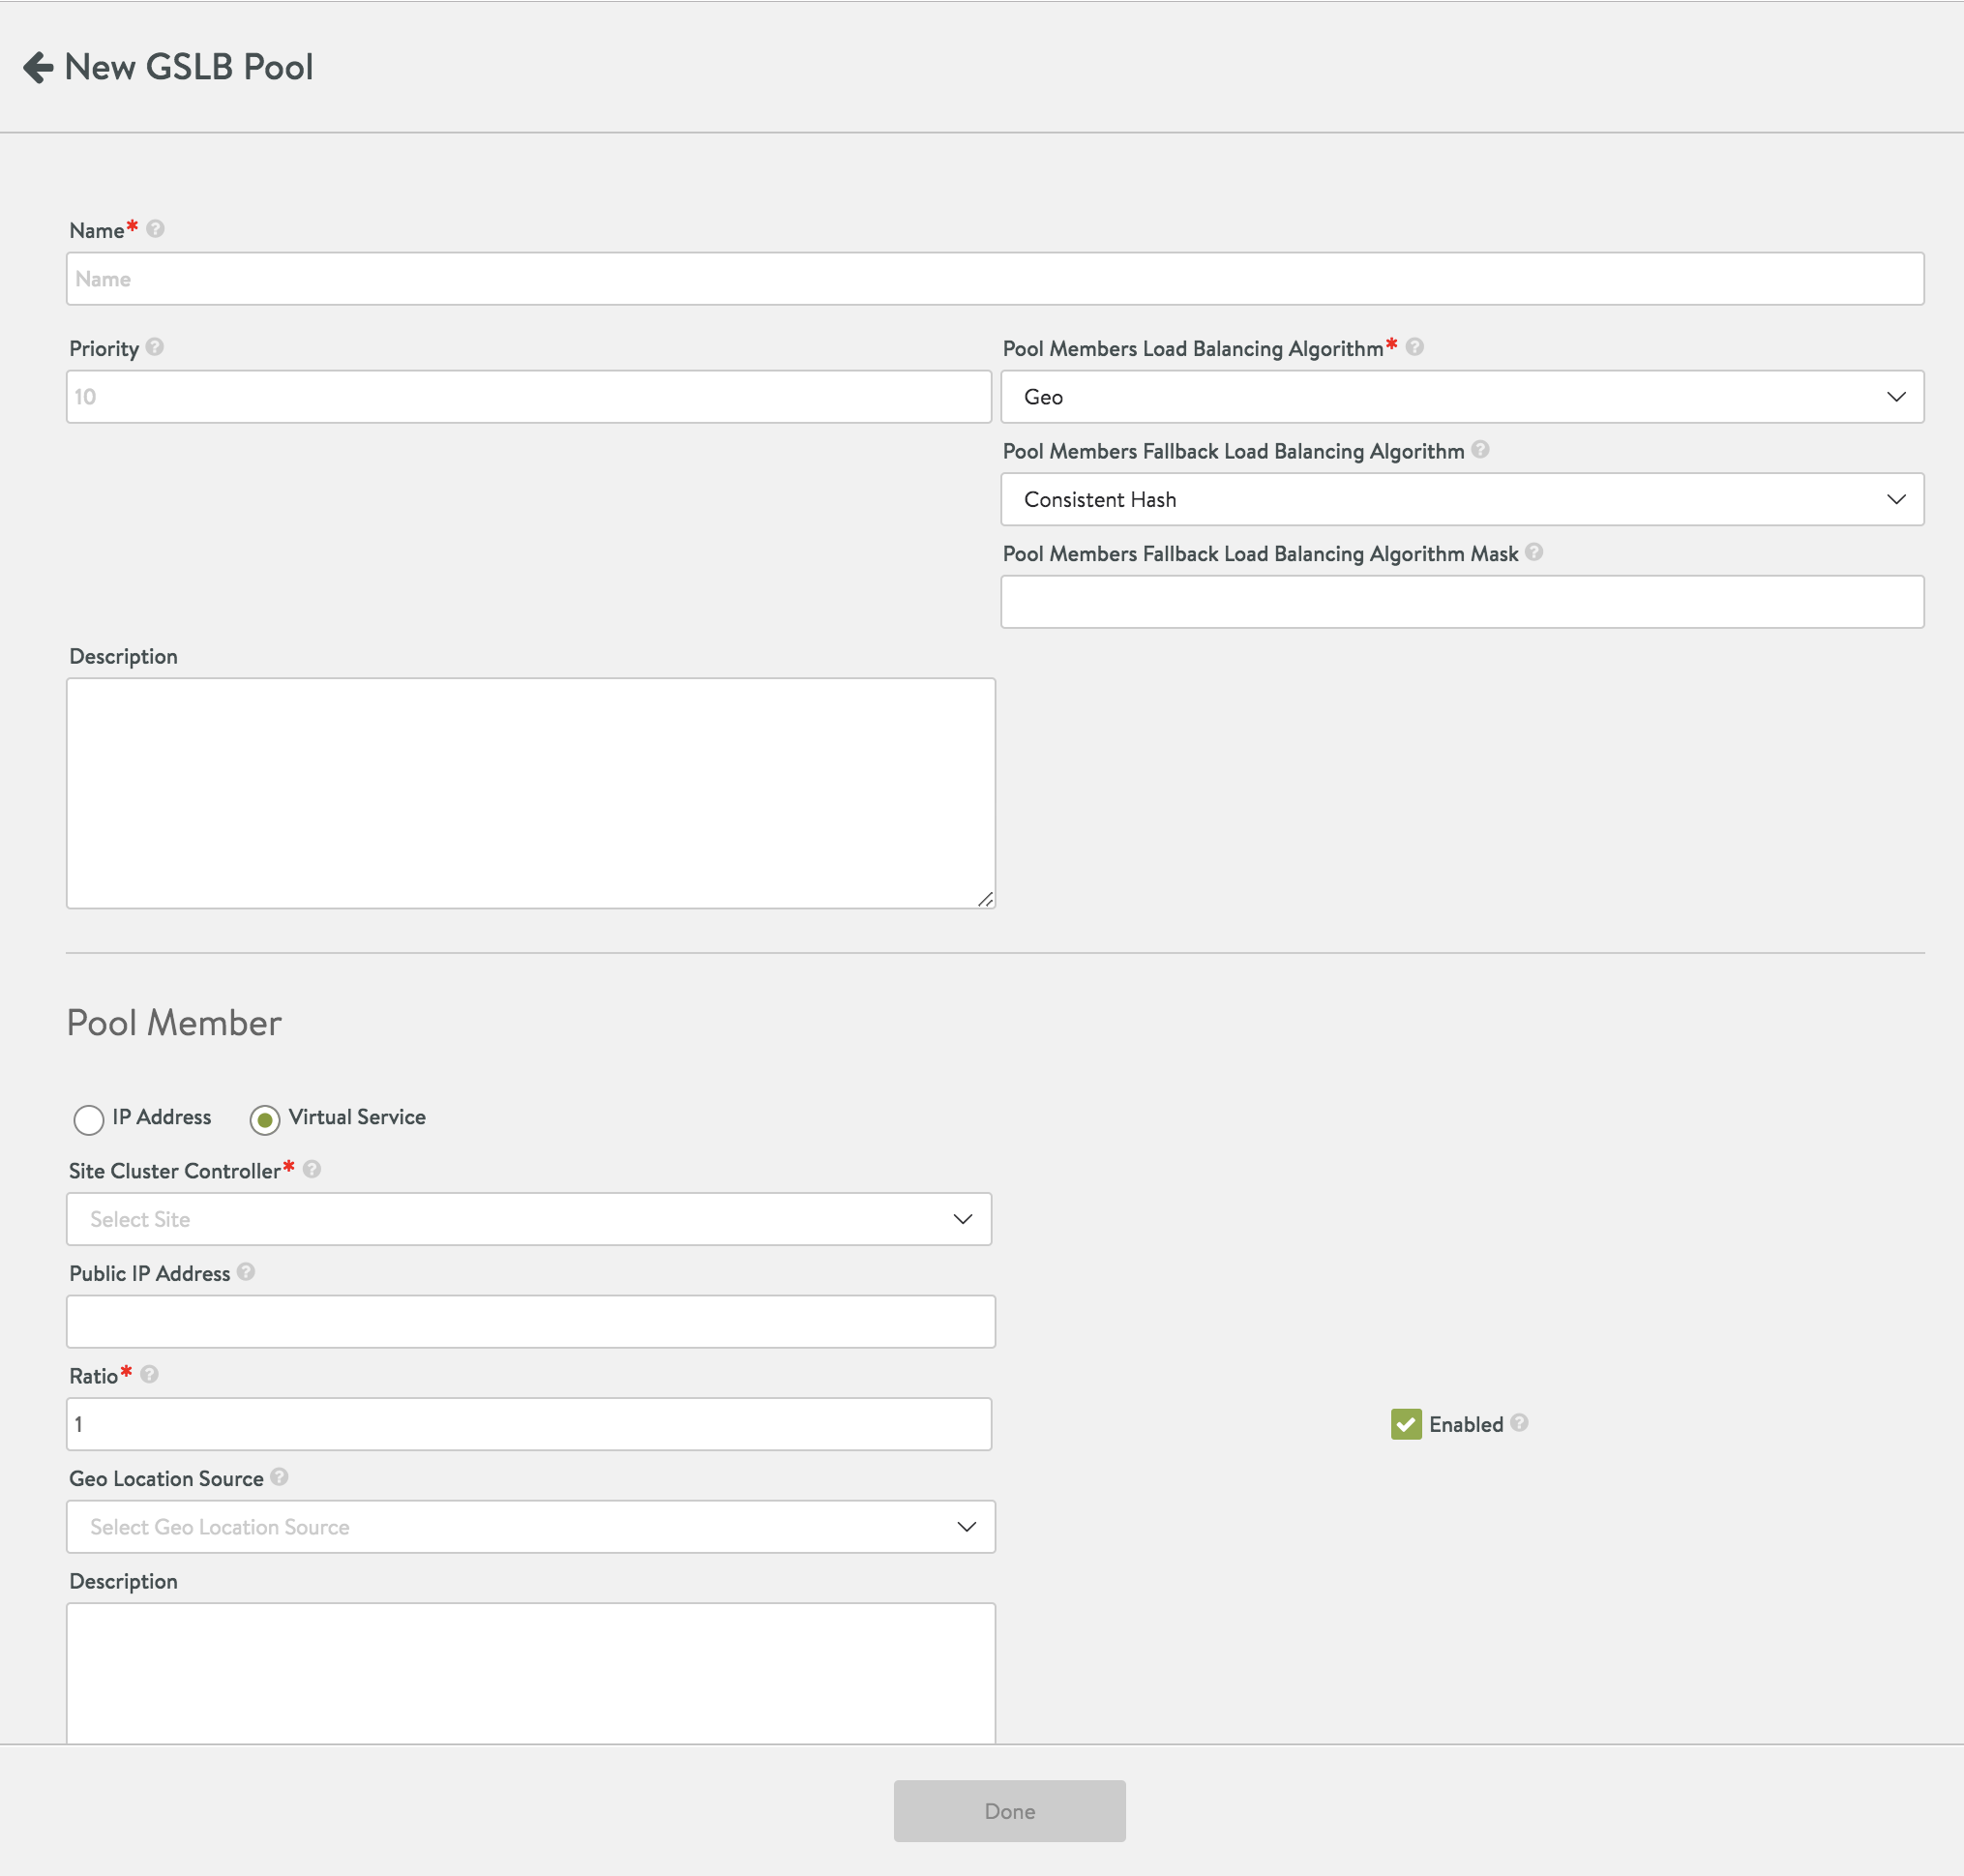
- Create a GSLB pool.
- Click Add Pool. The New GSLB Pool configuration screen is discussed in step 5.
In NSX Advanced Load Balancer, the location for the load balancing algorithm for pool and group has been changed for the basic and advanced setup.
- Click Add Pool. The New GSLB Pool configuration screen is discussed in step 5.
- Click the edit icon for an existing pool, to open the GSLB Pool editor.
- The following are the additional fields for configuring a pool member either by Virtual Service or through IP Address:
Option Description Ratio
With the ratio setting, each GSLB pool member receives statically adjusted ratios of traffic. If one GSLB pool member has a ratio of 1 and another GSLB pool member has a ratio of 4, the GSLB pool member set to ratio 4 will receive 4 times the amount of connections it otherwise would. For example, if the first GSLB pool member with ratio 1 has 100 requests, the second GSLB pool member will have 400 requests.
Enabled
Enabled by default so that the IP address of this member is provided in DNS responses.
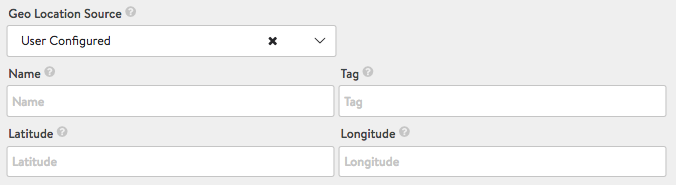
Geo Location Source
Specify the geolocation source or set the User Configured option from the drop-down menu to enter data about a particular location. For more details, see Geolocation-based Load Balancing Algorithm for GSLB Members. The fields needed for defining a location on-the-fly are shown in the following screenshot.
Example: Usage of min_health_monitors_up Parameter
Below are some scenarios explaining usage of the min_health_monitors_up parameter in various deployment conditions:
Scenario 1:
If No health monitor is configured, then the only control plane default health monitor works. Any status change will get propagated to other sites after send_interval.
Scenario 2:
If one health monitor is configured with the min_health_monitors_up value set to 0 - If the health monitor fails then it immediately take effect locally, but will consider the send_interval value to propagate to other sites.
Scenario 3:
If one health monitor is configured with the min_health_monitors_up value set to one - Regardless of whether the health monitor is up or down, the VIP will stay marked up until the send_interval time elapses. When the health monitor marks the VIP up back again, it will immediately mark the VIP up locally, but will take the send_interval time to propagate to other sites.
Scenario 4:
Two health monitors are configured with the min_health_monitors_up value set to 0 - Any or both of the health monitor fails, local control plane and data plane will mark the VIP down and the same when health monitors come up. But it will consider the send_interval time to propagate to other sites.
Scenario 5:
Two health monitors are configured with the min_health_monitors_up set value to 1 - Regardless of whether the health monitor is up or down, the VIP will stay marked up until the send_interval time elapses. Since there is always a control-plane default health monitor on the VIP. When Any or Both of the health monitor marks the VIP up back again, the VIP will be marked up. But remote sites will get this update when the send_interval elapses.
Scenario 6:
Two health monitors are configured with the min_health_monitors_up value set to 2 - If both of the health monitor fails then local control plane and data plane will mark the VIP down and same when health monitors mark it UP. But it will take the send_interval time to propagate to other sites.
