


This topic describes the DNS configuration steps for GSLB.
Custom DNS Application Profile
Optionally create a custom DNS profile to be referenced when defining the DNS virtual service.
For more information, see DNS Profile in the VMware NSX Advanced Load Balancer Configuration Guide.
DNS Virtual Service
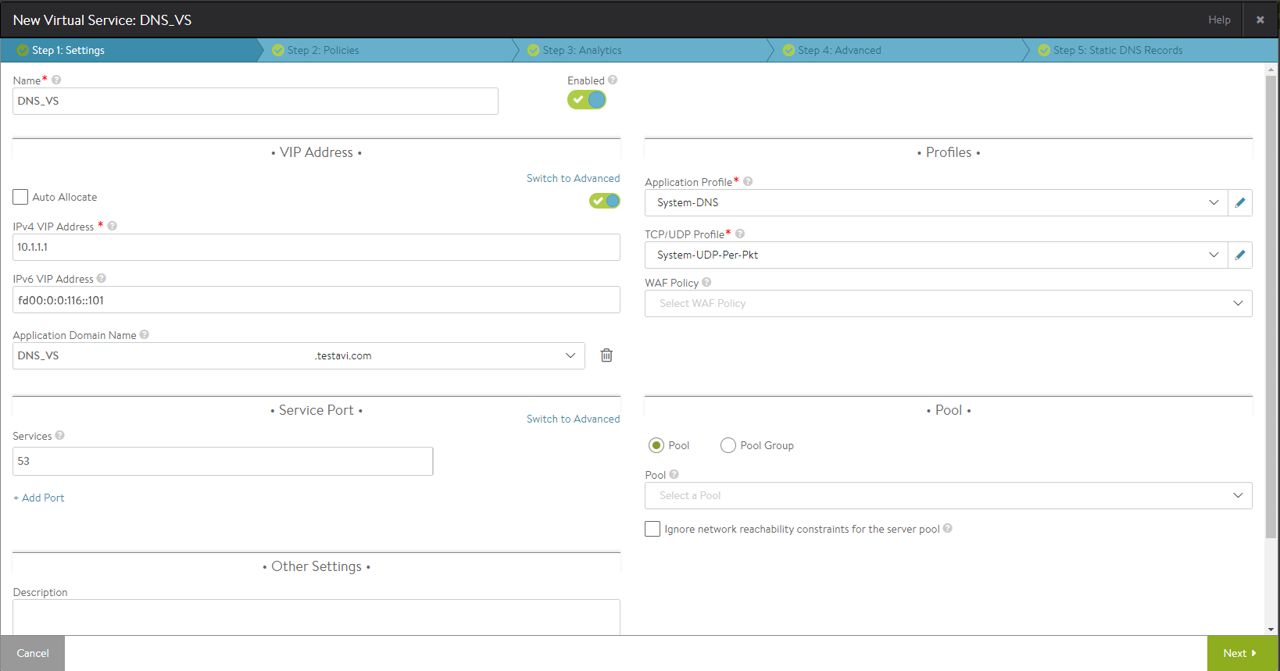
In the NSX Advanced Load Balancer, the DNS virtual service can be configured with IPv4 VIP, IPv6 VIP, or a dual VIP.
Navigate to and click Create Virtual Service (Advanced Setup).
The configuration tabs associated with DNS are explained in the following sections.
Settings
Under the Profiles section, select either the default profile or the custom DNS profile from the drop-down menu for Application Profile. For more information on creating custom DNS profiles, see DNS Profile in the VMware NSX Advanced Load BalancerConfiguration Guide.
Note:System-DNS is the default DNS Application Profile. Optionally, you can also create a custom DNS profile to be referenced when defining the DNS virtual service.
Select a suitable profile for the network settings under TCP/UDP Profile, such as System-UDP-Per-Pkt.
Under the Service Port section, enter 53 for the Services field.
Save the configuration.
