


This section discusses the steps to configure custom security groups using the UI and CLI.
Using the UI
Navigate to .
Click the edit icon to edit the Default-Group SEG. For more information, see
Under Security, select an existing HSM profile or create a HSM Profile by clicking the three dots.
Enter a value for Service Engine Cache Size. By default, the value is
20000.Select Enable Avi Managed Security group and enter the details as shown below:
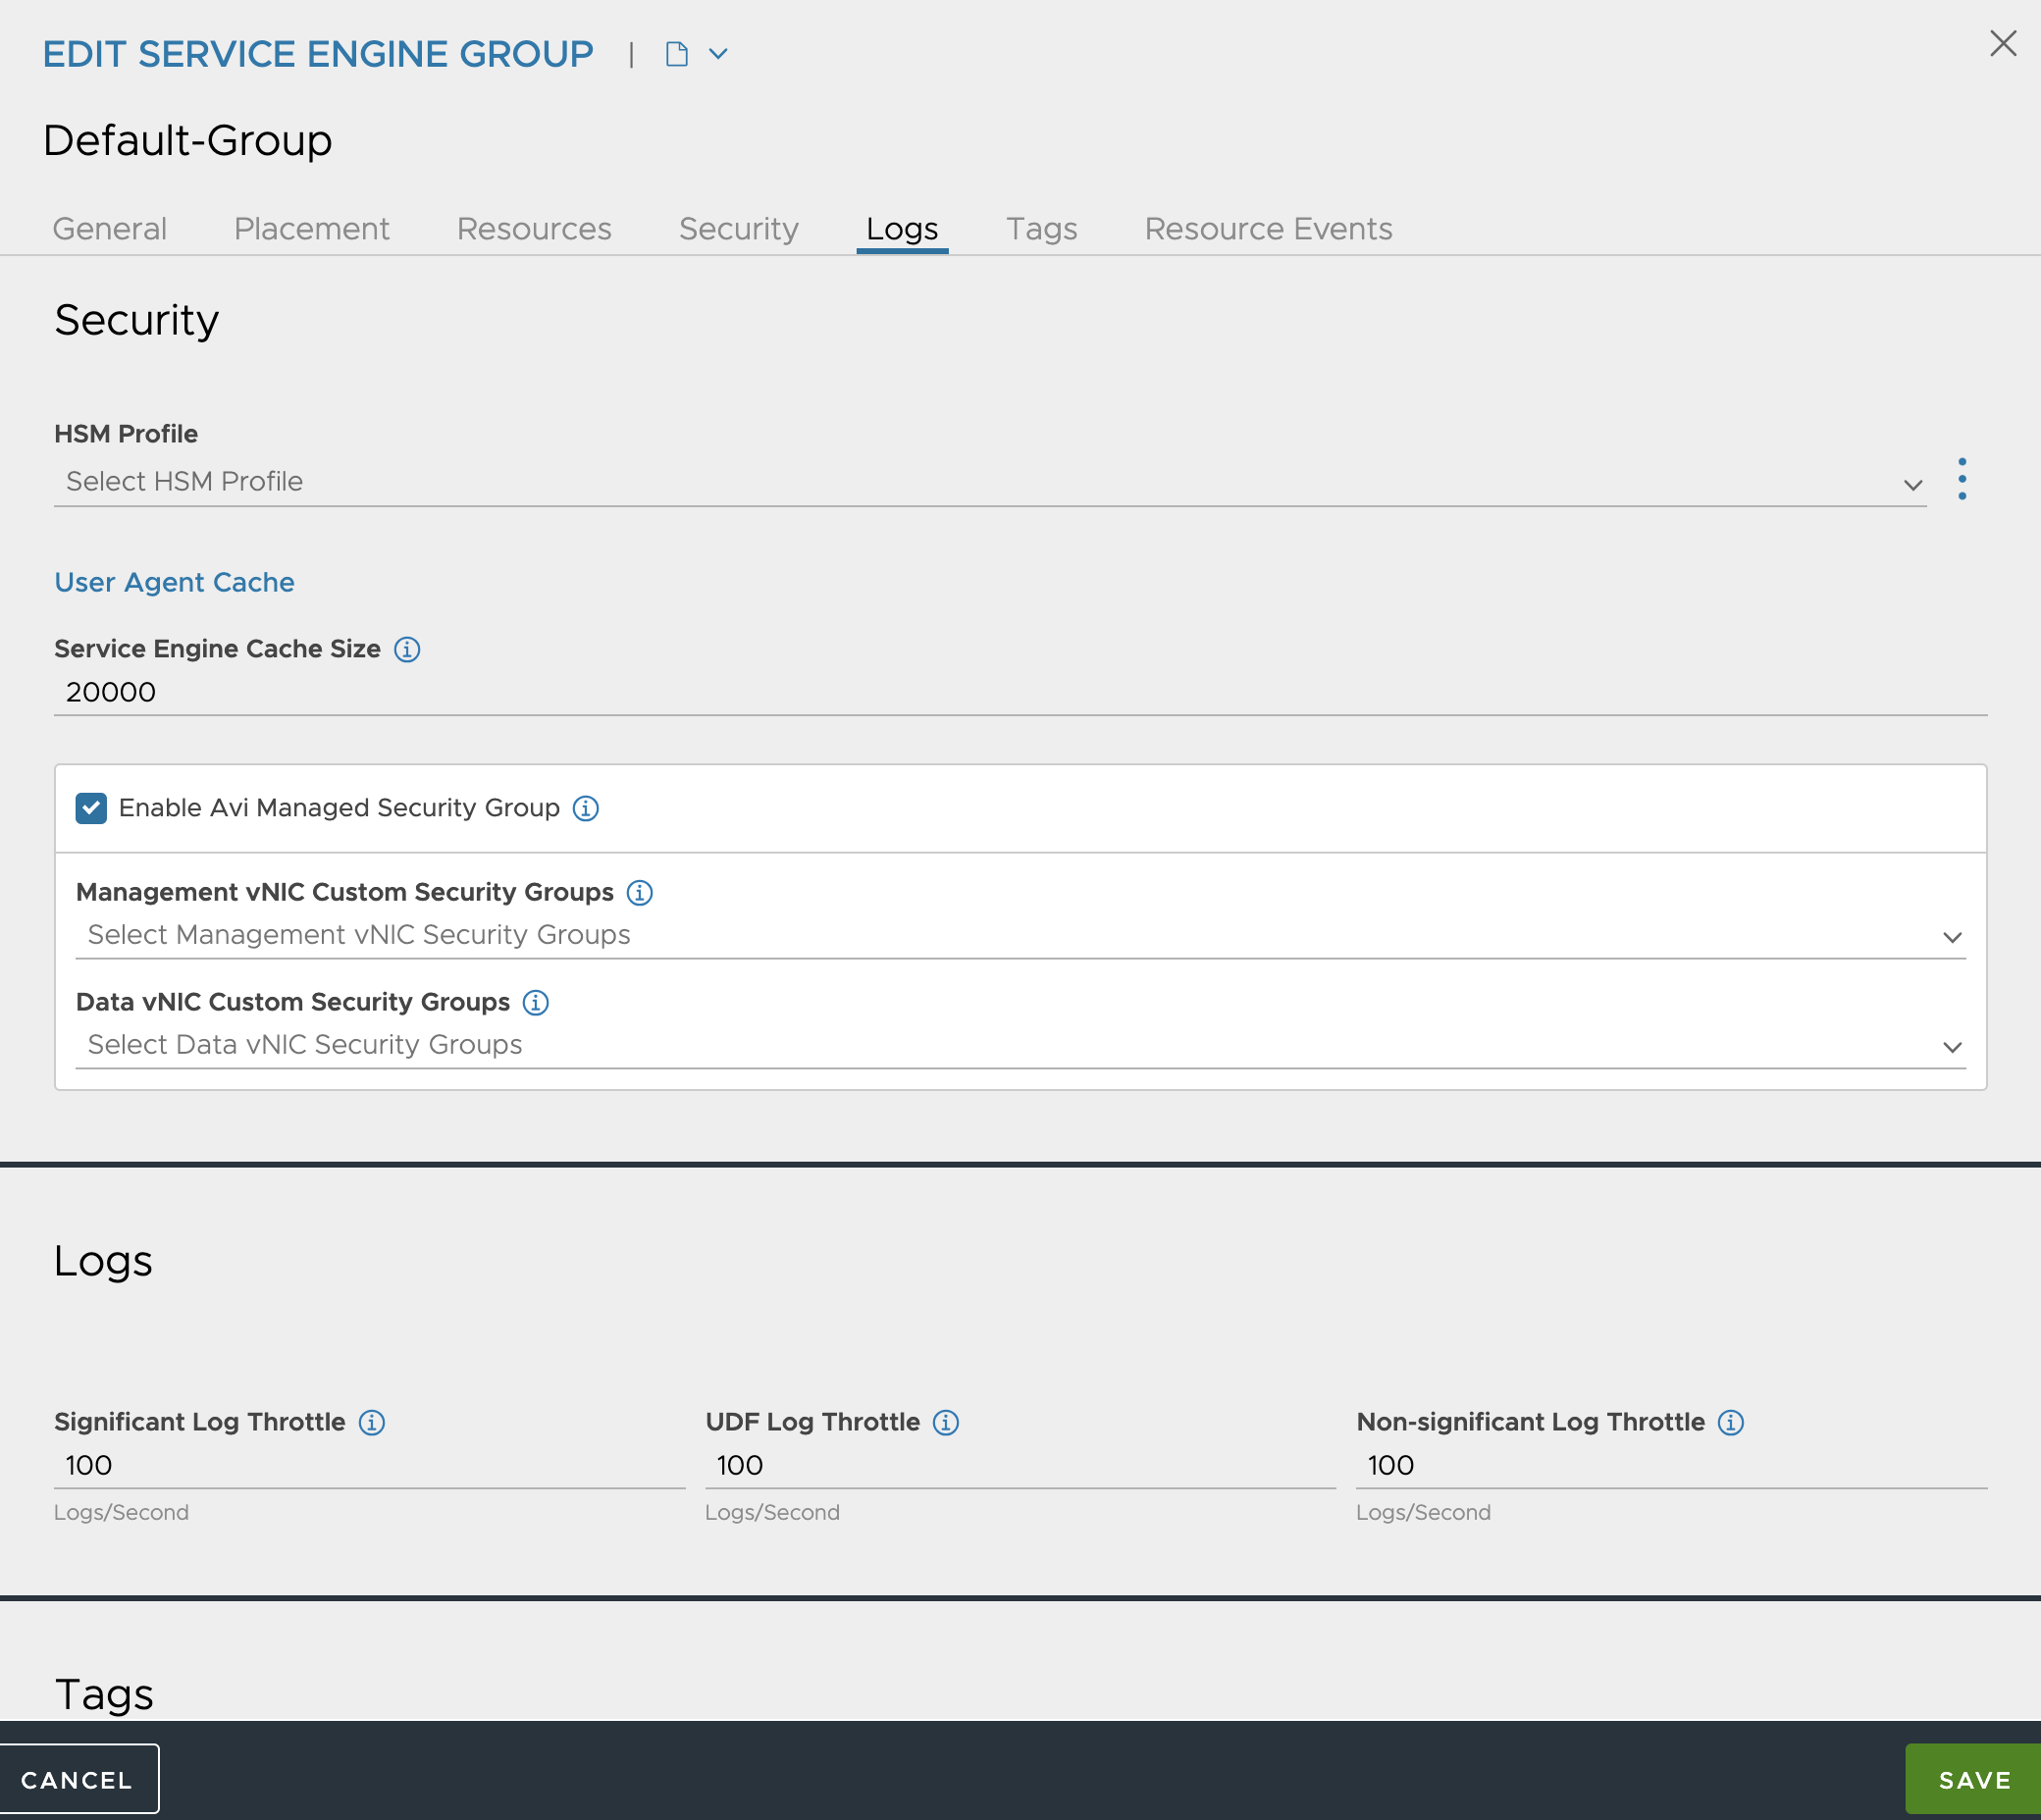
Click SAVE.
Using the CLI
It is recommended to create a custom security group at the SE group level and disable the default security group creation. disable_avi_securitygroups is the flag to disable the default security group creation by NSX Advanced Load Balancer .
[email protected]:~$ shell
Login: admin
Password:
[admin:10.10.1.1]: > configure serviceenginegroup Default-Group
[admin:10.10.1.1]: serviceenginegroup> disable_avi_securitygroups
Once the option to create the default security group is disabled, NSX Advanced Load Balancer does not create any new security group.
By default, rules for management interface, data interface, and tunnelling protocols are not added to the custom security groups. These rules are created manually. This is equivalent to setting the value for theingress_access_data option and ingress_access_mgmt option to None.
If the
disable_avi_securitygroupsoption is set on an existing cloud, it applies only to the newly created Service Engines and virtual services. The existing security groups are not deleted automatically.
