


This document details the steps to configure the Controller Cluster IP.
To configure the Controller cluster IP:
Procedure
- Starting with NSX Advanced Load Balancer 22.1.3, the following UI is available:
- Navigate to .
- Click Edit. The EDIT CLUSTER screen is displayed.
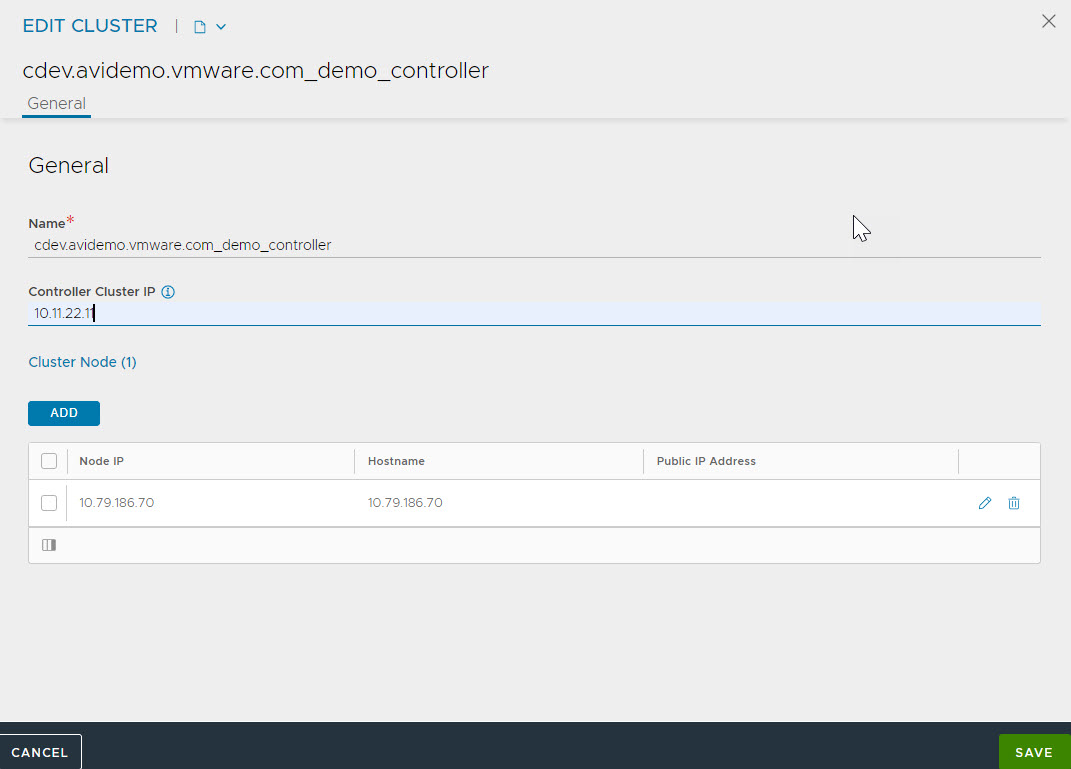
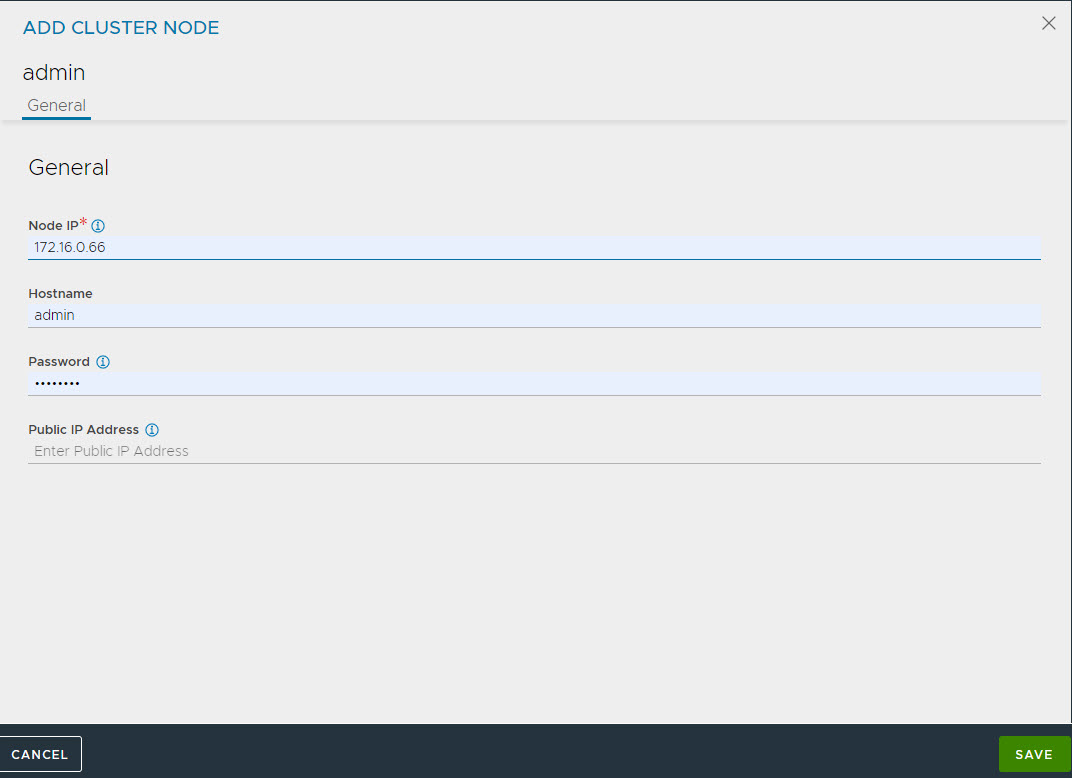
- Under Cluster Node, click ADD to add the Node IP, Hostname, Password and Public IP Address.
- Click SAVE.
Results
The Controller Cluster IP gets programmed as a sub-interface on the leader node's primary NIC, and must be in the same subnet as the controller nodes. Whenever there is a failover, this IP is reprogrammed on the new leader's primary NIC.
Example
10.146.3.2 is the Controller cluster IP programmed on a leader in a three-node cluster.
admin@demo-gcp-fa-cluster-node-1:~$ ip a
2: eth0: <BROADCAST,MULTICAST,UP,LOWER_UP> mtu 1460 qdisc mq state UP group default qlen 1000
link/ether 42:01:0a:92:03:1c brd ff:ff:ff:ff:ff:ff
inet 10.146.3.28/32 brd 10.146.3.28 scope global eth0
valid_lft forever preferred_lft forever
inet 10.146.3.2/32 scope global eth0:1
valid_lft forever preferred_lft forever
inet6 fe80::4001:aff:fe92:31c/64 scope link
valid_lft forever preferred_lft forever
