


Amazon Route 53 is a Domain Name System (DNS) service provided by Amazon Web Services, which is scalable and highly available.
NSX Advanced Load Balancer supports integration with Route 53, where a virtual service IP address or a floating IP address gets registered with a specific Fully Qualify Domain Name (FQDN). It also supports domain registration to the zone hosted in different AWS account using Route 53 as the DNS service.
Currently, only public FQDNs are supported for this feature. Enable the
publish_vip_to_public_zoneflag in the cloud if the user needs to publish a private IP address in the public zone.IAM role is not supported for this feature; only AWS Access Keys option is supported.
CNAME record type is not supported, only A record is supported for AWS DNS.
Use Case
In some deployments, AWS Route 53 zones are hosted in a central AWS account rather than being hosted along with the application workloads. In this scenario, NSX Advanced Load Balancer should be able to integrate with this central AWS account for updating the FQDN of the virtual service in the record sets.
Prerequisites
Access Key IDs and Secure Access Keys are required for the desired accounts using which installation and domain registration will be done.
For more information on AWS Access Key IDs and Secure Access Key, see Access Keys (Access Key ID and Secret Access Key) section of Understanding and Getting Your Security Credentials for AWS.
Configuration
- Creating an AWS DNS profile with the first account (Account 1) using IPAM
-
Log into the shell mode of NSX Advanced Load Balancer Controller.
Execute the ipamdnsproviderprofile <profile_name> command to configure the IPAM profile.
Use ipamdns_type_aws_dns to configure the DNS profile using AWS Access Keys.
[admin:controller-ip]: > configure ipamdnsproviderprofile <profile_name>

 [admin:controller-ip]: ipamdnsproviderprofile> type ipamdns_type_aws_dns

 [admin:controller-ip]: ipamdnsproviderprofile> aws_profile

 [admin:controller-ip]: ipamdnsproviderprofile:aws_profile> access_key_id <access_key>

 [admin:controller-ip]: ipamdnsproviderprofile:aws_profile> secret_access_key <secret_key>

 [admin:controller-ip]: ipamdnsproviderprofile:aws_profile> region <region_name>

 [admin:controller-ip]: ipamdnsproviderprofile:aws_profile> usable_domains <domain_name>

 [admin:controller-ip]: ipamdnsproviderprofile:aws_profile> save

 [admin:controller-ip]: ipamdnsproviderprofile> save
- Using DNS profile from a different account (Account 1) while using another account (Account 2) for cloud creation
-
Create an AWS cloud using the another account (Account 2).
While creating the cloud, select the option of DNS Profile instead of Amazon Route 53.
Select DNS profile created for the first account (Account 1), and complete the remaining steps for the cloud creation.
The DNS profile option is available under VPC/Network/Encryption.
Navigate to .
In DNS tab, select DNS Profile under DNS as shown below:
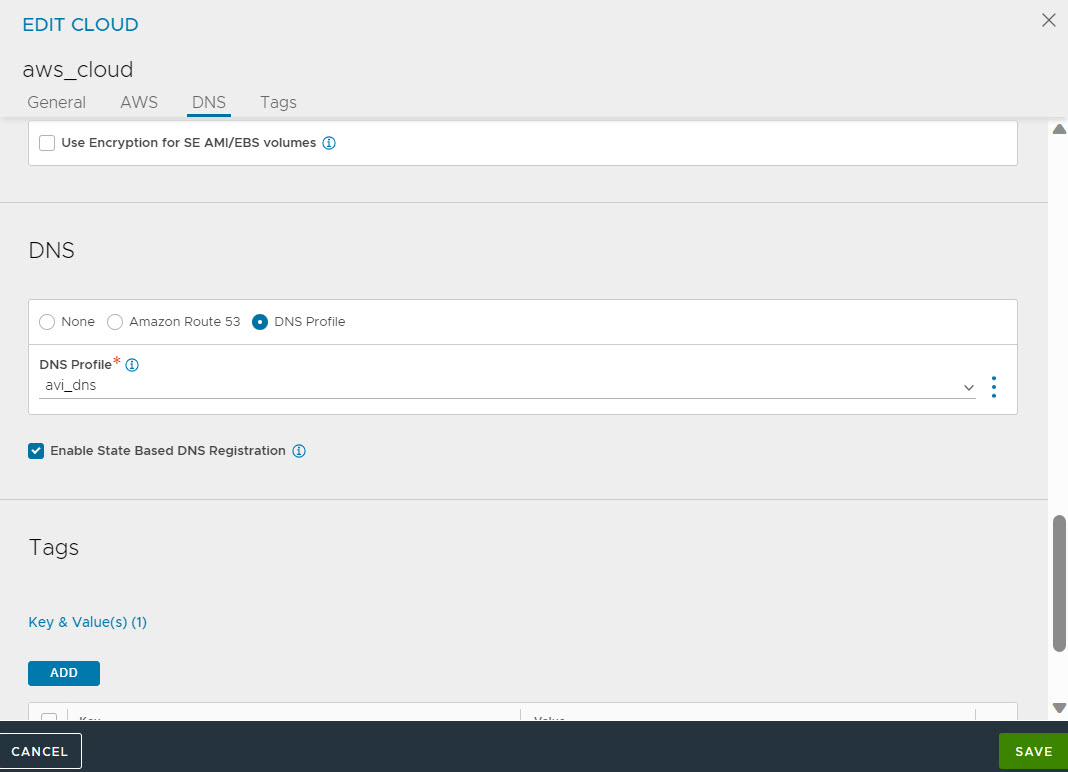
Click SAVE.
