


This topic steps through the UI screens required to configure a custom alert notification.

The NSX Advanced Load Balancer defines a robust collection of events for which the default notification is an entry in the alert log. An administrator can replace or augment the default behavior with one or more of the following additional actions:
Send an email.
Send a Syslog event.
Generate an SNMP trap.
Run a ControlScript for custom action.
For a broader view of the alert process, see Alerts Overview.
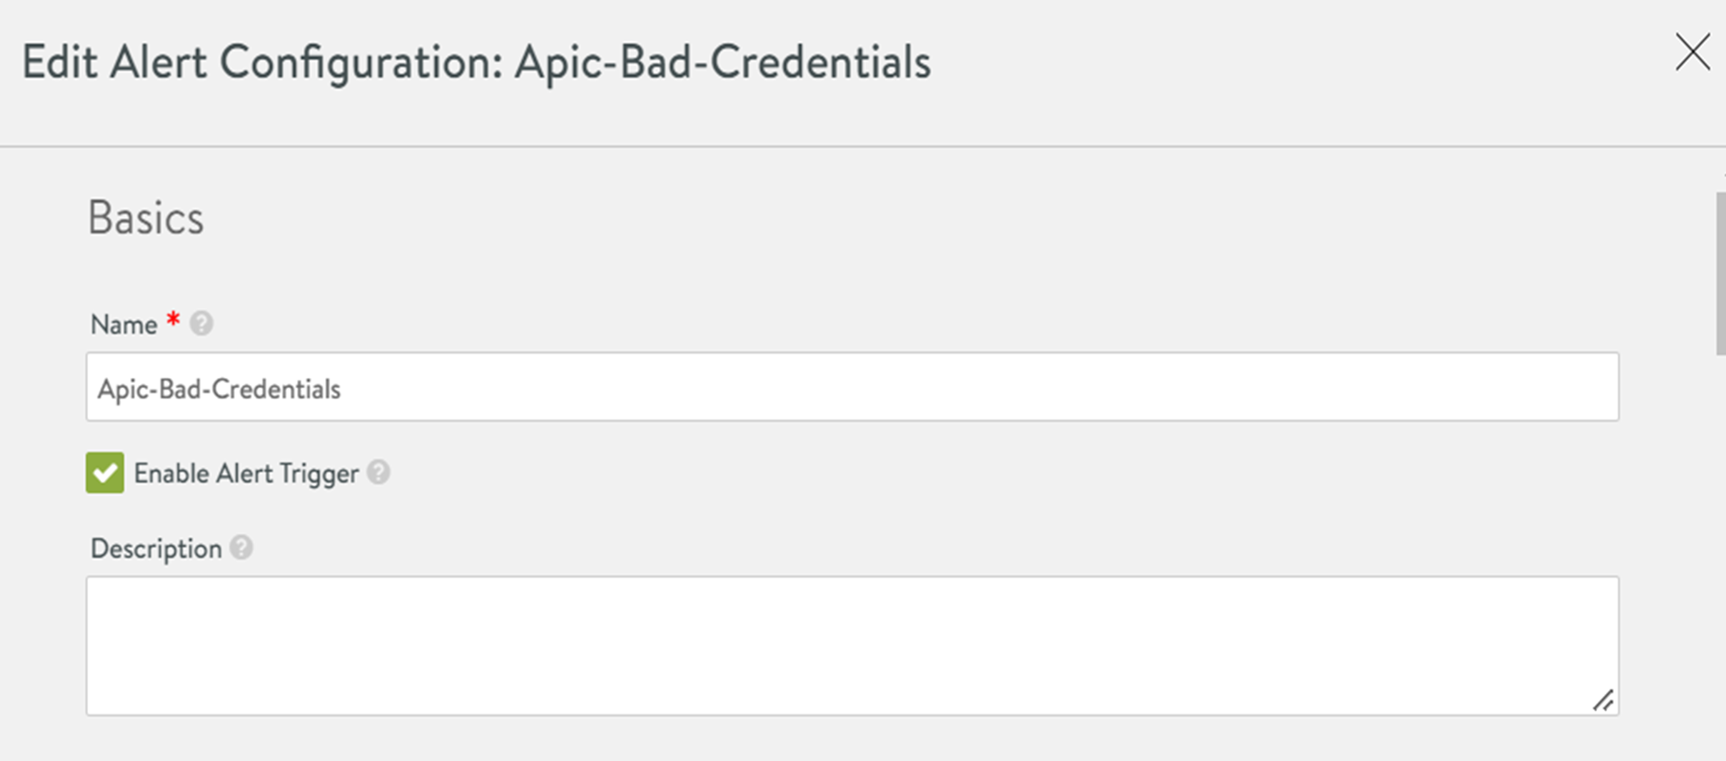
Step One - Alert Config
Navigate to page. This page shows a list of default alert configs, which are the triggers that define when an alert must be generated. Though the default system alert configs are editable, they cannot be deleted.
From this page a new alert config can be created or you can choose to edit an existing one. For example, consider that the existing Apic-Bad-Credentials alert config needs to be customized. The default alert action (System-Alert-Level-High) will be changed.
Step Two: Alert Action
As shown above, an edit icon appears in the Alert Config table.
Clicking the edit icon reveals the Edit Alert Configuration panel. Choose one of the existing alert actions or create a new alert by clicking the Alert Action drop-down menu.
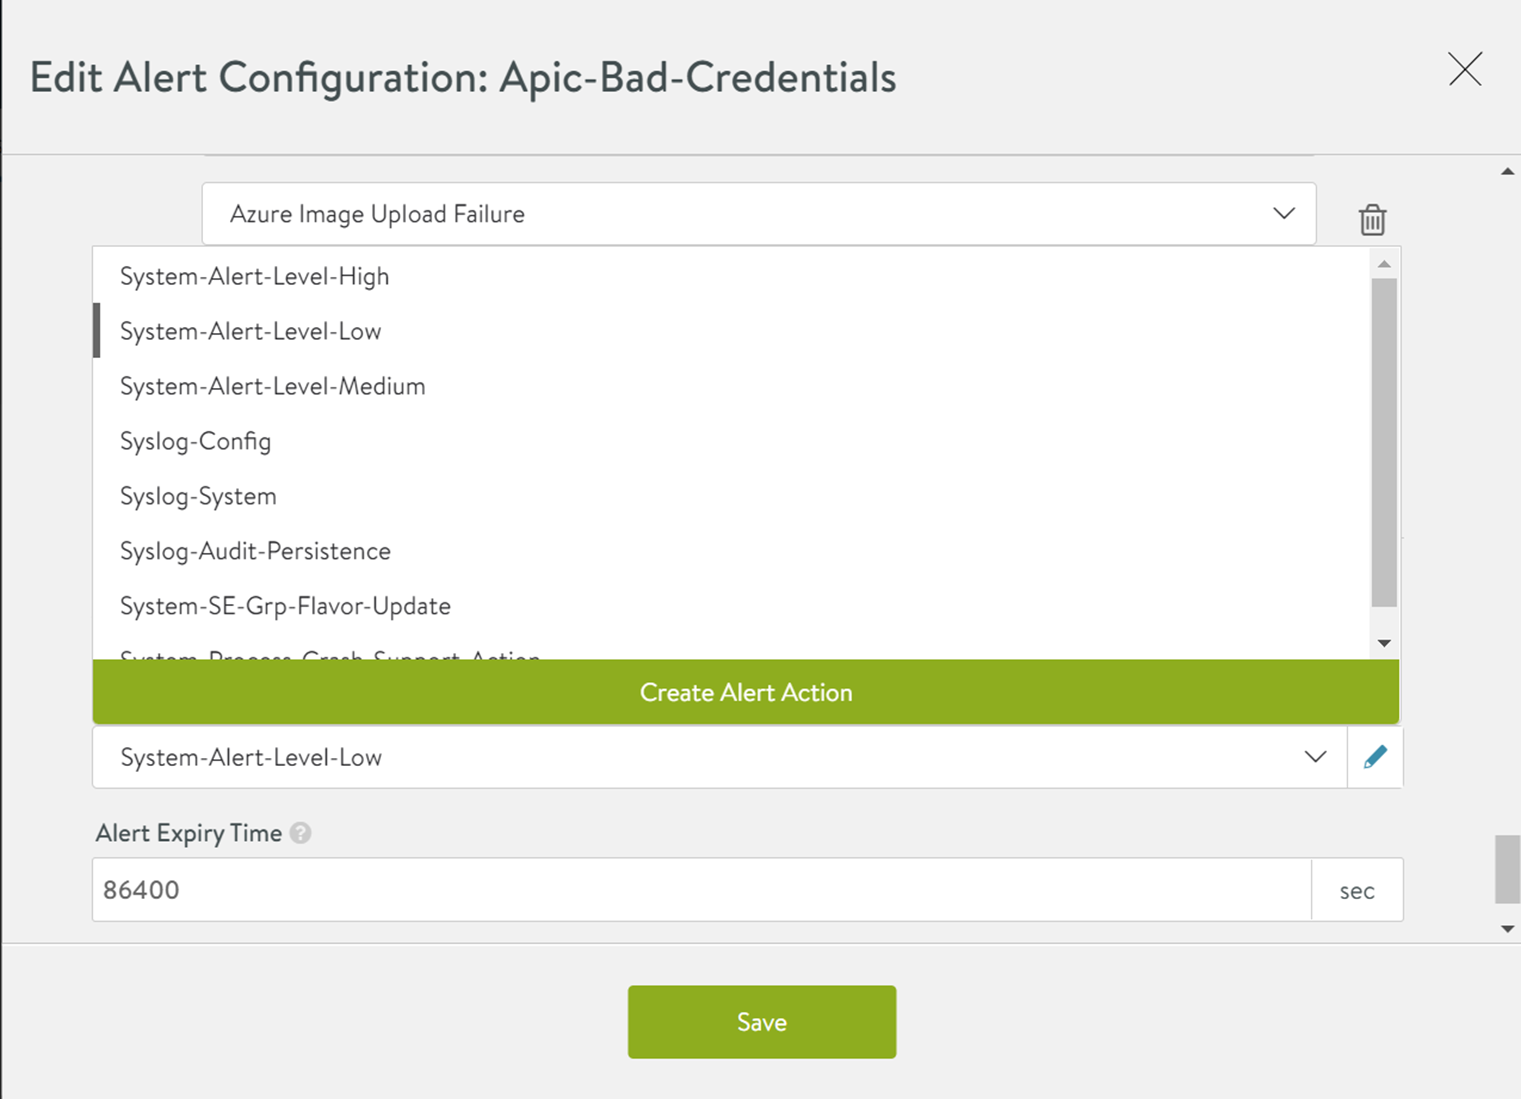
Give the new alert action a descriptive name, as shown below:

If you do not want the NSX Advanced Load Balancer to make an entry in the alerts log when the event occurs, select the Only General External Alerts check box. With this option, alerts are not stored in the NSX Advanced Load Balancer or shown locally in the UI through notifications.
Alert Level: Choose Low, Medium, or High. The severity of the alert that is shown in the NSX Advanced Load Balancer UI.
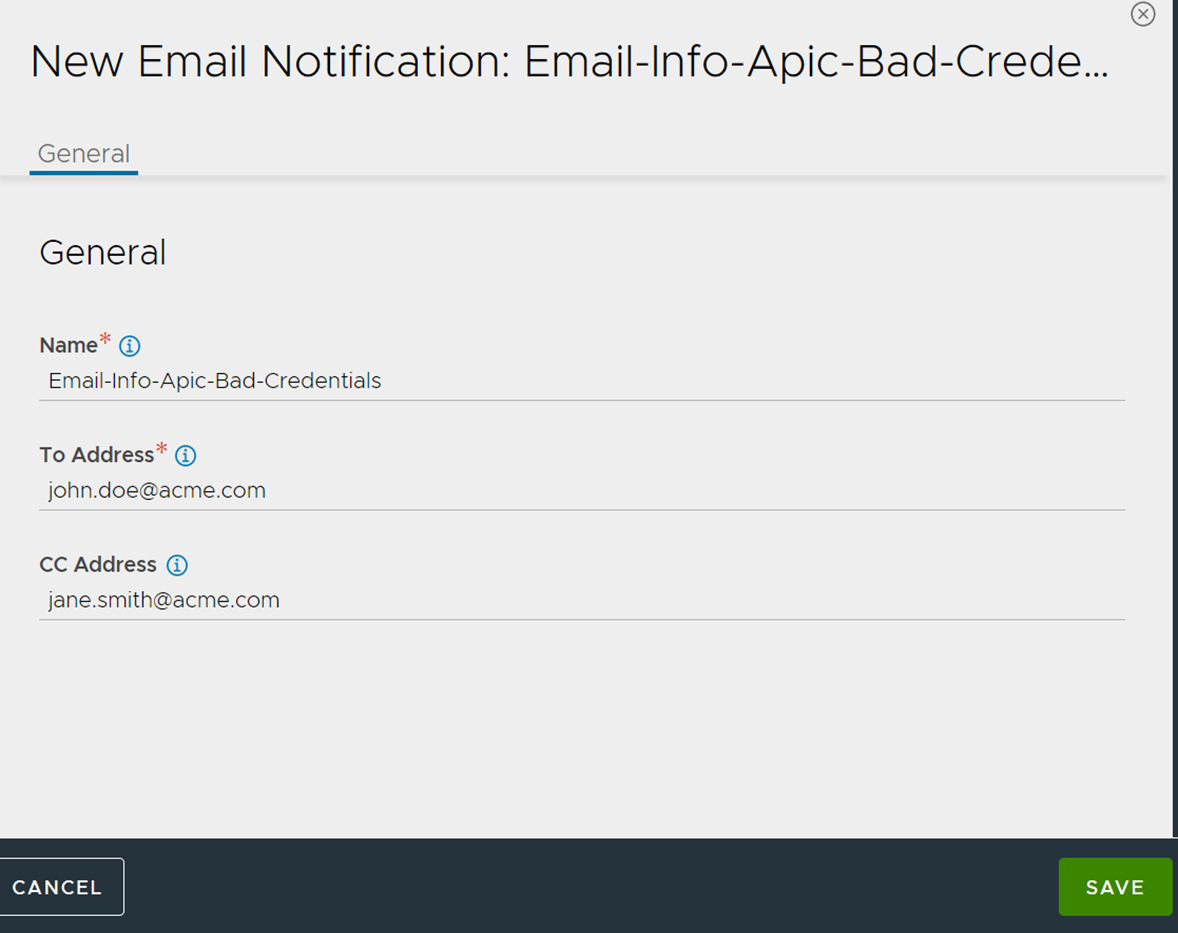
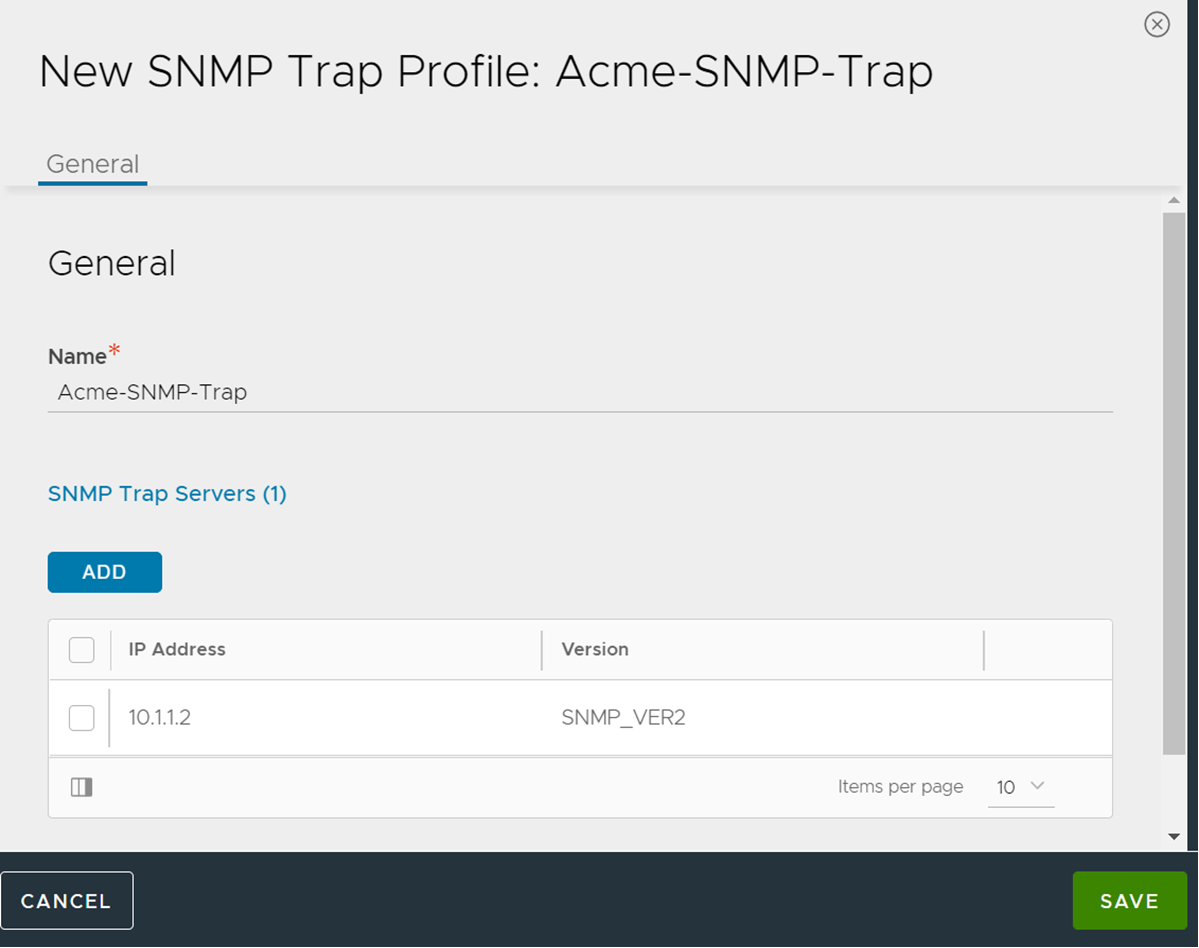
Enter the details for the four action options as desired.
For email, name the action and supply the To: and Cc: lists.
To successfully send emails, the NSX Advanced Load Balancer might require additional system level configurations in the section of the UI.
For Syslog, choose a Name. Identify the Syslog server(s). For each server, specify the IP address or host name and select a Port.

For SNMP Trap Servers, enter a Name. Define the SNMP trap servers by providing IP address (or hostname) and community details.
For ControlScript, either upload a text file with your Python code or enter it directly into the provided scrolling window.
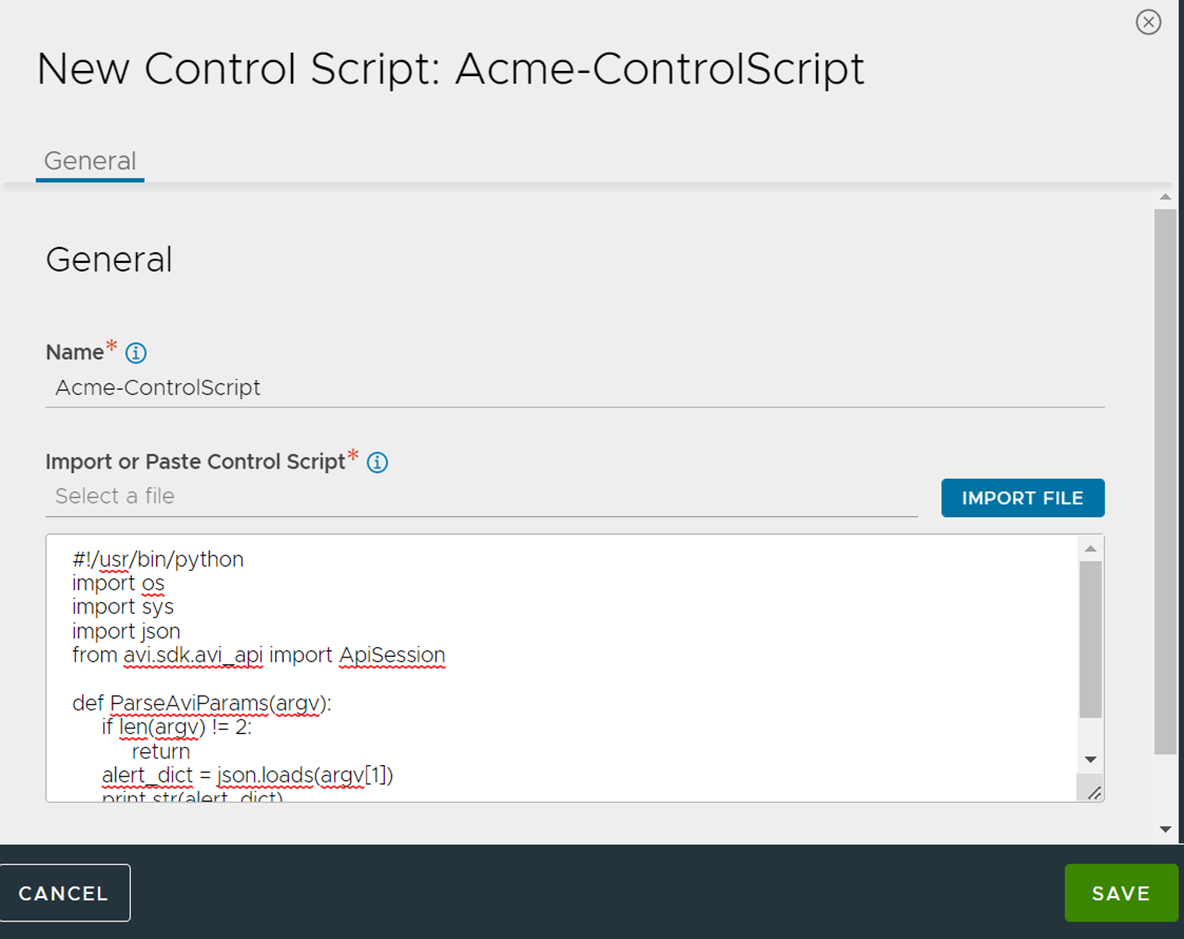
The window size in the above screenshot is too small to show the entire ControlScript. The full ControlScript is as follows. It prints the parameters passed to the ControlScript.
 #!/usr/bin/python
 import os
 import sys
 import json
 from avi.sdk.avi_api import ApiSession

 def ParseAviParams(argv):
      if len(argv) != 2:
           return
      alert_dict = json.loads(argv[1])
      print str(alert_dict)
 def DisableVirtualService(vs_name):
     # Get session on the basis of authentication token
     token=os.environ.get('API_TOKEN')
     user=os.environ.get('USER')
     tenant=os.environ.get('TENANT')
     with ApiSession("localhost", user, token=token, tenant=tenant) as session:
         # Get the virtualservice objct of name myVirtualService
         vs_obj = session.get_object_by_name('virtualservice', vs_name)
         # Update the object
         if vs_obj:
             vs_obj['enabled'] = False
         # Save the object
         session.put('virtualservice/%s' %vs_obj['uuid'], data=json.dumps(vs_obj))

 if __name__ == "__main__":
     ParseAviParams(sys.argv)
     DisableVirtualService('myVirtualService')
Parameters Passed to ControlScript
Name: Name of the alert for which the ControlScript is invoked.
Level: Level of the alert for which the ControlScript is invoked (High, Medium, Low).
Object UUID: The NSX Advanced Load Balancer UUID of the object on which the alert is raised.
Object Name: Name of the NSX Advanced Load Balancer object on which the alert is raised.
Threshold: The threshold value (if configured) for this alert. Can be a count or an absolute number.
Event Details: For alerts based on system events, the list of all events on which the alert is raised. The contents of the event details vary based on different events.
Metric Information: For metrics-based alerts, the list of all metrics on which the alert is raised.
Throttle Count: A count of the number of times an alert was throttled.
Changing an Alert Action
To make a change to any of the four alert actions, click the corresponding field. Select the action to edit or change from the drop-down menu. Choose a different action or edit the selected action. Editing action can be done by clicking actions (three dots) and selecting Edit from the drop-down menu. Click Save after editing and verifying your alert actions.
Step Three: Save the New Alert Action
Prior to clicking Save in the Edit Alert Configuration window, you can add a description to document your work.
Step Four: Confirm that the Custom Action is in Place
Return to the page. You can see your work reflected in the list of events and alert actions.
