When an alert is triggered, alert configurations call the corresponding Alert Actions. The reusable Alert Config object defines what should happen for the triggered alert.
Alert Actions
Alerts actions can be used to define the alert level, and notify administrators through the NSX Advanced Load Balancer UI(default mode), email, Syslog or SNMP traps. The alert action can trigger a ControlScript or an autoscale policy to scale the application in or out, to a particular level (SEs in the SE group, members of a server pool).
They can also be used to effect automation through:
Application autoscaling (e.g., SE scale-out or sacle-in, server pool autoscaling).
Execution of a ControlScript.
An alert action can specify any combination of these actions.
To create a new alert action navigate to . The following table explains the list of fields to be entered in the New Alert Action screen:
Field Name |
Description |
|---|---|
Name |
User-friendly name. |
Only Generate External Alerts |
By default, the controller appends an entry in the alert log, which is visible to administrators in the UI. Checking the Only Generate External Alerts box disables this logging. Alerts can still be sent externally through any combination of the four methods listed (email, syslog, SNMP, or ControlScript). |
Autoscale Trigger |
Checking this box engages the Autoscale Manager. |
Alert Level |
High, medium, or low. Provides a way of classifying the alert to the remote system. For local notifications within the Controller UI, the alerts show as a different color to denote their severity. |
Send the alert as an email by selecting a previously created Email Notification. |
|
Syslog |
Send the alert to a syslog server (or servers) by selecting a previously defined Syslog Notification. |
SNMP Trap |
Send the alert as a trap an SNMP server (or servers) by selecting a previously defined SNMP Trap Notification. |
ControlScript |
Launch a custom ControlScript, which is a Python script to be executed on the Controller. |
Syslog Audit Persistence
To stream alerts of events for audit compliance, starting with NSX Advanced Load Balancerversion 20.1.3, a new alert action, the Syslog-Audit-Persistence is created for streaming events to external rsyslog servers.
Use Syslog-Audit-Persistence as a template, and configure the alert action as required.
To edit Syslog-Audit-Persistence:
Navigate to . Click the edit icon.
In the Edit Alert Action screen, update general information like Alert Level and Email.
Select the Syslog notification configuration to use when sending alerts through Syslog or click Create Syslog Notification.
In the New Syslog Notification screen, update the Name, Syslog Server and Port.
Click Save.
Syslog Messages for TCP
When configured from the UI, syslog message streaming defaults to using UDP. To use TCP, the configuration has to be changed from the CLI as follows:
[*:alert-ctlr]: alertsyslogconfig> syslog_servers index 1
[*:alert-ctlr]: alertsyslogconfig:syslog_servers> no udp
+--------------------+---------------+
| Field              | Value         |
+--------------------+---------------+
| syslog_server      | 10.10.0.235   |
| syslog_server_port | 514           |
| udp                | False         |
|format              | SYSLOG_LEGACY |
| tls_enable         | False         |
| anon_auth          | False         |
+--------------------+---------------+
[*:alert-ctlr]: alertsyslogconfig:syslog_servers> save
[*:alert-ctlr]: alertsyslogconfig> save
+----------------------+--------------------------------------------------------+
| Field                | Value                                                  |
+----------------------+--------------------------------------------------------+
| uuid                 | alertsyslogconfig-c39ad76c-4630-4c87-8c56-0d6df5ffc78f |
| name                 | Pybot-Syslog-Cfg                                       |
| syslog_servers[1]    |                                                        |
|   syslog_server      | 10.10.0.235                                            |
|   syslog_server_port | 514                                                    |
|   udp                | False                                                  |
|   format             | SYSLOG_LEGACY                                          |
|   tls_enable         | False                                                  |
|   anon_auth          | False                                                  |
| tenant_ref           | admin                                                  |
+----------------------+--------------------------------------------------------+
[*:alert-ctlr]: >
Using Syslog Audit Persistence
The updated Syslog-Audit-Persistence can be used when configuring an alert as shown below:
From the Controller UI, navigate to . Click CREATE.
Configure the Basics and the Conditions sections as required.
Under Actions, select Syslog-Audit-Persistence as the Alert Action.
Click Save.
The alert config will trigger Syslog-Audit-Persistence which sends notifications and executes a ControlScript.
Alert Table

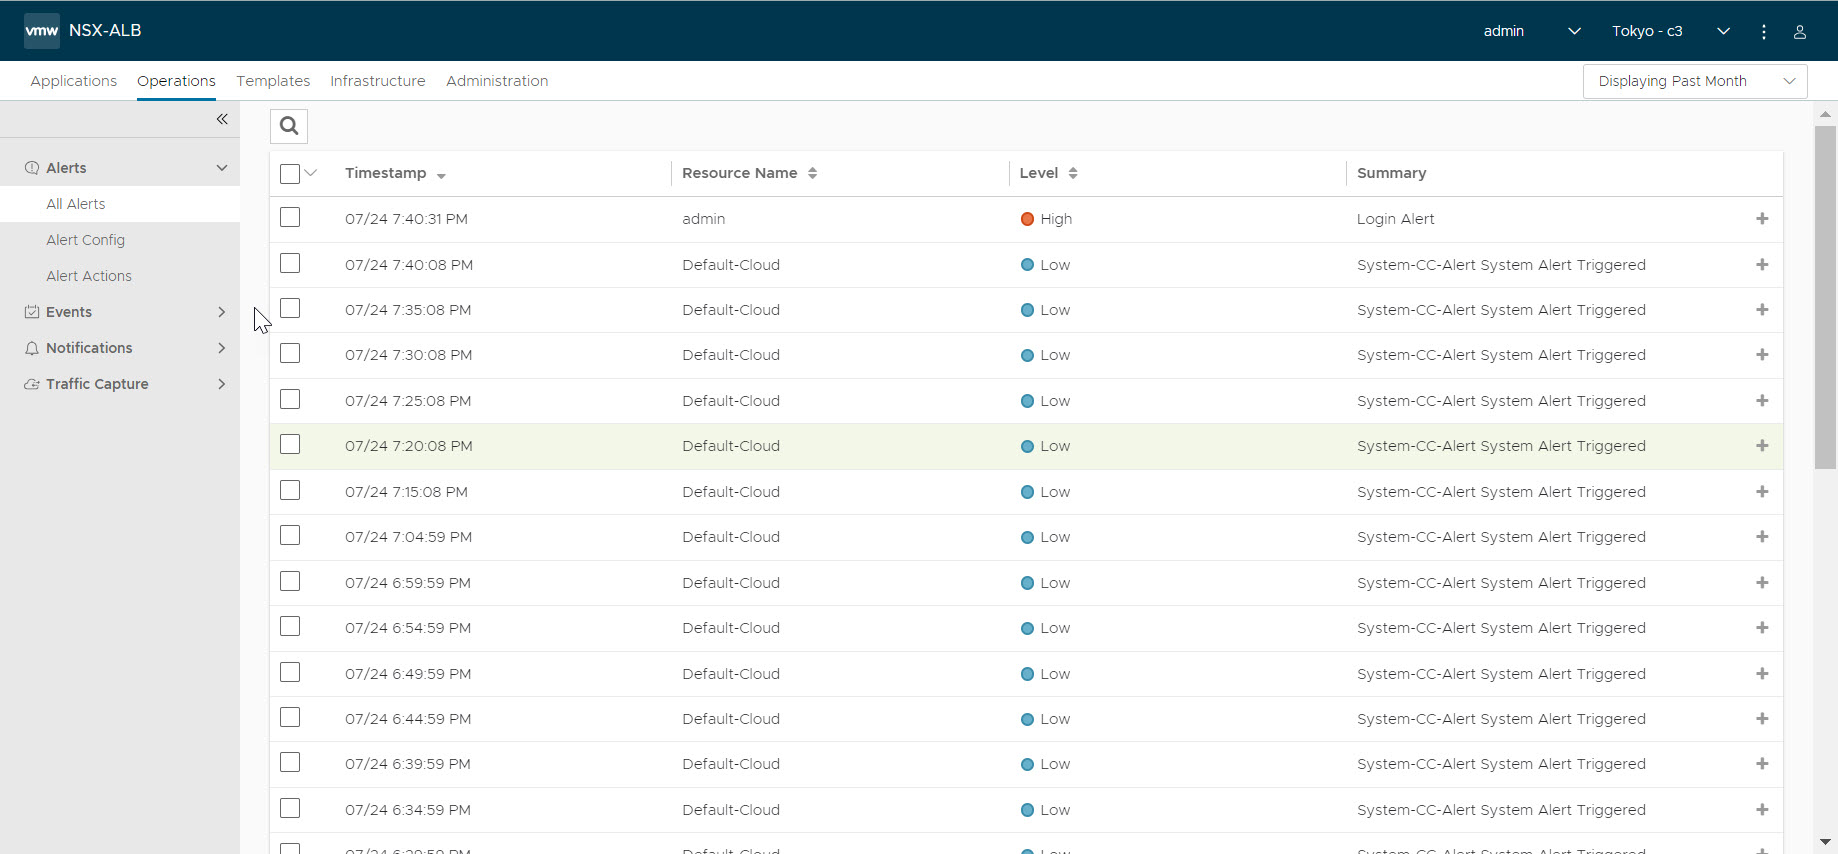
The table at the bottom of the Alerts tab displays the following alert details:
Field |
Description |
|---|---|
Timestamp |
Date and time when the alert was triggered. Changing the time interval using the Displaying drop-down menu may potentially show more alerts. |
Resource Name |
Name of the object that is the subject of the alert, such as a server or virtual service. |
Level |
Severity level of the alert, which can be High, Medium, or Low. Specific notifications can be set up for the different levels of alerts via the Administration page’s Alerts Overlay. |
Summary |
Summarized description of the alert. |
Action |
Click the appropriate button to act on the alert:
|