


This section shows the steps to configure Single VIP with two virtual services.
Procedure
- Create IP group with UAG as members:
IP groups are comma-separated lists of IP addresses that may be referenced by profiles, policies, and logs. Since same UAG servers are used as pool members in two different pools, IP groups can be attached to the pool instead of directly attaching servers to the pool. Any configuration change to the pool members like addition or removal of servers needs to be done at the IP Group level.
To create an IP group,
- From the NSX Advanced Load Balancer UI, navigate to .
- Click Create.
- In the New IP Group screen, click Add.
- Enter the IP Address to be added.
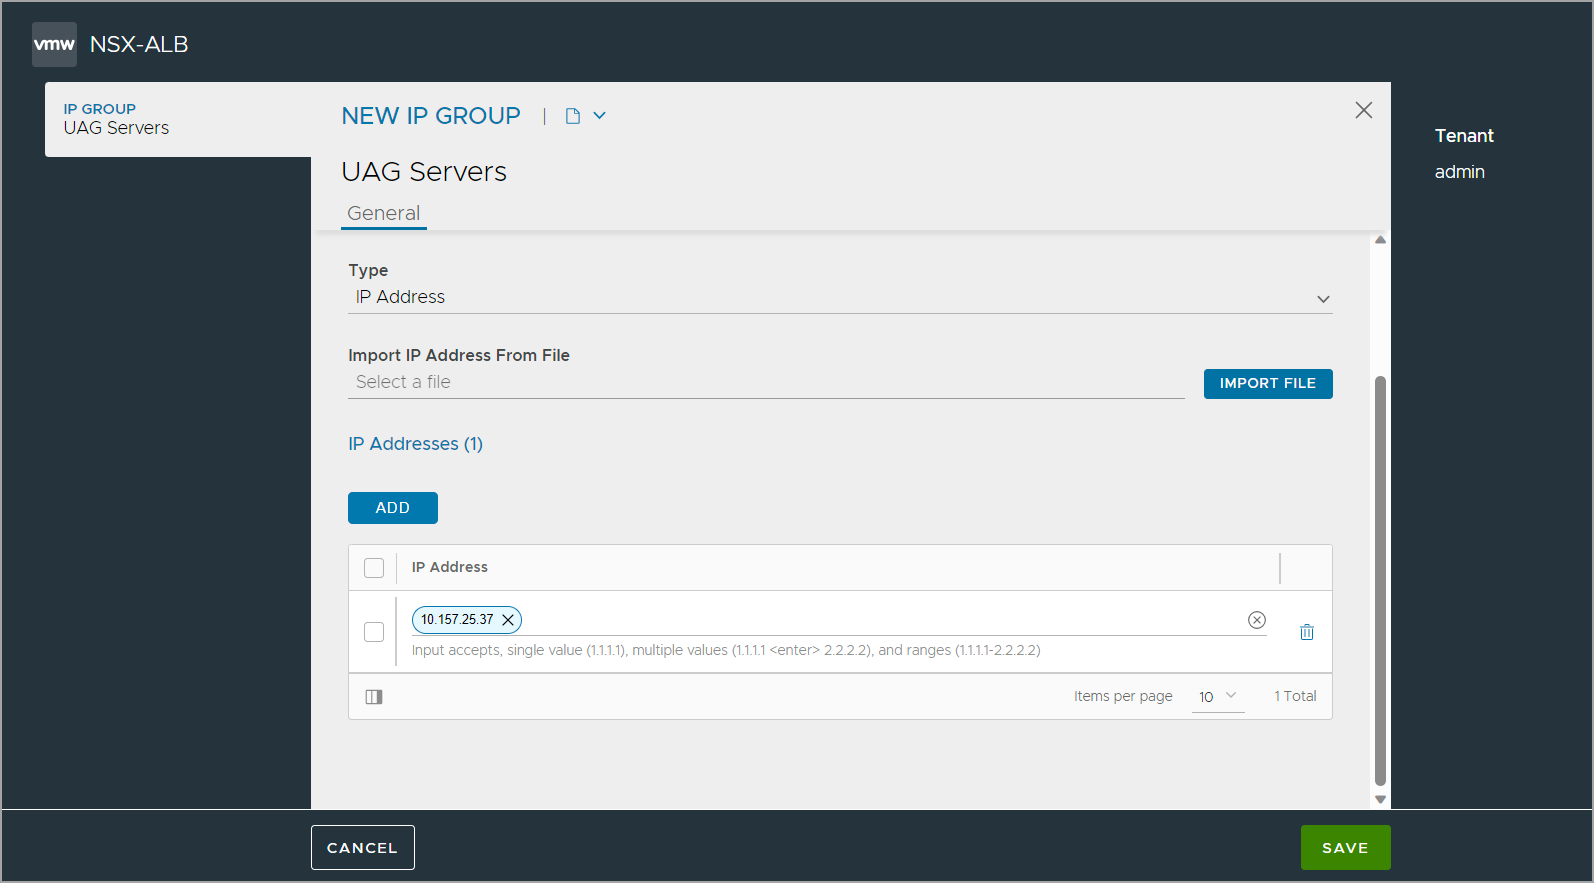
- Click Save.
- Create Custom Health Monitor for UAG as shown below:
- From the NSX Advanced Load Balancer UI, navigate to .
- Click Create.
- Select the vCenter cloud that was created for Horizon.
- Enter the following details in the New Health Monitor screen.
Field
Value
Send Interval
30
Receive Timeout
10
Client Requested Data
GET /favicon.ico HTTP/1.0Response Code
2xx
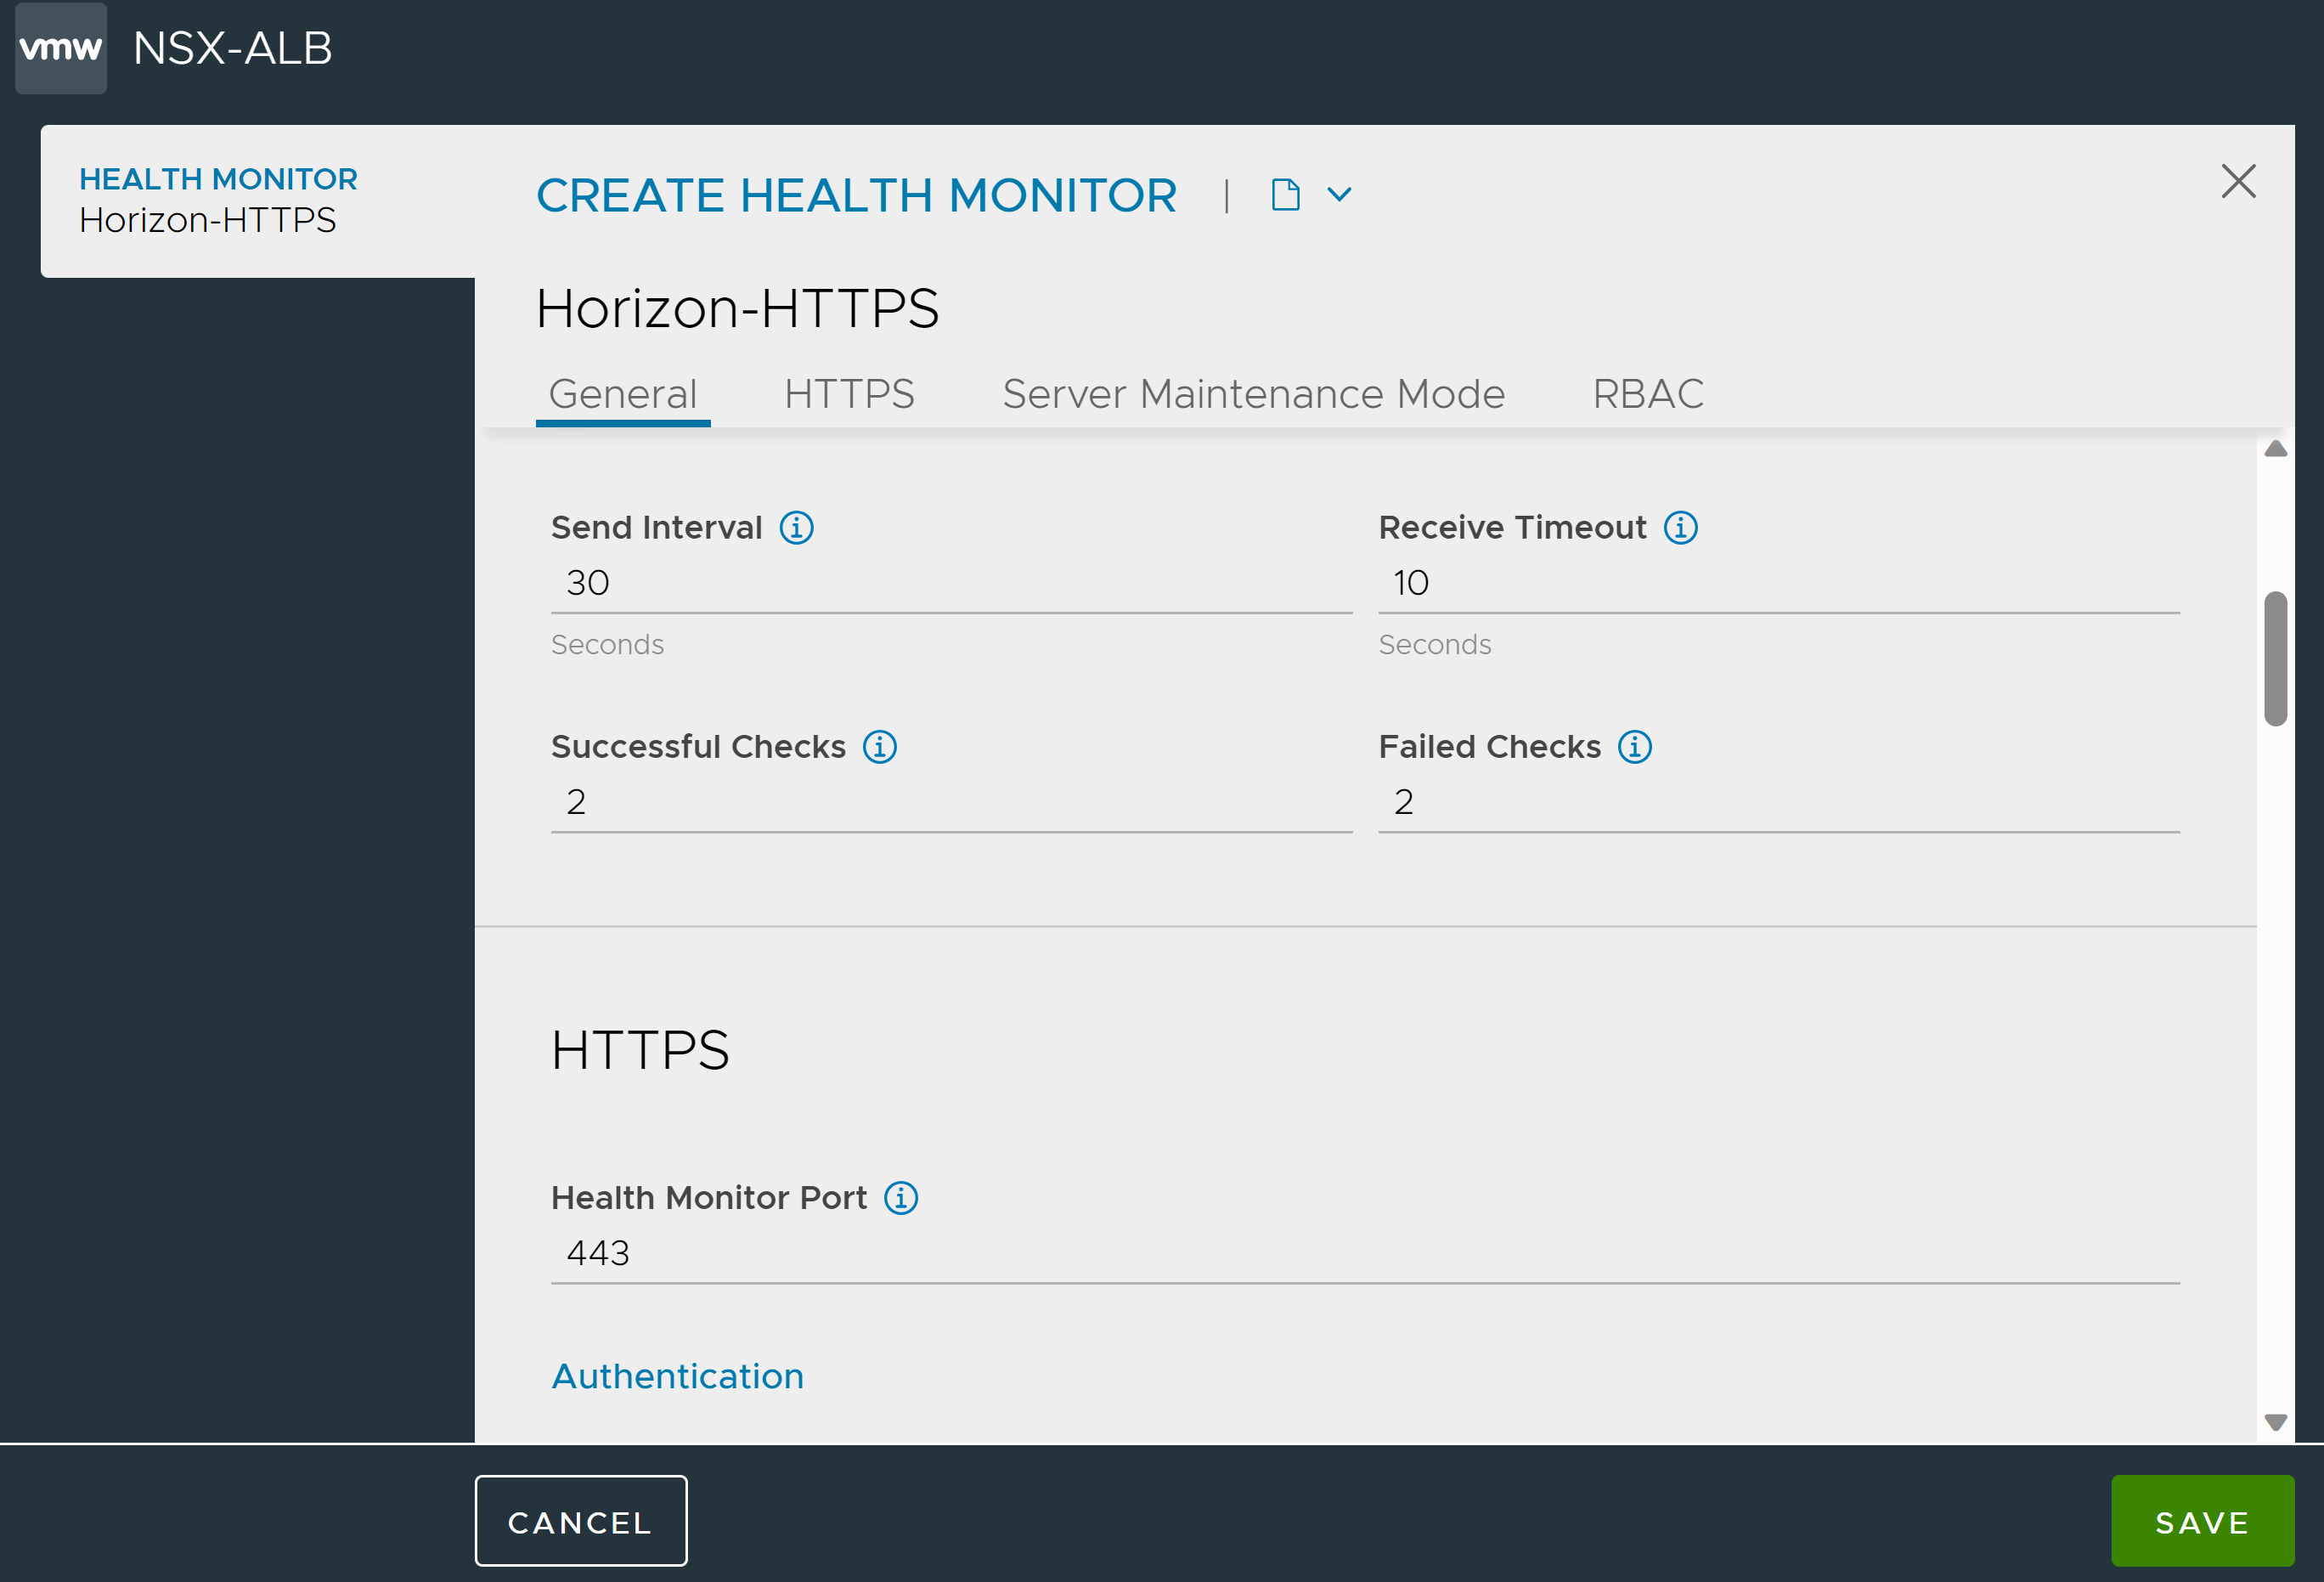
- Click Enable SSL Attributes and select System-Standard as the SSL Profile.
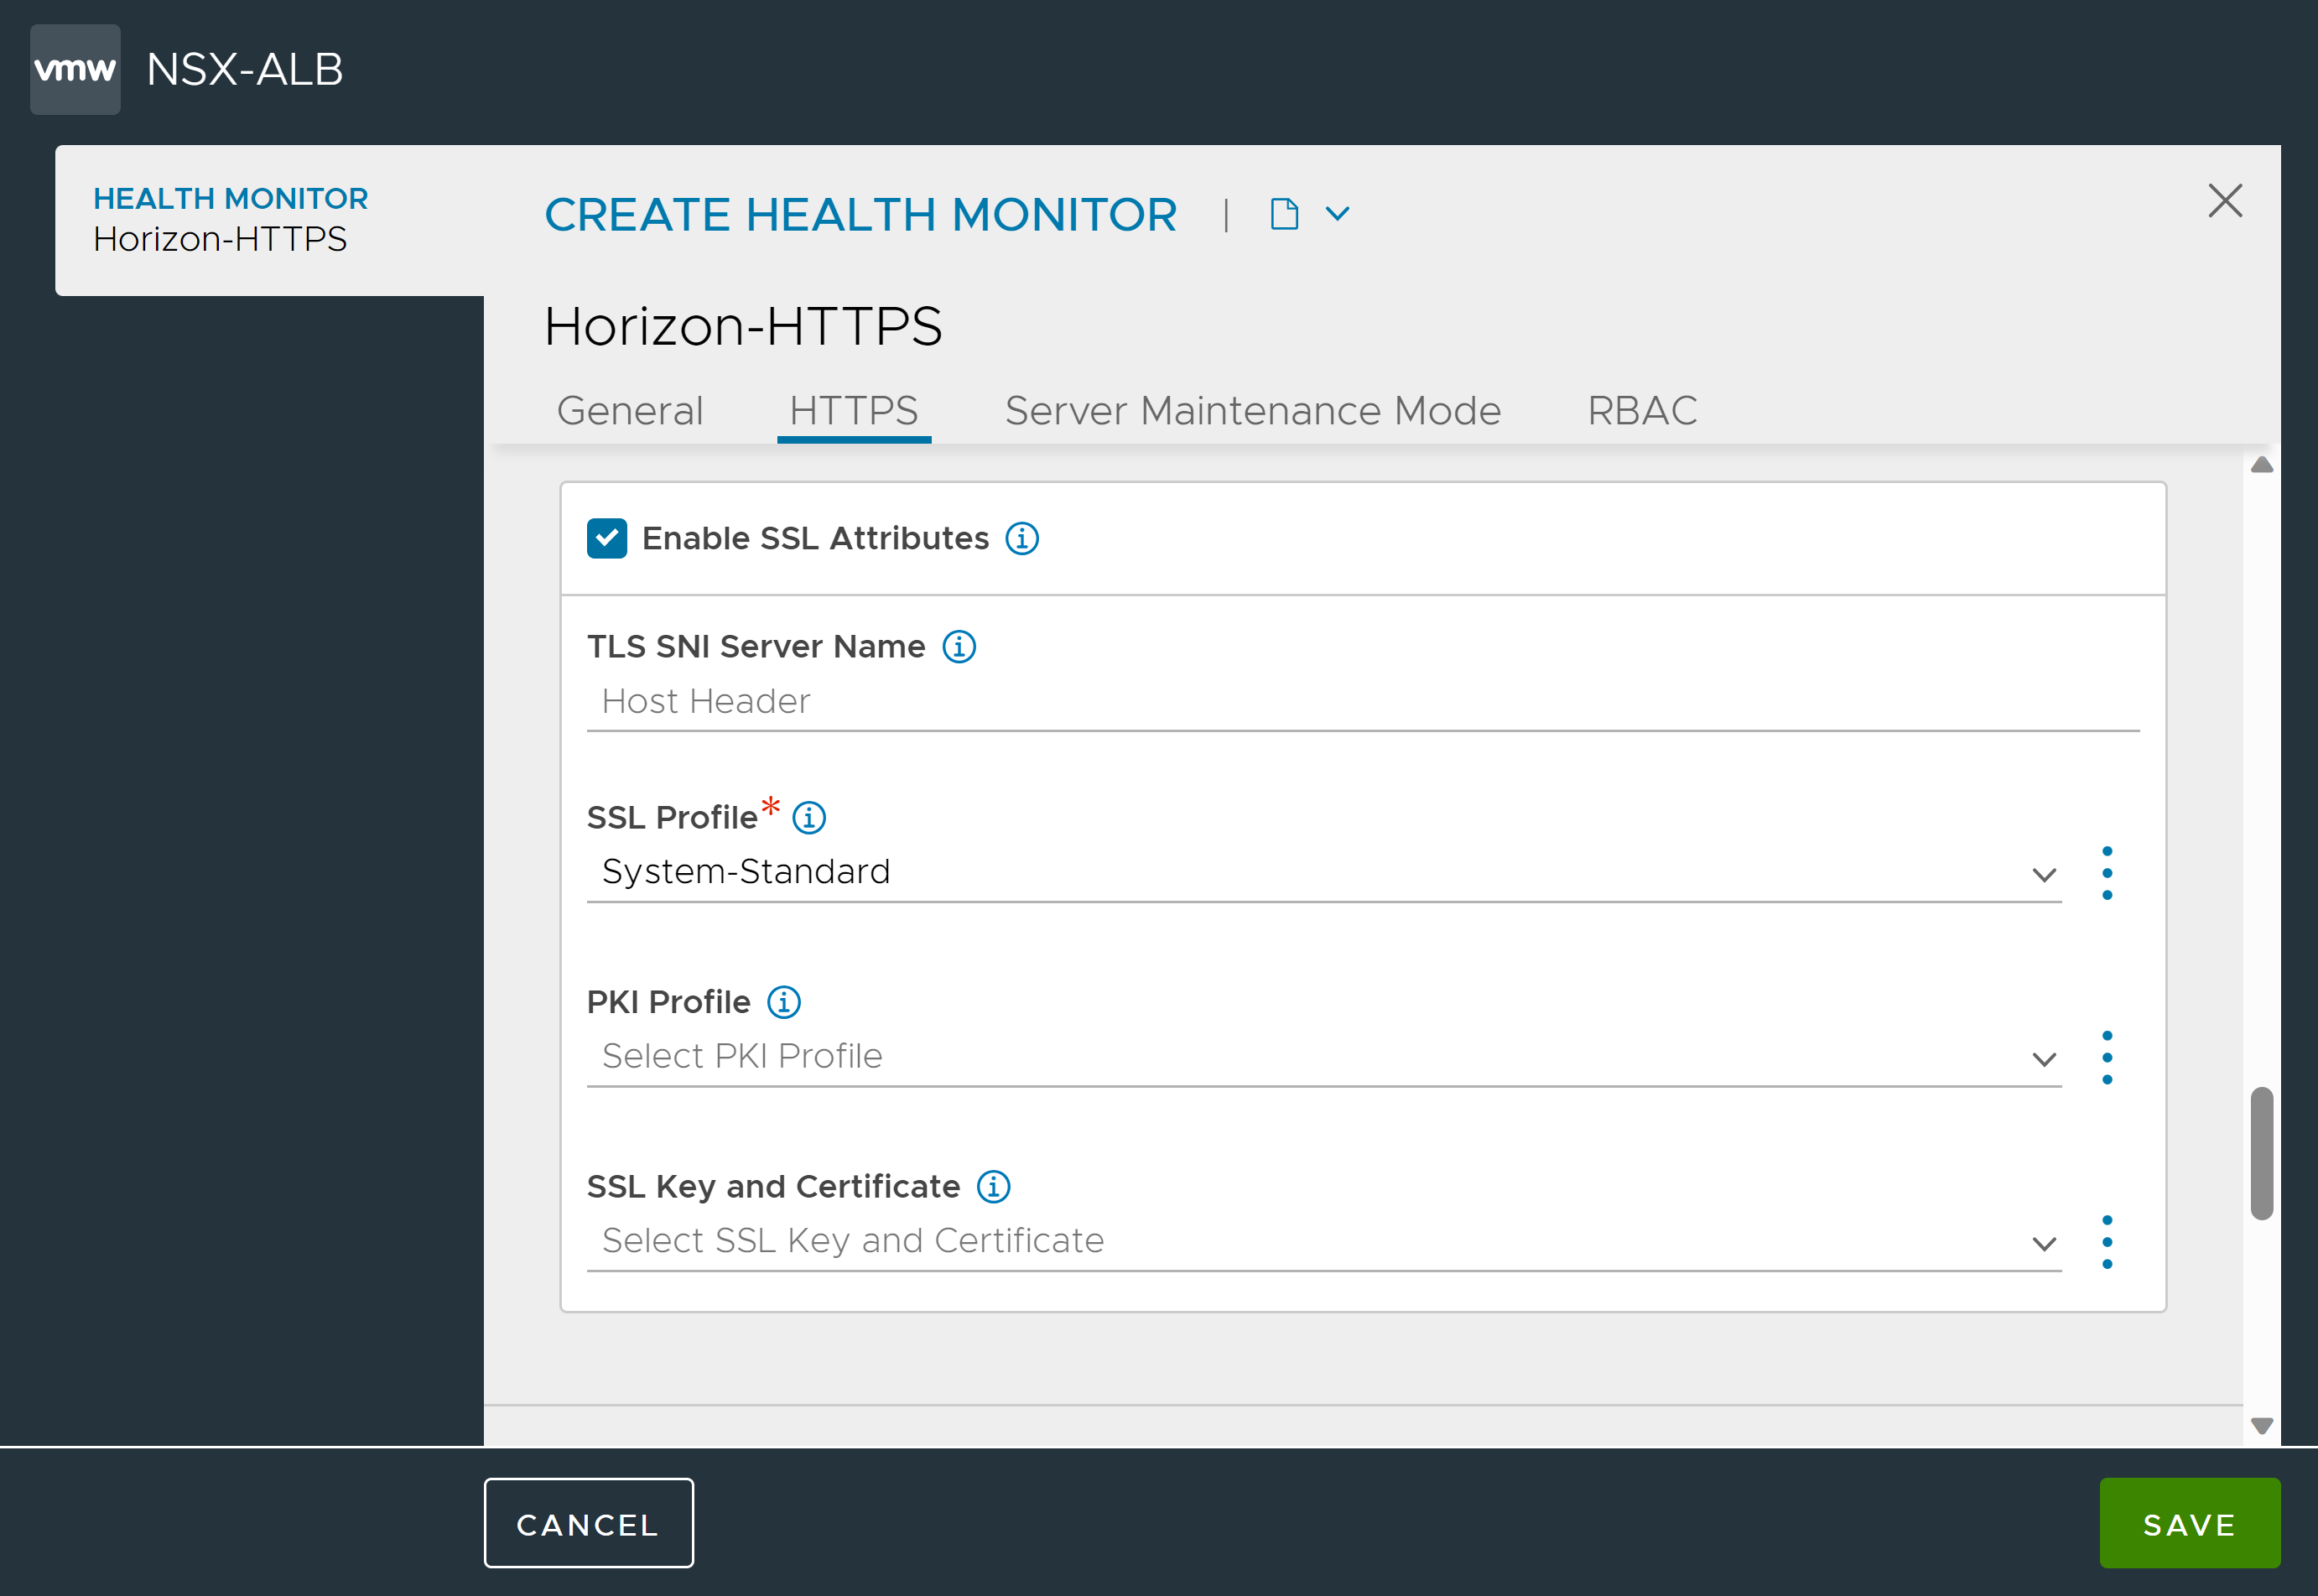
- Click Save.
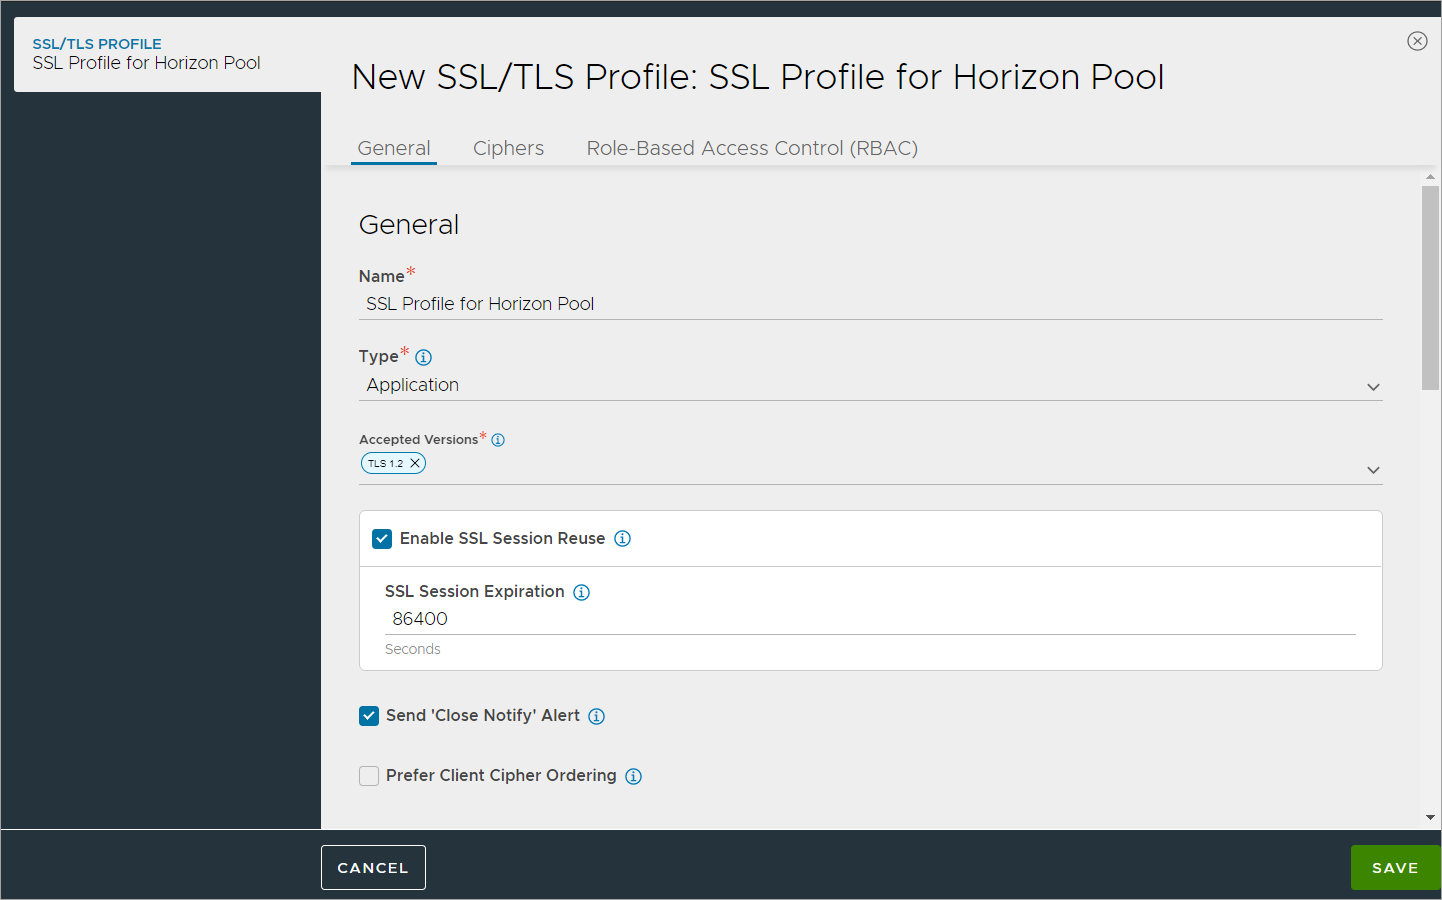
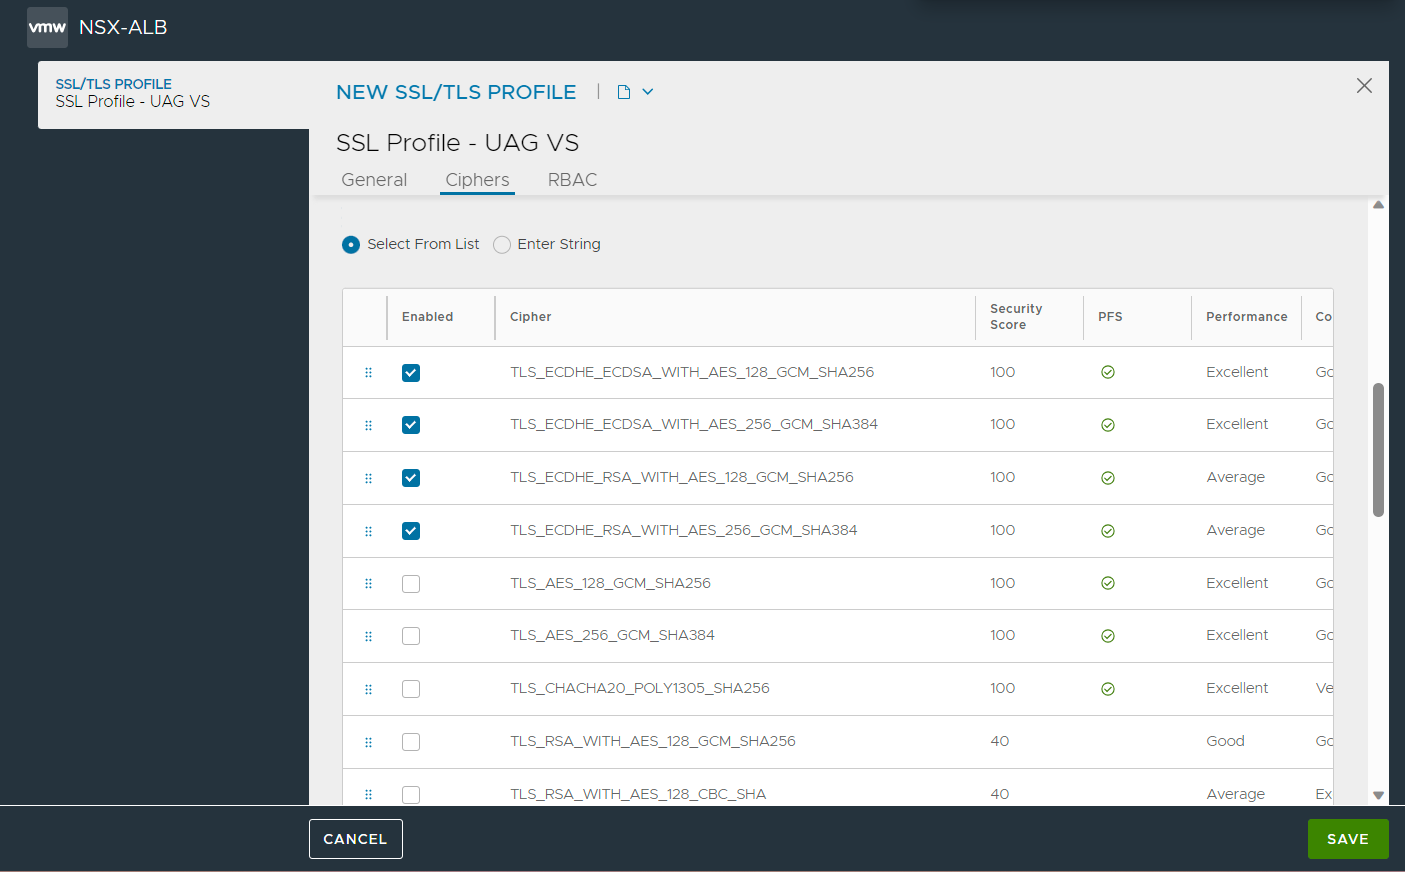
- Create an SSL Profile for the Pool for the UAG pool with the configuration given below:
Accepted Versions: 1.2
Cipher List:
TLS_ECDHE_RSA_WITH_AES_128_GCM_SHA256
TLS_ECDHE_RSA_WITH_AES_128_CBC_SHA256
TLS_ECDHE_RSA_WITH_AES_256_GCM_SHA384
TLS_ECDHE_RSA_WITH_AES_256_CBC_SHA384
- Navigate to .
- Select Application Profile.
- Enter the required details in the General tab as shown below:
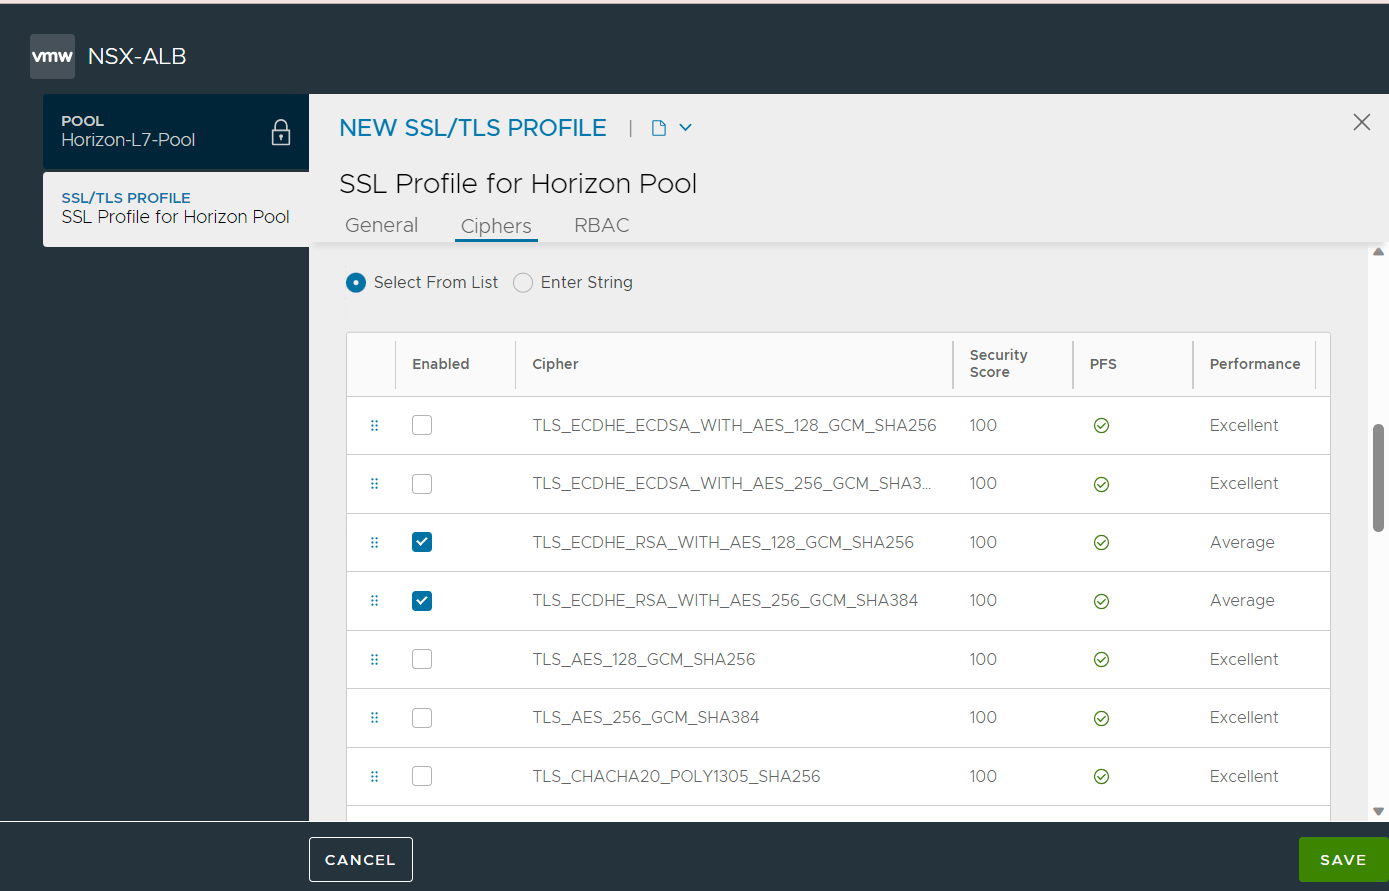
- Click the Ciphers tab and select the following ciphers
TLS_ECDHE_RSA_WITH_AES_128_GCM_SHA256
TLS_ECDHE_RSA_WITH_AES_128_CBC_SHA256
TLS_ECDHE_RSA_WITH_AES_256_GCM_SHA384
TLS_ECDHE_RSA_WITH_AES_256_CBC_SHA384
The Ciphers selected in the New SSL/TLS screen is as shown below:
- Click Save.
- Create Pools.
Pools maintain the list of servers assigned to them and perform health monitoring, load balancing, persistence, and functions that involve NSX Advanced Load Balancer-to-server interaction. A typical virtual service will point to one pool.
A pool includes the IP address of the UAG servers that is UAG server01 and UAG server02.
Create two pools:
For L7 (HTTPS) that is. Horizon-L7-pool
For secondary protocols named as Horizon-L4-pool
These two pools are required to attach to the two virtual services which will be created. Consistent hash, with source IP address as the key, must be configured as the hash algorithm to maintain source IP affinity.
To create the Horizon L7 Pool,
- Navigate to .
- Click Create Pool.
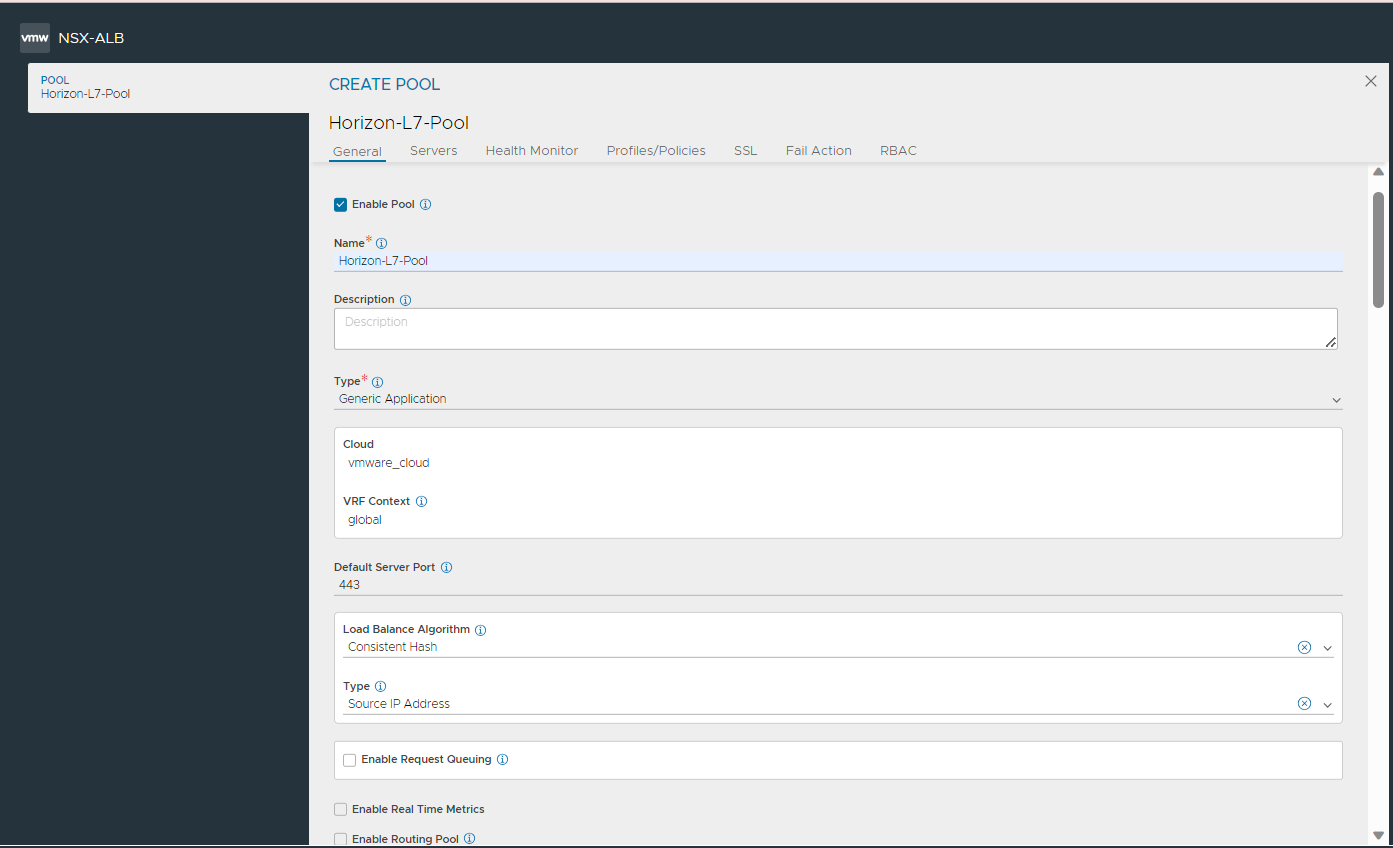
- In the New Pool screen, under the General tab, configure as follows:
Field
Value
Cloud
Select any VMware colud
Default Server Port
443
Load Balance Algorithm
Consistent Hash
Type
Source IP Address
The General tab of the CREATE POOL screen is as shown below:
- In the Servers tab, under Select Servers By, choose IP Group and select the IP group created with UAG as members.

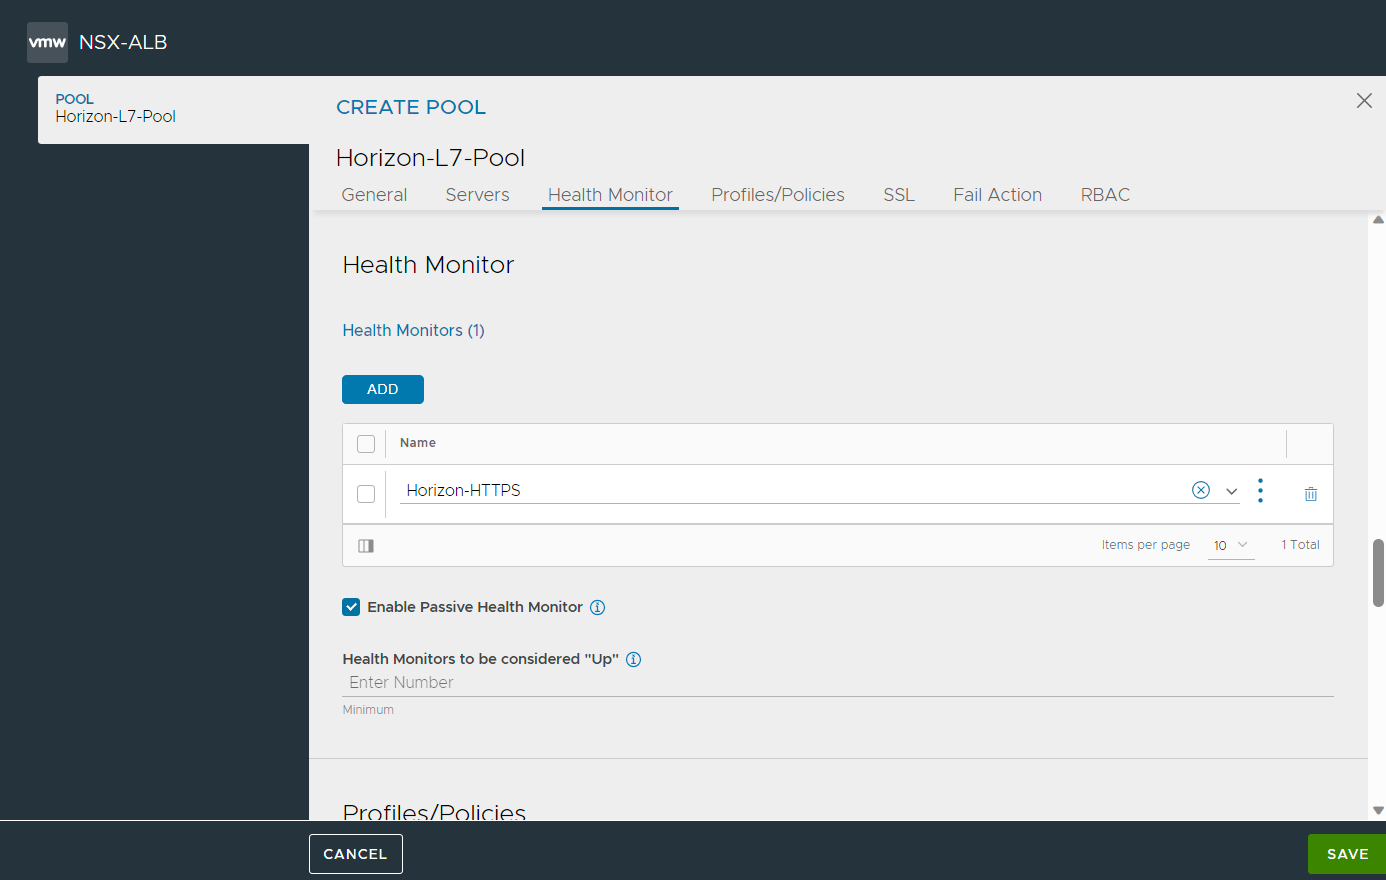
- Under the Health Monitor tab, click Add and select the Custom Health Monitor that was created.
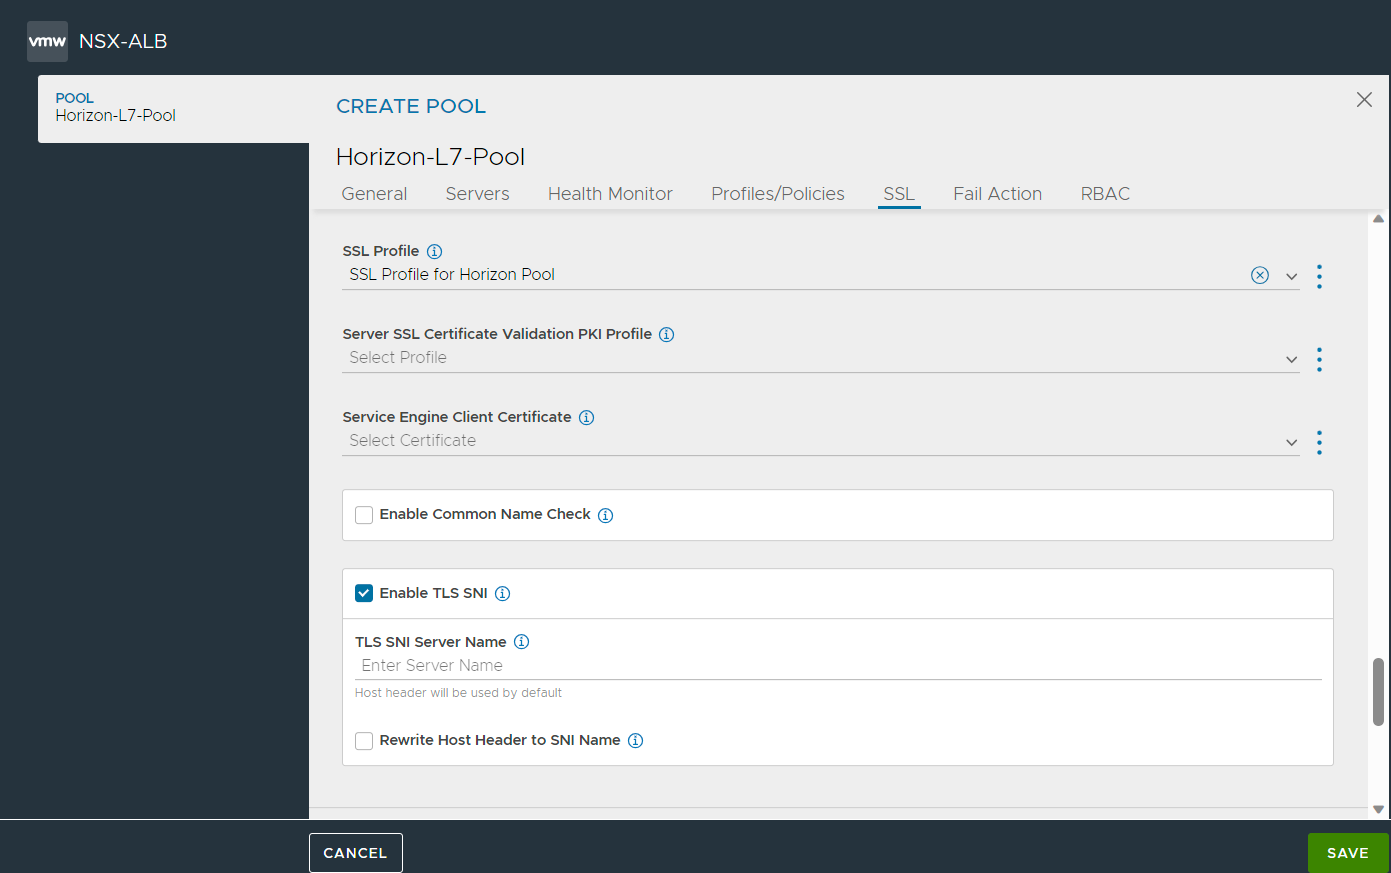
- Under the SSL tab, select the SSL Profile created for the L7 Pool.
- Click Save.
Similarly, create a pool with the name Horizon-l4-pool with the following configuration:
The CREATE POOL screen is as shown below:Tab
Field
Value
General
Cloud
Select any VMware Cloud
Default Server Port
443
Type
Source IP Address
Servers
Select Servers By
IP Group
Select IP Group
The IP group created earlier
Append Port To Host Name
Never
Health Monitor
Select Health Monitor
The HTTPS health monitor that was created
SSL
SSL Profile
The SSL profile created for the Horizon pool
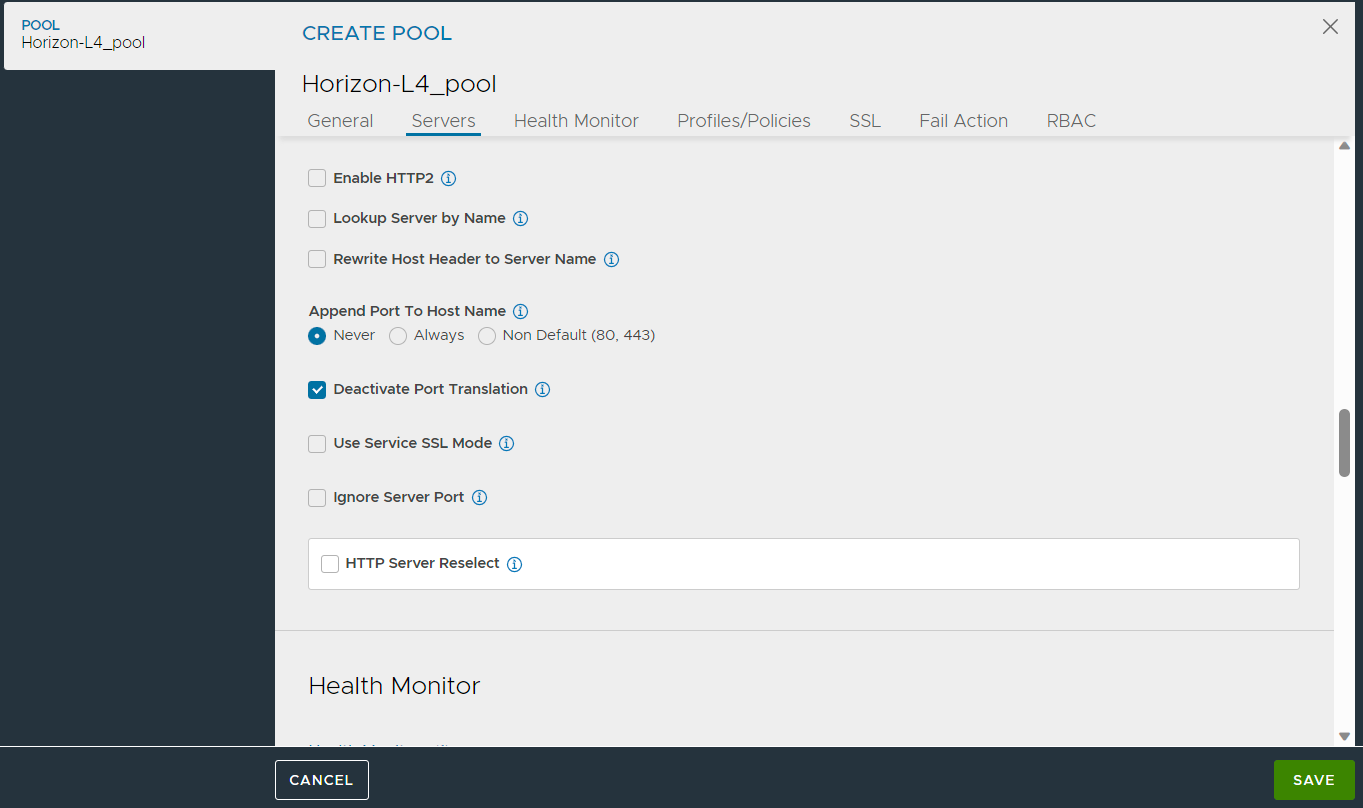
- Disable connection multiplexing
In UAG load balancing, deactivate connection multiplexing for the System-Secure-HTTP-VDI profile.
To deactivate connection multiplexing,
- Navigate to .
- Click the edit icon.
- Under the HTTP tab, ensure that the Connection Multiplex option is deactivated.
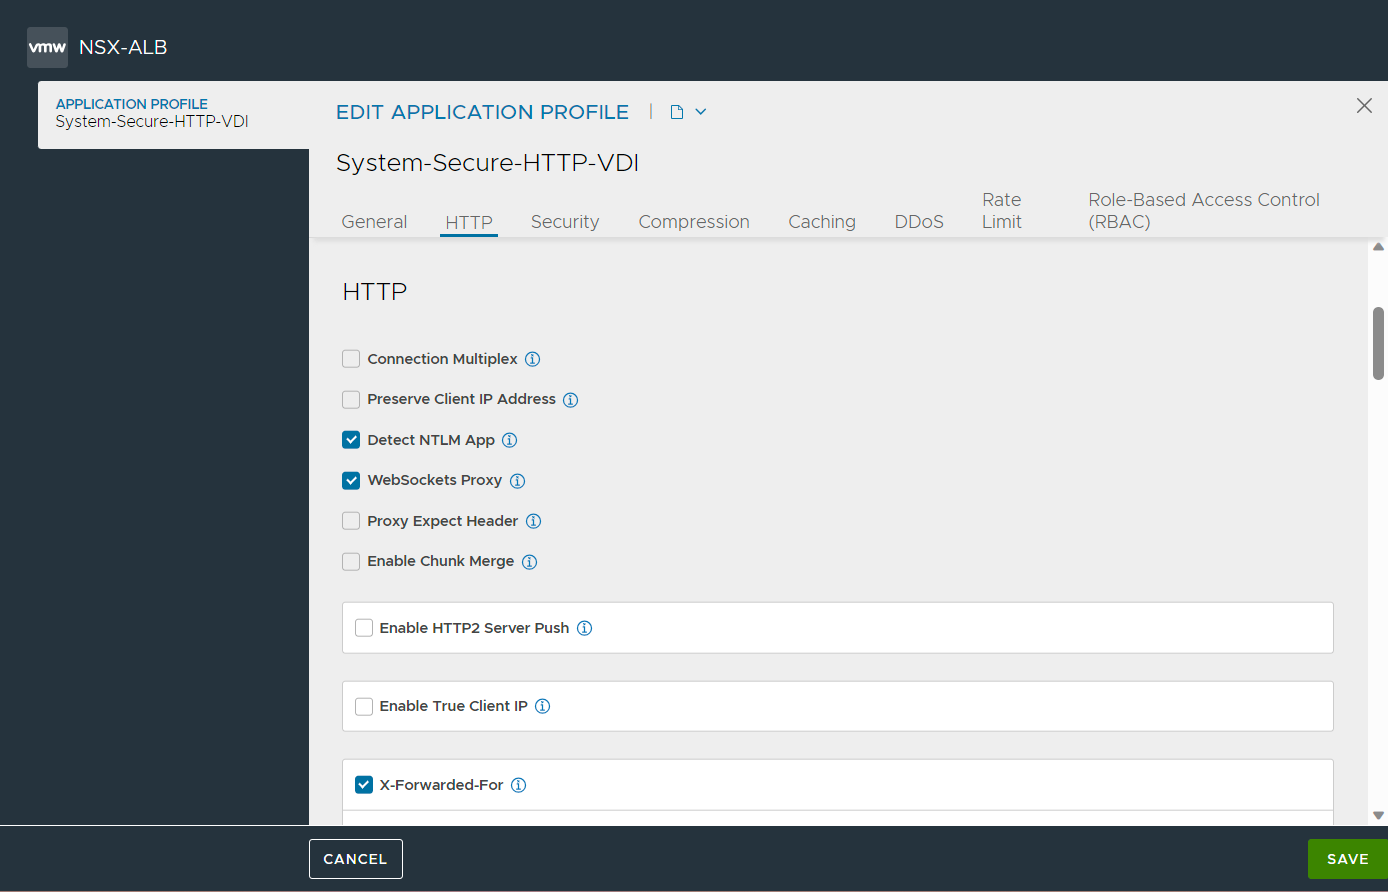
- Click Save.
- Create an L7 virtual service
The L7 virtual service requires an SSL profile with Accepted Versions selected as TLS 1.1 and TLS 1.2. Select the following Ciphers:
TLS_ECDHE_ECDSA_WITH_AES_128_GCM_SHA256
TLS_ECDHE_ECDSA_WITH_AES_256_GCM_SHA384
TLS_ECDHE_RSA_WITH_AES_128_GCM_SHA256
TLS_ECDHE_RSA_WITH_AES_256_GCM_SHA384
To create the new L7 virtual service,
- From the UI, navigate to .
- Click .
- In the Select Cloud dropdown menu, select the VMware cloud.
- Use System-Secure-HTTP-VDI profile. as the Application Profile.
- From the Pool dropdown menu, select the Horizon L7 Pool created.
- Under Service Port, click Add Port and enter 443 under Services and enable SSL for this port.
- Under SSL Settings, select the SSL Profile that was created for the virtual service.
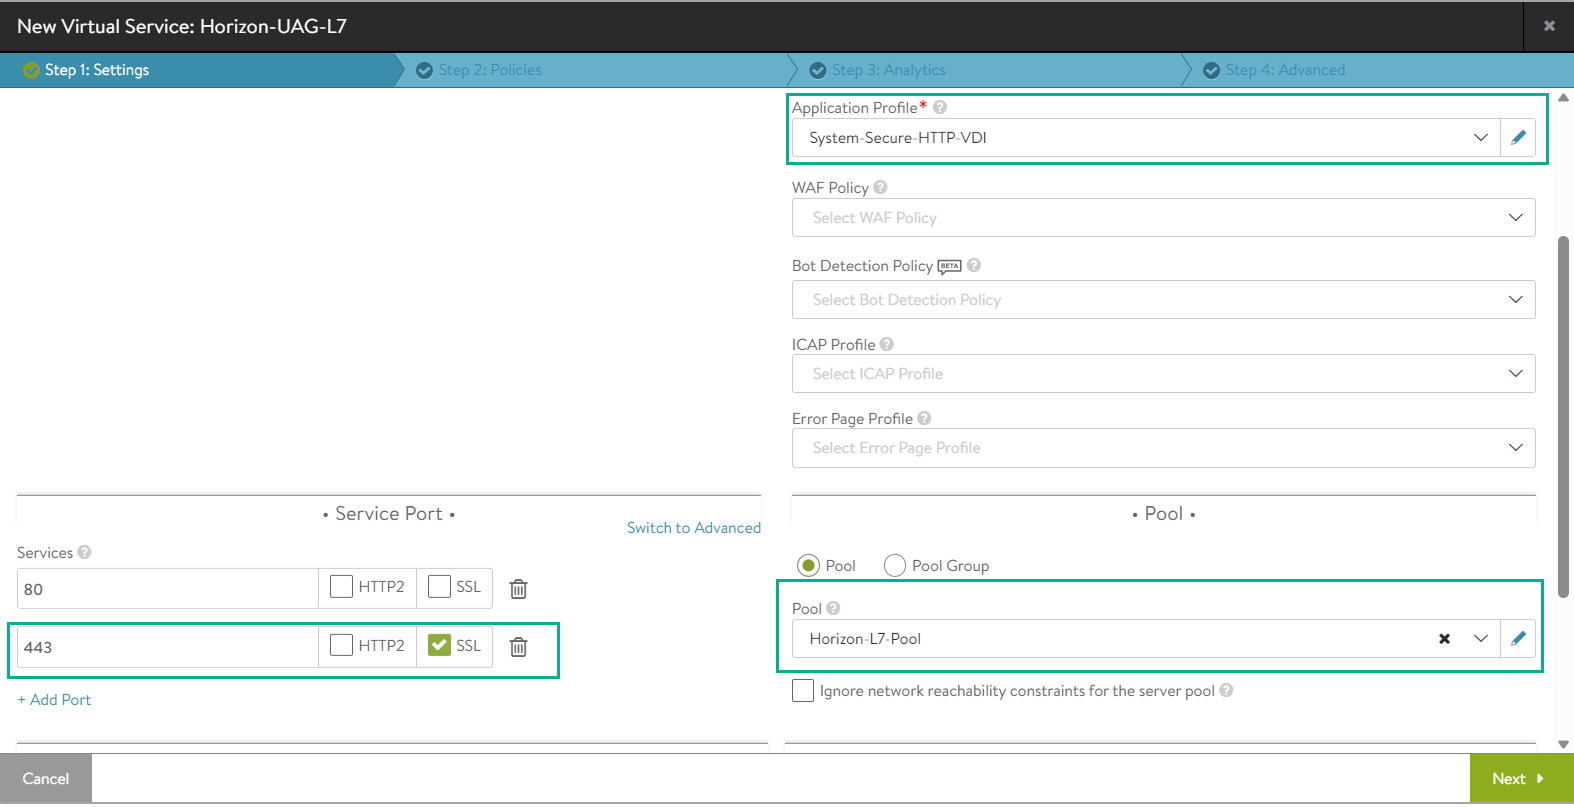
- Complete the virtual service configuration, as required and click Save.
- Create an L4 Virtual Service
Create another virtual service which will share the same IP address as that of the L7 VIP. This will make sure that we need only one virtual IP address for both the primary and secondary protocols. L7 virtual service will handle the primary protocol and the tunnel whereas L4 virtual service will handle other secondary protocols.
To create an L4 virtual service,
- Click .
- In the New Virtual Service screen, click Switch to Advanced under VIP Address.
- Select the L7 virtual service that was created as the Virtual Service for VIP Sharing.
- Select the Application Profile created in the previous steps.
- Under , click Switch to Advanced.
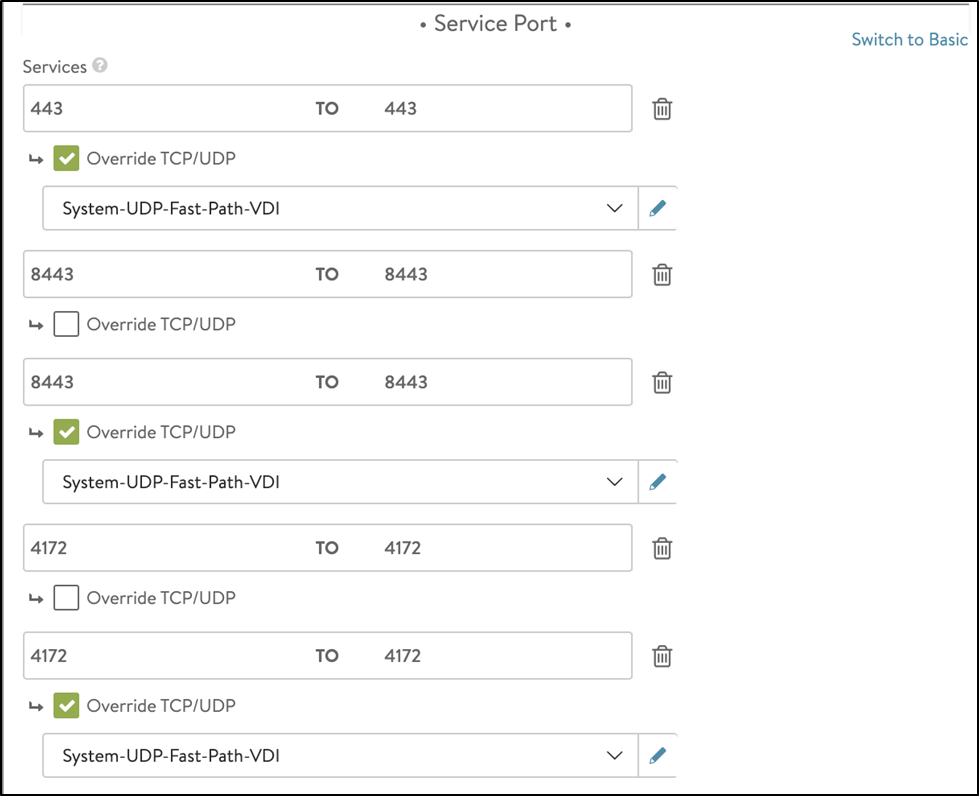
- Add the following port numbers for the secondary protocols:
443 UDP to override TCP/UDP and use System-UDP-Fast-Path-VDI as the profile
Add 8443 for Blast
Add 8443 UDP to override TCP/UDP and use System-UDP-Fast-Path-VDI as the profile
Add 4172 for PCoIP
Add 4172 UDP to override TCP/UDP and use System-UDP-Fast-Path-VDI as the profile
- Select the SSL Profile created for the virtual service.
- Click Next and Save.
With this, the configuration is complete and ready to use the NSX Advanced Load Balancer for Horizon.
Note:Ensure the following:
L4 and L7 pools have the same configuration.
The option Disable Port Translation is enabled under Advanced Settings for an L4 pool.
