


The main difference between the Default-User-Account-Profile and No-Lockout-User-Account-Profile is the value set for Max Login Failure Count. The Max Login Failure Count is the number of login attempts allowed before the lockout of the user account. By default, this value is set to 3 for the default profile.
For the no lockout user profile, Max login Failure Count is set to 0. It means that a user can have unlimited login failures without the risk of an account getting locked.
In GSLB deployments, it is recommended to use No-Lockout-User-Account-Profile. It prevents the locking of the user account due to various reasons. Sometimes, an admin account gets locked when one node of the GSLB pair tries to reach another node with the admin credentials, but the other node is not reachable.
Configuring using UI
To check or edit the attributes for No-Lockout-User-Account-Profile, navigate to and click the pencil icon on the right side of No-Lockout-User-Account-Profile.
You can use the existing No-Lockout-User-Account-Profile available or create a new one. Max Login Failure Count must be set to 0 for any profile to work like a No-Lockout-User-Account-Profile.
To create a new user, follow the below steps:
Login to the NSX Advanced Load Balancer Controller using admin credentials.
Navigate to .
Click Create.
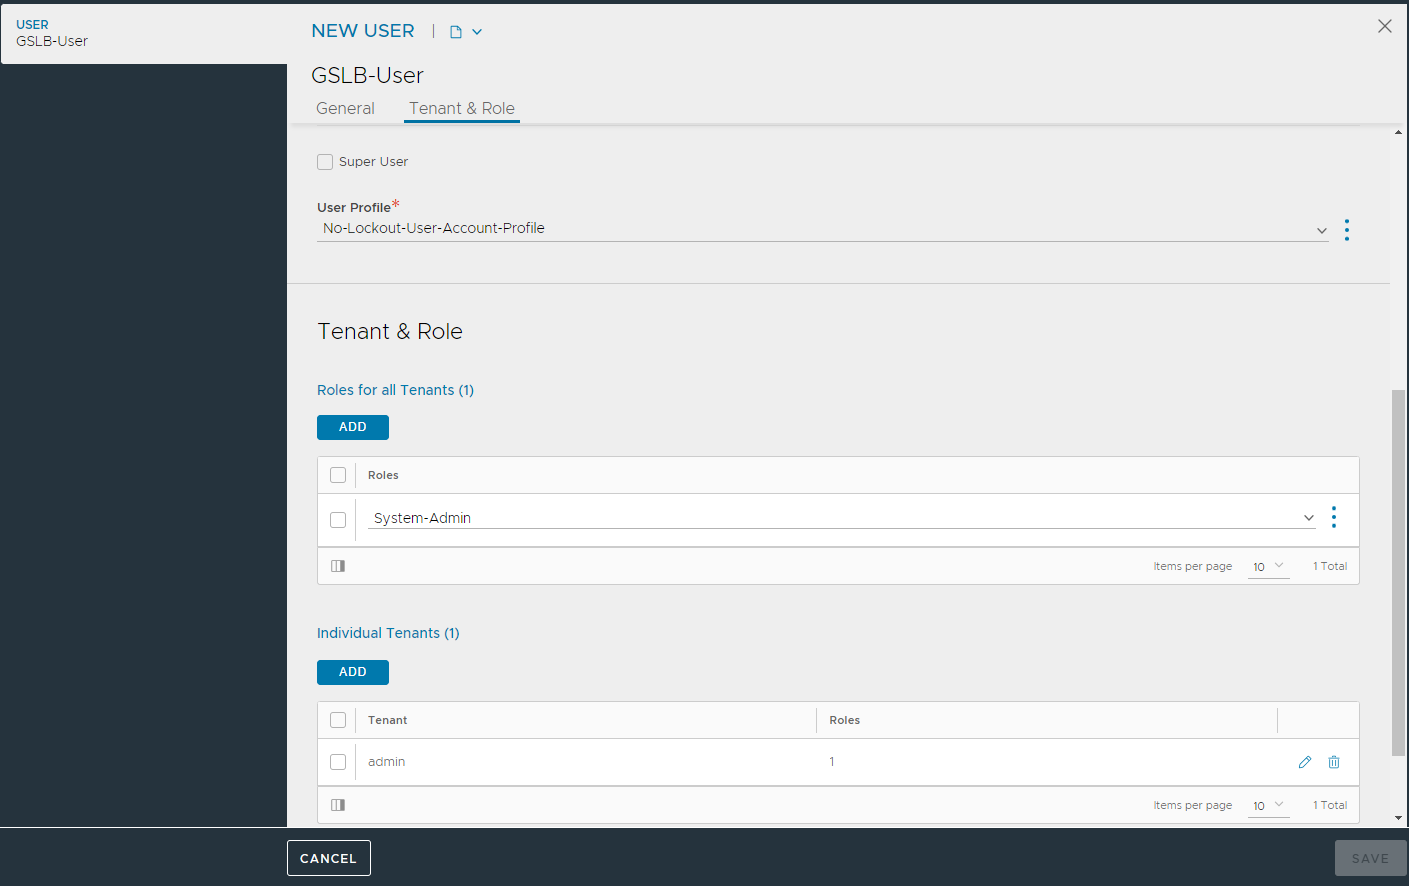
Provide the username of your choice.
Select the No-Lockout-User-Account-Profile from the drop-down menu for User Profile.
Use desired Tenant and Role for this new user.
Click Save.
Use the same user created in the previous step while doing GSLB configuration. For example, the user admin must be replaced with the newly created user (GSLB-User) with No-Lockout-User-Account-Profile.

For more information, see GSLB Site Configuration.
