


A valid account is required for access to NSX Advanced Load Balancer through the web interface, REST API, or CLI. To configure or manage NSX Advanced Load Balancer user accounts, you need a user account with write access to the Accounts section. This is defined by the role assigned to the user account. The admin user account is a unique account used for initial setup of NSX Advanced Load Balancer.
Default System Accounts
By default, the NSX Advanced Load Balancer installation includes a number of pre-configured user accounts that serve specific purposes. Unlike custom user accounts, these accounts cannot be deactivated or removed.
- admin
-
The admin account exists on both the Controller and Service Engine of NSX Advanced Load Balancer.
It is the default administrator user-name for the system and cannot be changed.
The default shell is Linux bash.
From Linux prompt, use shell command to access the CLI shell.
admin is the only NSX Advanced Load Balancer account with its password automatically synchronized with Linux.
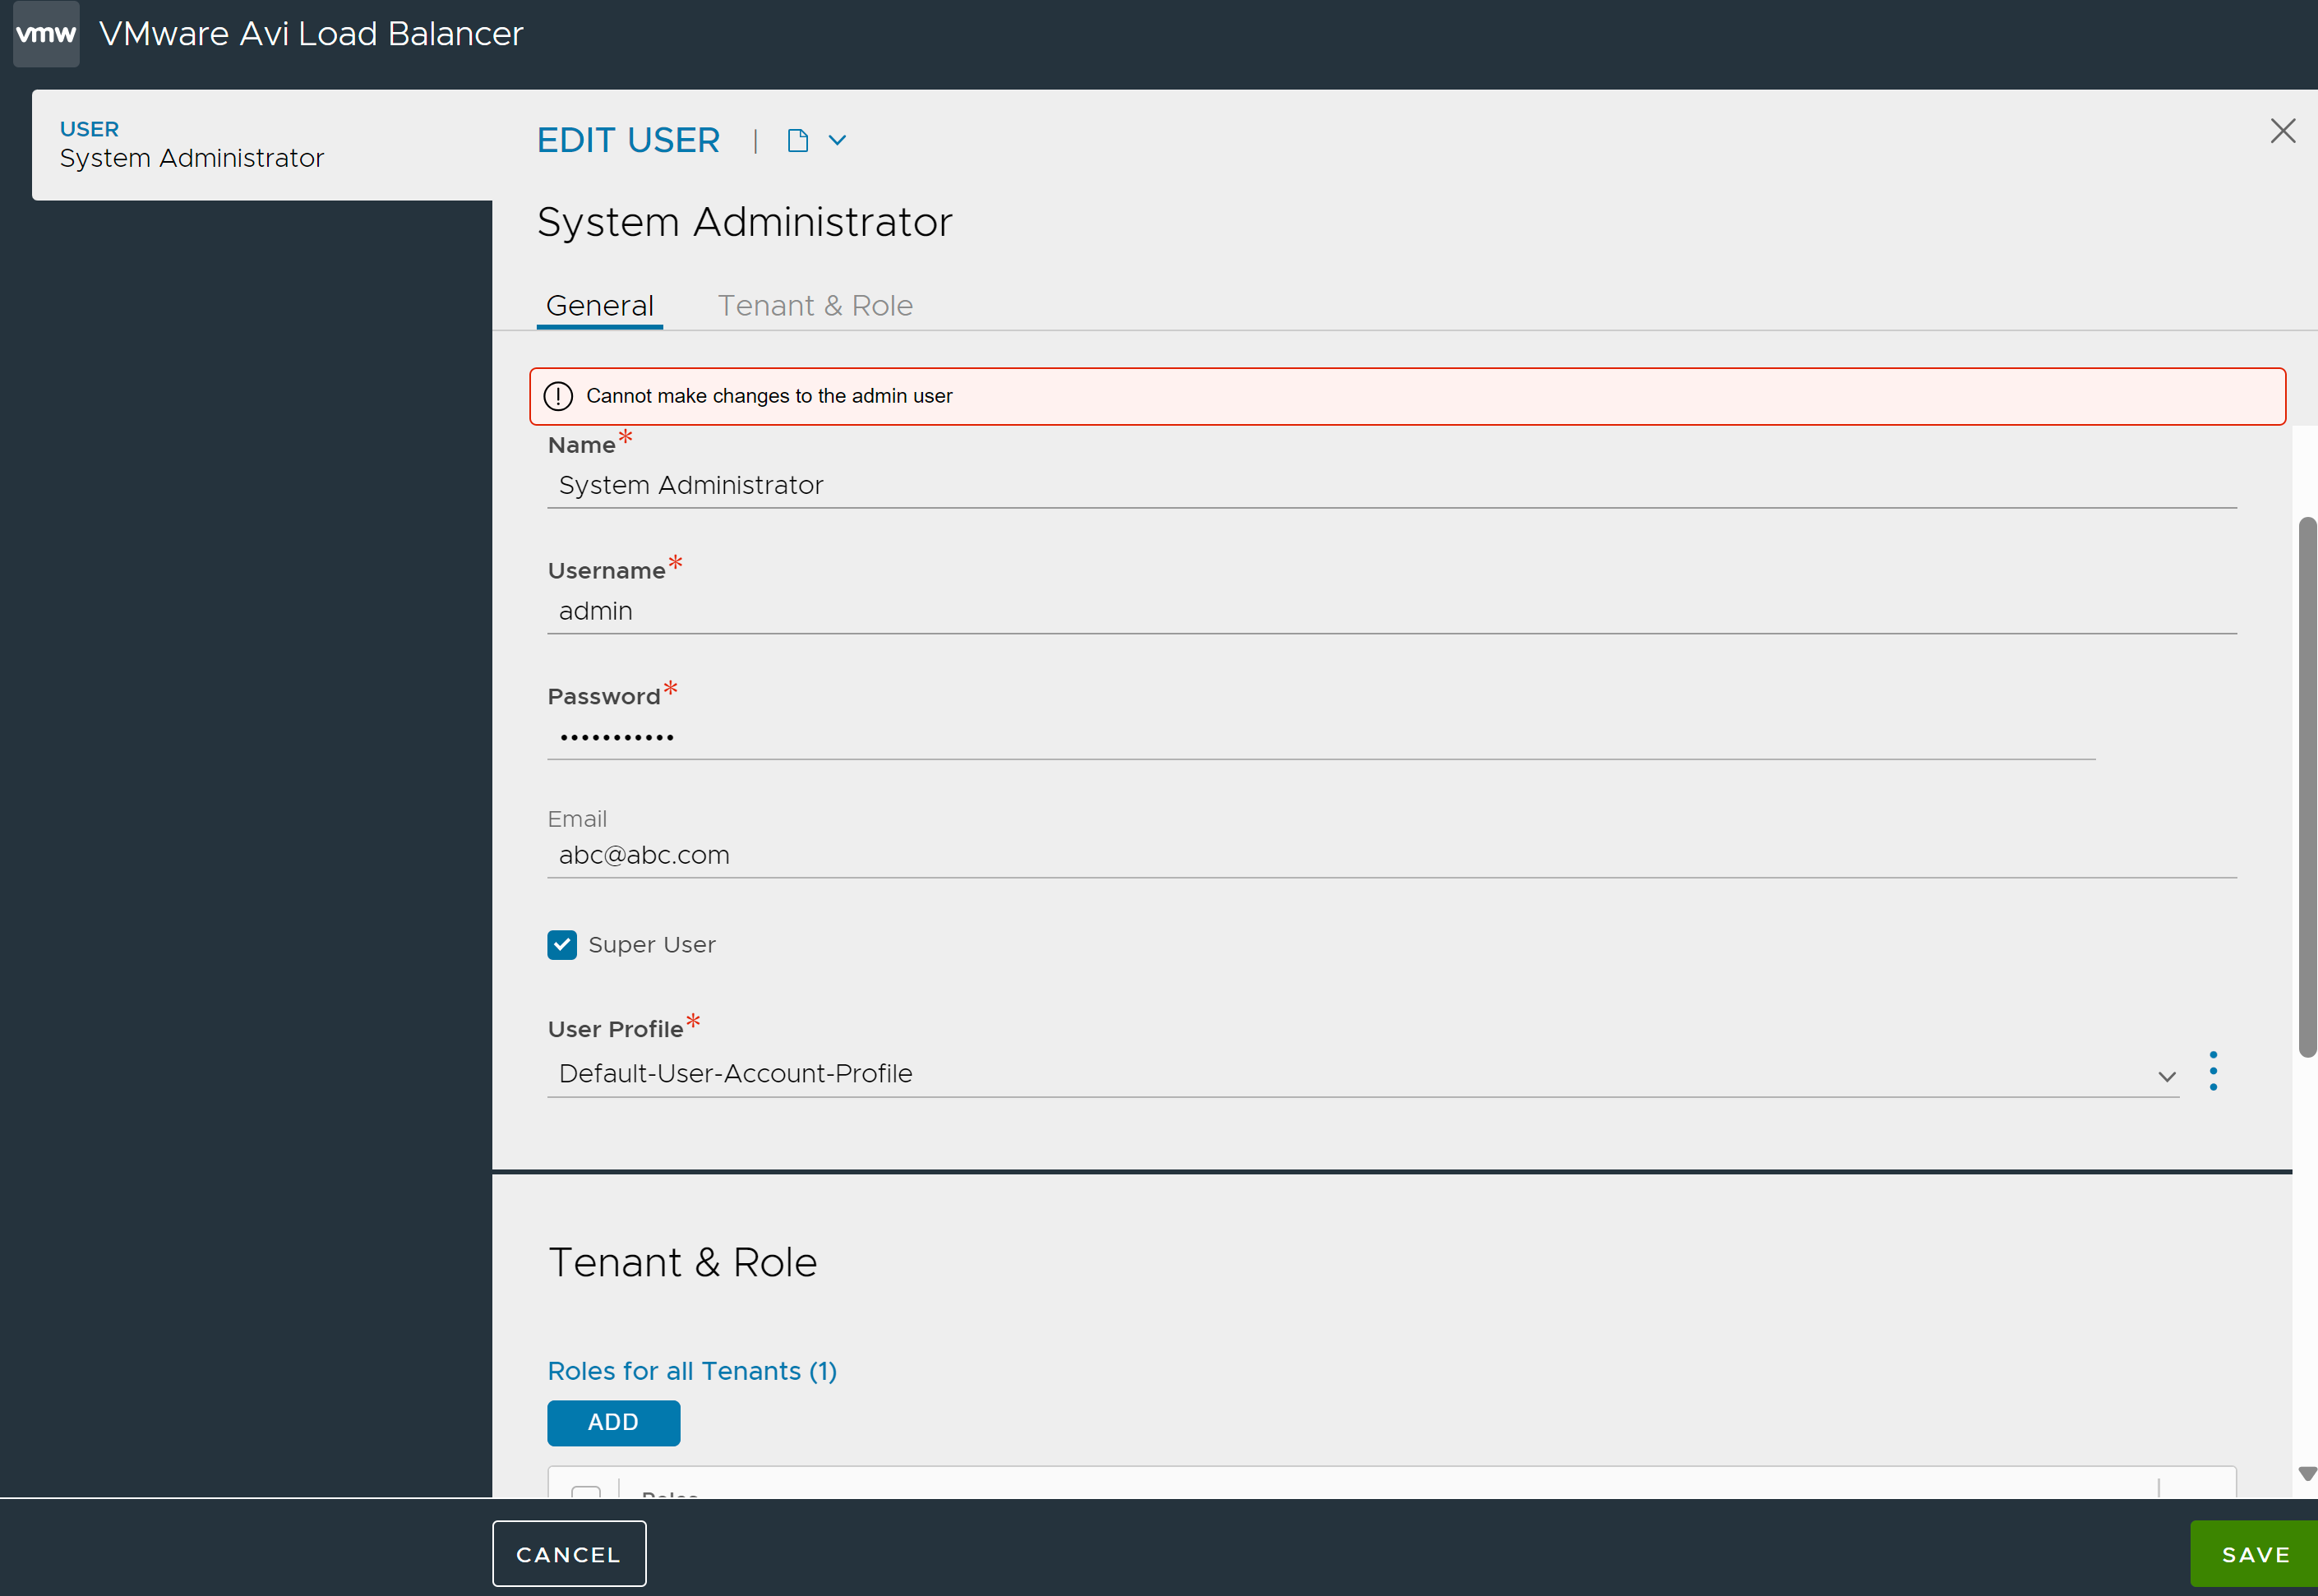
admin account has the Super-user field enabled in the Controller. Any changes to the admin account are not allowed.
User is in the sudoers list.
Default password for admin user - The initial default password of the Controller admin user is changed from admin to a strong password. This password is available in the portal where release images are uploaded and is accessible only to customers having an account on the portal. Additionally, SSH access to the Controller with this default password is not allowed until the user changes the default password of the admin user. Once the password is changed, SSH access to the admin user is permitted. For more information on default password, see Strong Default Admin Password.
Password is synchronized to the SEs.
Account has super-user status with full access to all tenants.
This account is always authenticated through the local user-db. It does not use any configured remote authentication.
- cli
-
This account is used to launch the CLI shell by logging into the Controller. Users will SSH to a Controller IP address, use cli as the username at the Linux prompt, and then be presented with the NSX Advanced Load Balancer CLI shell access username and password prompt, which requires their custom credentials.
It is password-less from the Linux perspective with the CLI shell as the default shell that prompts for a user name/password.
CLI shell is launched in a container with no persistent storage.
- aviseuser
-
This account exists on the Controller and SE.
It is the internal user for SE-to-Controller communication through SSH tunnel.
No password is required. It uses unique key-pair per SE.
User is not in the sudoers list on the Controller.
User is in the sudoers list on the SEs.
- avictlruser
-
This account exists on Controller only.
It is the internal user for Controller-to-Controller communication through SSH.
No password is required. It uses unique key-pair per Controller.
User is in sudoers list.
Create a Local User Account
Navigate to .
Under Authentication, select Local. For more information on configuring Access Settings, see Web Interface Access Settings.
Navigate to and click Create.
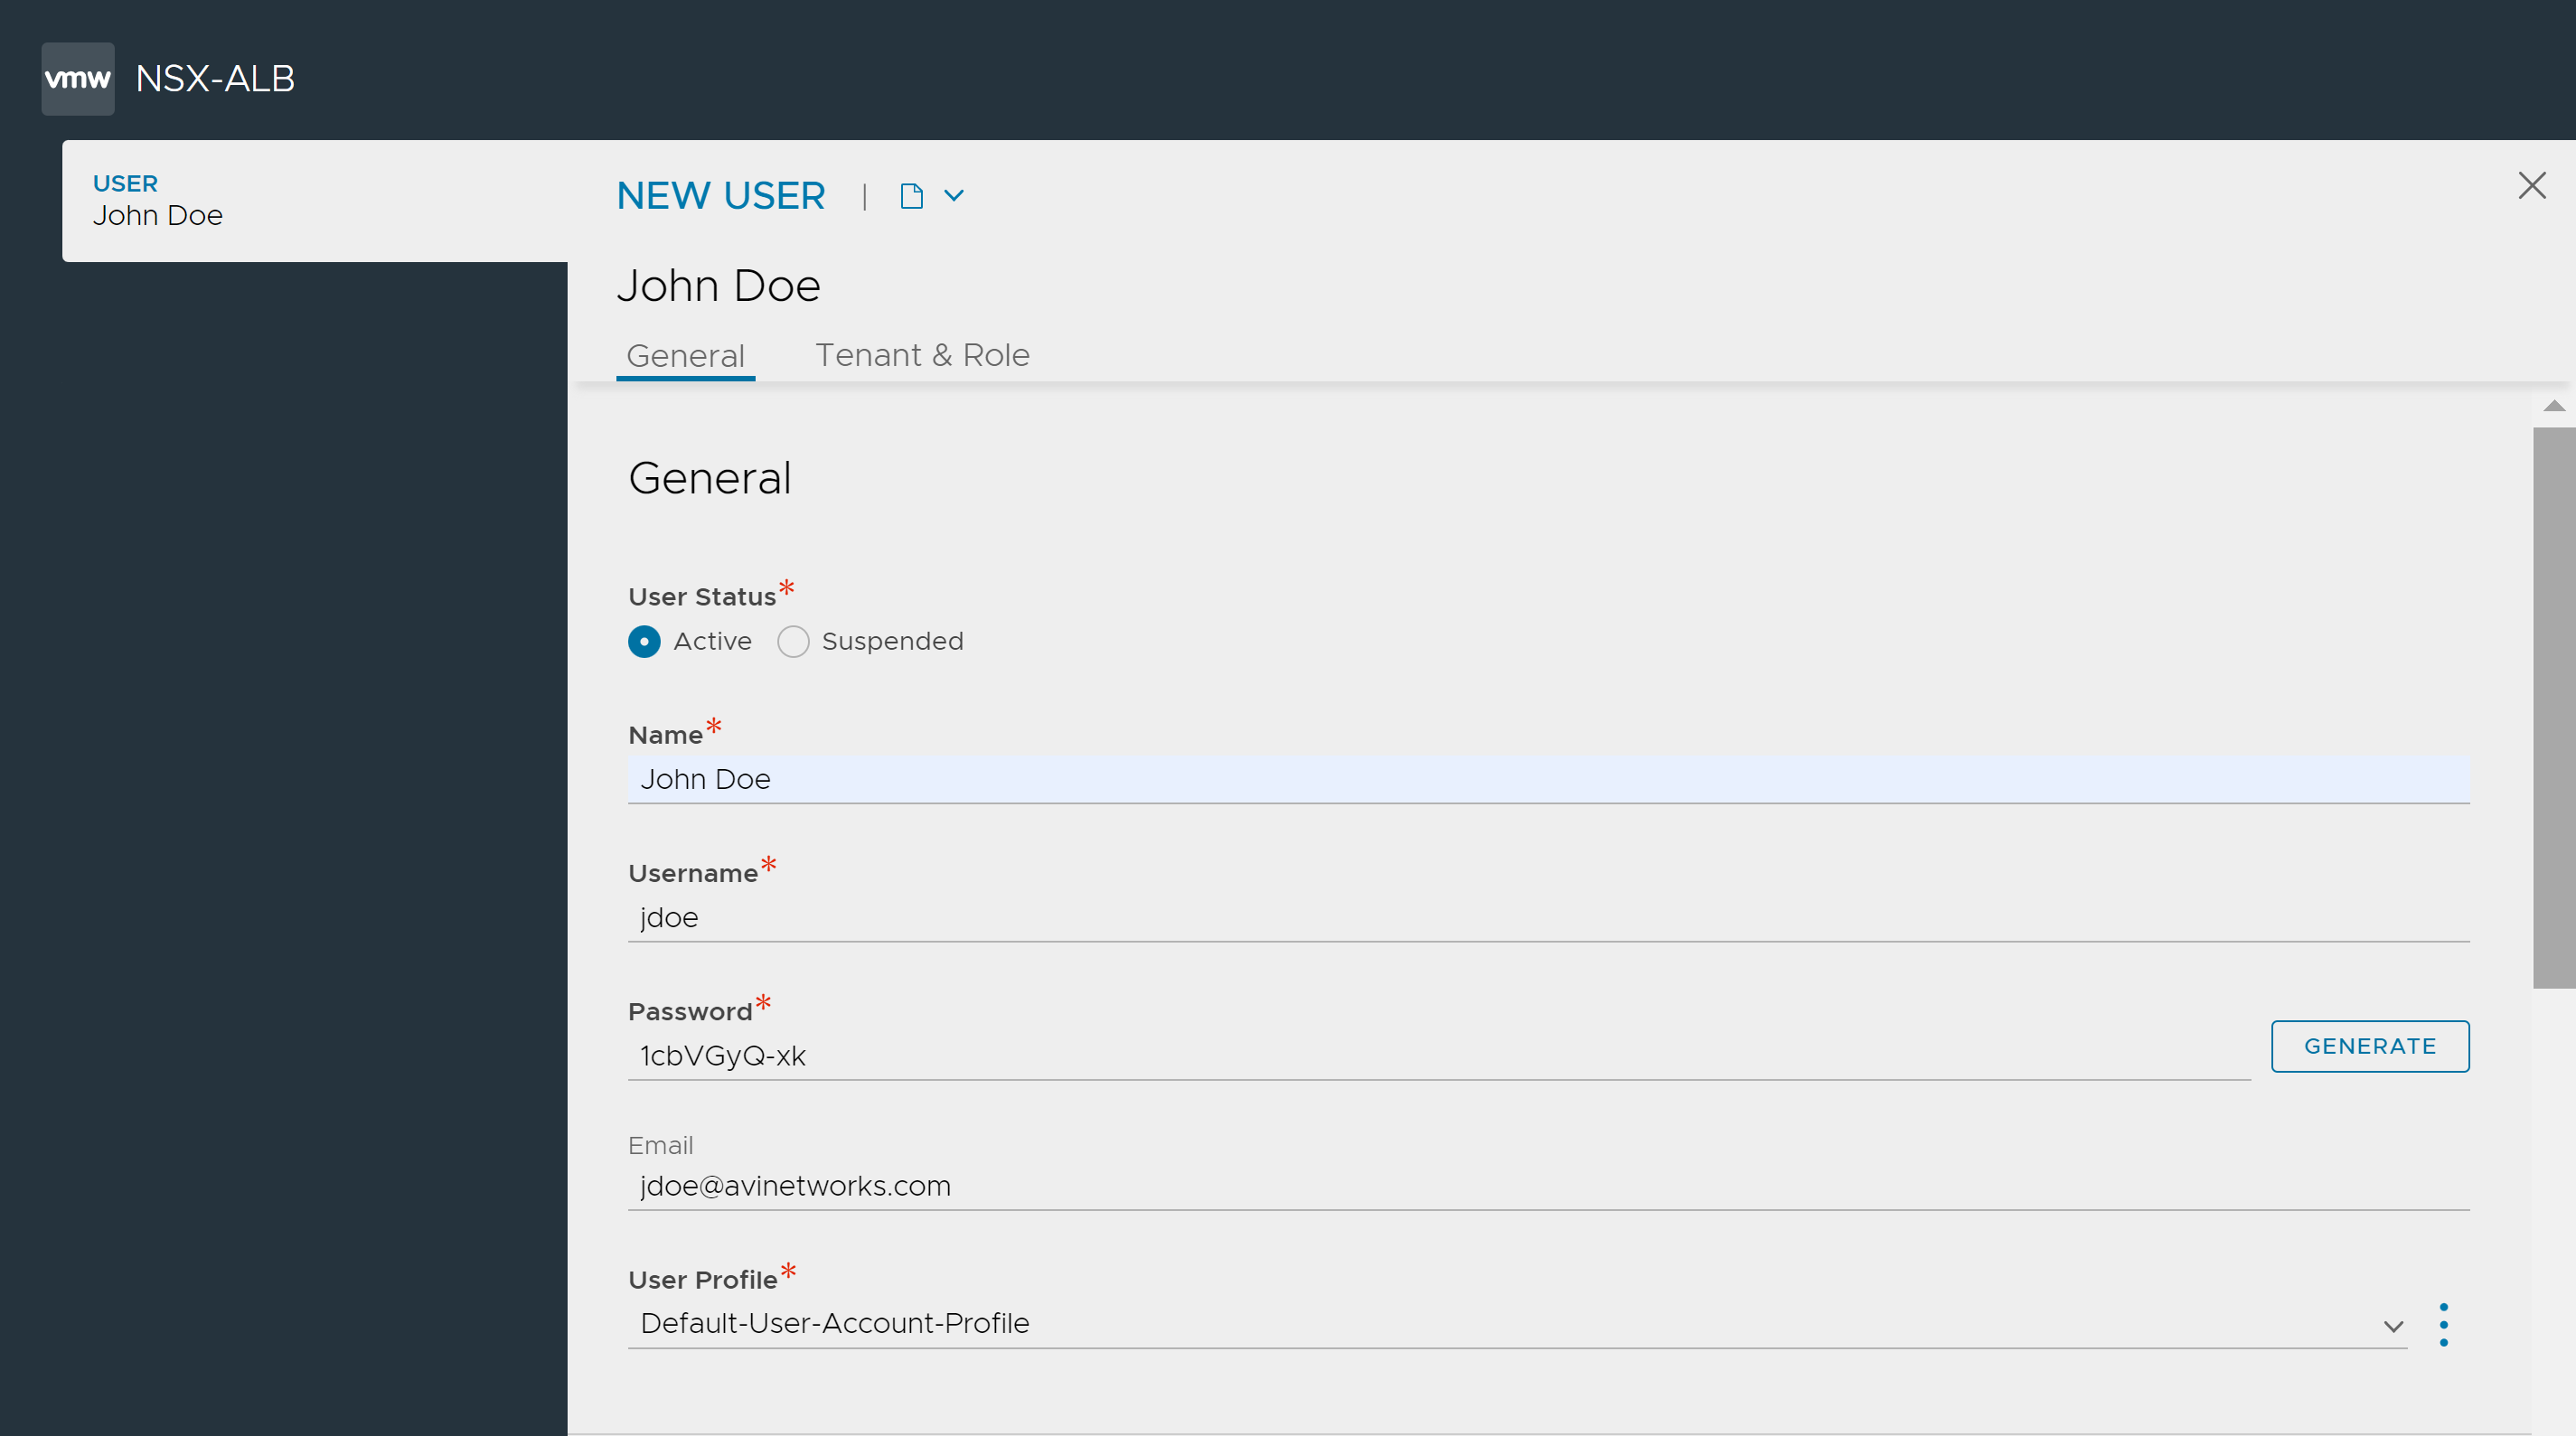
If the user requires the same privileges as the admin account, select the Super User check box. For more information, see Super User Accounts.
In the Name field, enter the full name of the user.
In the Username field, enter the name that the user will supply when signing into NSX Advanced Load Balancer, such as jdoe or [email protected].
In the Password field, either enter a case-sensitive password or click the GENERATE button to create a random password for the new user.
In the Email field, enter the email address of the user. This field is used when a user loses their password and requests to have it reset.
From the User Profile drop-down menu, select Default-User-Account-Profile or No-Lockout-User-Account-Profile as required. For more information, see User Profile.
Under Tenant & Role, select the areas of the NSX Advanced Load Balancer system to which the user account will be allowed access. For each system area, the role defines whether the user account has read, write, or no access. NSX Advanced Load Balancer comes with predefined roles. In addition, users who have write access to the Accounts section of NSX Advanced Load Balancer can customize the predefined roles and create new roles. For more information, see User Roles.
Click Save.
Modifying the Admin User Account
The admin user account can be modified only from the EDIT MY ACCOUNT screen:
1. Click the user icon at the right-hand top corner.
2. Click My Account.
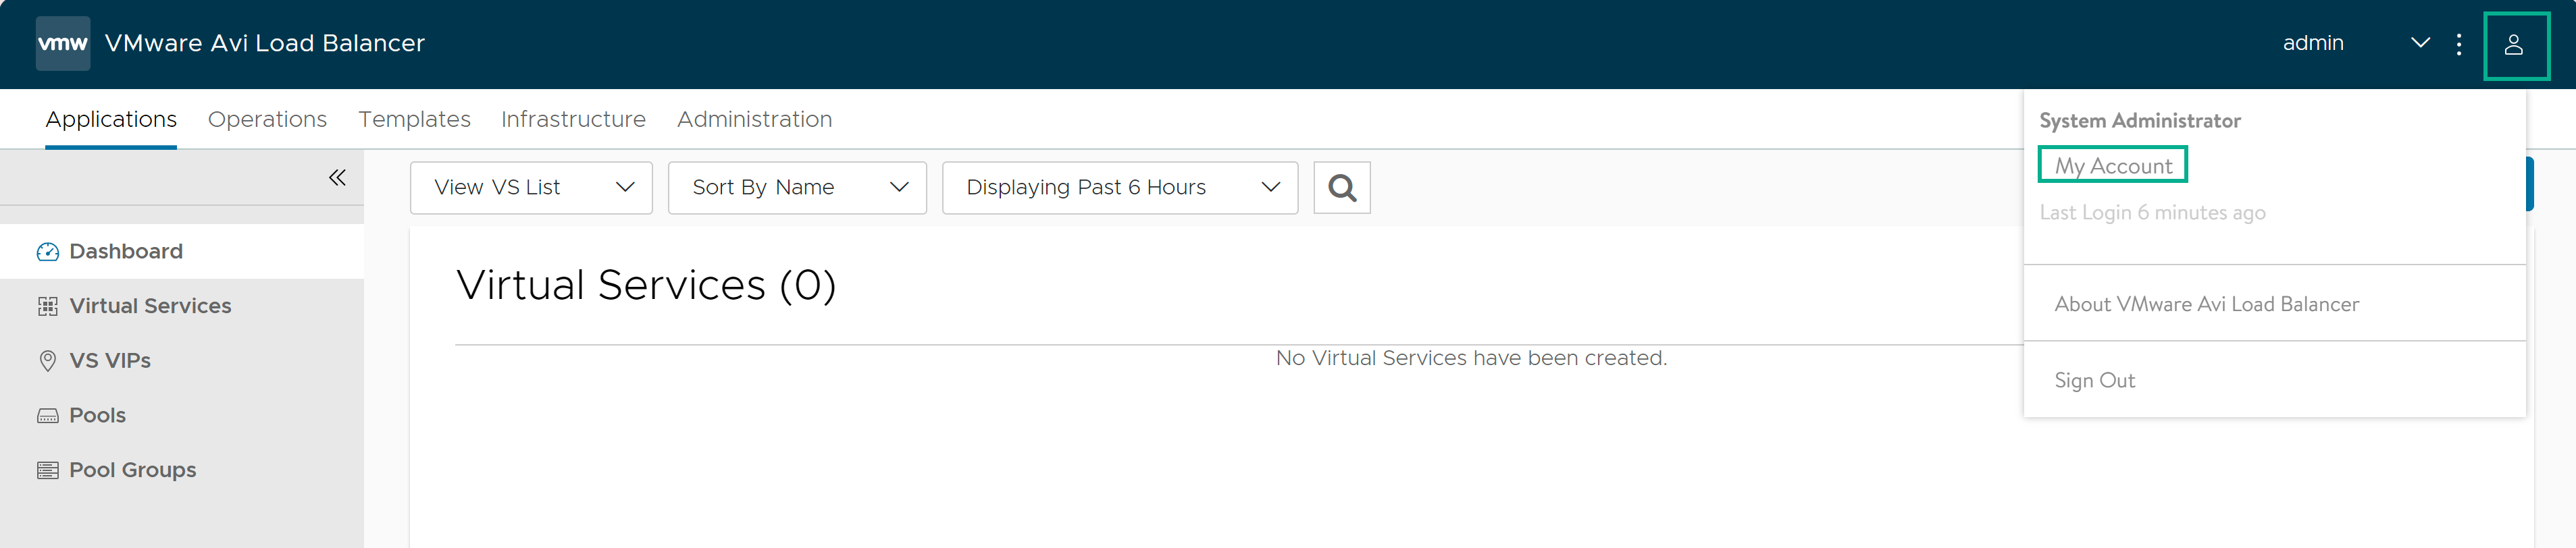
3. Modify the details as required in the EDIT MY ACCOUNT screen.
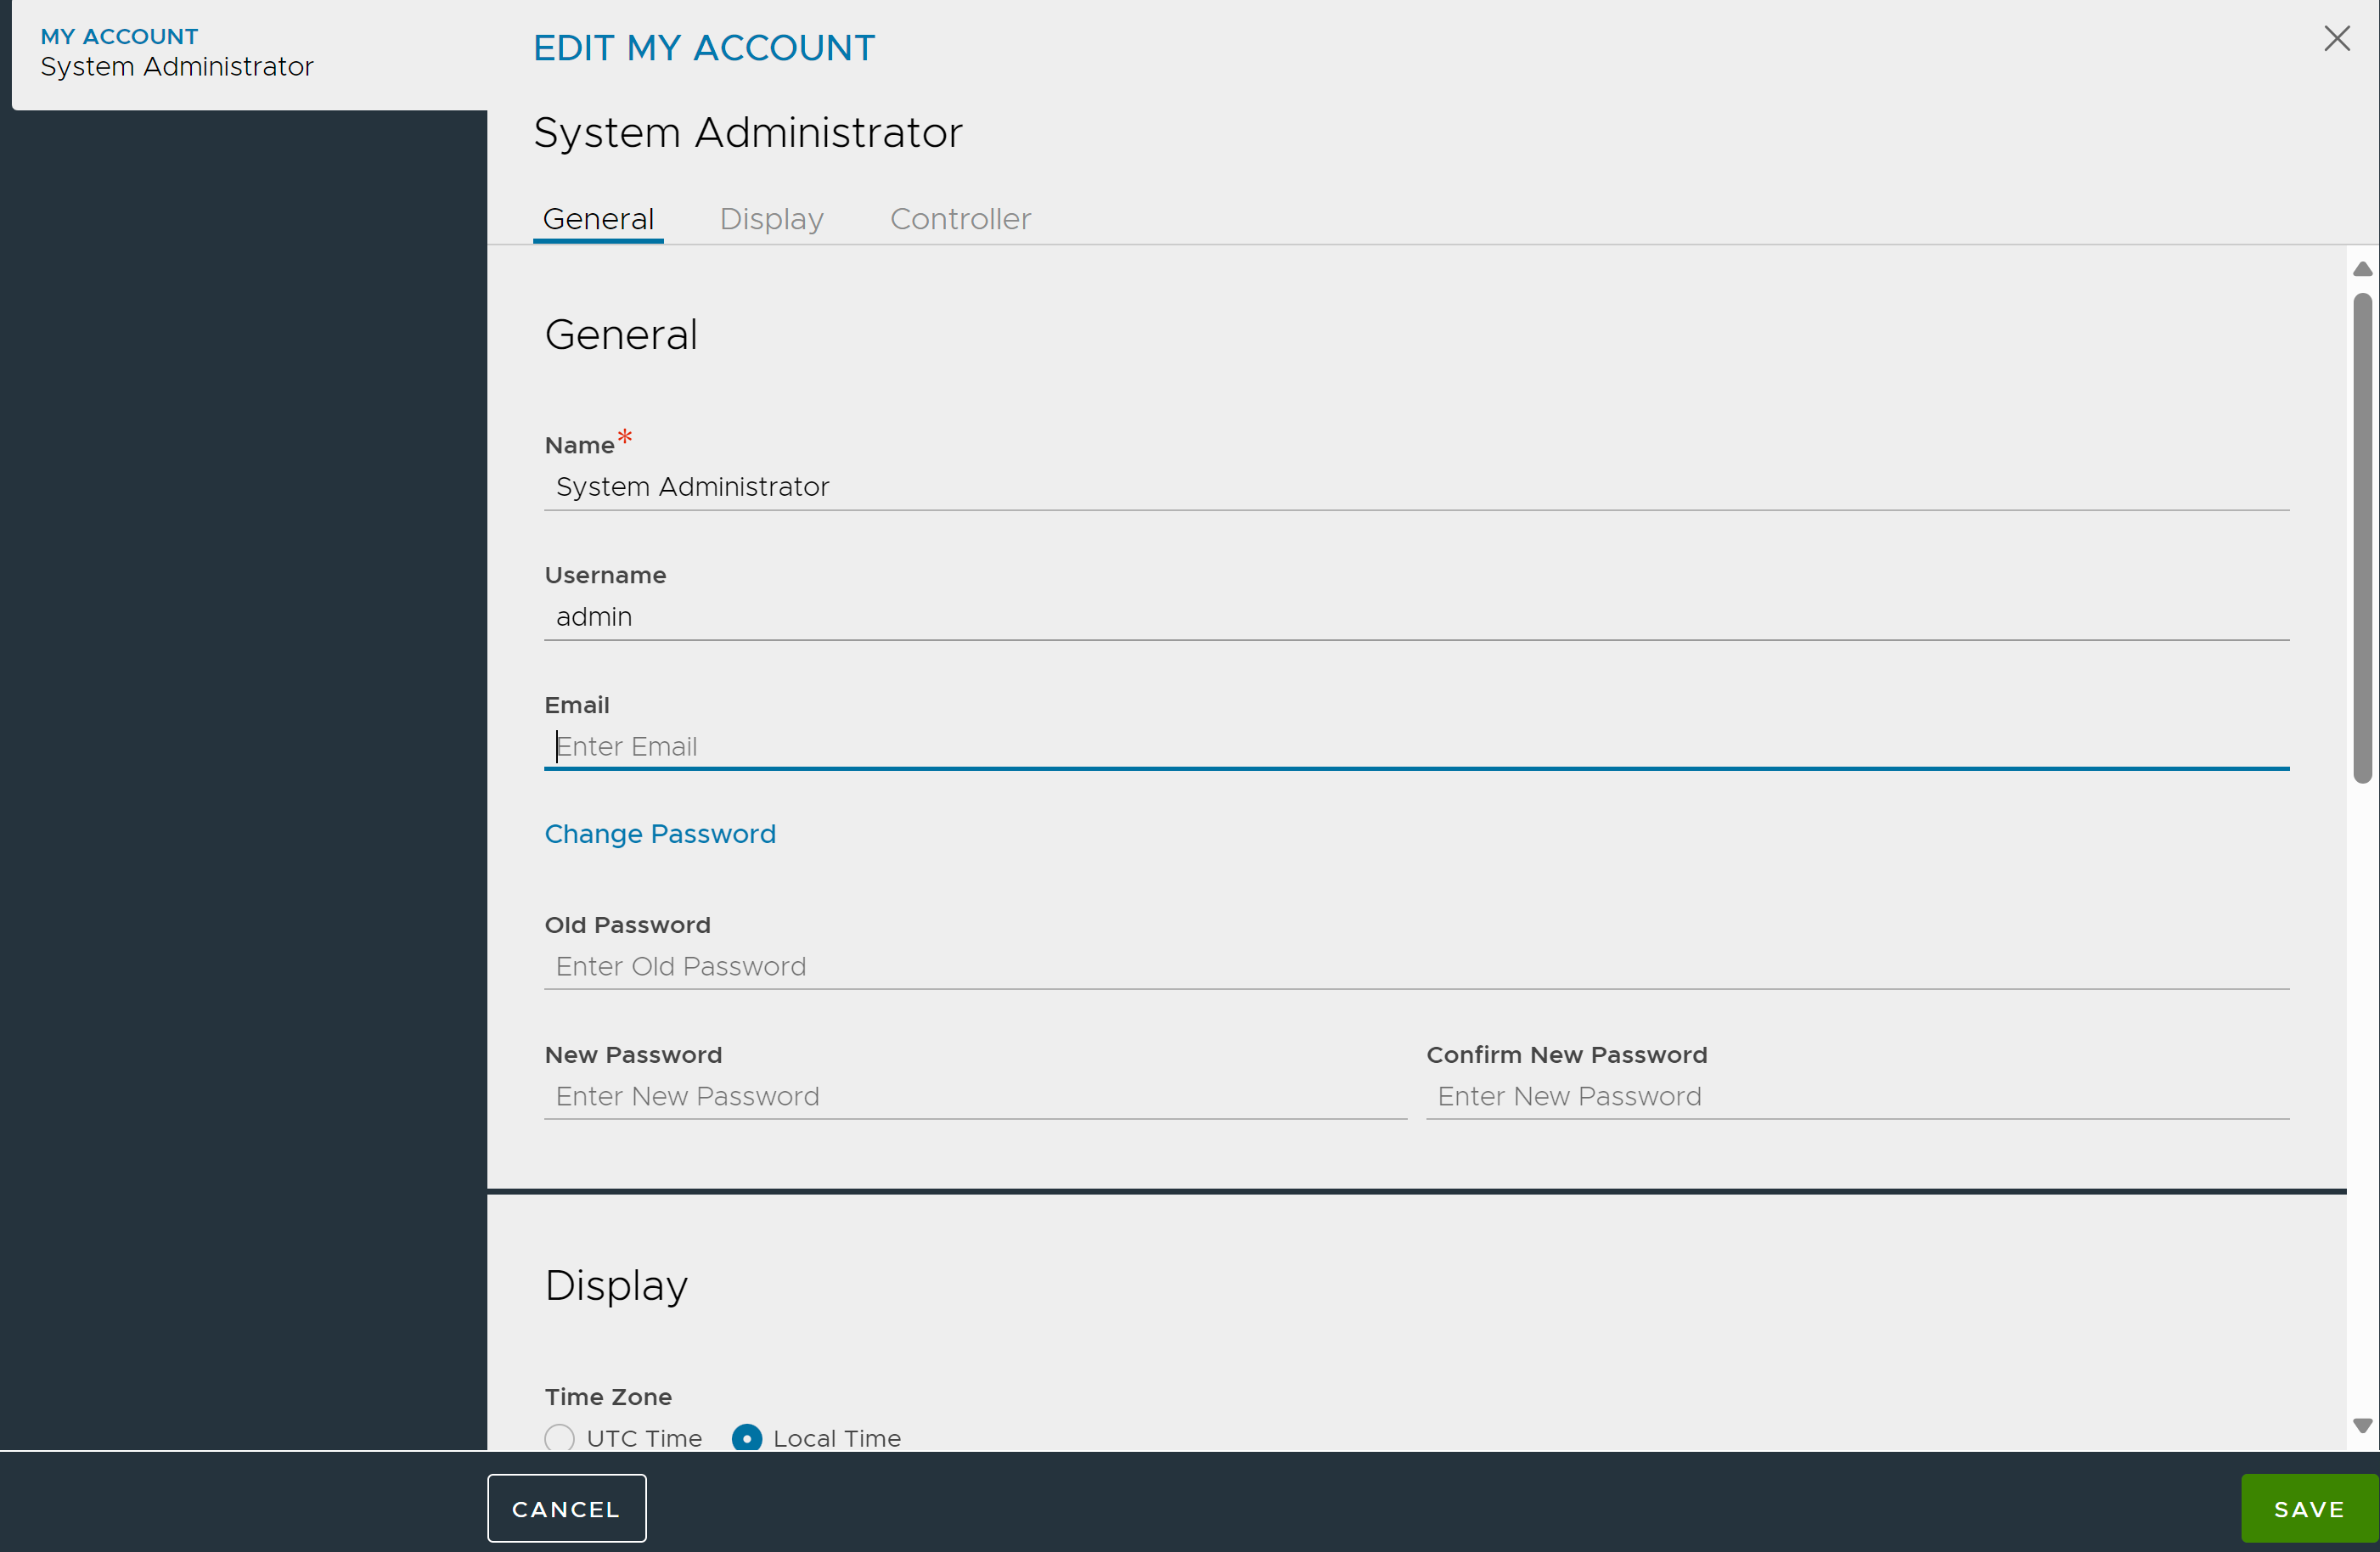
4. Click Save.
Modifying the admin user account from the EDIT USER screen (Administration > Accounts > Users) displays the error: Cannot make changes to the admin user.
User Account Table
To view the NSX Advanced Load Balancer user accounts that are in its local user database, navigate to .
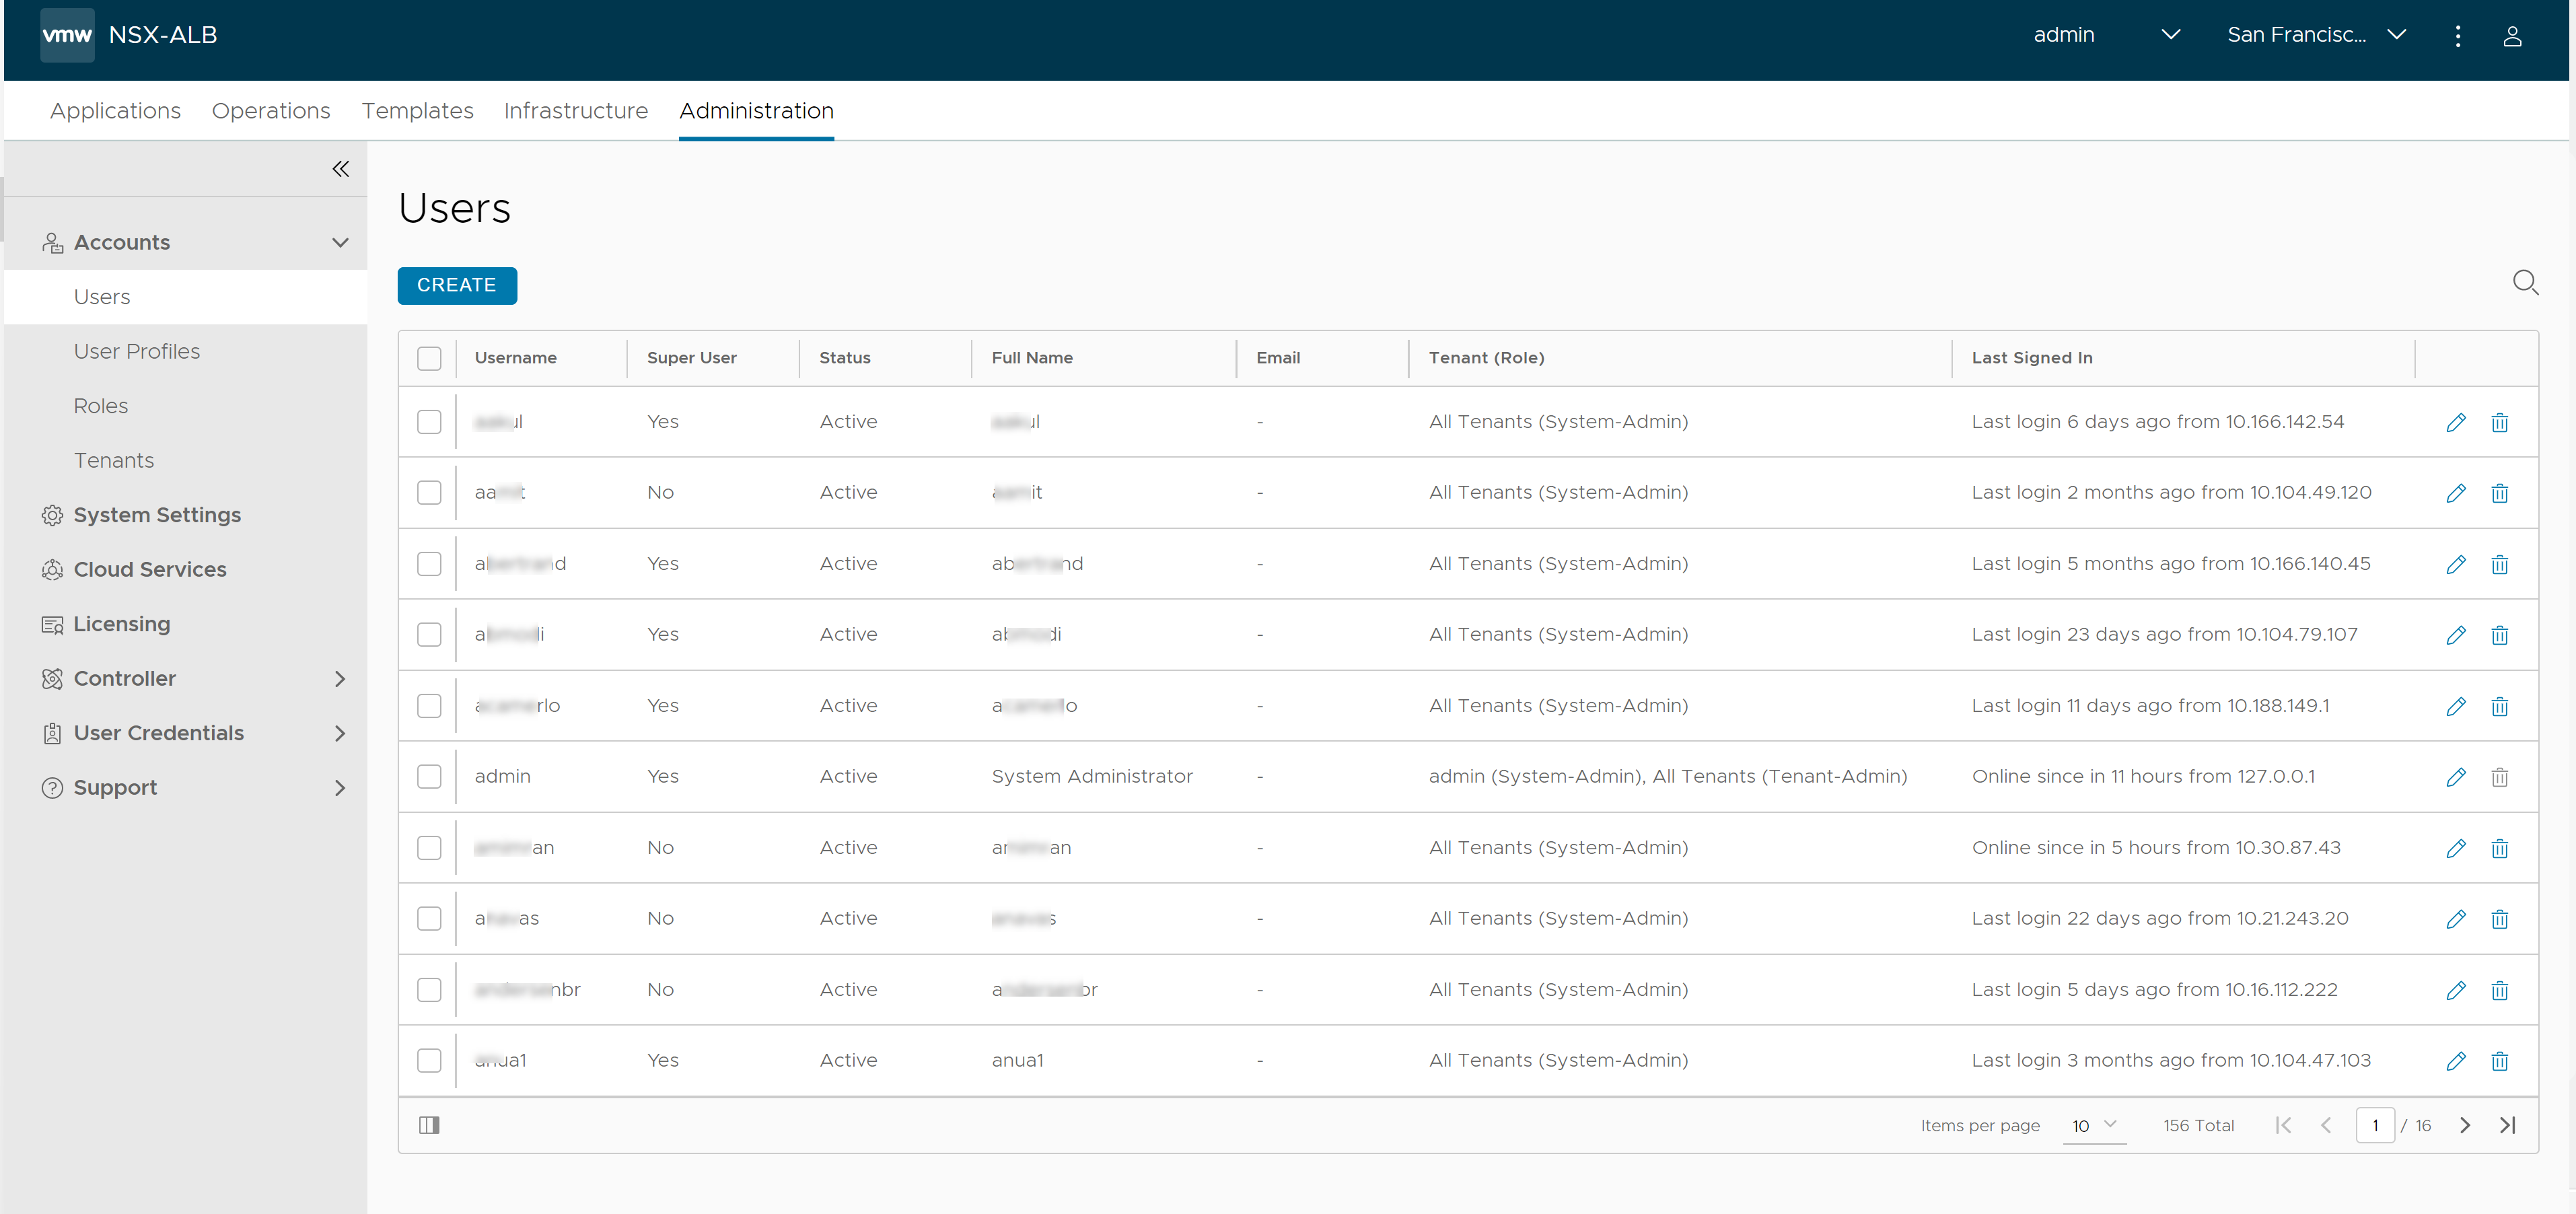
Field |
Description |
|---|---|
Username |
The account name used to log in to NSX Advanced Load Balancer through its management interfaces, that is, web interface, REST API, or CLI. |
Super User |
Super user access provides write access to all resources within NSX Advanced Load Balancer. |
Status |
Diplays the status of the user account, whether it is Active or Suspended. |
Full Name |
Full name of the user. |
Email address of the user. |
|
Tenant (Role) |
Access settings (write, read, or no access) for each type of resource within NSX Advanced Load Balancer. |
Last Signed In |
System time on the NSX Advanced Load Balancer Controller when the user most recently logged in. |
Super User Accounts
The user accounts in NSX Advanced Load Balancer can be enabled for Super User access. Super User access provides write access to all resources within the NSX Advanced Load Balancer and also automatically provides access to all tenants.
The admin account that is created during the installation of the Controller automatically has Super User access enabled.
Optionally, super user access can be enabled in other user accounts, on an individual basis.
To enable super access for a NSX Advanced Load Balancer user account, select the Super User check box in the account configuration.
A non-admin user that is also a super-user can be associated with the NSX Advanced Load Balancer Controller by using the attach <Avi Controller IP> command. This provides the Controller container access to the user as an avidebuguser. The avidebuguser is also a sudo user. Attach option is available only if the local or remote user is configured as a super-user.
For detailed information about configuring user accounts, see Create a User Account.
SSH Access for the Super User
During debugging, there is a need to access different NSX Advanced Load Balancer entities such as Controllers and Service Engines. The NSX Advanced Load Balancer includes a mechanism whereby the Controller can self-authenticate a super-user access to any entity in the system.
A user can attach to the Service Engine using the attach serviceengine <se_ip> command. The admin user is authenticated using a token and logs into the SE as admin.
A sample illustration is as follows:
login as: admin
Pre-authentication banner message from server:
|
| Avi Cloud Controller
|
| Avi Networks software, Copyright (C) 2013-2017 by Avi Networks, Inc.
| All rights reserved.
|
| Management:   10.10.10.1/22               UP
| Gateway:      10.79.186.1                    UP
|
| Controller 1 demo environment
|
End of banner message from server
[email protected]'s password:
The copyrights to certain works contained in this software are
owned by other third parties and used and distributed under
license. Certain components of this software are licensed under
the GNU General Public License (GPL) version 2.0 or the GNU
Lesser General Public License (LGPL) Version 2.1. A copy of each
such license is available at
http://www.opensource.org/licenses/gpl-2.0.php and
http://www.opensource.org/licenses/lgpl-2.1.php
Last login: Wed Aug 17 14:32:15 2022 from 10.16.113.99
admin@10-79-187-241:~$
SSH Users and Keys
The Controller and SEs use SSH for secure management communication. The communication falls into two categories, Controller-to-SE, and administrator-to-Controller.
Controller-to-SE Communication
This requires an SSH user who exists on both the Controller and the SEs, and a copy of the SSH user’s public key on the NSX Advanced Load Balancer SEs. Though SSH setup is automated for some installation types such as installation into VMware with write access, other installation types require manual setup of these SSH resources. For more information, see Public Key Management on SE Hosts topic in the VMware NSX Advanced Load BalancerInstallation Guide.
Create SSH User
To create an SSH user on the NSX Advanced Load Balancer Controller, use the following steps.
An SSH user and key that already exists can be used. They must still be added to the Controller using these steps. When creating the user account, the existing key for the user can be added by copying and pasting it or by importing the key file.
Navigate to .
Click Create.
Enter the SSH user name (for example, root) in the Name field.
Select SSH as Credentials Type.
In Authentication section, select SSH Key.
In Keys section, select Generate SSH Key Value Pair to create a key pair for the user.
Click Generate and Save.
If the user already exists, you can add the user to the NSX Advanced Load Balancer by entering the user name, selecting Import Private Key, or either copying and pasting or importing the key file.
Download Public Key File
After creating an SSH user on the NSX Advanced Load Balancer Controller, perform the following steps to download the user public key from the Controller.
Navigate to .
Click the three dots next to the SSH user and select Download Public Key.
Restricting admin SSH access to Service Engines
By default, the user can connect directly to an SE via SSH using the system’s admin credentials.
If there is a security requirement to disallow this connectivity, it is possible to disable this access using the following CLI configuration:
[admin:<controller-ip>]: > configure serviceengineproperties
[admin:<controller-ip>]: seproperties> se_runtime_properties
[admin:<controller-ip>]: seproperties:se_runtime_properties> no admin_ssh_enabled
[admin:<controller-ip>]: seproperties:se_runtime_properties> save
[admin:<controller-ip>]: seproperties> save
Securing Remote Access to Service Engines
With direct SSH access to SEs disabled, it is still possible for a user with the Super User privilege to remotely access a Service Engine's shell through a secure tunnel from the Controller using the attach serviceengine command from the Controller CLI. This will automatically log in to the SE using an internal user account (avidebuguser) via PKI authentication - the Super User does not need to know the default admin account credentials. The avidebuguser account also has passwordless sudoer privileges.
Users without the Super User privilege cannot establish remote connections to an SE through this method, even if the user has the default admin account credentials.
The attach serviceengine command can only be used from a CLI shell running directly on the associated Controller. A remote shell or a shell launched in a container on the Controller (via SSH with the cli username) will not be able to attach to the service engine.
A user with the Super User privilege can launch a CLI shell directly on the Controller without requiring to know the default admin password as follows:
ssh cli@<controller-ip>
(Log in to the container CLI shell with Super User account.)
[admin:<controller-ip>]: > attach controller <controller-ip>

avidebuguser@<controller-ip>:~$ shell
(Log in to the second non-container CLI shell with Super User account.)
The Super User can now attach to service engines:
[admin:<controller-ip>]: > attach serviceengine <service-engine>
For more information, refer to the following topics:
