


This section explains the steps to configure legacy HA using the web interface.
Creating an SE Group for each Active/Standby Pair of SEs
Navigate to . Select the required cloud.
Click CREATE.
Specify a name for the SE group.
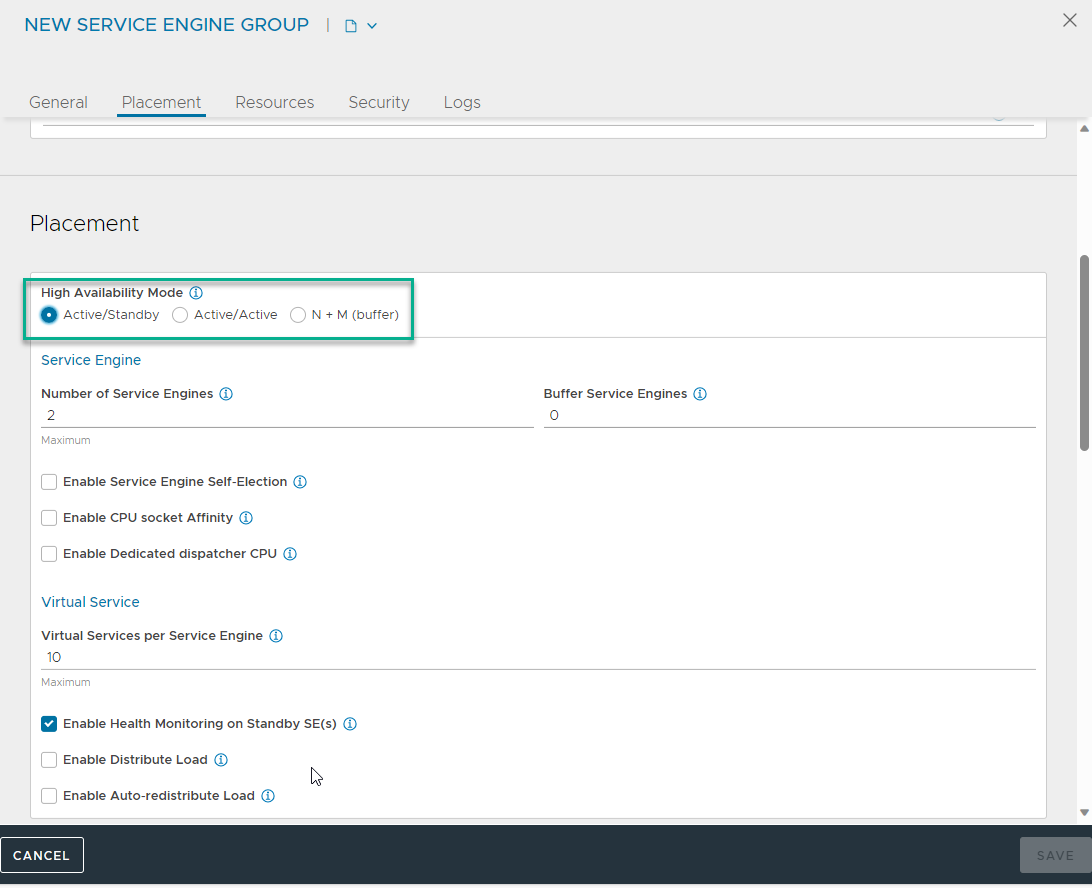
Click Placement tab and select Active/Standby.
Specify the floating IP address (optional). Configuration of floating IP address is not supported through the UI in current release. Configure it using CLI through Network Service of the corresponding SE-Group. For more details, see Network Service Configuration section.
By default, NSX Advanced Load Balancer compacts all virtual services into one SE within the active/standby pair. To distribute active virtual services across the pair, within the Virtual Service Placement Policy section of the SE group editor, select Enable Distribute Load option.
Note:You can specify the second floating IP address. Assign virtual services on an individual basis to one or the other SE in the legacy pair by navigating to the Advanced tab in the virtual service editor.
You can configure the second floating IP address using CLI through Network Service of the corresponding SE-Group. For more information, see Network Service Configuration section.
By default, virtual services that fail over cannot be migrated to the SE that replaces the failed SE. Instead, the load remains compacted on the failover SE. Choose Enable Auto-redistribute Load option to make failback automatic.
The Virtual Services per Service Engine field sets a maximum number of virtual services that may be placed. The legacy is non-elastic such that for any given virtual service, exactly one placement (onto the virtual service's active SE) will be performed.
Finally, deselect Health Monitoring on Standby Service Engine(s) option so that it can be performed only by active SEs.
Click Save.
Add a Pair of SEs to the SE Group
The following are the steps to add a pair of SEs to the SE group.
Navigate to .
Select the cloud from Select Cloud drop-down menu.
Click the edit icon next to one of the SEs.
Select the SE group from Service Engine Groupdrop-down menu.
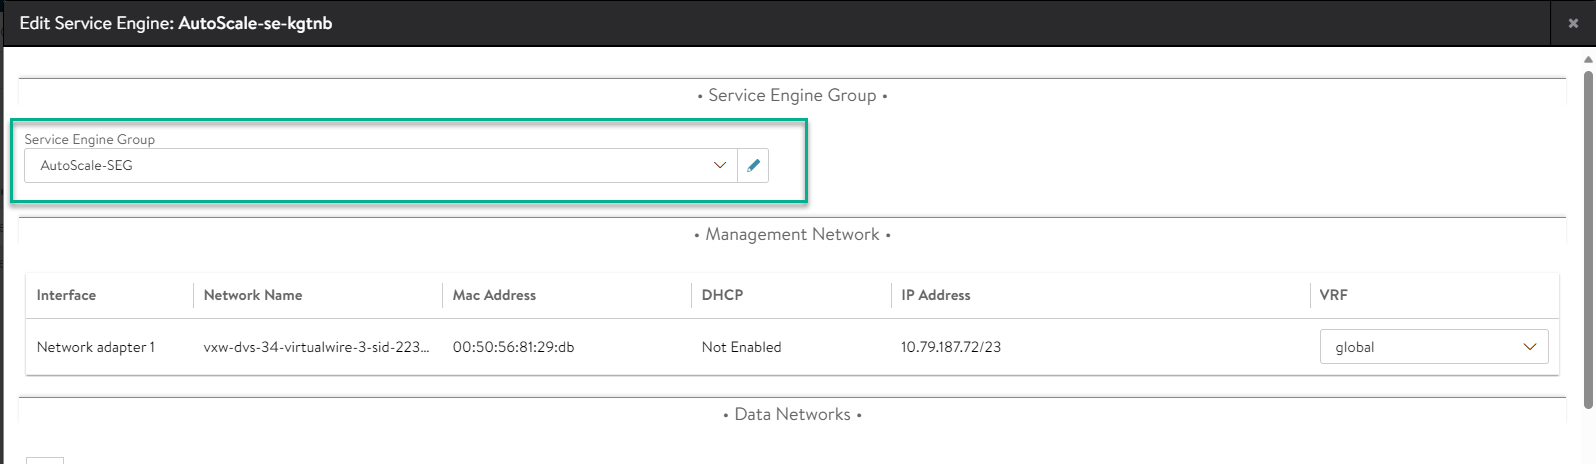
If NSX Advanced Load Balancer is deployed in full access mode then, the other SE is added to the same group automatically.
If NSX Advanced Load Balancer is installed in no access mode then, select the second SE to add it to the group.
Placing a Virtual Service on the SE Group
After configuring the SE group for legacy HA, virtual services can be placed on the group. The following are the steps to place a virtual service on the SE group.
Navigate to .
If you are creating a new virtual service, select . Specify a name and the VIP address, and then click Advanced tab.
If you are editing an existing virtual service, click the edit icon in the row for the virtual service. Click Advanced tab.
In the Other Settings section, select the SE group from ServiceEngine Group drop-down menu.
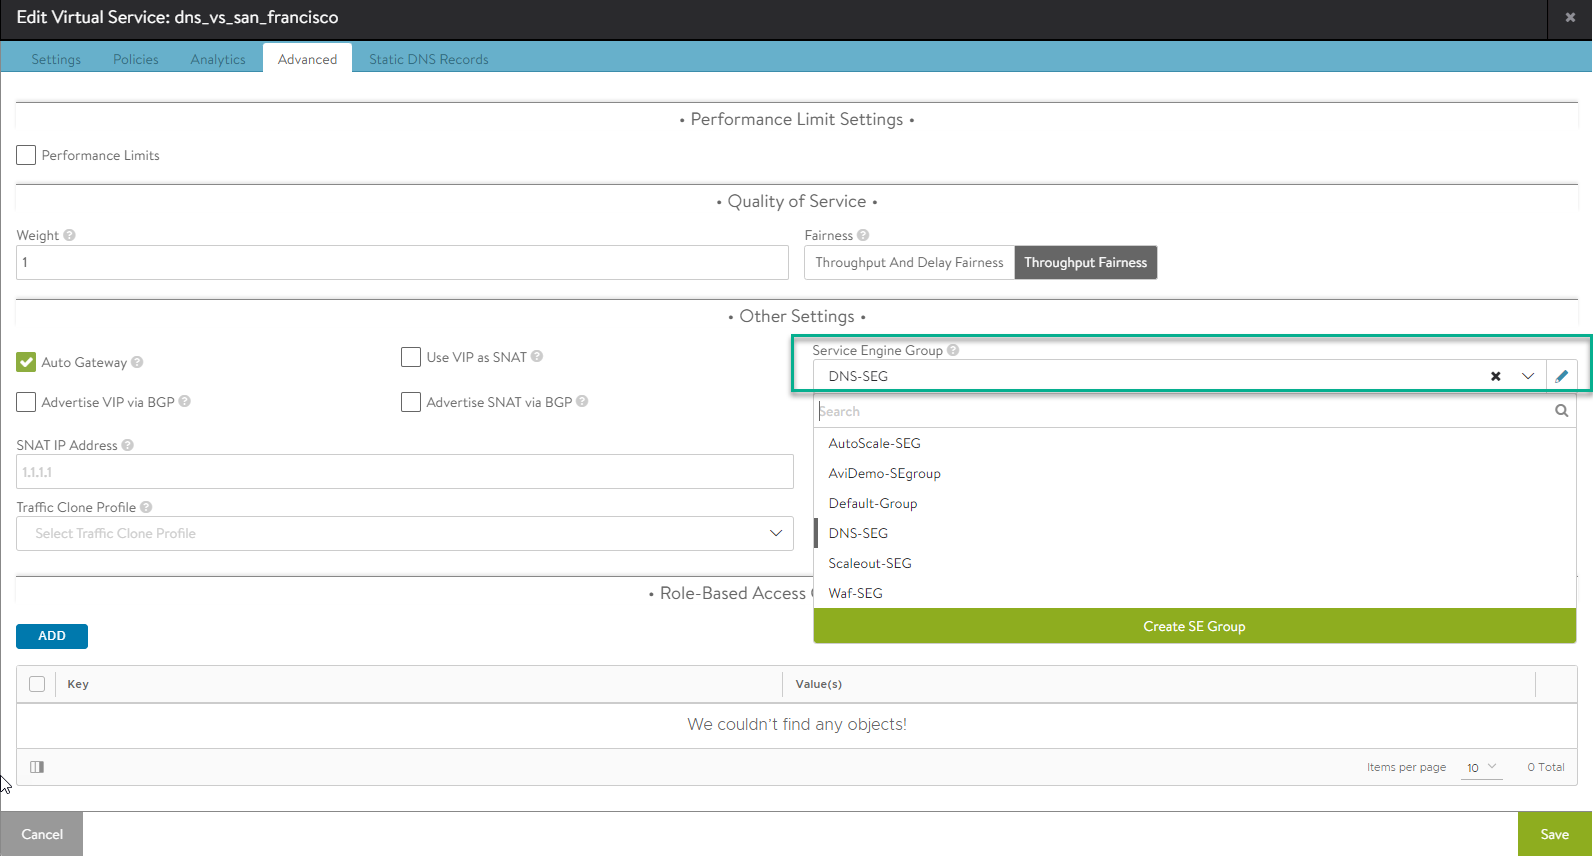
Click Save.
