To configure LDAP authentication, follow the steps below:
Create LDAP Authentication Profile
In the LDAP authentication profile, define parameters for user identification and HTTP authentication.
To create an LDAP Authentication Profile,
From the NSX Advanced Load Balancer UI, navigate to .
Click the Create button.
In the CREATE AUTH PROFILE screen, enter the Name of the profile
Select the Type as LDAP.
Click Add and under Servers configure one or more LDAP servers by adding their IP addresses.
Note:Assume there are three LDAP servers. When a user logs in, the Controller validates the credentials against the first LDAP server. If a match is detected, the Controller does not check any further. However, if no match is found, the Controller continues to validate against the remaining LDAP servers in the configured order until a match is found. If no match is identified across all servers, an error is displayed.
Select the security protocol under LDAP Connection Security Mode. By default, LDAPS is selected.
Enter the service Port which will be used when communicating with the LDAP Servers. This can be:
389 for LDAP
636 for LDAPS
Enter the LDAP Base Distinguished Name (Base DN).
Select either Administrator Bind or Anonymous Bind as the process of authenticating the client to the LDAP directory.
- Admin Bind
-
The client provides credentials like Base DN and a password which authenticates the user to perform administrator tasks within the LDAP directory.
- Anonymous Bind
-
The client does not provide any credentials during the bind operation.
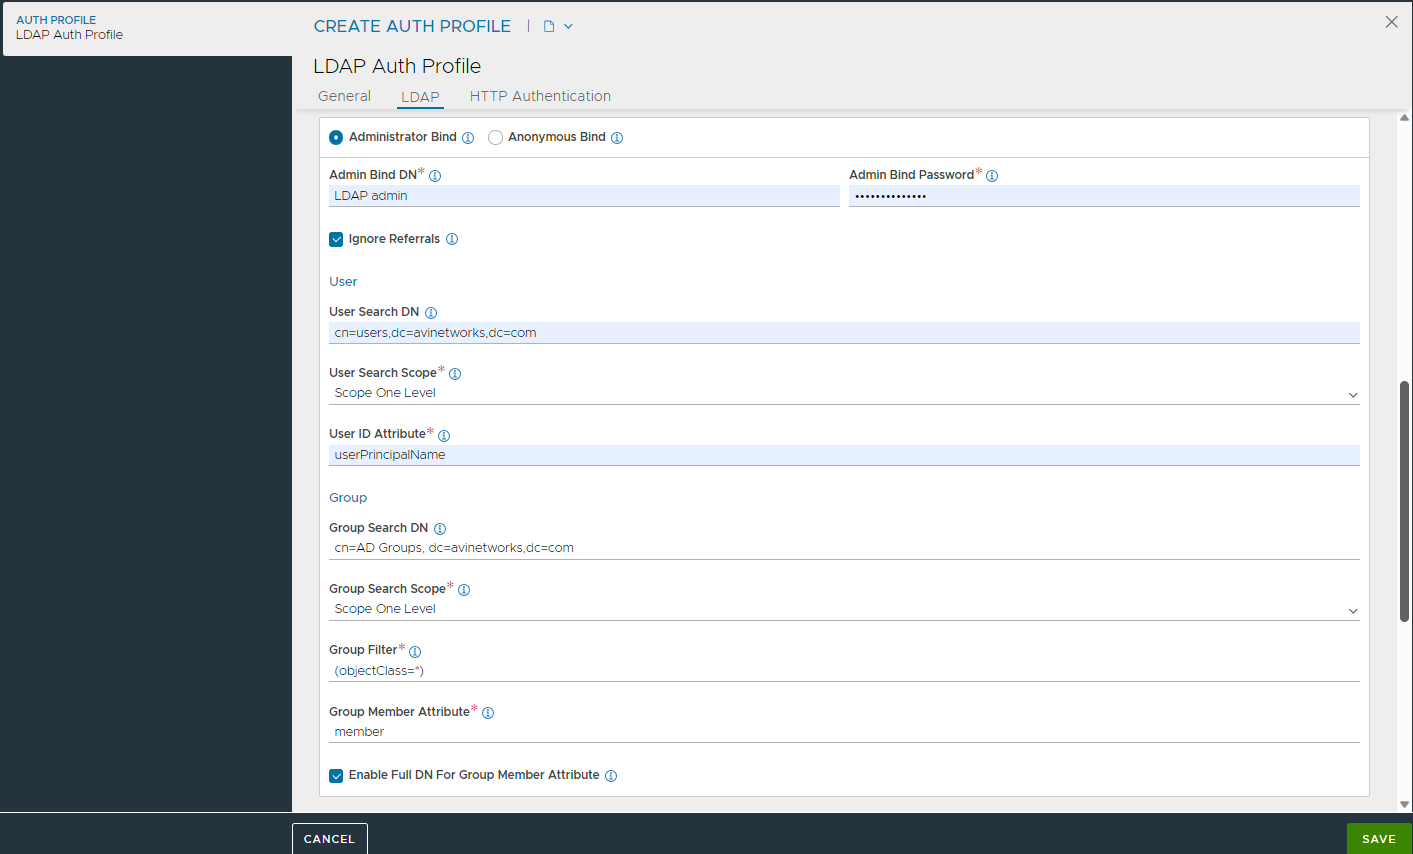
10. For Administrator Bind, configure the following options:
Enter the Admin Bind DN and Admin Bind Password as credentials for authentication.
Enable Ignore Referrals to ignore referrals during user or group search.
Configure the User details:
Under User Search DN, specify the directory within which the LDAP server searches for user entries.
Enter the User Search Scope to define how many levels the LDAP server must search for starting with the DN.
Enter the User ID Attribute that uniquely identifies the user.
Configure the Group details:
Enter the Group Search DN, the root of the search for any group in the directory.
Enter the Group Search Scope to define how many levels the LDAP server must search from the group.
Enter the Group Filter to identify groups during search.
Enter the Group Member Attribute to identify each member in the group.
If the LDAP group stores the full user DN as member instead of just user name, select the option Enable Full DN For Group Member Attribute.
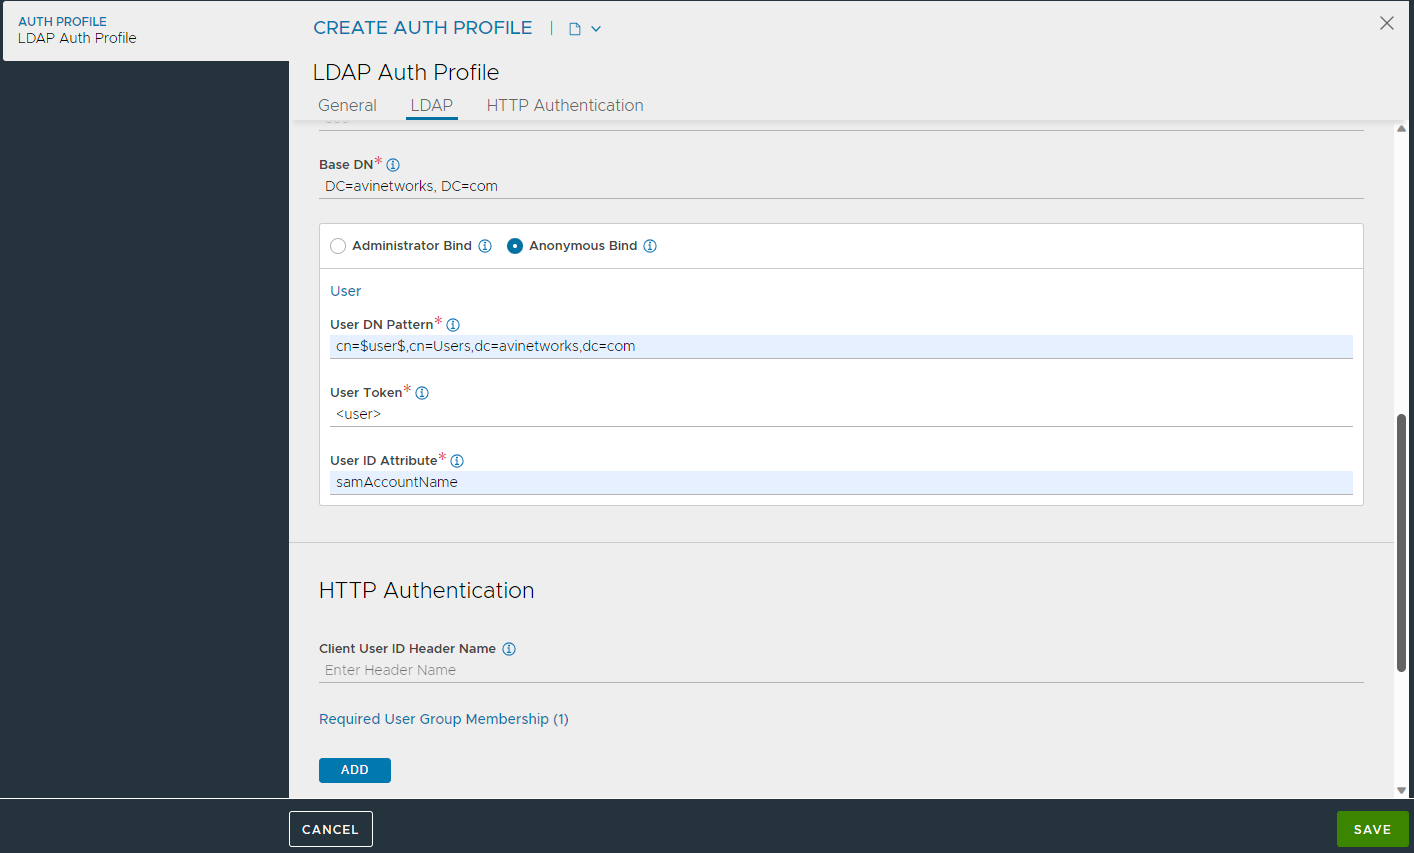
For Anonymous Bind, configure the following options:
The User DN Pattern which is common across all users.
The User Token to be replaced with the user's login name.
The User ID Attribute that uniquely identifies the User's login name.
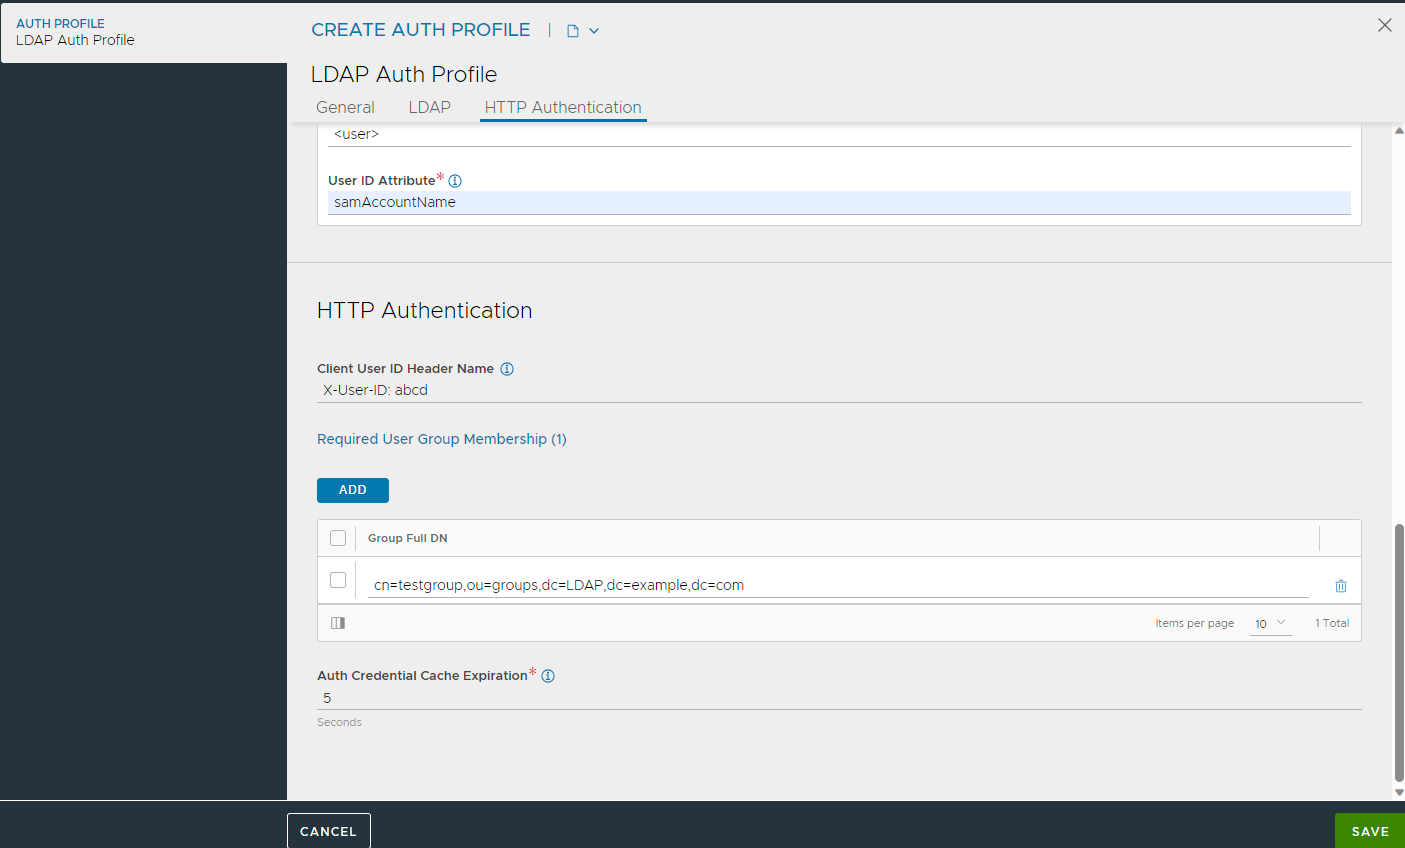
11. Configure HTTP Authentication, if required:
Enter the Client User ID Header Name to be included into the client request before it is sent to the destination server. This will be the client’s User ID. This same User ID will be displayed as User ID in the Virtual Service’s logs.
To add Required User Group Membership, click Add.
Under Group Full DN, enter the DN of a group in which the user must be a member of.
Define the Auth Credentials Cache Expiration which is the maximum duration for which a client's authentication is cached.
12. Click Save.
Creating SSO Policy
To create an SSO Profile,
From the NSX Advanced Load Balancer UI, navigate to and click CREATE.
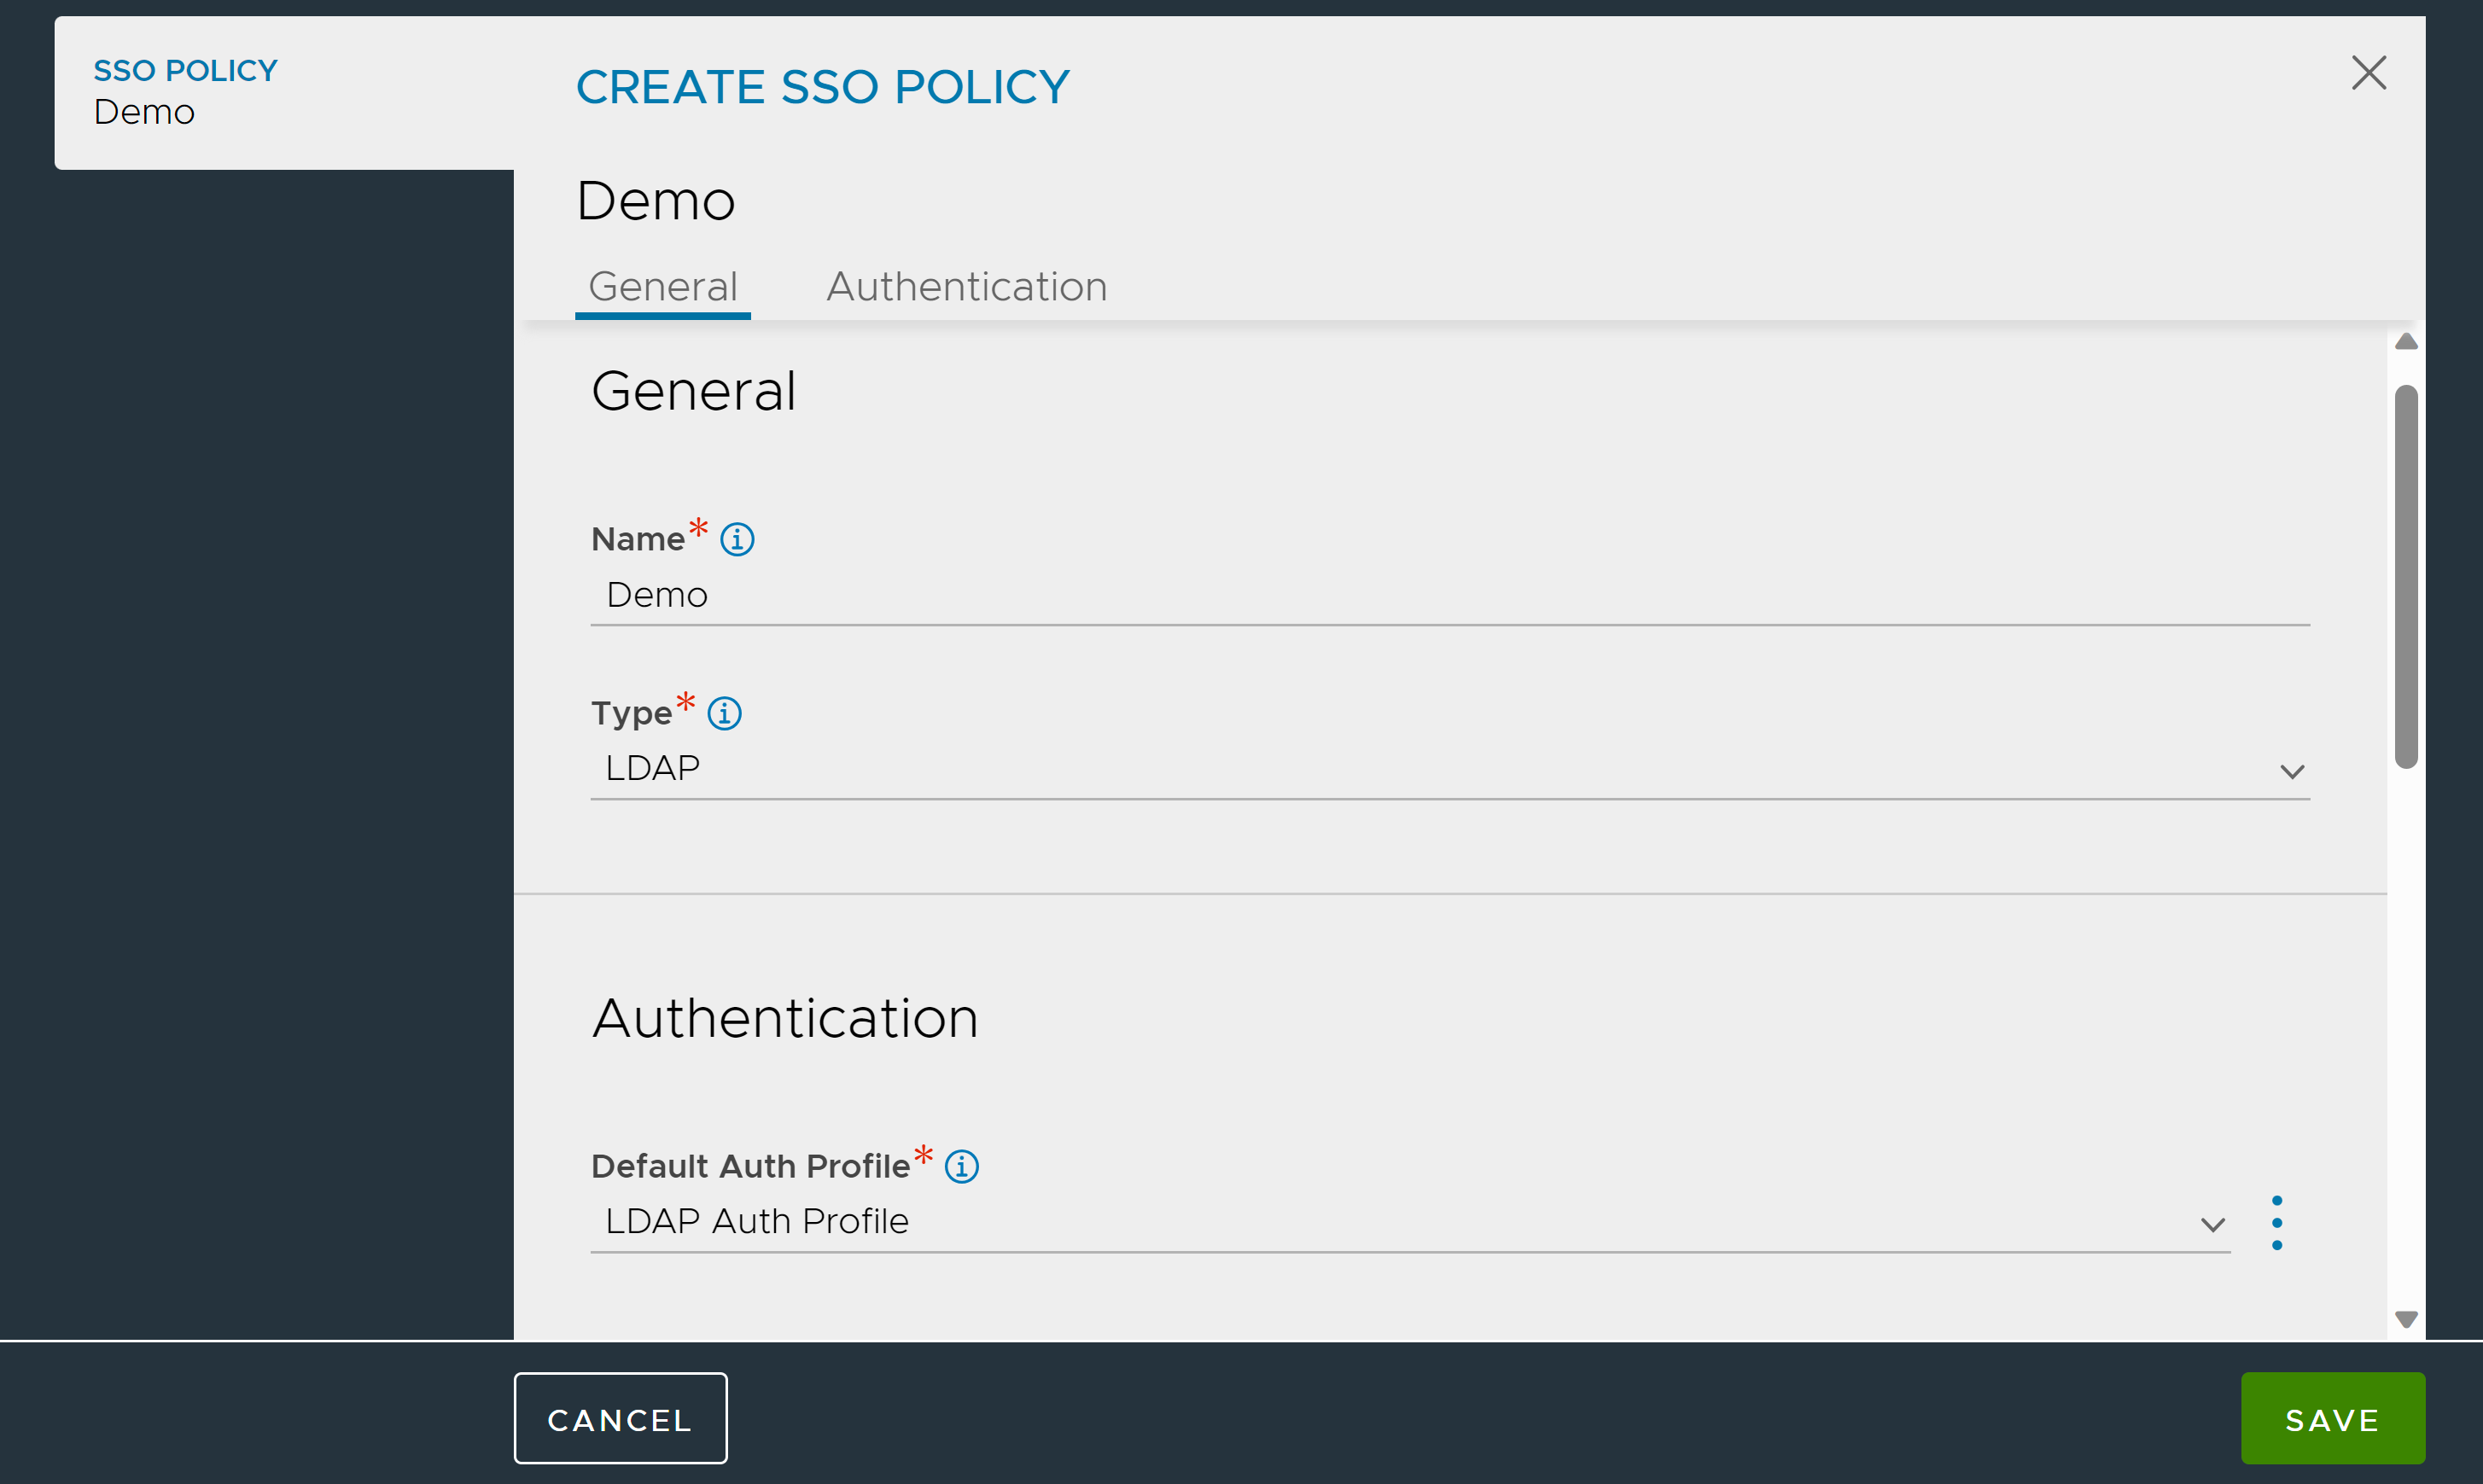
Enter a Name for the SSO Policy.
Select LDAP as the Type.
Under the Authentication tab, select the LDAP Profile created for LDAP Authentication.
Under Authentication Rules, click Add and configure the Authentication Rules as required.
Under Authorization Rules, click Add and configure the Authorization Rules as required.
Click Save.
Configure Access Policy
Access policies for LDAP define how users access services through LDAP. Access policies are defined for every virtual service.
To configure an access policy, from the New Virtual Service or Edit Virtual Service screen,
Configure the required information in Step 1: Settings and click Next.
Under Step 2: Policies, click the Access tab and select LDAP.
Select the SSO Policy created for LDAP authentication.
Enter the Basic Realm to be specified along with the credentials.
Enter the following parameters:
- Connections Per Server
-
The maximum number of concurrent connections that can be established between NSX Advanced Load Balancer and the LDAP server.
- Cache Size
-
The size of the connection cache used on the dataplane
- Bind Timeout
-
The maximum time allowed for the bind operation beyond which the connection is considered unsuccessful.
- Request Timeout
-
The maximum duration for which the client waits for a response from the LDAP server during login or group search operations.
- Connect Timeout
-
The maximum duration for which the client waits for a connection to be established with the LDAP server.
- Reconnect Timeout
-
If the connection is not successful until Connect Timeout, after sometime the system tries to reconnect. Under Reconnect Timeout, enter the duration of time after which the connection has to be initiated again.
6. Enable Servers Failover Only to make connections to the first available LDAP server in the list on priority and then failover to subsequent servers.
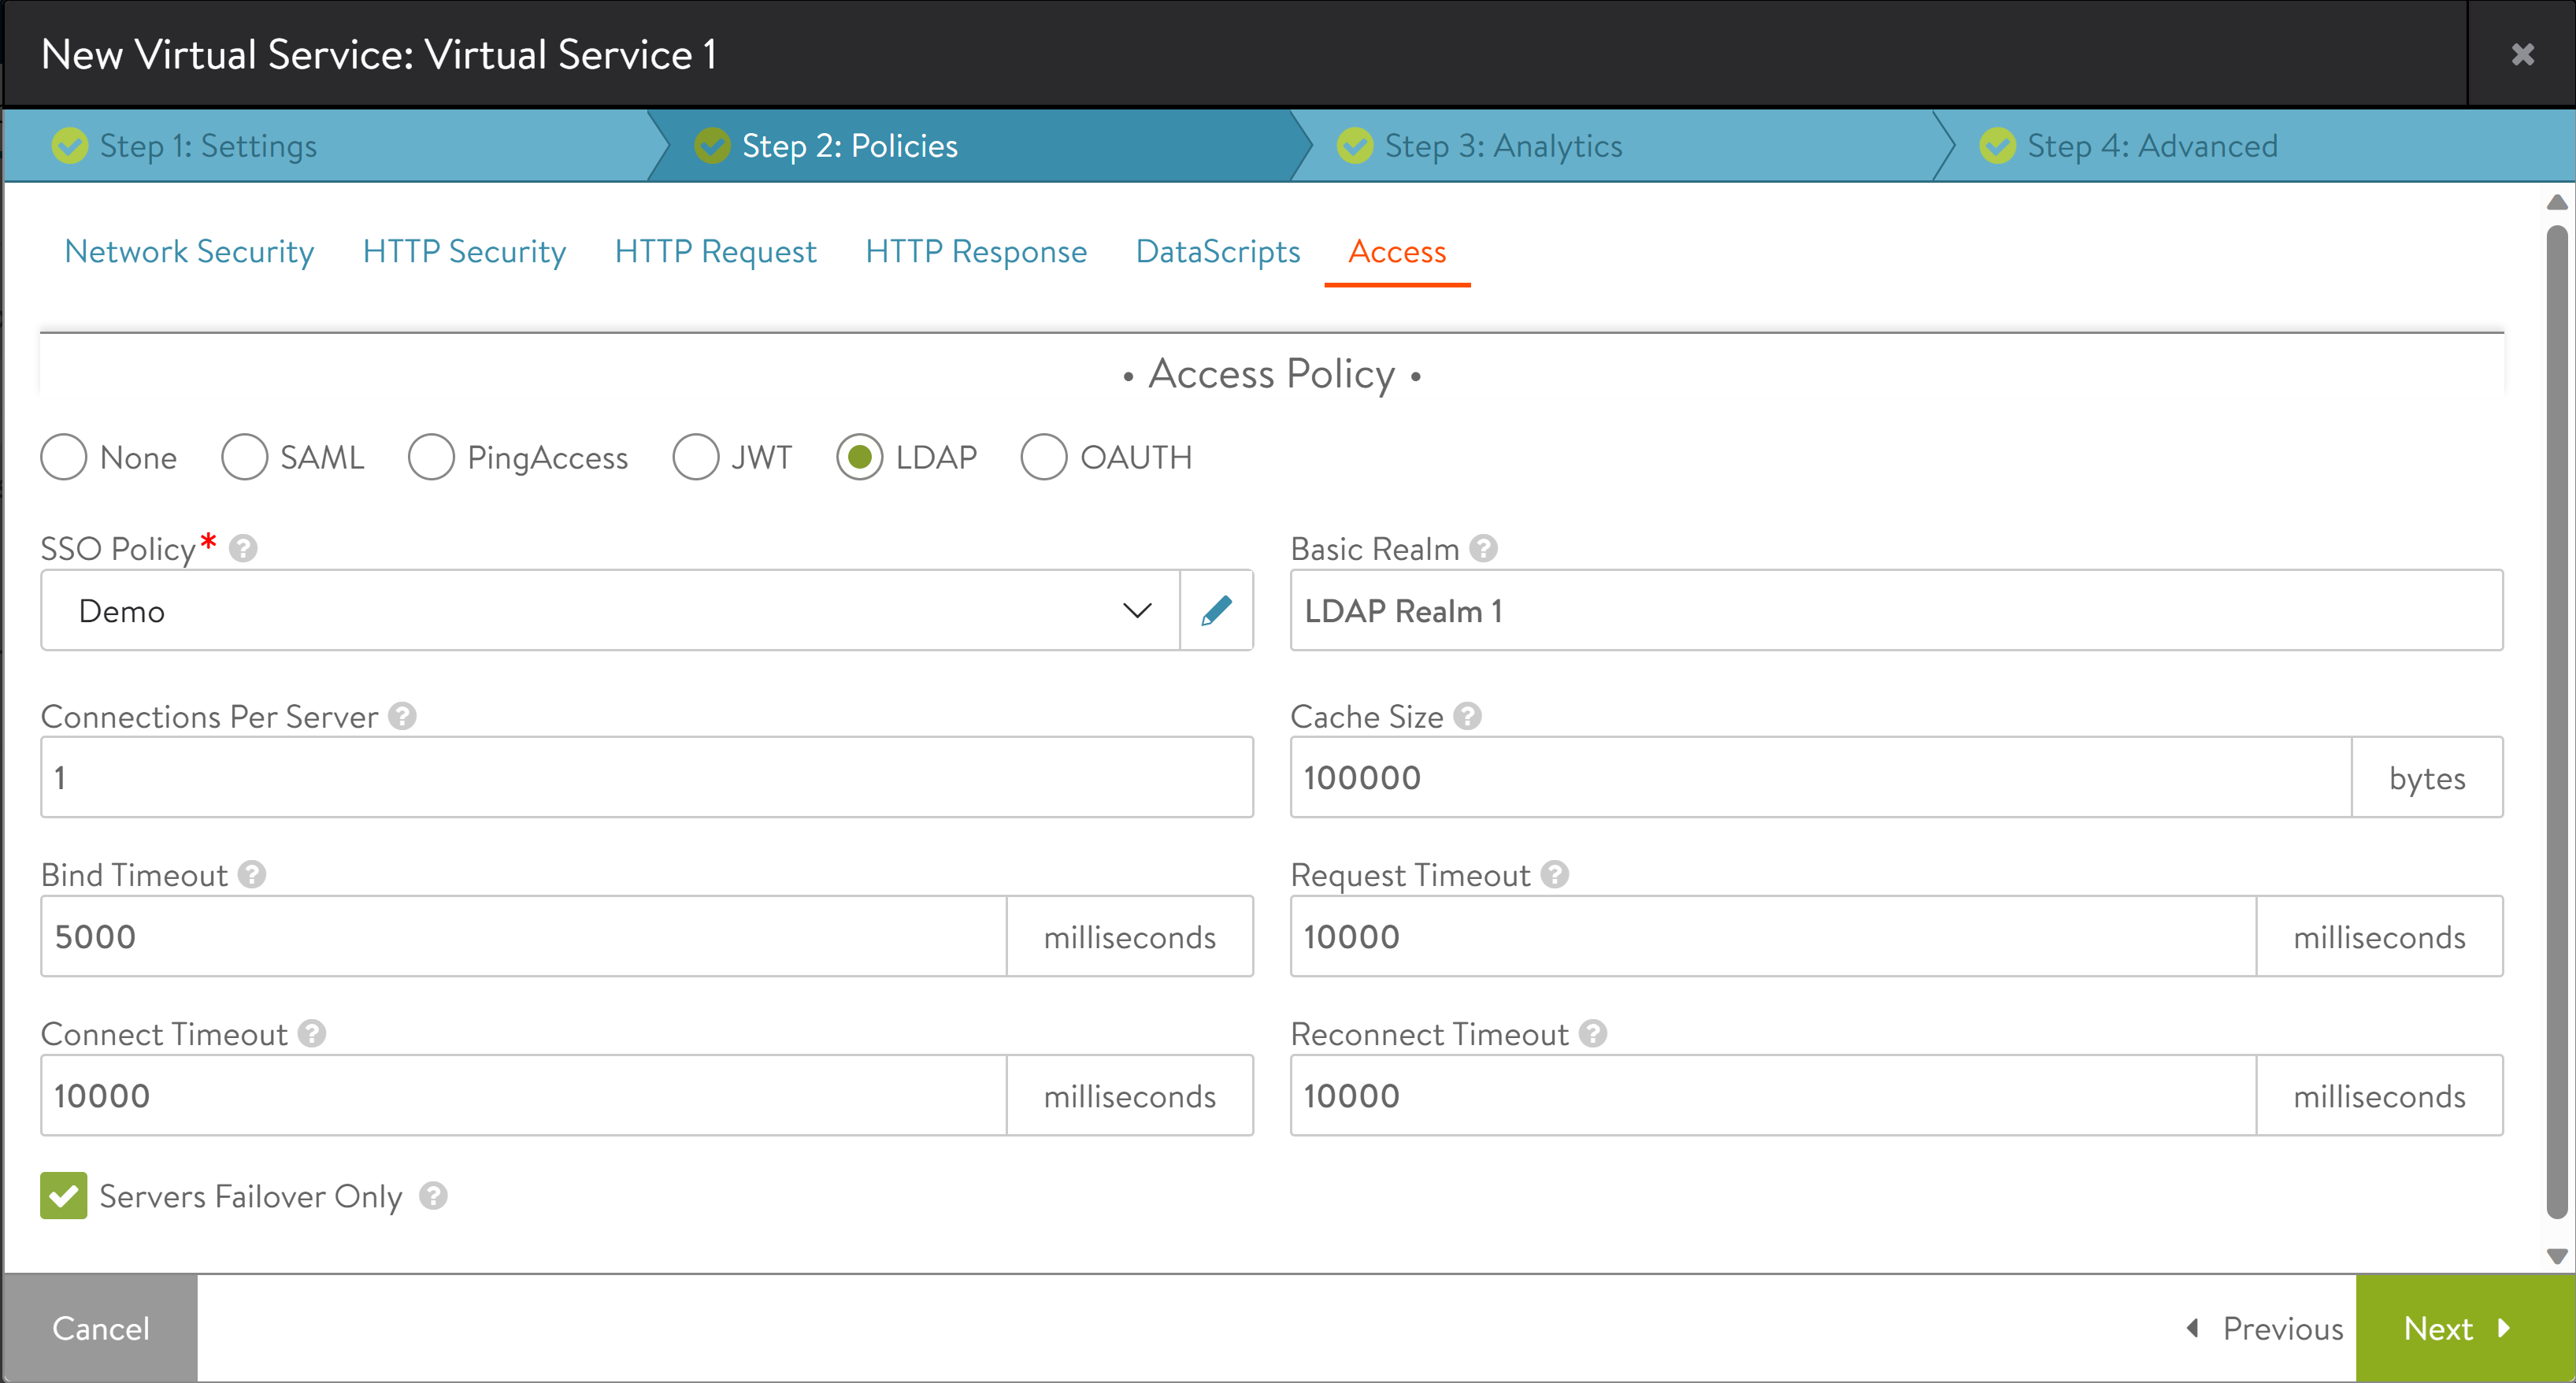
7. Click Next, complete the virtual service configuration and click Save.