This section explains the steps to configure IPAM.
Prerequisites
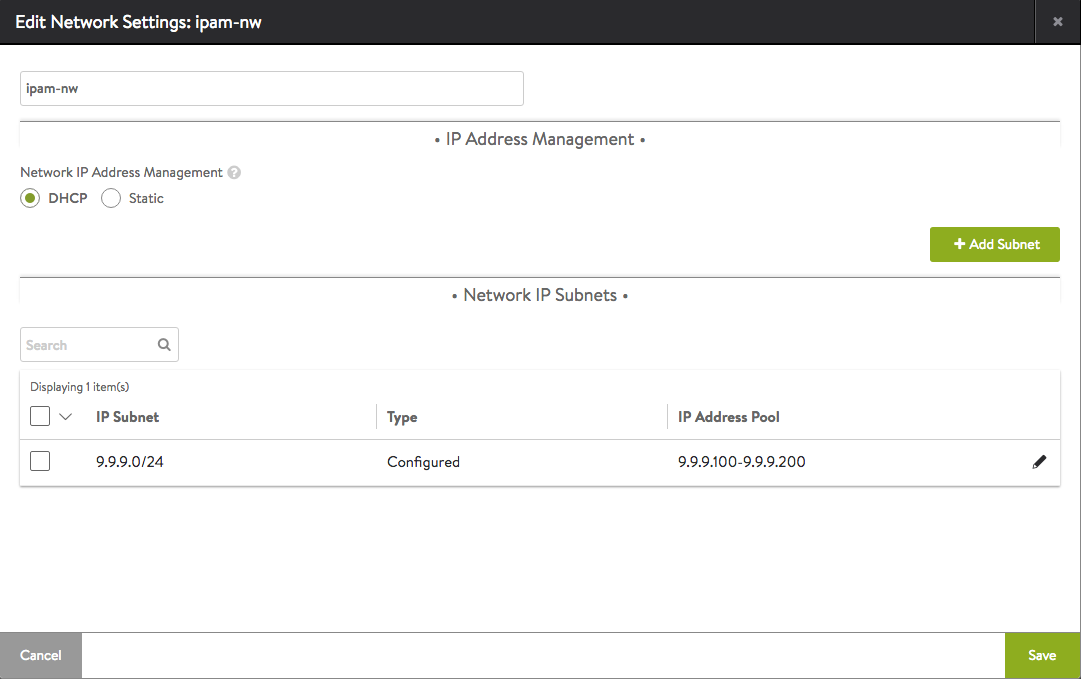
NSX Advanced Load Balancer allocates IP addresses from a pool of IP addresses within the subnet configured listed as follows.
Procedure
- Click Save.
Note:
Virtual service creation will fail if the static IP address pool is empty or exhausted.
For East West IPAM (applicable to container-based clouds, such as, Mesos, OpenShift, Kubernetes, Docker UCP, and Rancher), create another network with the appropriate link-local subnet and a separate IPAM/ DNS Profile.
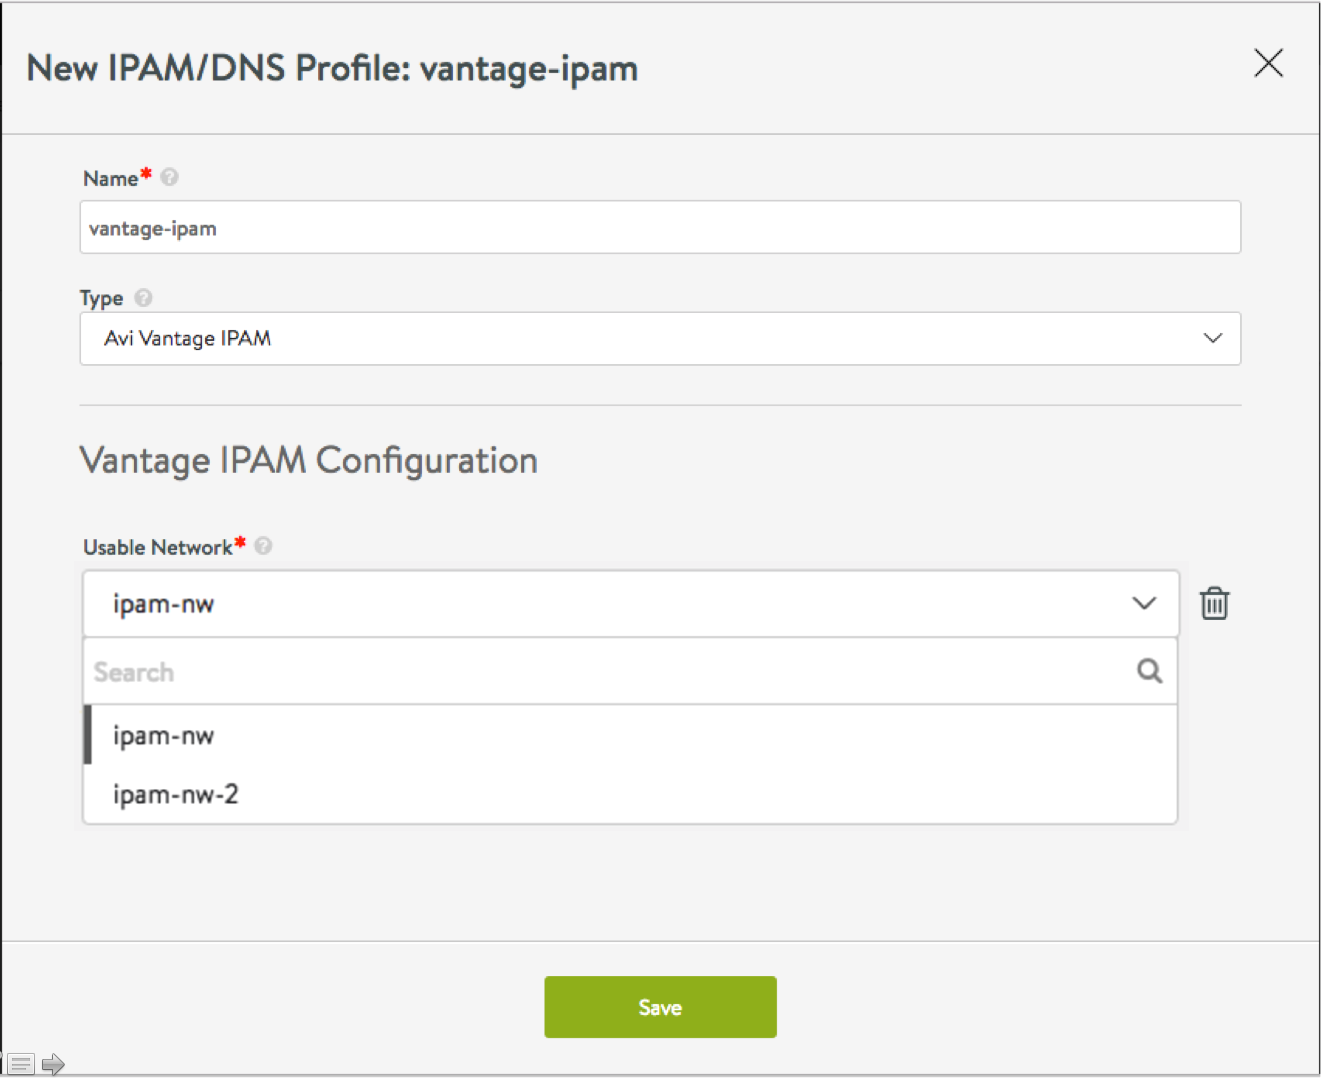
Usable Networks
This feature enables assigning one or more of the networks created above to be default usable networks, if no specific network/ subnet is provided in the virtual service configuration. An administrator can configure these networks, thus eliminating the need for a developer to provide a specific network/ subnet while creating a virtual service for the application.