


Stream Control Transmission Protocol (SCTP) is a transport layer protocol similar to TCP. It provides an alternate transport layer. It is used for transporting various signaling protocols over IP networks in telecommunication.
SCTP Supports the following features.
Multi-streaming: Enables data delivery in multiple and independent streams.
Multi-homing: Operates over multiple layer-3 endpoints while retaining the same layer-4 association.
Use Cases and Application
Kubernetes natively supports SCTP for services, POD, and endpoints. CNFs running in k8s clusters can be load-balanced using an SCTP load-balancer endpoint.
Load balancing 5G Core functions, where diameter or SS7 protocols use SCTP as transport layer protocol. For example,
Access and Mobility Management function - NAS Termination
Session Management Function (SMF)
User plane function (UPF): QoS and forwarding
Policy Control Function (PCF)
HSS (Home Subscriber Server) SCTP [For example, load-balancing SDP (Service Delivery Platform)
NSX Advanced Load Balancer Support for SCTP Network Profile
Starting with release 22.1.3, the NSX Advanced Load Balancer introduces an additional network profile named SCTP-Proxy-Profile, in addition to the existing TCP and UDP Network profiles. Users will be able to configure this profile to load balance based on SCTP associations.
Users get a configurable profile for SCTP proxy. Various streams and different SCTP parameters can be tweaked in this profile to serve various use-cases.
Configuring SCTP Proxy Network Profile
Navigate to .
Click CREATE to open NEW TCP/UDP PROFILE.
Under the General tab, enter Name and Description.

Select SCTP Proxy as Type.
Under SCTP Proxy, select the SCTP Proxy Profile Parameters check box. The following additional fields are displayed. Enter values for the fields.
Number of Streams. The default value is 10.
Receive Window. The default value is 256.
Heartbeat Interval. The default value is 30.
Max Retransmissions Init Chunks. The default value is 8.
Reset Timeout. The default value is 0.
Cookie Expiration Timeout. The default value is 60.
Idle Timeout. The default value is 0.
Max Retransmissions Association. The default value is 10.
Under Role-Based Access Control (RBAC), add Key & Values.
Click Save.
Configuring SCTP Health Monitors
Navigate to .
Click Create to open CREATE HEALTH MONITOR.
Under the General tab, enter Name and Description.
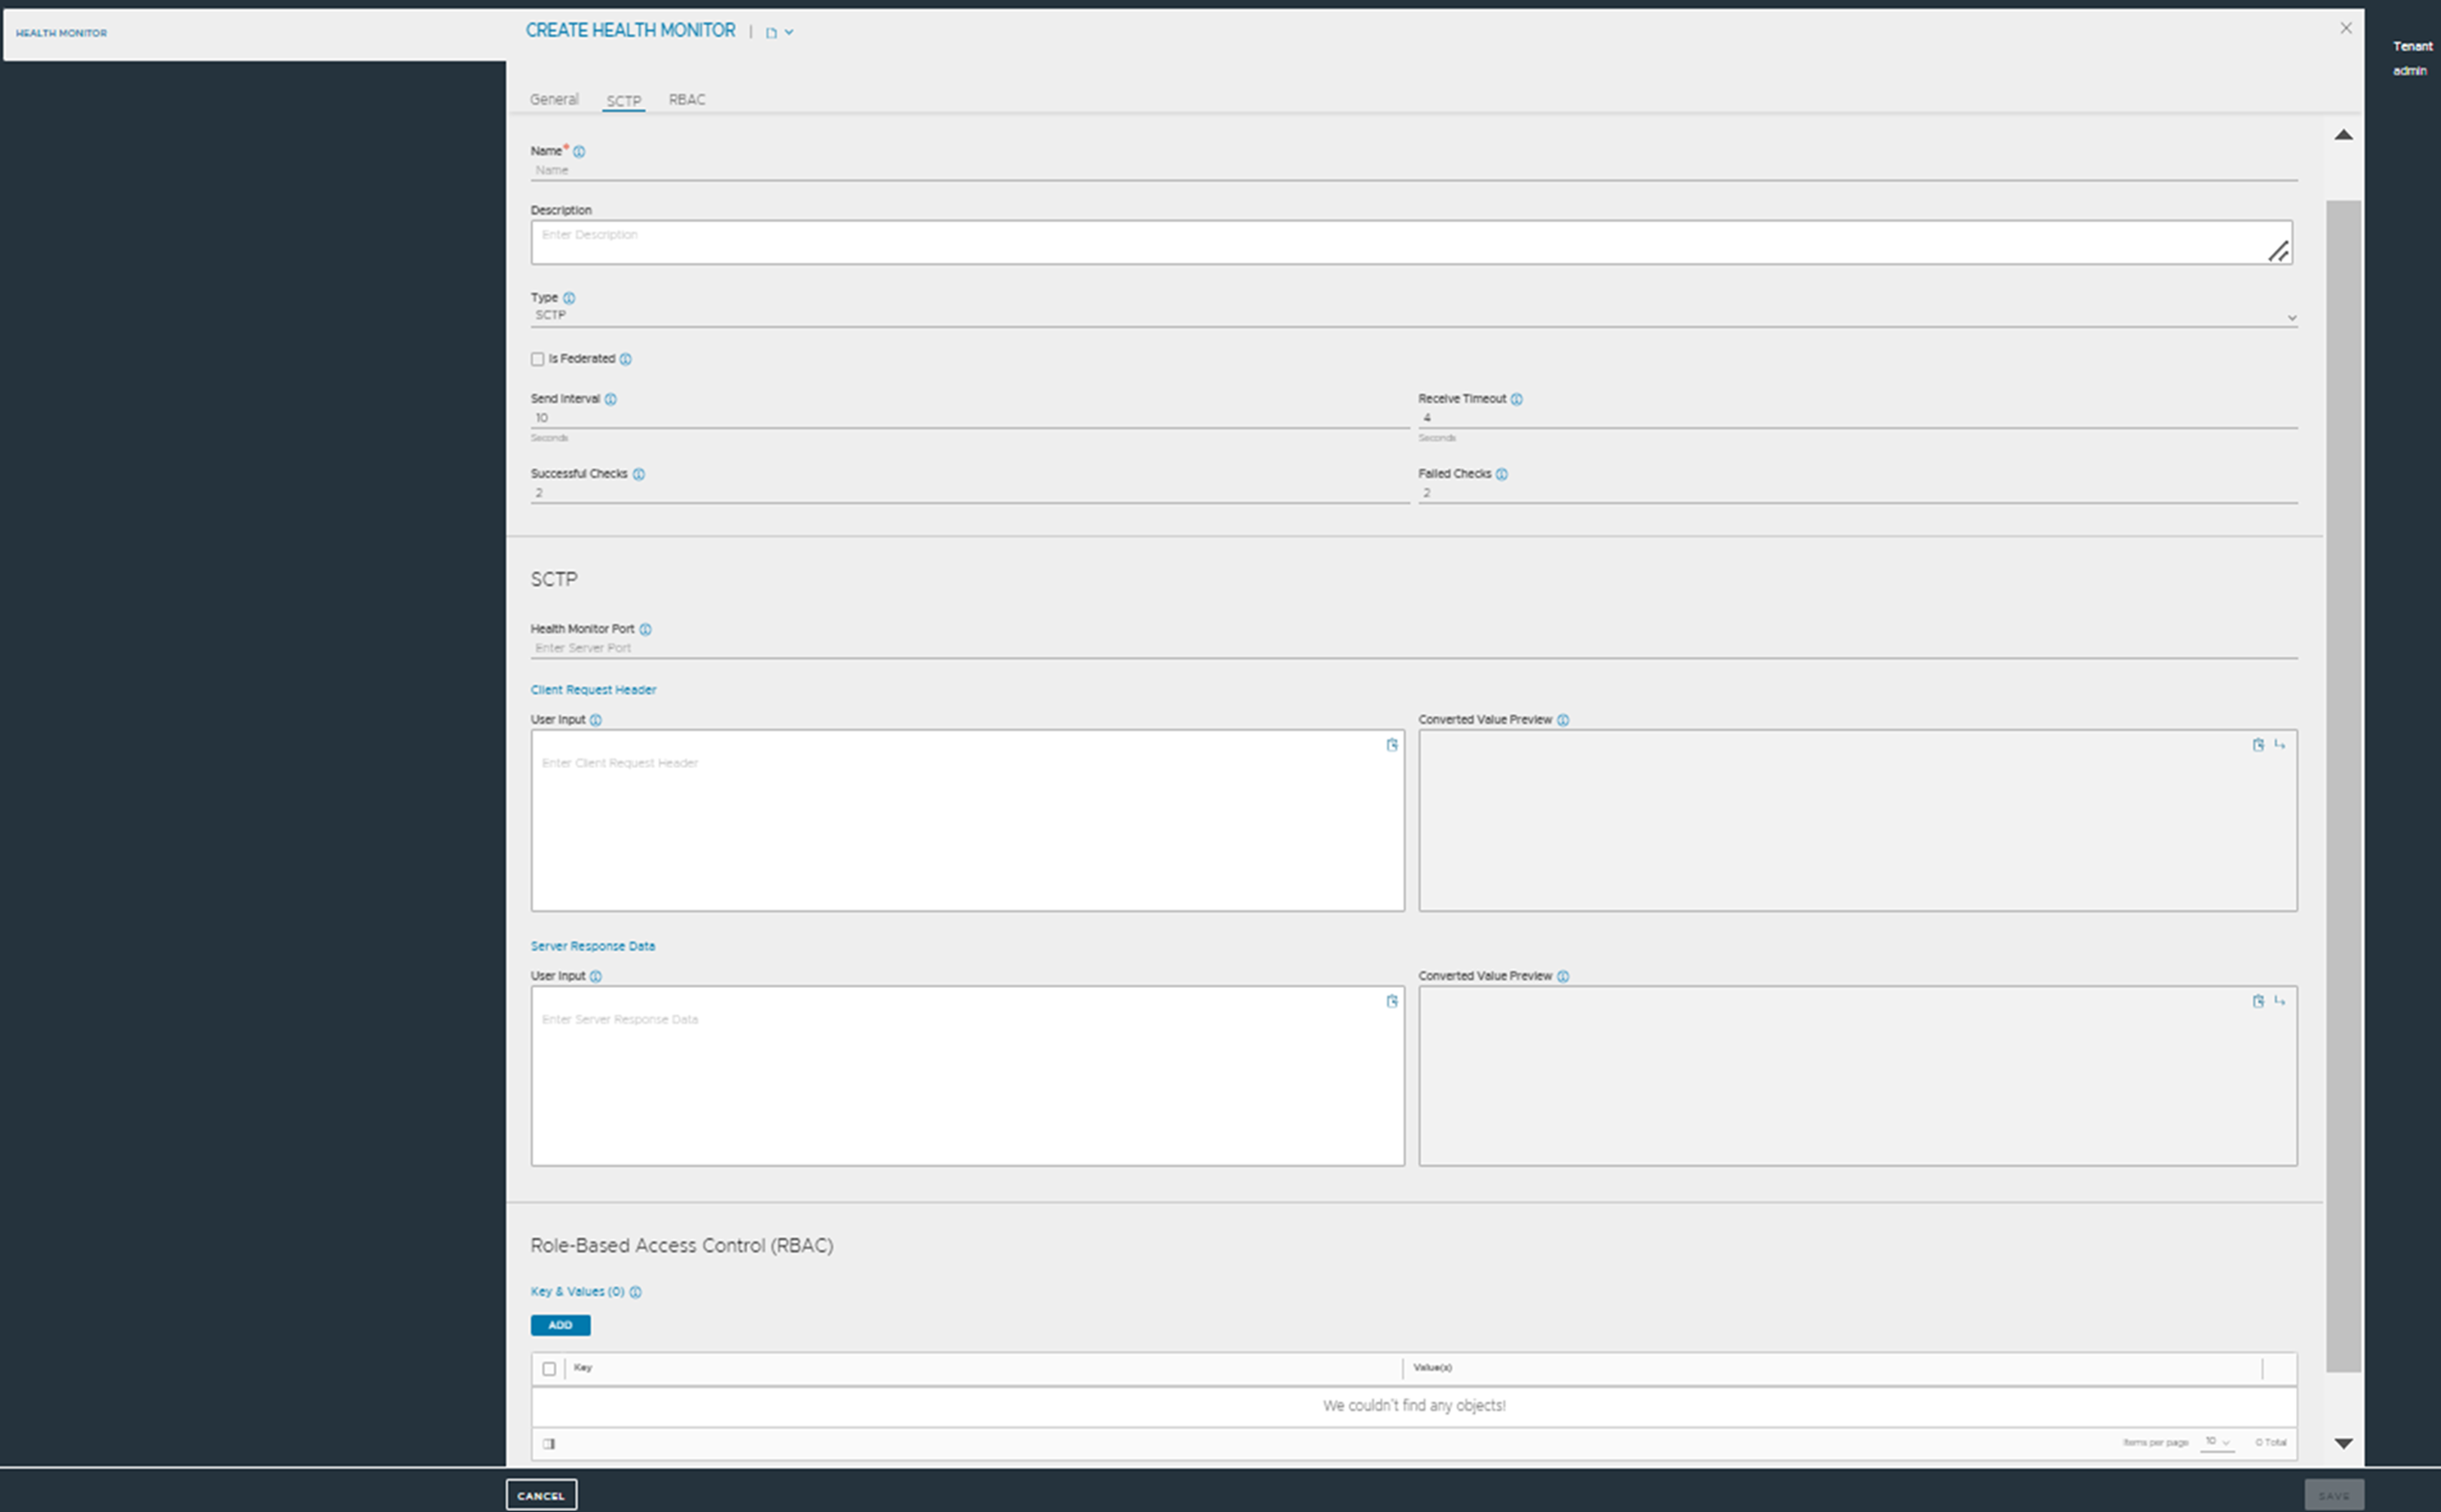
Enter values for the following fields:
Type - Select SCTP.
Is Federated - deselected by default.
Send Interval. The default value is 10.
Successful Checks. The default value is 2.
Receive Timeout. The default value is 4.
Failed Checks. The default value is 2.
SCTP - enter a value for Health Monitor Port.
Under Client Request Header, enter User Input and Converted Value Preview as required. Enter an appropriate send string applicable to the server application. This request will be sent to the server immediately after completing the SCTP handshake. The maximum allowable size for the request length is 1024 bytes.
Under Server Response Data, enter User Input and Converted Value Preview as required. Enter the expected response from the server. NSX Advanced Load Balancer checks to see if the Server Response data is contained within the first 512 bytes of data returned from the server.
Under Role-Based Access Control (RBAC), add Key & Values.
Click Save.
Configuring SCTP Virtual Services
Navigate to .
Click edit icon to open the existing virtual services.
In the Settings tab, enter details in the fields as shown below:
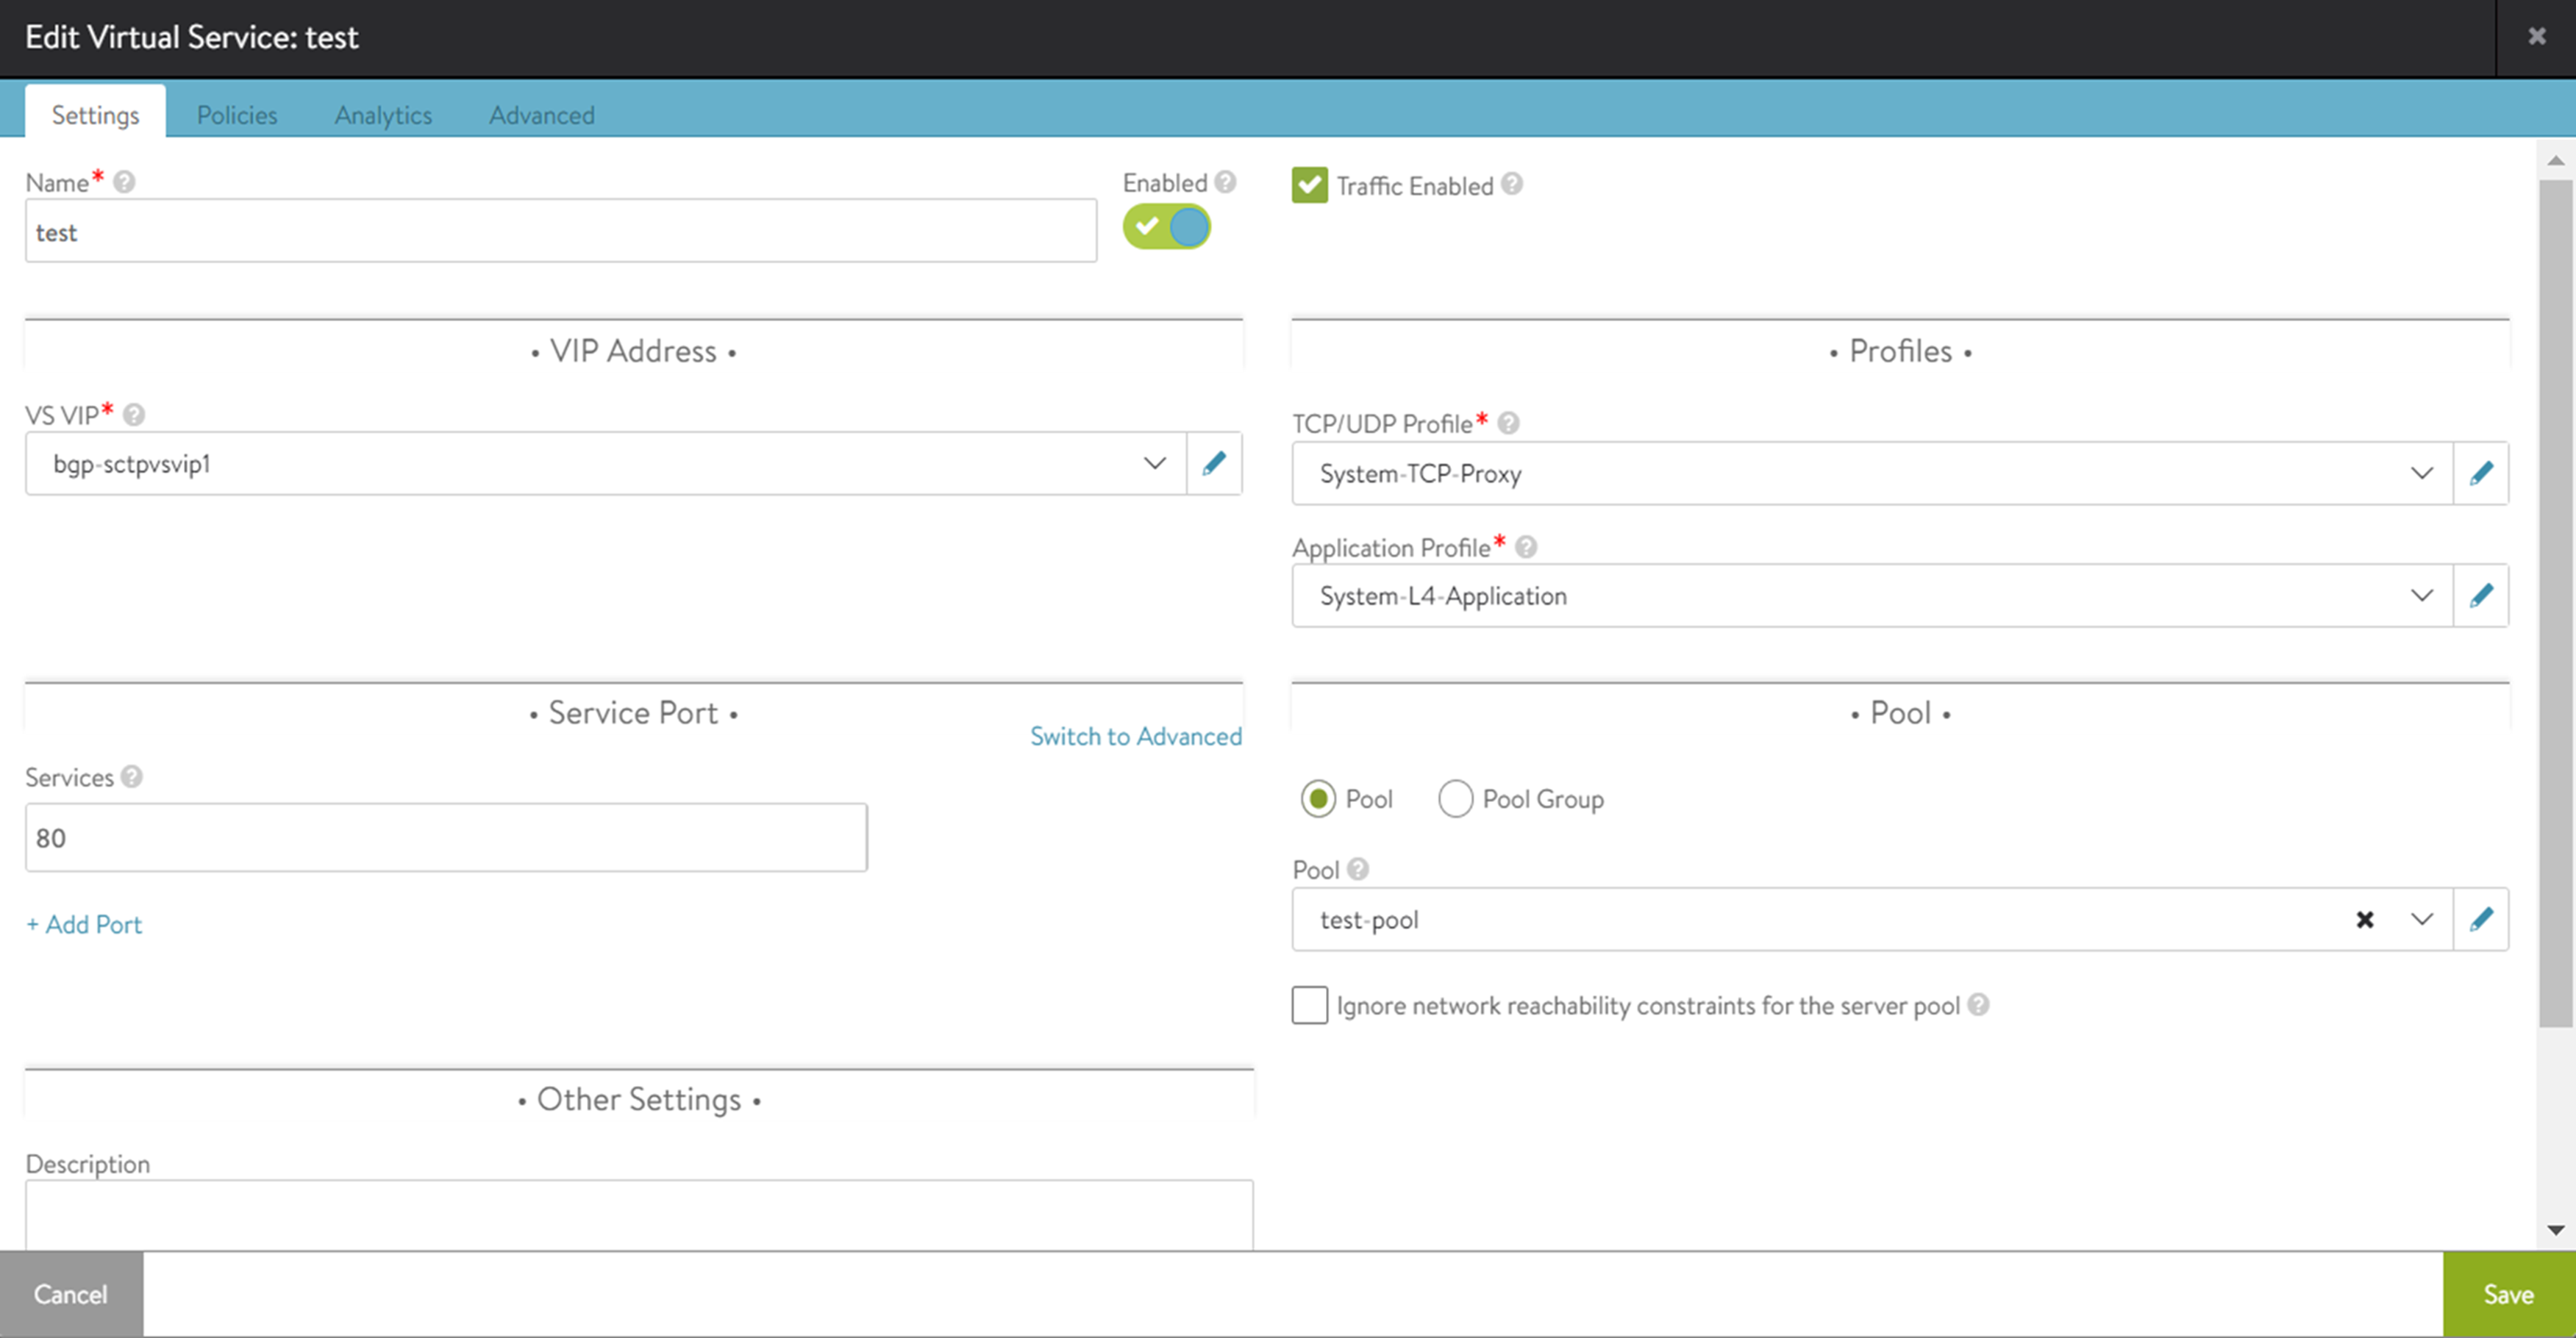
Under VIP Address, select the desired VS VIP.
Select System-SCTP-Proxy from TCP/UDP Profile.
Select System-L4-Application from Application Profile.
Under Pool, select sctp-vs2-Pool from Pool.
Click Save.
Supported Features
The following SCTP functionalities are Generally Available starting with version 22.1.7:
SCTP Proxy profile with Legacy HA in vCenter Cloud environment with support for Preserve Client IP, IPv6, Auto gateway, L4 Connection Logs and Metrics. (Previously Tech Preview)
Support for Active-Active, N+M HA mode for SCTP.
IPv6 support for SCTP.
AKO support for creating SCTP Virtual Service and other SCTP objects in Kubernetes clusters is available starting AKO 1.9.1. For more information, see SCTP support in AKO for L4 services in the Avi Kubernetes Operator Guide.
Limitations
The following features are not supported:
SCTP fast path
AWS, GCP, Azure, and OpenStack
SCTP multihoming
Multi VRF
RSS, TSO, and GRO
No Specific metrics and connection log corresponding to SCTP
Custom SNAT
Network security policy
DataScript policies
Shared VIP
Pool sharing
Configuring Port Ranges: When System-SCTP-Proxy TCP/UDP Profile is selected as network profile for virtual services, a port range cannot be specified under Service Ports. If a port range is configured, only the first port within the specified range handles traffic.
