


This section describes how NSX Advanced Load Balancer platform is integrated with Azure virtual machine (VM) scale sets.
The integration primarily involves the following two sections:
Configuring Pools
Configuring Virtual Service
The pool and virtual service settings are customized as explained in the below sections for NSX Advanced Load Balancer to implement the auto-scaling policies. An exception to this is where Azure drives the auto-scaling using inbuilt policies.
Overview
An NSX Advanced Load Balancer pool is a group of back-end servers having similar characteristics or hosting similar applications. In an NSX Advanced Load Balancer-Azure integration, an NSX Advanced Load Balancer pool is scaled in or scaled out to reflect the actions taken by Azure to manage the specific scale set. Azure’s preconfigured policies and criteria govern these actions.. For more information on Azure virtual machine scale sets, see What are virtual machine scale sets in Azure?
Background
NSX Advanced Load Balancer supports Azure scale sets configuring NSX Advanced Load Balancer pools for a virtual service. The NSX Advanced Load Balancer Azure cloud connector periodically polls Azure scale set information and updates the corresponding NSX Advanced Load Balancer pool server membership in case of any changes.
For example, if a new server (virtual machine) is added to an Azure scale set used as an NSX Advanced Load Balancer pool, NSX Advanced Load Balancer automatically updates the pool membership to include the newly provisioned server. Conversely, upon deleting a server (virtual machine) from the Azure scale set, NSX Advanced Load Balancer deletes this server from its pool membership. This enables seamless, elastic, and automated back-end server resource management without operator intervention or configuration updates.
Prerequisites
The Azure credential asset needs access to the scale sets. The credential asset could either be a service principle object, as in the case of an application or a username/password credential set. For more information on Azure role definitions, see Azure Roles and Permissions.
Scale sets are configured in Azure.
Configuring Pool Settings
Navigate to .
Click Create Pool and choose Azure cloud when prompted.

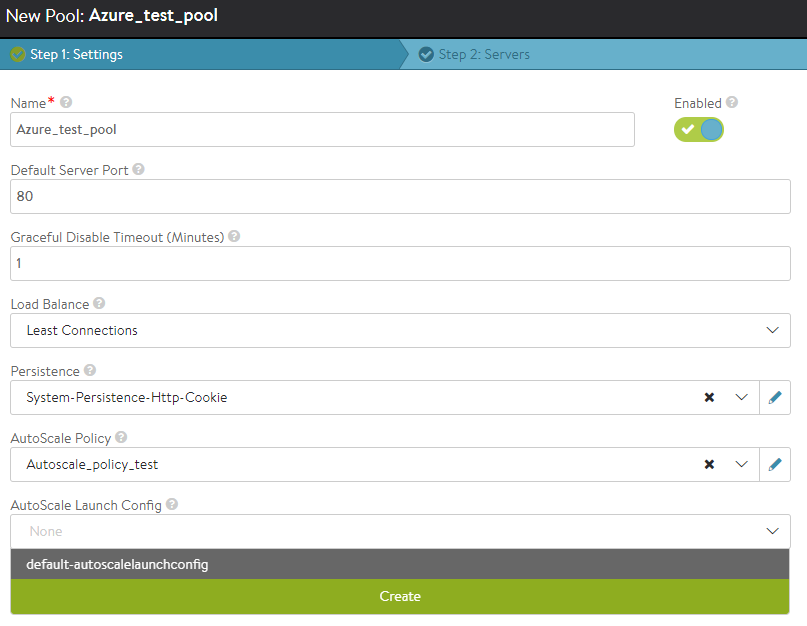
Enter the pool name and suitable values for Default Server Port, Graceful Disable Timeout, Load Balance, and Persistence fields.
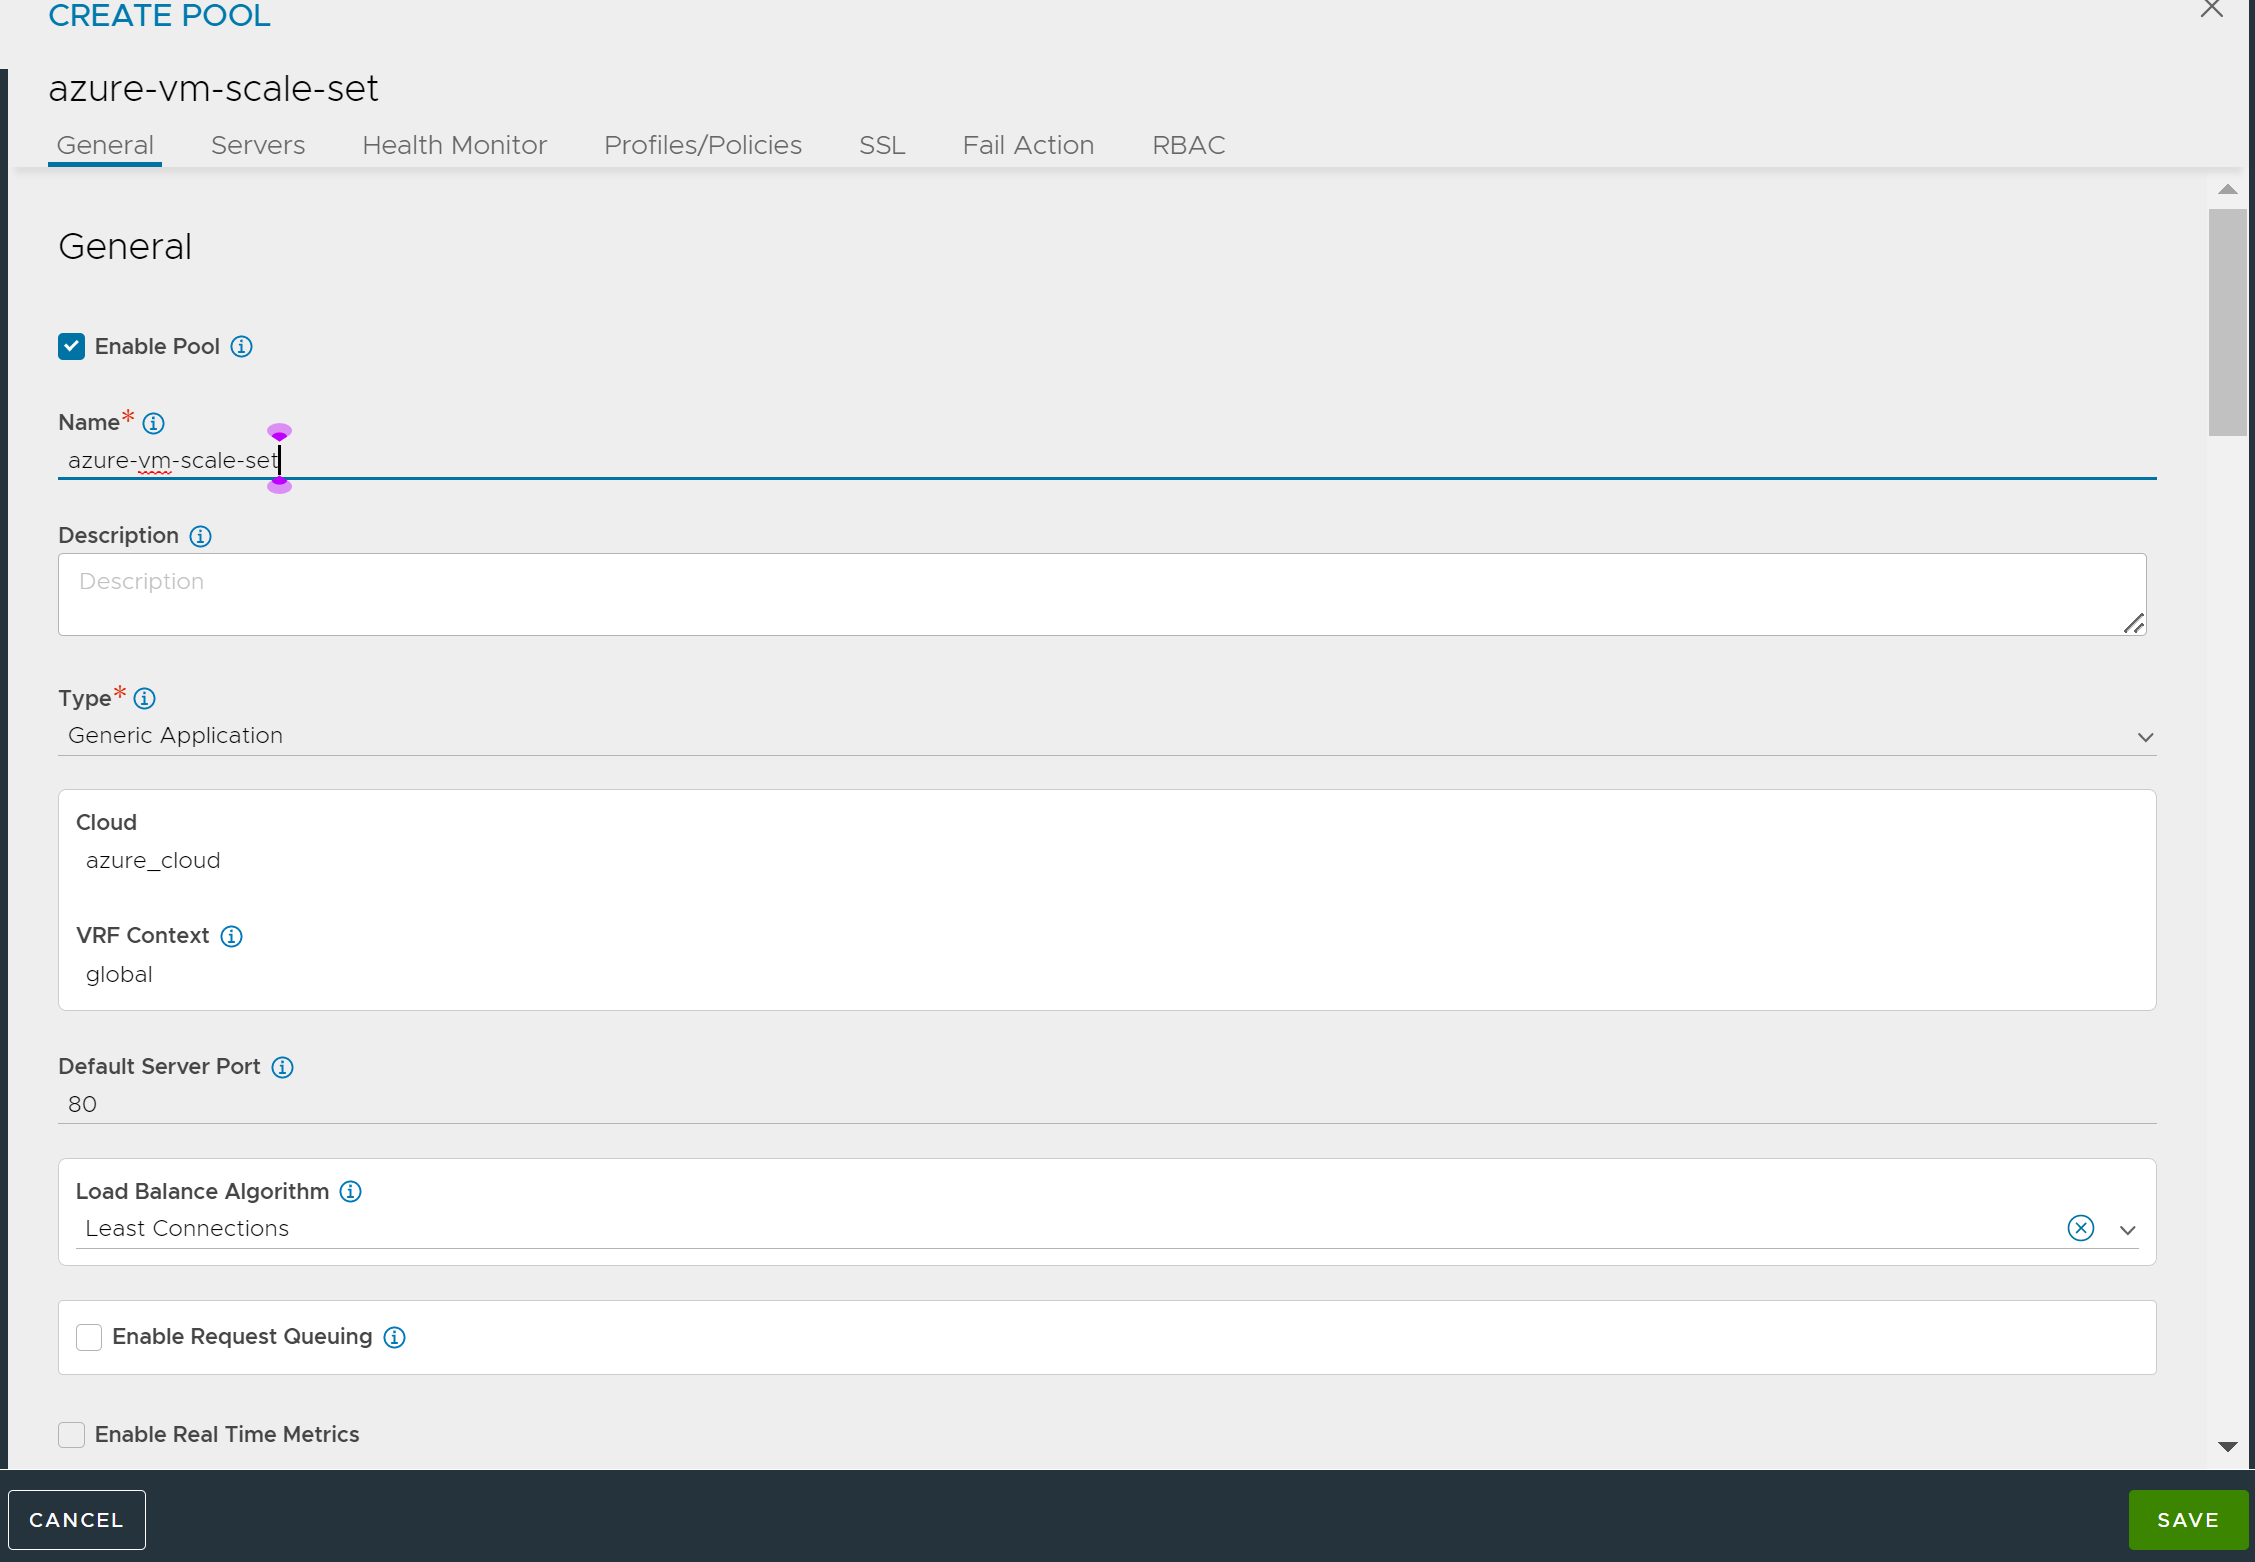
Enter the other required fields and click Save.
AutoScale Policy
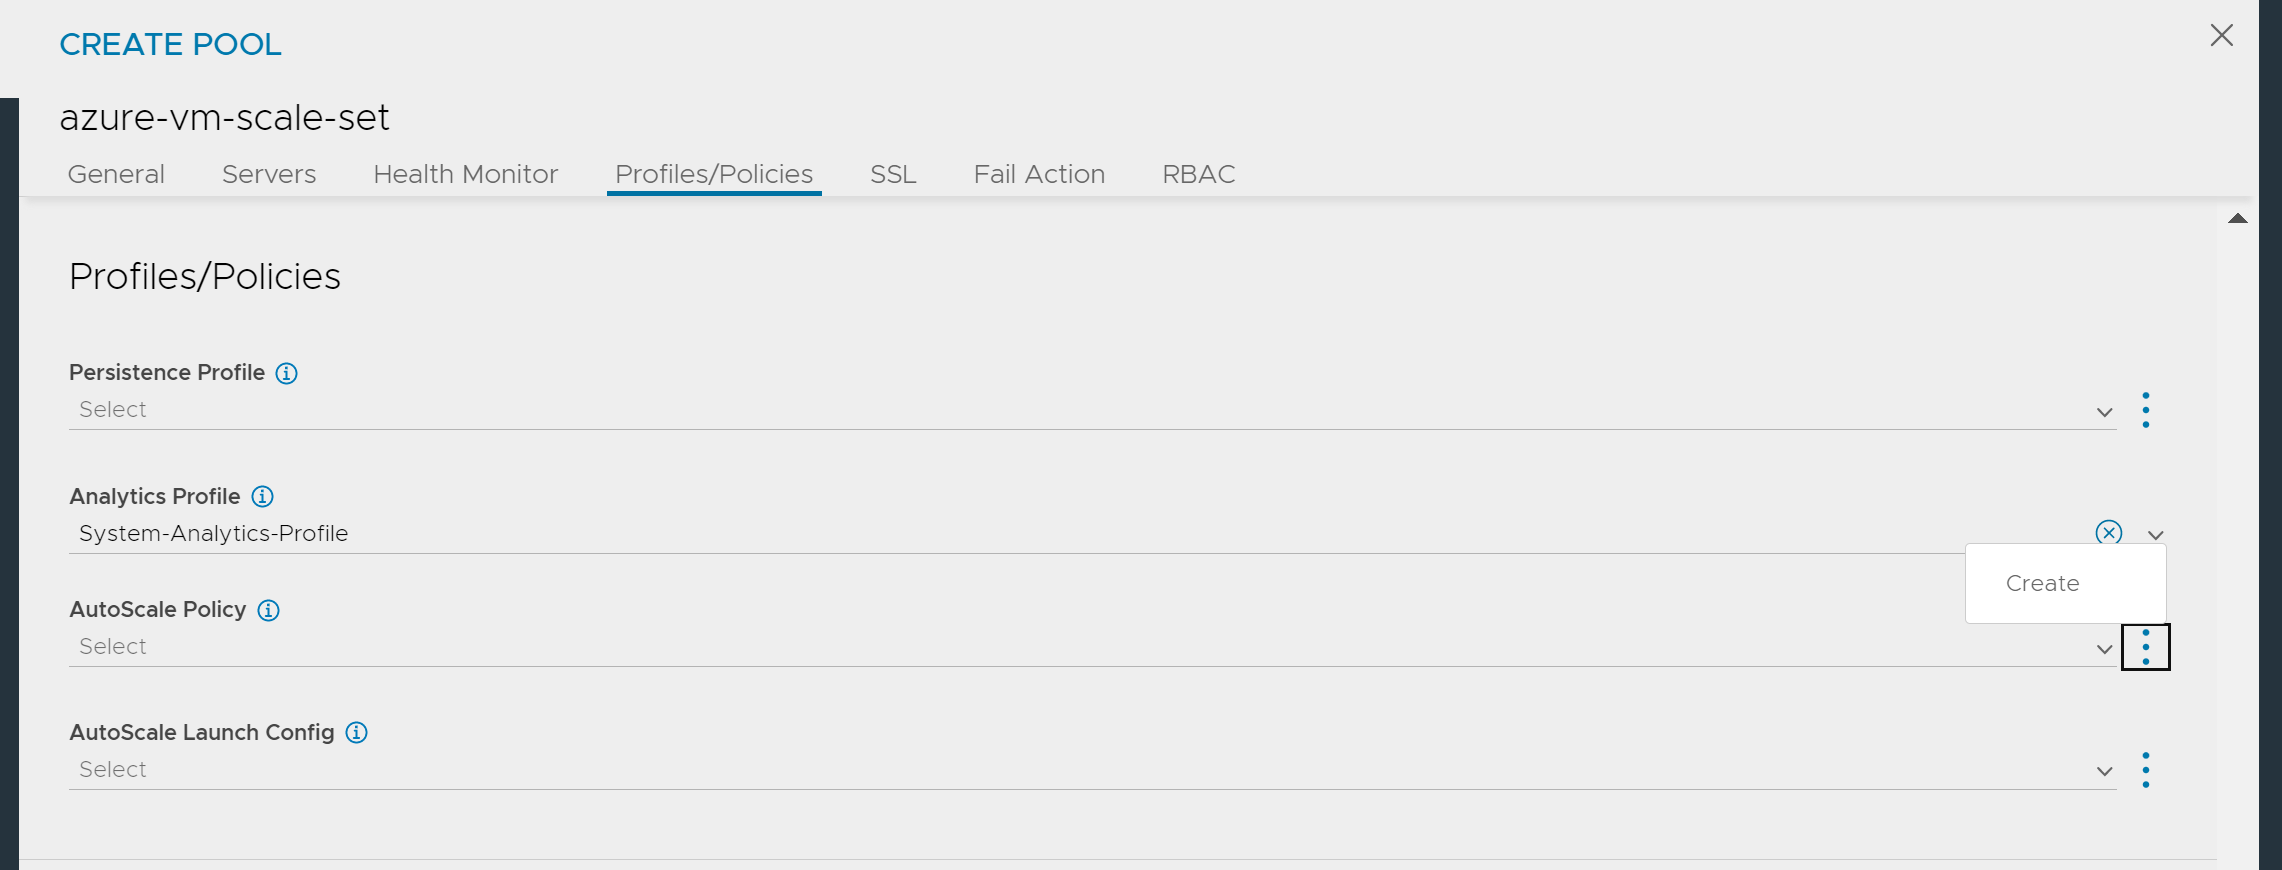
To integrate NSX Advanced Load Balancer with Azure VM scale sets, configure the autoscale policy by defining conditions and alerts for scale in and scale out.
To create a new policy, click on the drop-down menu for AutoScale Policy tab and choose Create.
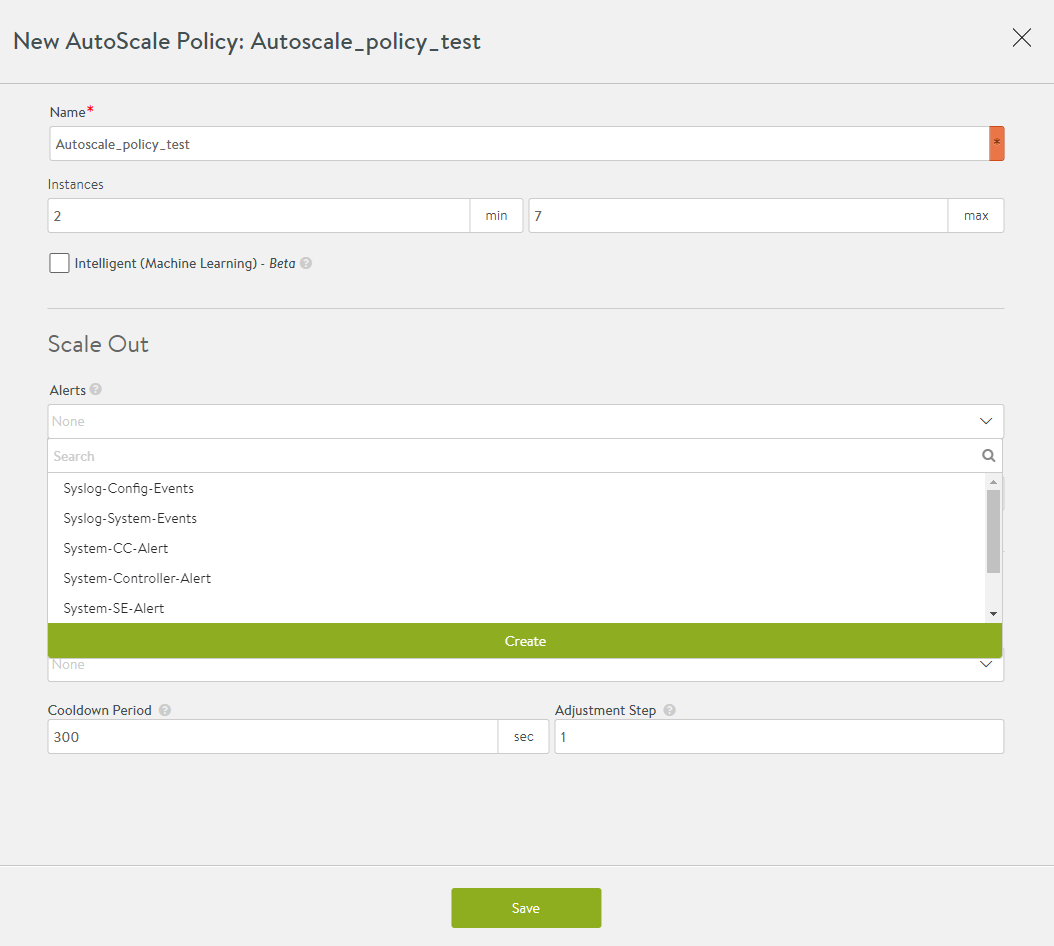
Enter the following fields in the New AutoScale Policy popup window:
Name – Enter a relevant name for the policy.
Instances – Enter the minimum and the maximum number of servers for the scaling process.
Scale-Out
Alerts – Click on the dropdown menu to choose a pre-defined alert. To create a new alert, see Create Alerts section below.
Cooldown Period – Enter the time duration in seconds during which no new scaleout will be triggered despite an alert.
Adjustment Step – Enter the number of servers to scale out simultaneously.
Scale In
Alerts – Click on the dropdown menu to choose a pre-defined alert. To create a new alert, see Create Alerts section below.
Cooldown Period – Enter the time duration in seconds during which no new scale in will be triggered despite an alert.
Adjustment Step – Enter the number of servers to scale in simultaneously.
Figure 2. 
In the example shown, the cooldown period is configured for 300 seconds, and the adjustment step is set to 1. So, after a scale-out or scale-in event is triggered, the system waits for 300 seconds before triggering a new event. With the adjustment step set to one, the servers will be incremented or decremented by one for every scale-out or scale-in event, respectively.
Create Alerts
To create a custom alert for Scale-out or Scale-in,
Click Alerts dropdown menu and choose Create as shown below:
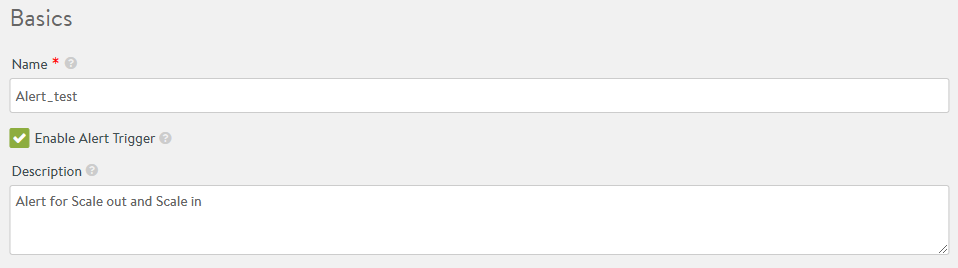
Enter the following fields in the Basics section,
Enter a Name for the alert configuration.
Select Enable Alert Trigger check box to activate triggers for the configured alert.
(Optional) Enter the Description for the configured alert.
Enter the following fields in the Conditions section,
Throttle Alert – Enter the time in seconds for which this alert will be suppressed since the last trigger.
Source – Choose the Metrics option to configure suitable metric parameters in the subsequent sections.
Object – Choose one of the options provided: Virtual Service, Service Engine, Pool. In this instance, none are chosen.
Select AutoScale Alert to activate this alert for autoscaling.
Number of Occurrences – Enter the number of events that must be met or exceeded within the specified time frame for the alert to be created. The allowed range is from 1 to 65536.
Category – Choose Rolling Window to define metric parameters with a time window. Only if the number of events meets or exceeds the defined limit within this time window will an alert be generated. Choose Real-time to define metric parameters without a time window. This checks for metric triggers in real-time.
Metric Occurs – Click on the drop-down menu to choose from the list of event IDs. Enter relevant values in the Comparator, Value, and Duration fields to complete the metric configuration. The instance in the screenshot configures a metric for
l4_server.max_open_connsevent, which refers to the maximum open Layer 4 connections allowed. In this case, an alert is triggered if the Layer 4 open connections exceed or are equal to 500 for a time duration of 300 seconds.Click + Add New Metric to create more event triggers. You can configure the new metric using And and Or conditions with the metric that has already been configured.

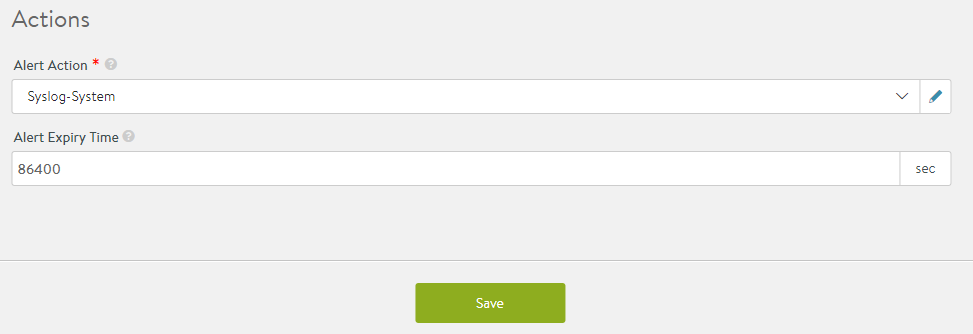
Enter the following fields in the Actions section,
Alert Action – Click on the dropdown menu to choose a pre-defined alert action or click on Create Alert Action to create a new action. Click edit icon to customize the action parameters.
Alert Expiry Time – Enter the expiry time in seconds for the configured alert.
AutoScale Launch Config
Click on the AutoScale Launch Config drop-down menu and choose default-autoscalelaunchconfig which indicates that the servers for auto scaling are hosted by an external ecosystem, such as, Azure cloud in this case.
Click on Next.
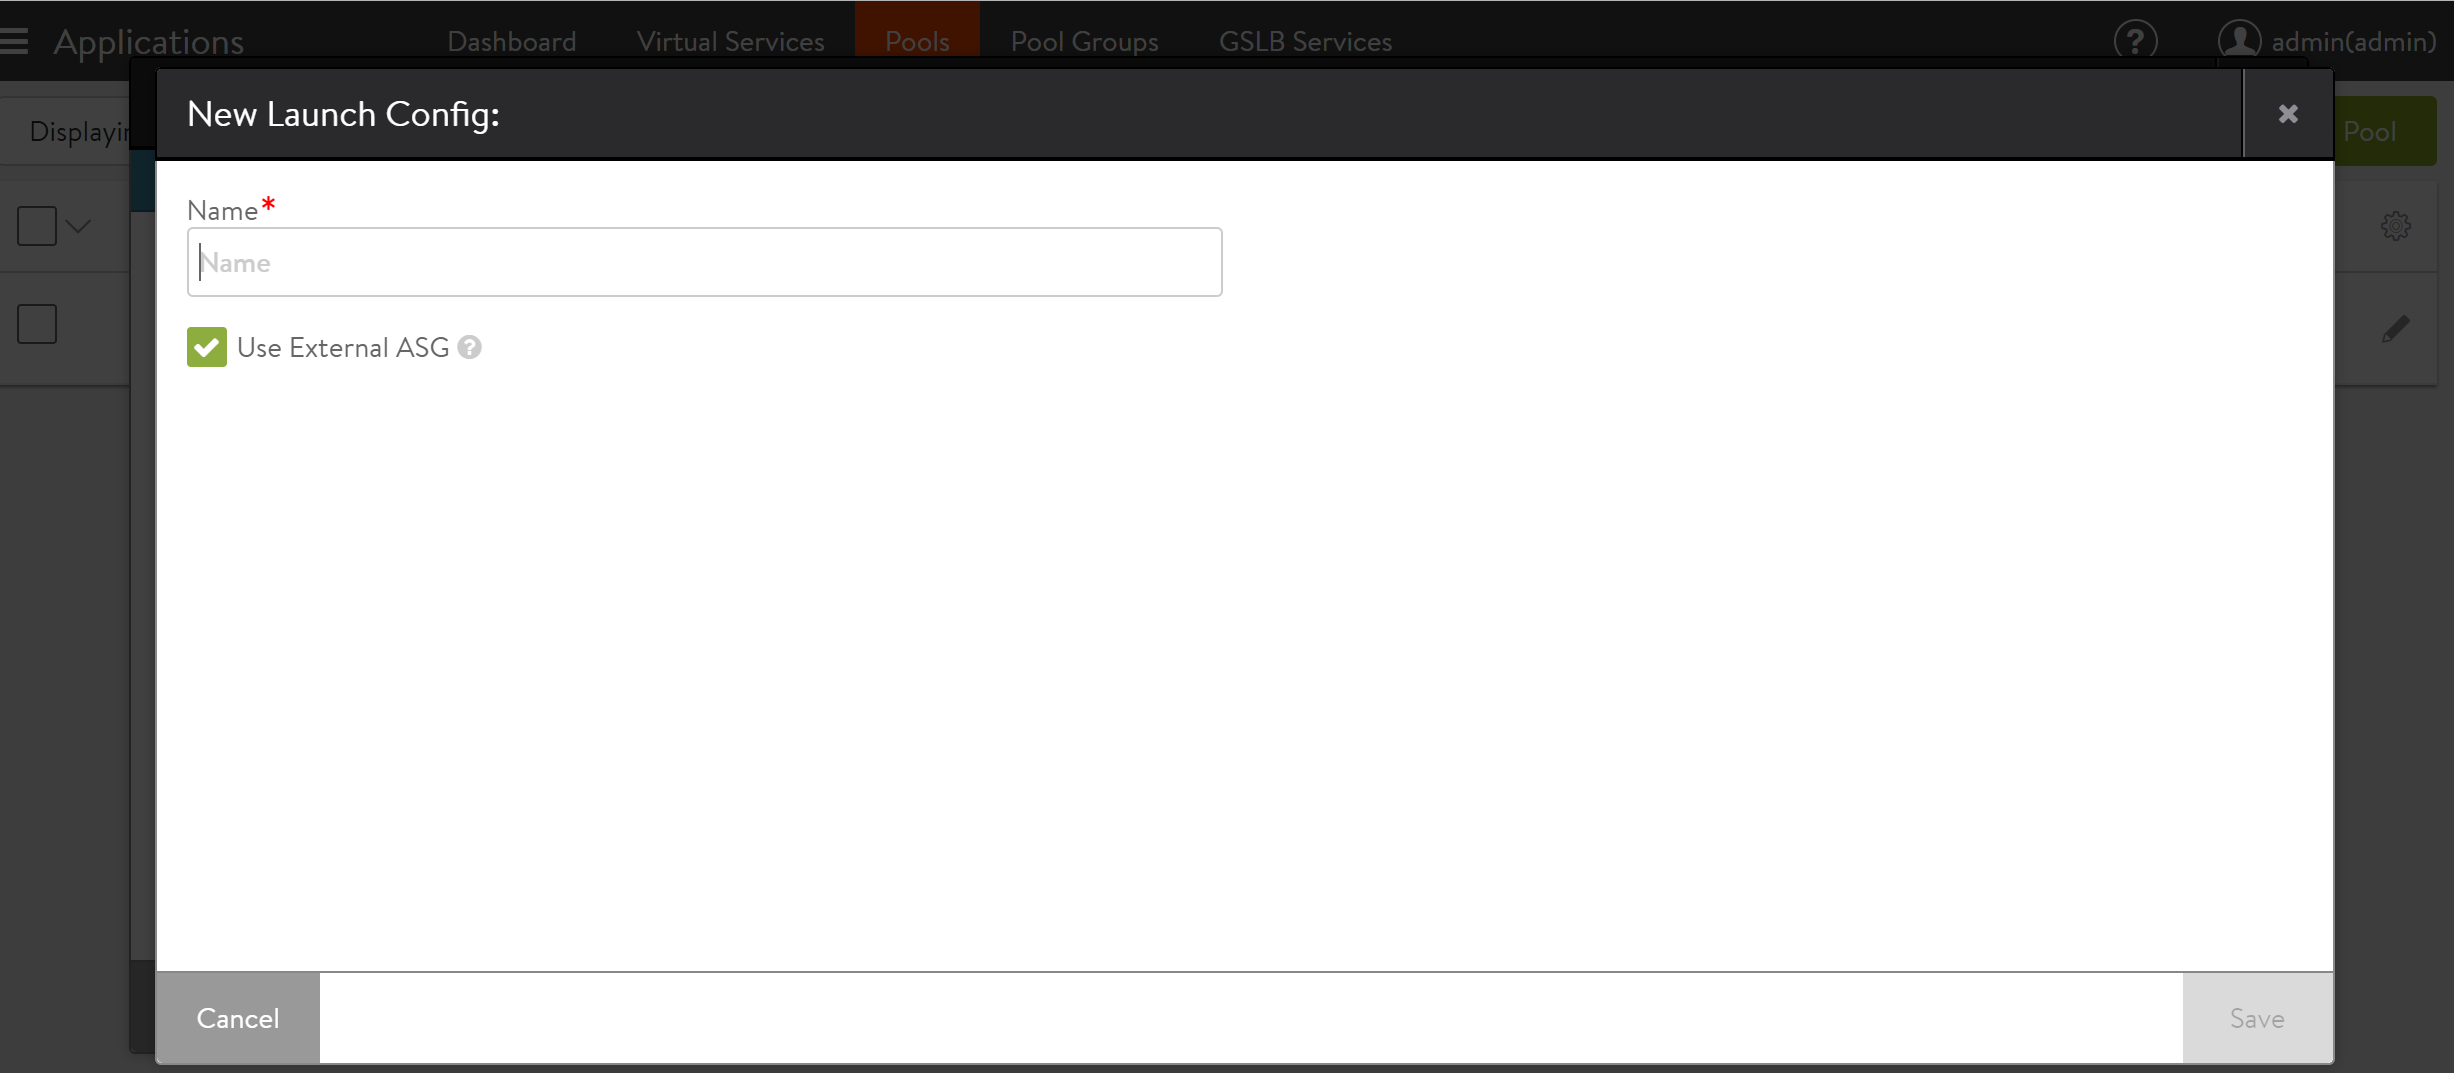
To create a new autoscale launch configuration, click Create.
Provide the name and select the check box for Use External ASG.
Configuring Pool Servers
-
Under Select Servers, choose Azure Scale Set option. Click on the drop-down for Auto Scaling Groups which will list the scale sets configured on Azure for the specified cloud.

Click on Next, to configure Placement Settings, Pool Full Settings, and Pool Failure Settings.
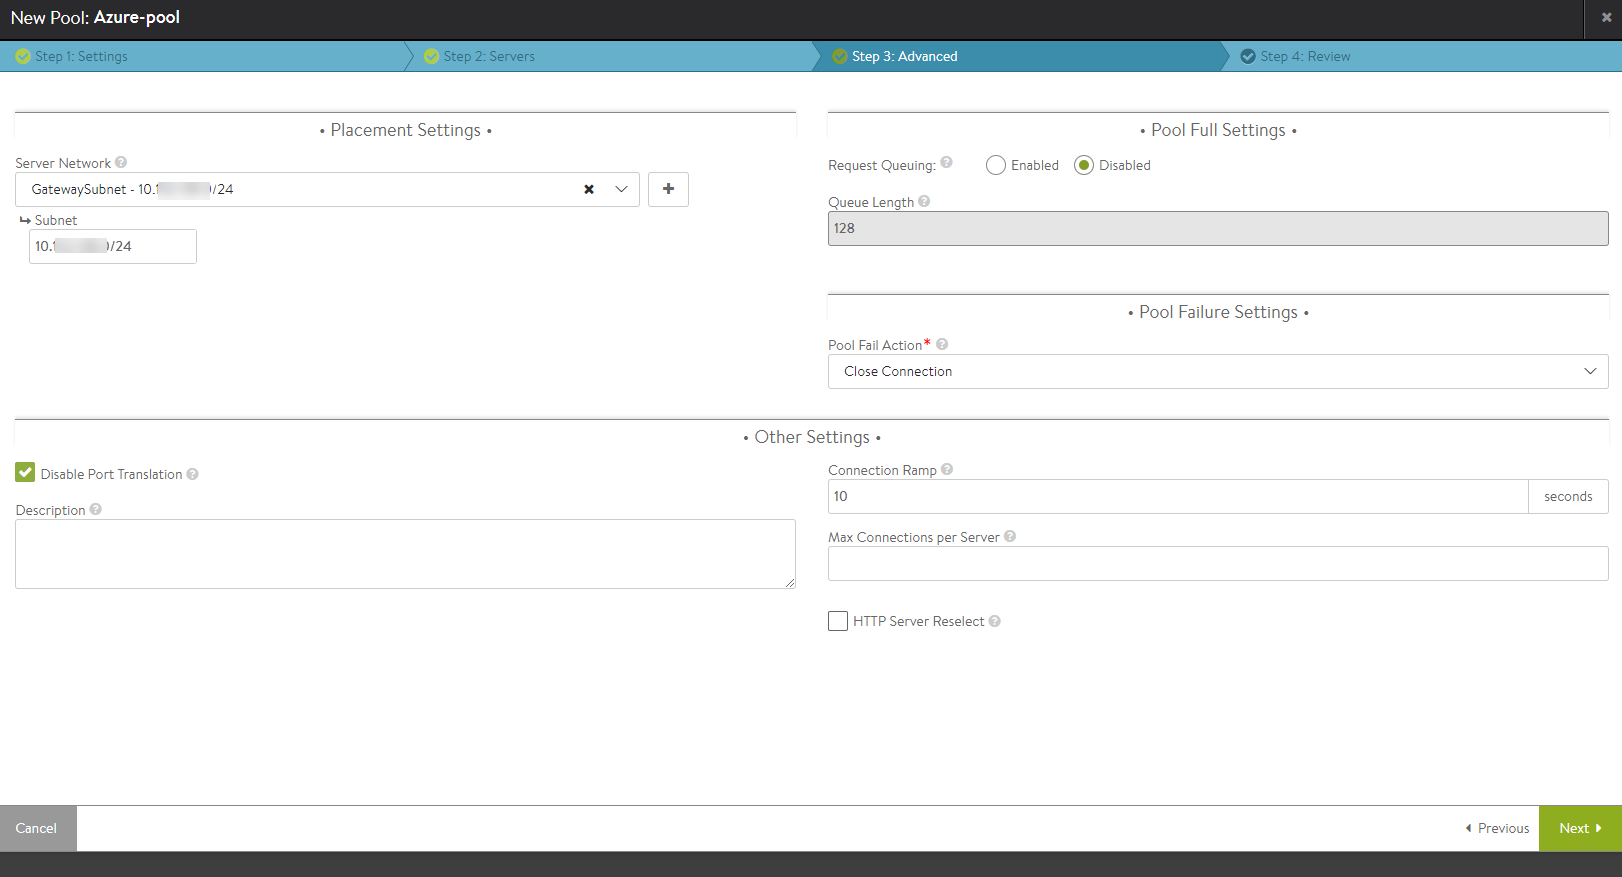
Click on Next to review the configuration and click Save to complete the configuration. This concludes the pool configuration for integrating Azure VM scale sets.
Configuring Virtual Service
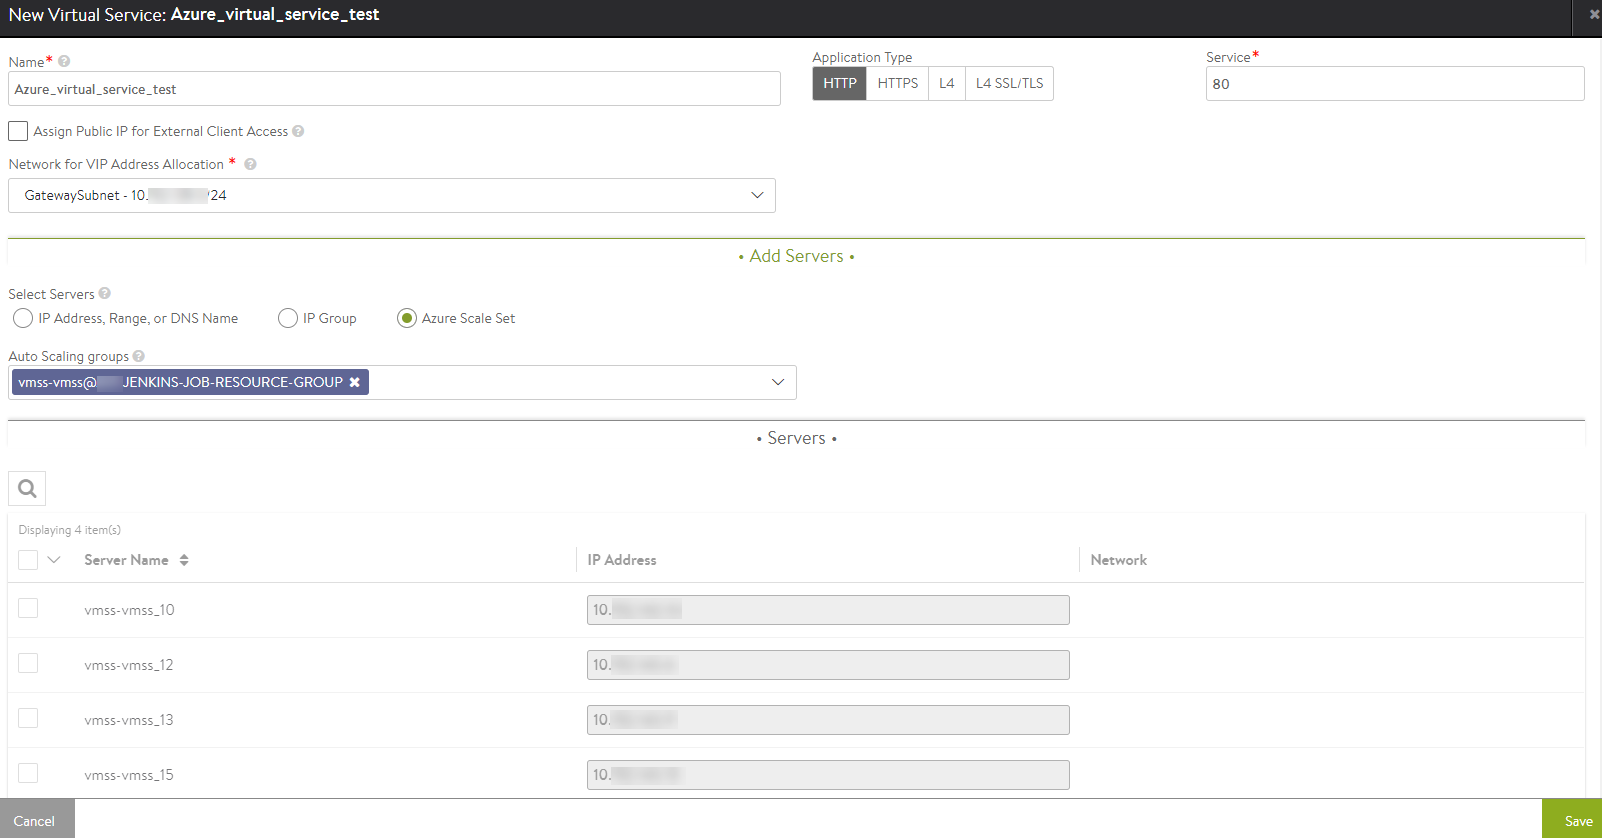
Navigate to and click Create Virtual Service. You can choose either Basic or Advanced setup to map the configured virtual service with Azure scale sets.
To configure the Basic Setup:
Select the Azure specific resource group.
Under Add Servers section, select Azure Scale Set.
Choose the resource group from the drop-down menu under Auto-Scaling groups.
-
On selecting a specific group, the configured servers will be displayed under the Servers section.
Configuring under Advanced Setup provides an option to allocate the Azure pool configured for a specific virtual service.
To choose the Azure pool, select Pool under the Pool section and from the drop-down menu select the Azure pool configured.
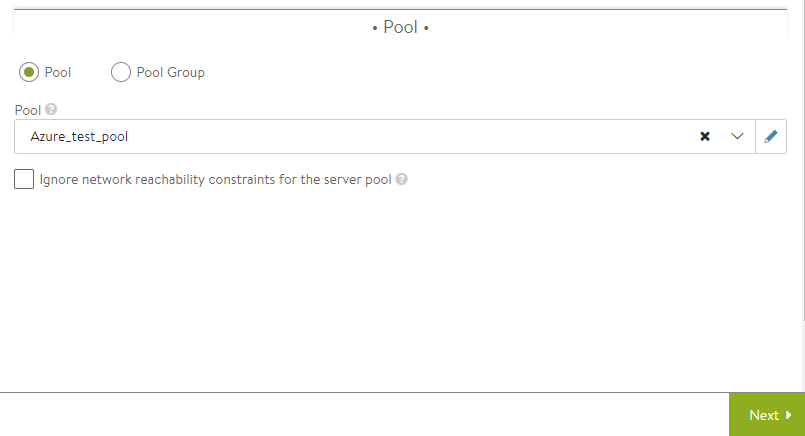
Click Next to navigate to the rest of the virtual service configuration.
Click Save to complete the configuration.
Auto Scaling using Azure Policies
The auto scaling can be driven using Azure policies instead of AutoScale Policy defined in NSX Advanced Load Balancer.
From the Navigation pane, choose Applications, and click on Pools. Click on Create Pool and choose Azure cloud, when prompted.
Enter the pool name and suitable values for Default Server Port, Graceful Disable Timeout, Load Balance, and Persistence fields.
Leave the AutoScale Policy field unselected and click Next to configure pool servers as explained in Configuring Pool Servers section.

As no AutoScale policy has been defined in NSX Advanced Load Balancer, auto scaling is driven by the policies configured on Azure.
Configuring Autoscale Polling Interval
To enable autoscale polling interval, login to NSX Advanced Load Balancer CLI and execute the autoscale_polling_interval <duration in seconds> command under the configure cloud Default-Cloud mode.
[admin:10-1-1-1]: > configure cloud Default-Cloud
[admin:10-1-1-1]: cloud > autoscale_polling_interval 120
[admin:10-1-1-1]: cloud > save
120 is the duration in seconds of polling interval.
