


This section explains the configuration of the native DNS hosting solution.
The DNS solution is available for the following clouds:
Containers (Docker UCP, Rancher)
Linux server
VMware
No Access
OpenStack
Amazon Web Services
Google Cloud Platform
Configuring DNS
You can configure DNS as follows:
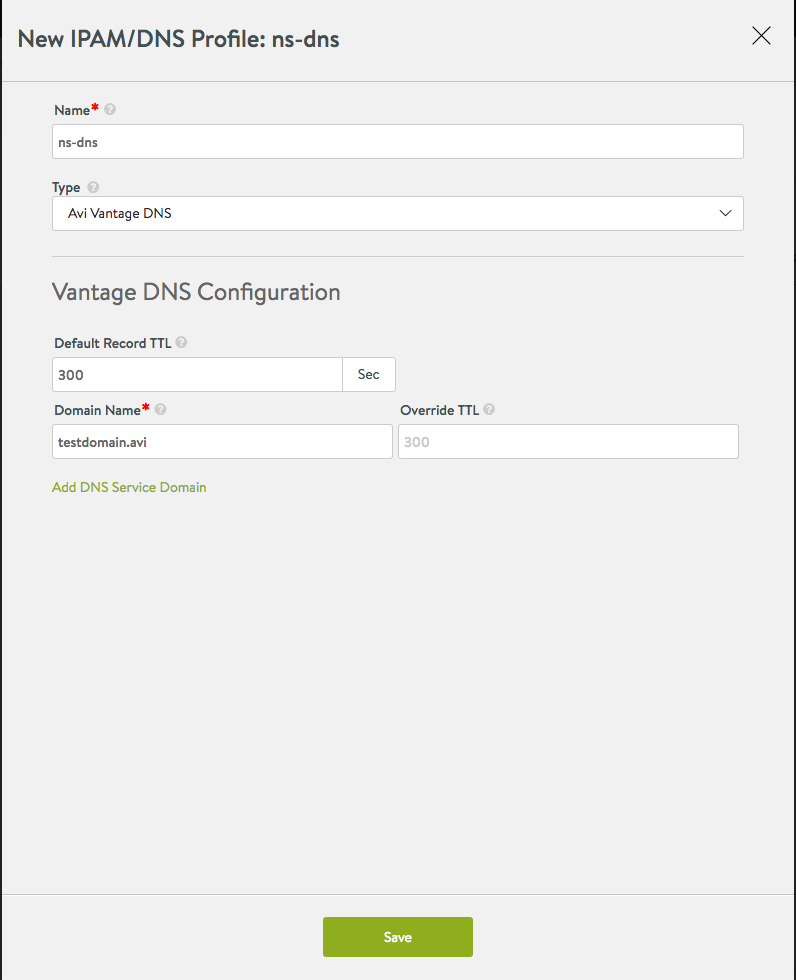
Navigate to and create a DNS profile.
Add one or more DNS service domain names. NSX Advanced Load Balancer will be the authoritative DNS server for these domains.
Configure a TTL value for all records for a particular domain, or leave the Default Record TTL field empty to accept the default TTL of 300 seconds.
Click Save.
Using NSX Advanced Load Balancer DNS
After configuring a DNS profile with a set of domains for which NSX Advanced Load Balancer DNS will be serving records, configure a DNS virtual service. The advantages of using a DNS virtual service are High Availability (HA) and Interoperability with other DNS providers.
NSX Advanced Load Balancer DNS Virtual Service
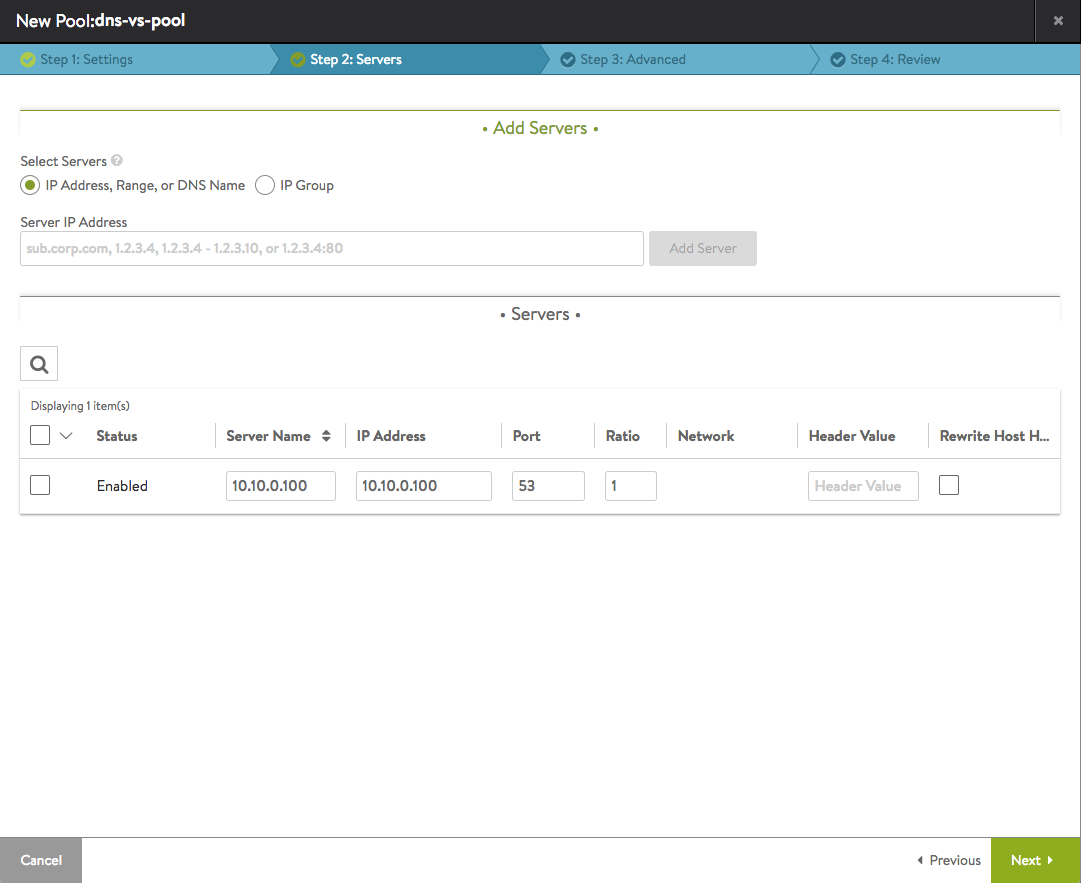
Create a DNS Pool with DNS server members to make the NSX Advanced Load Balancer DNS handle all DNS requests for which it does not host domains natively. For example, if the DNS profile contains authoritative domain 'test.avi,' this DNS virtual service will host all the records for this domain and additionally with a pool configured as below, it can relay the requests to DNS server members for non-authoritative domains such as 'google.com'.
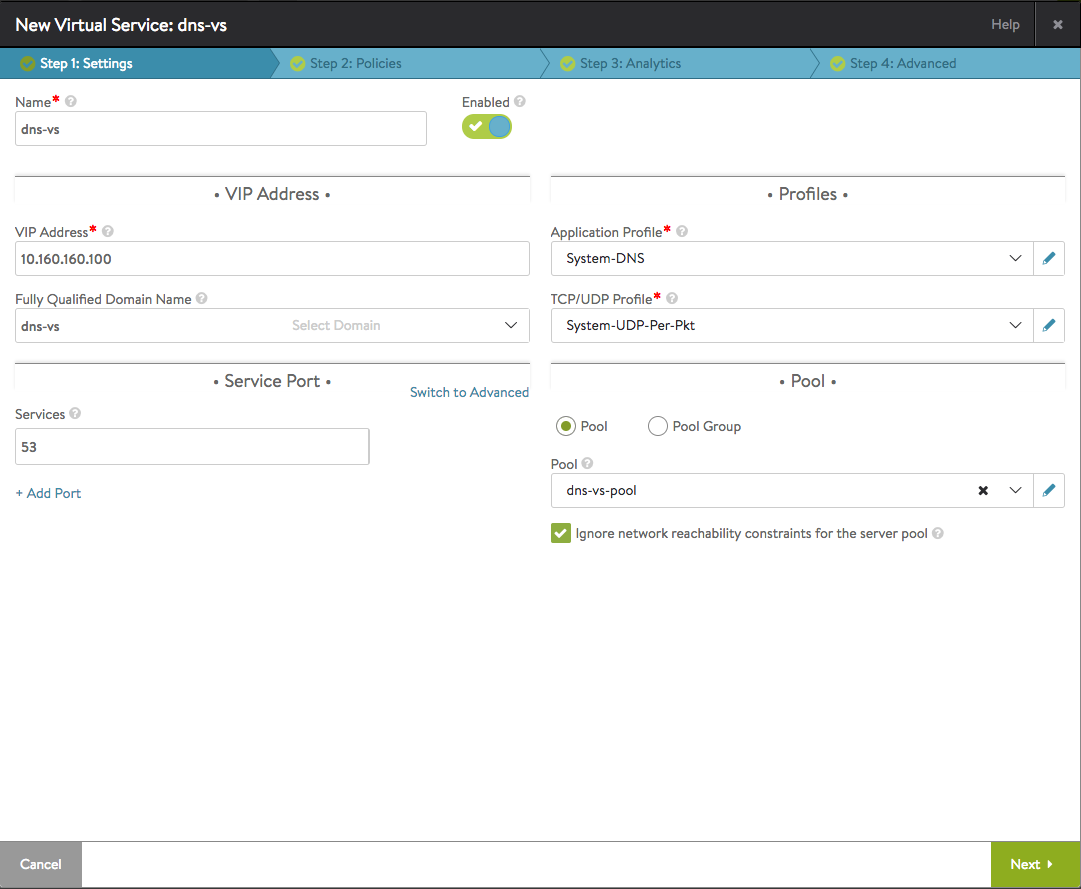
You can create DNS virtual service by providing a publicly-accessible virtual IP address and by selecting System-DNS in the Application Profile drop-down menu. Select the Ignore network reachability constraints for the server pool check box to ignore the network reachability.
If the corporate DNS server is on an external network (requires routing for SE data traffic to reach the DNS server), then add a static route to the external network as shown below (if a default route is not already configured):
Navigate to and add a Default-Gateway IP address for the cluster. After this configuration and if the DNS virtual service was down, it should now be up.
Navigate to and enable this DNS virtual service to start hosting application records. Multiple DNS virtual services can be configured for redundancy in the cluster.
Enable DNS service in your data center using one of the following two options:
Add DNS VIPs ('10.160.160.100' as configured above) to the nameservers’ list in
/etc/resolv.confon all nodes requiring service discovery. Create applications and verify resolution works for the application’s FQDN by issuing 'dig app.testdomain.avi' anywhere in the cluster.Add DNS VIP in the corporate DNS server as the nameserver for serving domain names configured in the DNS profile above. Any requests to
testdomain.aviwill be redirected to and serviced by the DNS service. Alternately, DNS server can be the main front-end DNS server and the corporation DNS servers can be configured as DNS pool members.
NSX Advanced Load Balancer DNS with AWS Cloud
You can choose NSX Advanced Load Balancer native DNS provider along with AWS Route 53 while creating an AWS cloud. The native DNS can be configured as explained in the above section (DNS Configuration) or can be created directly while creating the AWS cloud.
The following are the limitations and restrictions of using the DNS in AWS cloud:
Both Route 53 and the native DNS cannot be configured/enabled at the same time on the AWS cloud.
When the AWS cloud has a virtual service with FQDNs resolved by either DNS or Route 53.
Removal of the cloud is not allowed until the existing virtual service with FQDN is removed from the cloud.
Changing the DNS provider, that is, either removal of existing or changing from existing DNS provider to Route 53 or vice versa is not allowed until the existing virtual service with FQDN is removed from the cloud.
