


NSX Advanced Load Balancer integrates with Google Cloud Platform (GCP) for providing IPAM services to applications running on instances in GCP. This section explains how to create a GCP profile and configure GCP IPAM.
Linux Server Cloud and GCP IPAM on GCP are not supported.
Prerequisites for GCP IPAM
Set up the Controller and SE instances on GCP.
Install NSX Advanced Load Balancer in a Linux Cloud. To use GCP as the IPAM provider, all the Controller and Service Engine instances must run in Google Cloud. The cloud type selected within NSX Advanced Load Balancer must be Linux Server Cloud. For more information, see Installing NSX Advanced Load Balancer in a Linux Server Cloud.
GCP uses a /32-based interface IP configuration. To support this, perform the following after configuring the Linux Server Cloud.
The CLI command is as follows:
configure serviceengineproperties
se_runtime_properties
se_handle_interface_routes

service_ip_subnets subnet/mask
save
save
Reload all the SEs for the configuration to take effect.
The service_ip_subnets configuration optimizes the Docker routes on the SEs. If VIP allocation is done from multiple subnets, specify all of them.
Configuring GCP IPAM
Create and configure the GCP IPAM in NSX Advanced Load Balancer as follows:
Navigate to .
Click Create.
Enter the IPAM Profile Name.
Select Google Cloud Platform IPAM for Type as shown below.
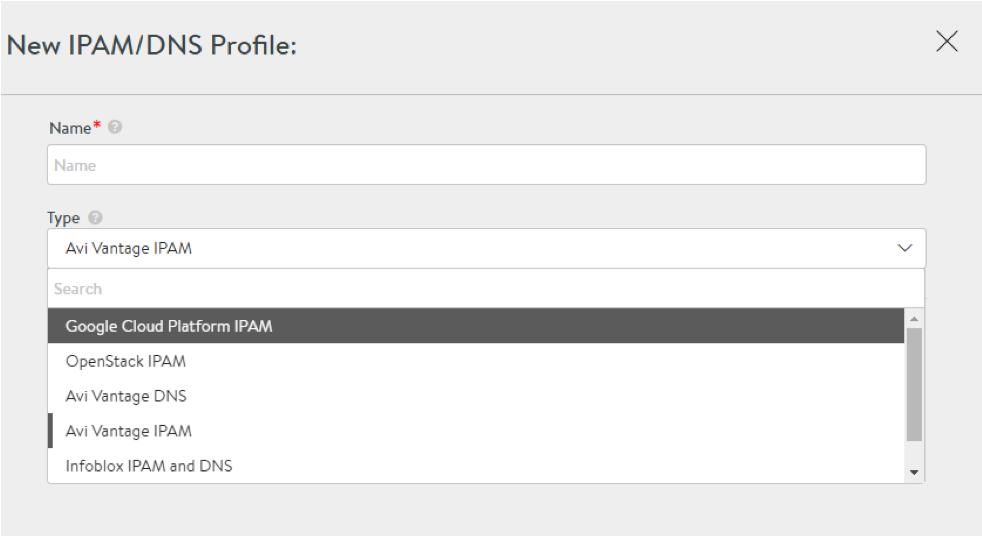
Starting with NSX Advanced Load Balancer 22.1.3, the following UI is available:
You can create the IPAM profile in one of the following ways:
Option 1: Create a GCP cloud and select that cloud during creation of IPAM
As a prerequisite to creating a GCP IPAM, create a cloud named GCP Cloud, with the following inputs:
Service Engine Project ID - Project A (Project Name of the SEs)
Service Engine Region - Region A (Region Name of the SEs)
Zones
VPC Project ID
VPC Network Name
VPC Subnet Name
Cloud Storage Project ID
Cloud Storage Bucket Name
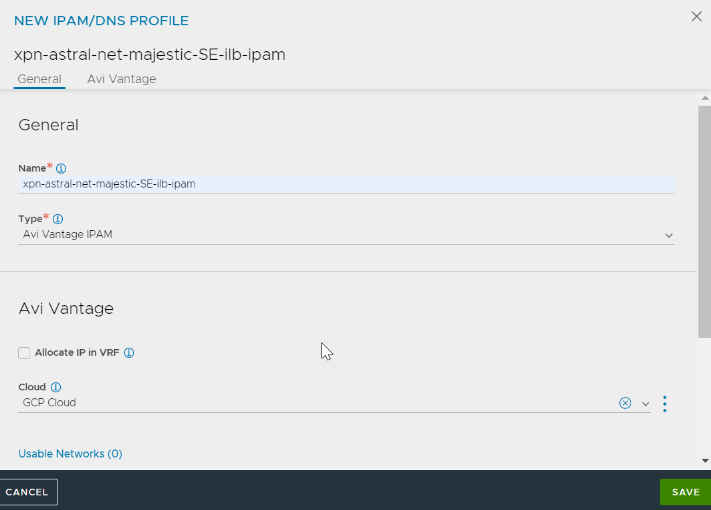
In the NEW IPAM/DNS PROFILE screen, specify the profile name.
Select Avi Vantage IPAM option from Type drop-down menu and select the previously created cloud – GCP Cloud – for the Cloud field.
Add Usable Networks and click SAVE.
Option 2:
Create a new GCP cloud or edit an existing cloud.
Navigate to IPAM/DNS tab.
In the IPAM Profile field, click the vertical ellipsis and then click Create.
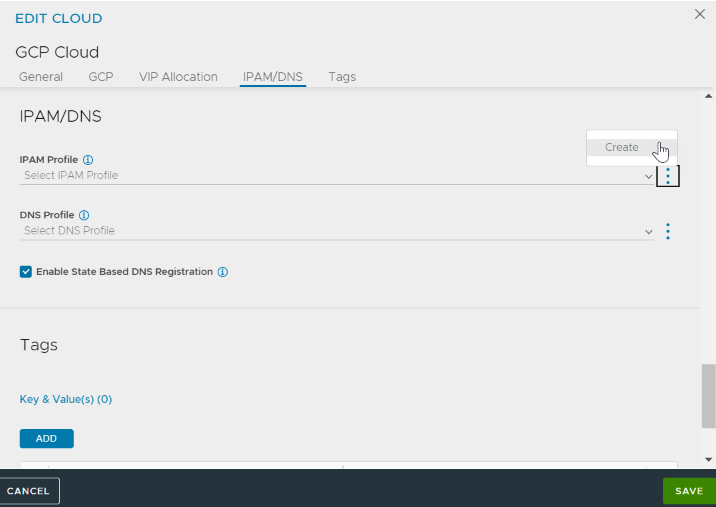
Configure the NEW IPAM/DNS PROFILE as shown in Option 1.
Complete the Cloud configuration by clicking SAVE in the EDIT CLOUD screen.
You can configure GCP IPAM as follows:
Navigate to .
Select Default-Cloud and click the Edit icon.
The IPAM that was created appears in the IPAM Profile drop-down menu. Select the IPAM Profile.
Configure a Linux Server Cloud using the IP addresses for the Service Engine instances created.
GCP IPAM has been configured, and virtual services can now be provisioned.
On GCP only L3 scale out mode is supported for virtual services.
Some of the GCP zones might require the MTU to be lowered to 1400.
To set the MTU on the SEs, you can use the following CLI command:
configure serviceengineproperties
se_runtime_properties
global_mtu 1400
save
save
The MTU value will take effect after the SEs are rebooted.
Assigning Floating IP
You can assign floating IP using the following CLI command:
++Truncated Output++
+------------------------------------+-----------------------------------------------------+
[admin:10-146-43-2]: virtualservice> vip index 1
[admin:10-146-43-2]: virtualservice:vip> auto_allocate_floating_ip
Overwriting the previously entered value for auto_allocate_floating_ip
[admin:10-146-43-2]: virtualservice:vip> save
[admin:10-146-43-2]: virtualservice> save
++ Truncated Output++

Assigning floating IP is currently supported through the CLI only.
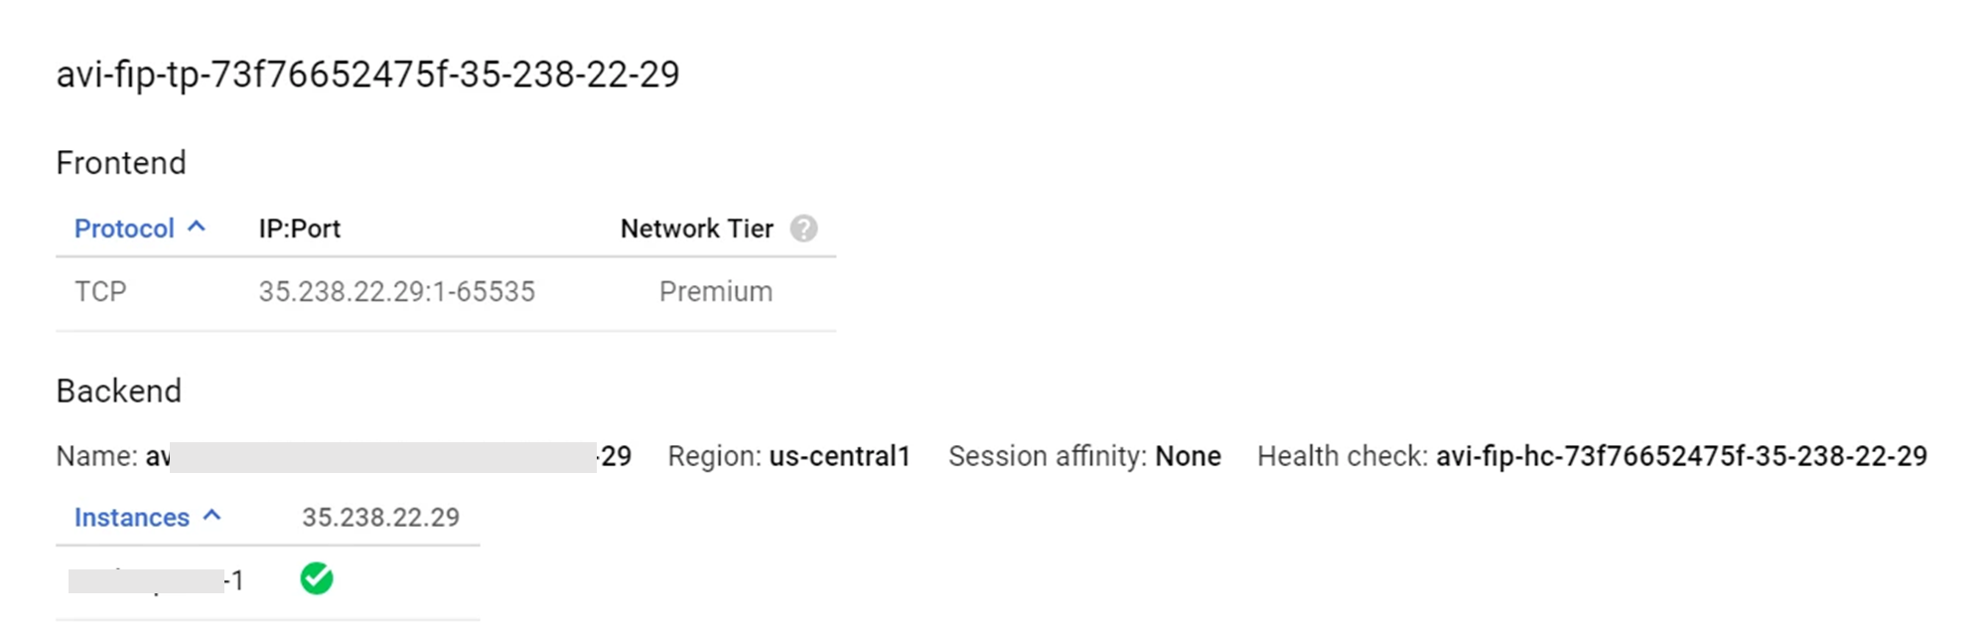
Auto-allocate Floating IP
All GCP resources will be created in the SEs project. Only auto-allocation of floating IP is supported.
++Truncated Output++
[2018-07-16 06:48:08,717] INFO [gcp_nlb.allocate_vip:63] old_vip_info: vip {
addr: "55.55.55.100"
type: V4
}
alloc_fip: false
|| new_vip_info: vip {
addr: "55.55.55.100"
type: V4
}
alloc_fip: true
You can also use Swagger APIs to auto-allocate a floating IP through a PUT request as follows:
"vip" : [ {
"availability_zone" : "aeiou",
"ip6_address" : "",
"subnet" : "",
"port_uuid" : "aeiou",
"subnet_uuid" : "aeiou",
"avi_allocated_vip" : true,
"vip_id" : "aeiou",
"ip_address" : "",
"auto_allocate_floating_ip" : true, *
"enabled" : true,
"floating_subnet6_uuid" : "aeiou",
"auto_allocate_ip" : true,
"subnet6" : "",
"floating_ip" : "",
"floating_subnet_uuid" : "aeiou",
"avi_allocated_fip" : true,
"subnet6_uuid" : "aeiou",
"floating_ip6" : "",
"ipam_network_subnet" : "",
"network_ref" : "aeiou",
"discovered_networks" : [ "" ]
Shared-VIP
Shared VIPs can be created on the same IP as shown in the image.

Configure GCP IPAM for Kubernetes/OpenShift
Kubernetes/OpenShift cloud is not supported in NSX Advanced Load Balancer.
