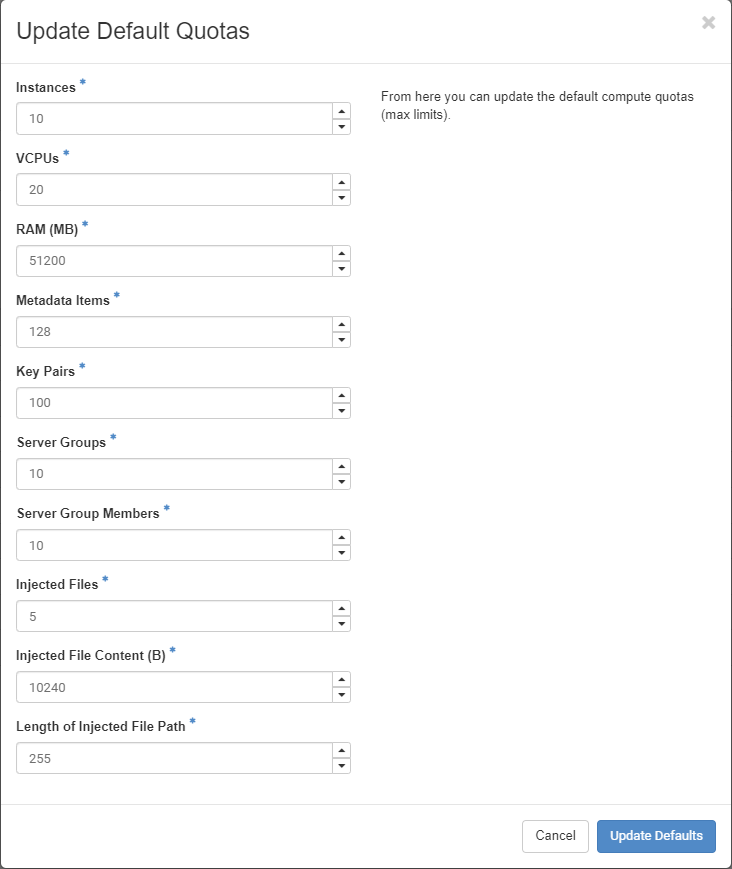
This section explains the installation process for tenant mode. You can create a tenant for the Controller and the SEs.
To create a tenant for the Controller and SEs:
Log in to the OpenStack dashboard with an account that has cloud administrator privileges and navigate to .
Click Create Project and follow the wizard’s instructions.
To deploy NSX Advanced Load Balancer , specify a project name, (NSX Advanced Load Balancer-tenant, for instance) and click the Project Members tab. You can add a user account to Project Members and assign the admin role to the account.
Navigate to . Click Update Defaults to modify the maximum resources. These settings allow for three Controllers (for redundancy), up to 1000 SEs and some other managerial instances, if required.

Creating Multiple Flavors of Controller Image
You can create multiple flavors of NSX Advanced Load Balancer as follows:
In the OpenStackdashboard, navigate to and click Create Flavor.
Create an appropriate flavor for the Service Engine.
Create appropriate flavor for the Controller.
You can manually configure the flavor if you want to use flavors other than the recommended ones using CLI. Also ensure that you check minimum and recommended resources required for Service Engine.
The OpenStack flavor name should be specified and not the flavor ID or UUID.
Uploading the Controller Image
You can upload the Controller image by copying the Controller qcow2 image onto your hard drive. Then navigate to in the OpenStack dashboard. Click Create Image and fill out the form.
Creating Management Network
A management network is required for communication between the Controller and the SEs. An existing network can be used but a dedicated management network is recommended.
The following are the step to create management network:
On the Horizon dashboard, navigate to .
Click on Create Network and follow the wizard’s instructions. For instance,
Network name: avi-mgmt
DHCP: Enabled
Connect the network to your Neutron router.
Navigate to .
On the Name column in the router list, click Router to add an interface to the network.
Click on the Interfaces tab, then click Add Interface.
Creating Security Group
A security group is required to allow the Controller and SEs to exchange management traffic. The group specifies the protocol ports for which traffic will be allowed.
For ingress traffic, the group must allow these ports.
For egress traffic, the group can allow all ports.
The NSX Advanced Load Balancer Controller automatically creates a security group for the SEs.
You can create a security group (for instance, Avi-mgmt-sg) and allow management traffic by navigating to on the OpenStack dashboard. Click Create Security Groups and add rules, for instance, 192.168.10.0/24 is the management network.
Deploying Controller and Assigning it a Floating IP
You can assign a floating IP address to the Controller by navigating to on the Openstack dashboard. If no floating IP address is available, click Allocate IP to Project. If a floating IP address is already available, you can associate it with the NSX Advanced Load Balancer Controller instance.
You can deploy the Controller instance by setting the following values:
Flavor: Deploy
avi_ctrl.smallor bigger.Network: Use
avi-mgmtto attach the Controller to the management network.Security group: Use
avi-mgmt-sgto allow management traffic.Enable
config-drive.