


This section explains the steps to configure NSX Advanced Load Balancer for MSI authentication.
Procedure
- Follow the steps mentioned below to enable MSI authentication using NSX Advanced Load Balancer UI.
- Navigate to . Create a new cloud of type Microsoft Azure.
- Enable the checkbox for Use Azure Managed Service Identity (MSI) Authentication. Continue the next steps to select the Vnet.
Figure 1. Enabling MSI 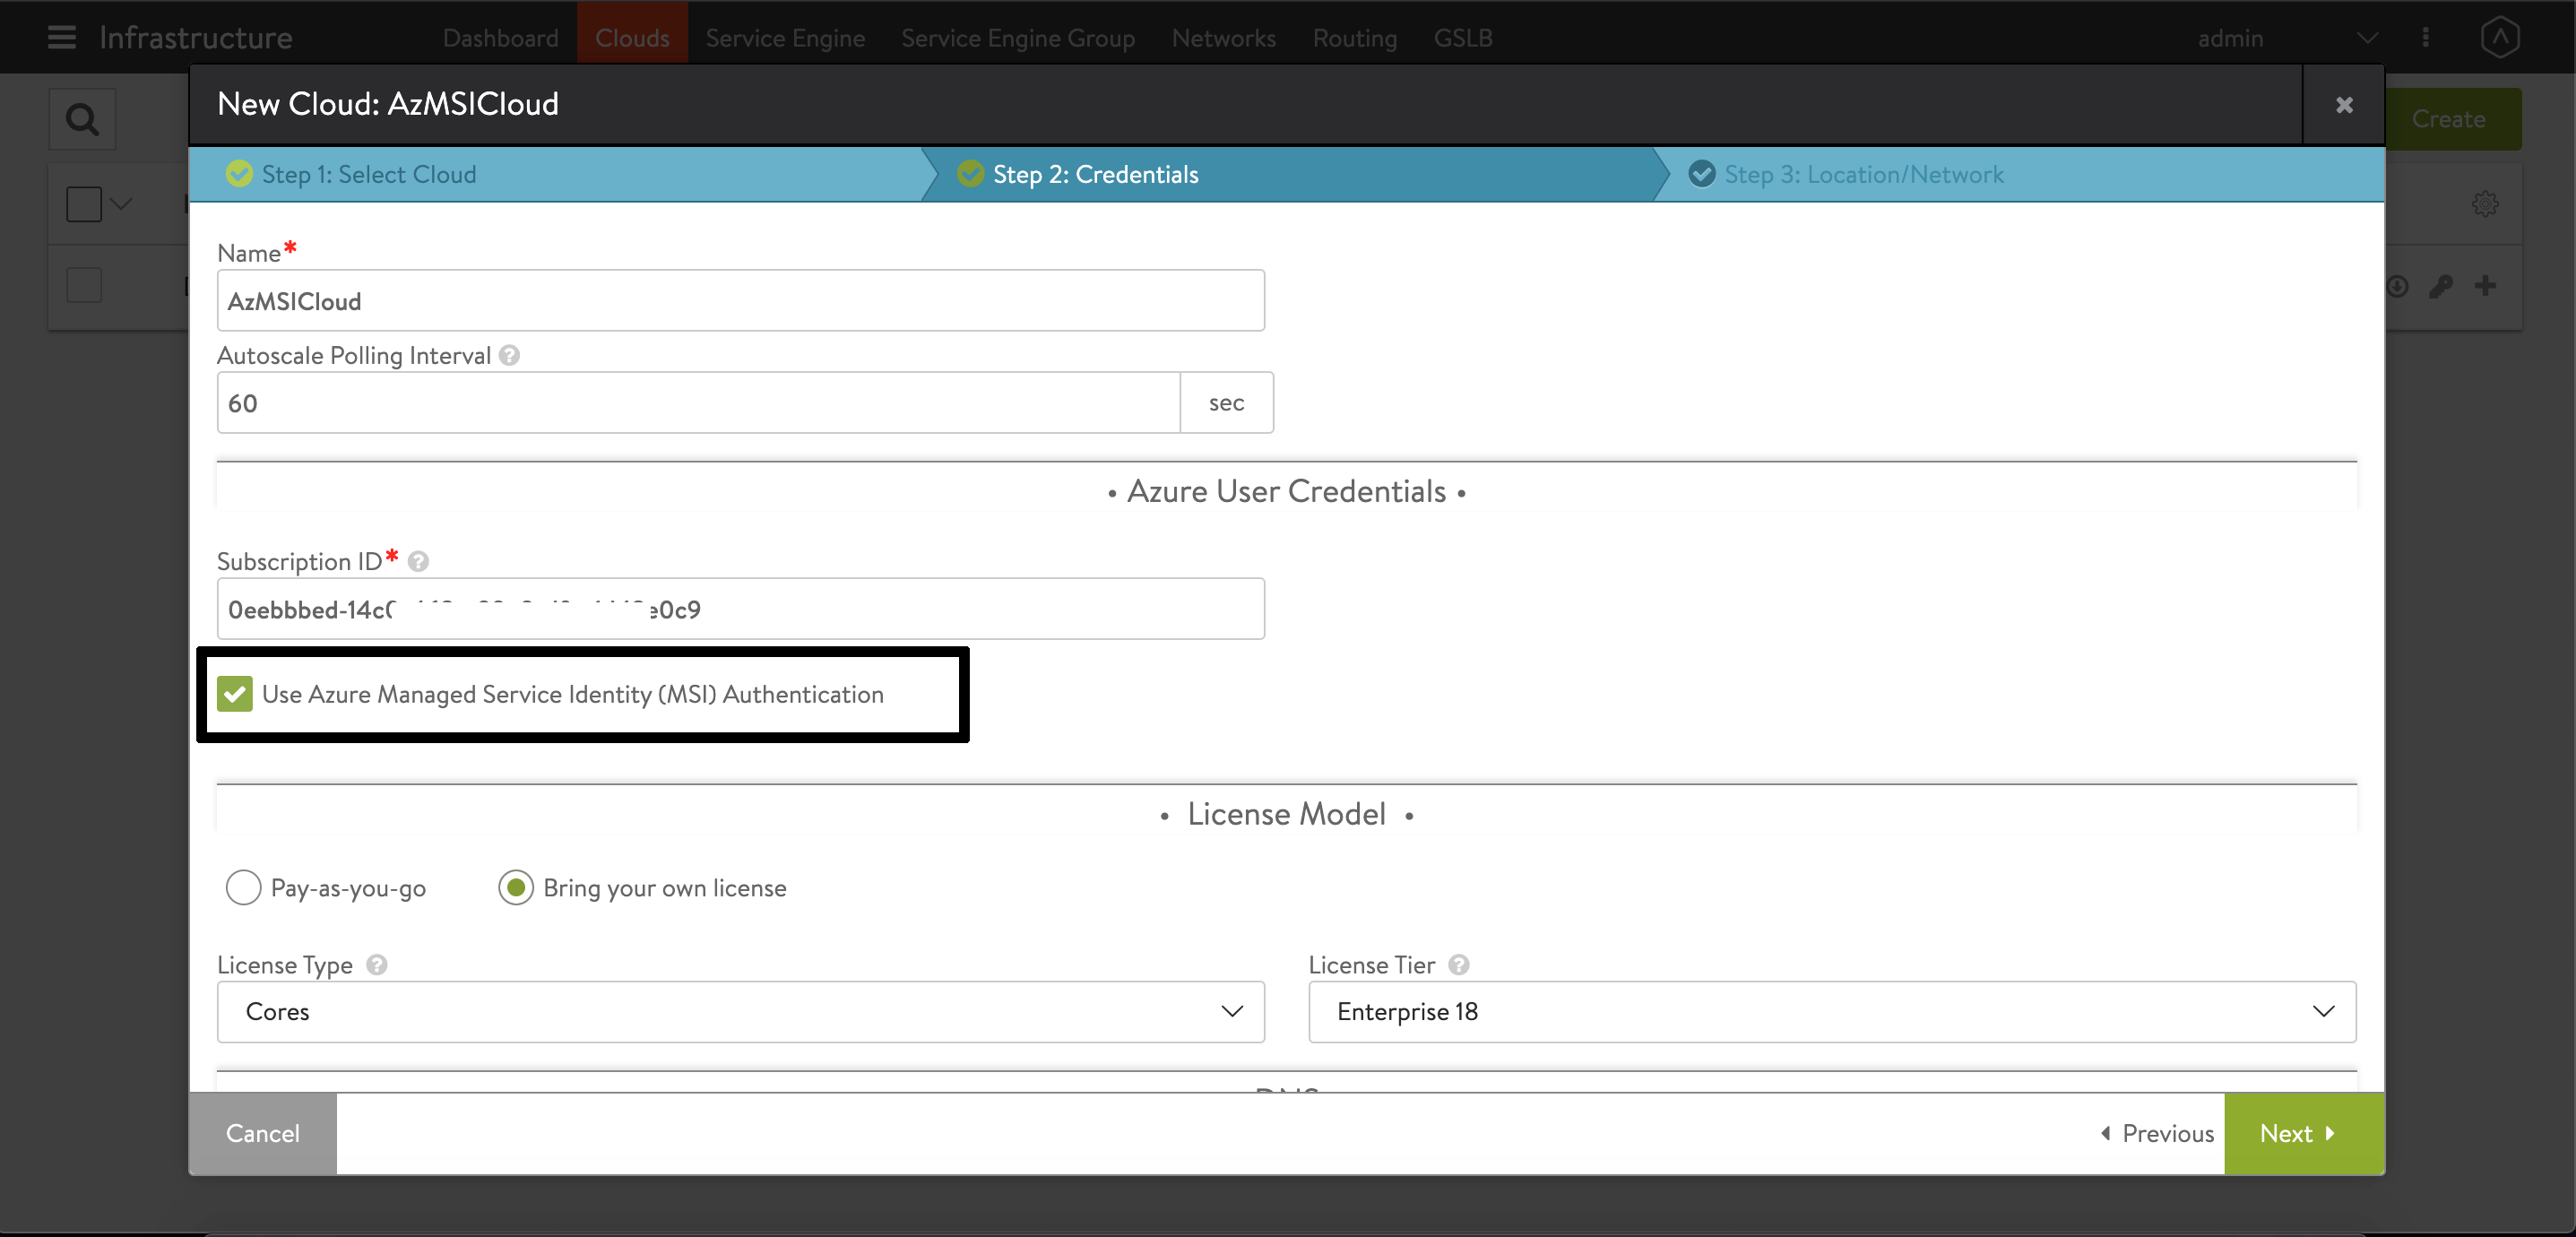
- For Vnet, select the virtual network with which Virtual IPs are associated. Select the desired Resource Group. The Controller creates all its resources in this resource group.
- Save and navigate back to to check the cloud created.
- Enabling MSI Authentication using the NSX Advanced Load Balancer CLI. Login to the NSX Advanced Load Balancer shell prompt and use the configure cloud <cloud name> to enable MSI authentication for the cloud.
- Login to the shell prompt and use the configure cloud
<cloud name>to enable MSI authentication for the cloud.
- Login to the shell prompt and use the configure cloud
