


An error, IP 10.x.x.x not associated with any eni, occurs when an elastic network interface (ENI) is deleted manually in AWS, and the associated disabled virtual service is re-enabled on NSX Advanced Load Balancer.
Reasons
When a virtual service is disabled on NSX Advanced Load Balancer and the virtual IP is moved as the secondary private IP to the parking interface on AWS, the association of any Elastic IP address, if present on the Virtual IP, would still remain intact and move with the private virtual IP.
Parking interfaces are created automatically for each subnet and are not associated with any instance. The ENIs or interfaces are holders of the virtual IP during disabled state. The status of these ENIs/interfaces is always available. These interfaces have the name tag of AviVipParking and have description as AviVipParking for this subnet. If for a cleanup activity these parking interfaces are deleted, the virtual IP associated with these parking interface (ENI) will also be lost. When the virtual service is re-enabled, error IP 10.x.x.x not associated with any eni is observed.
Deletion of the NSX Advanced Load Balancer created resources (ENI, security groups, etc.) on AWS is not supported and not recommended.
Resolution
To reuse the same (lost) virtual IP, follow the steps mentioned below:
Workaround 1: Changes on AWS
Create a new ENI with the same tags and same description as of earlier deleted ENI on AWS. For reference, check other virtual IP parking ENI or interface tags created by the same NSX Advanced Load Balancer Controller in the cloud. In the following screenshot, the virtual IP
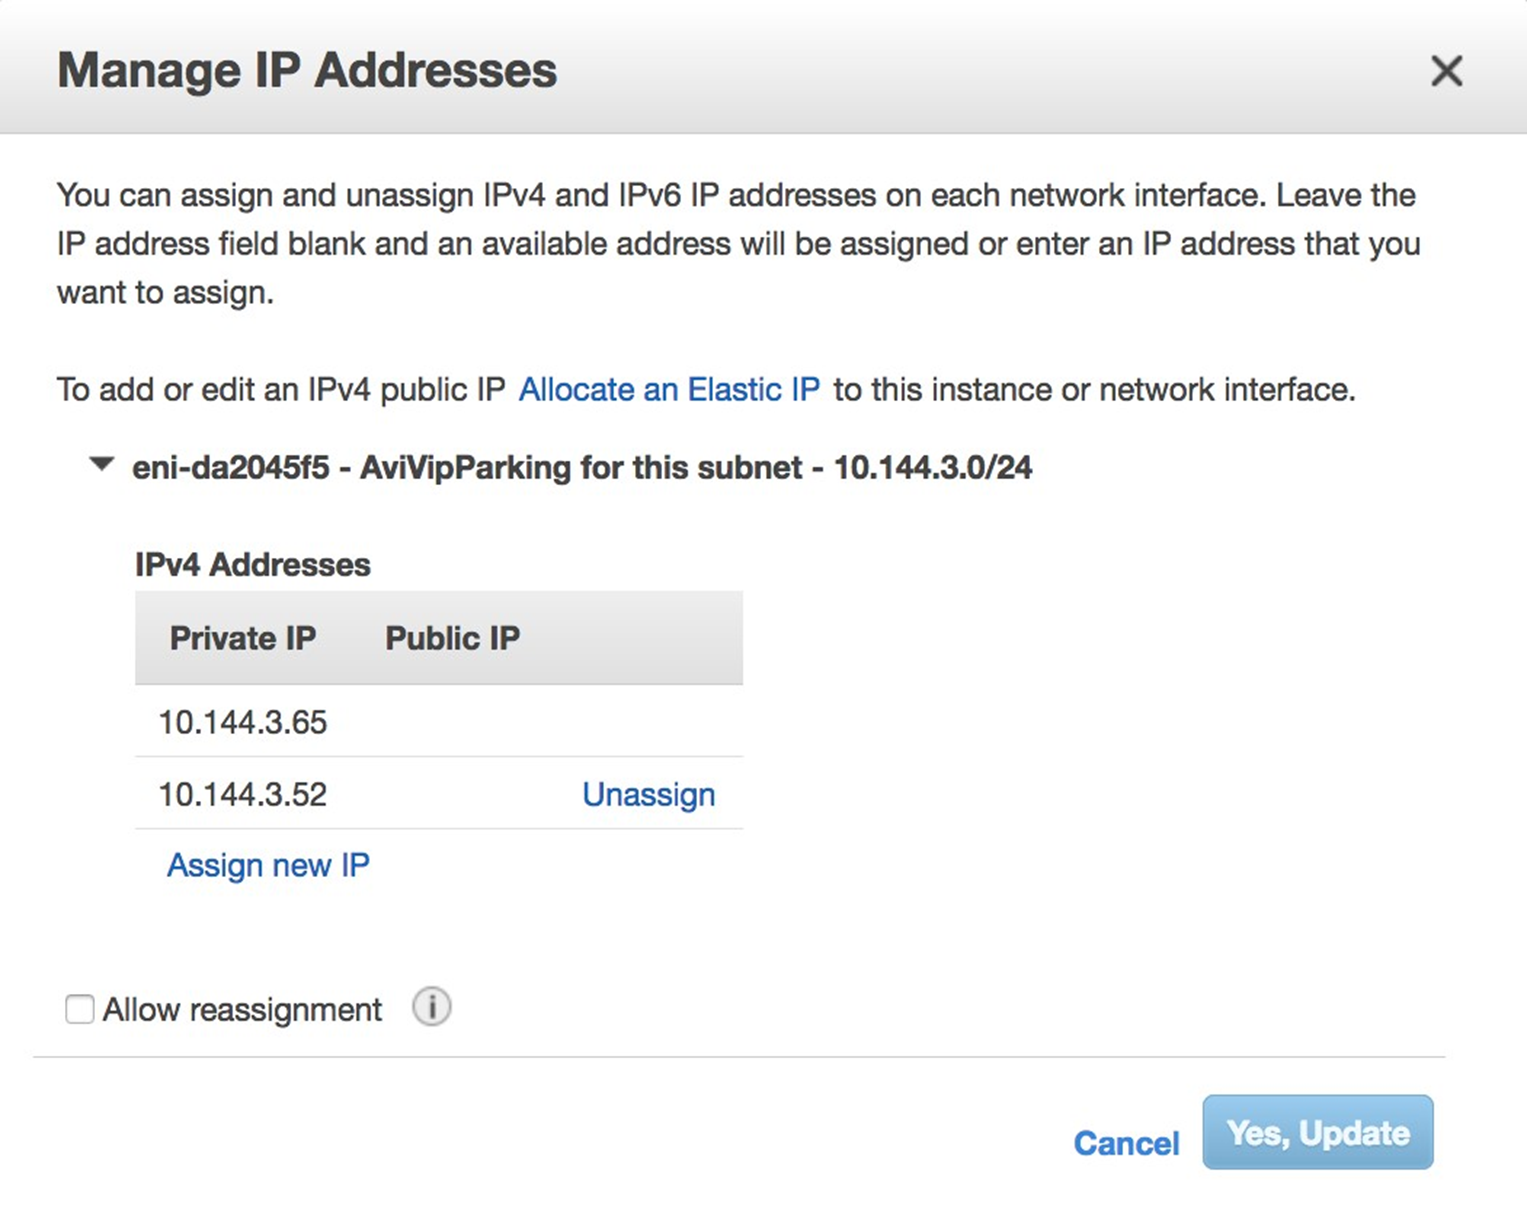
10.144.3.52is lost during the cleanup. 2Anw3 (subnet7ff1b71a) is the subnet associated with the virtual IP.
Add the virtual IP
10.144.3.53as the secondary VIP for the parking ENI. This IP must not be associated with any other ENI.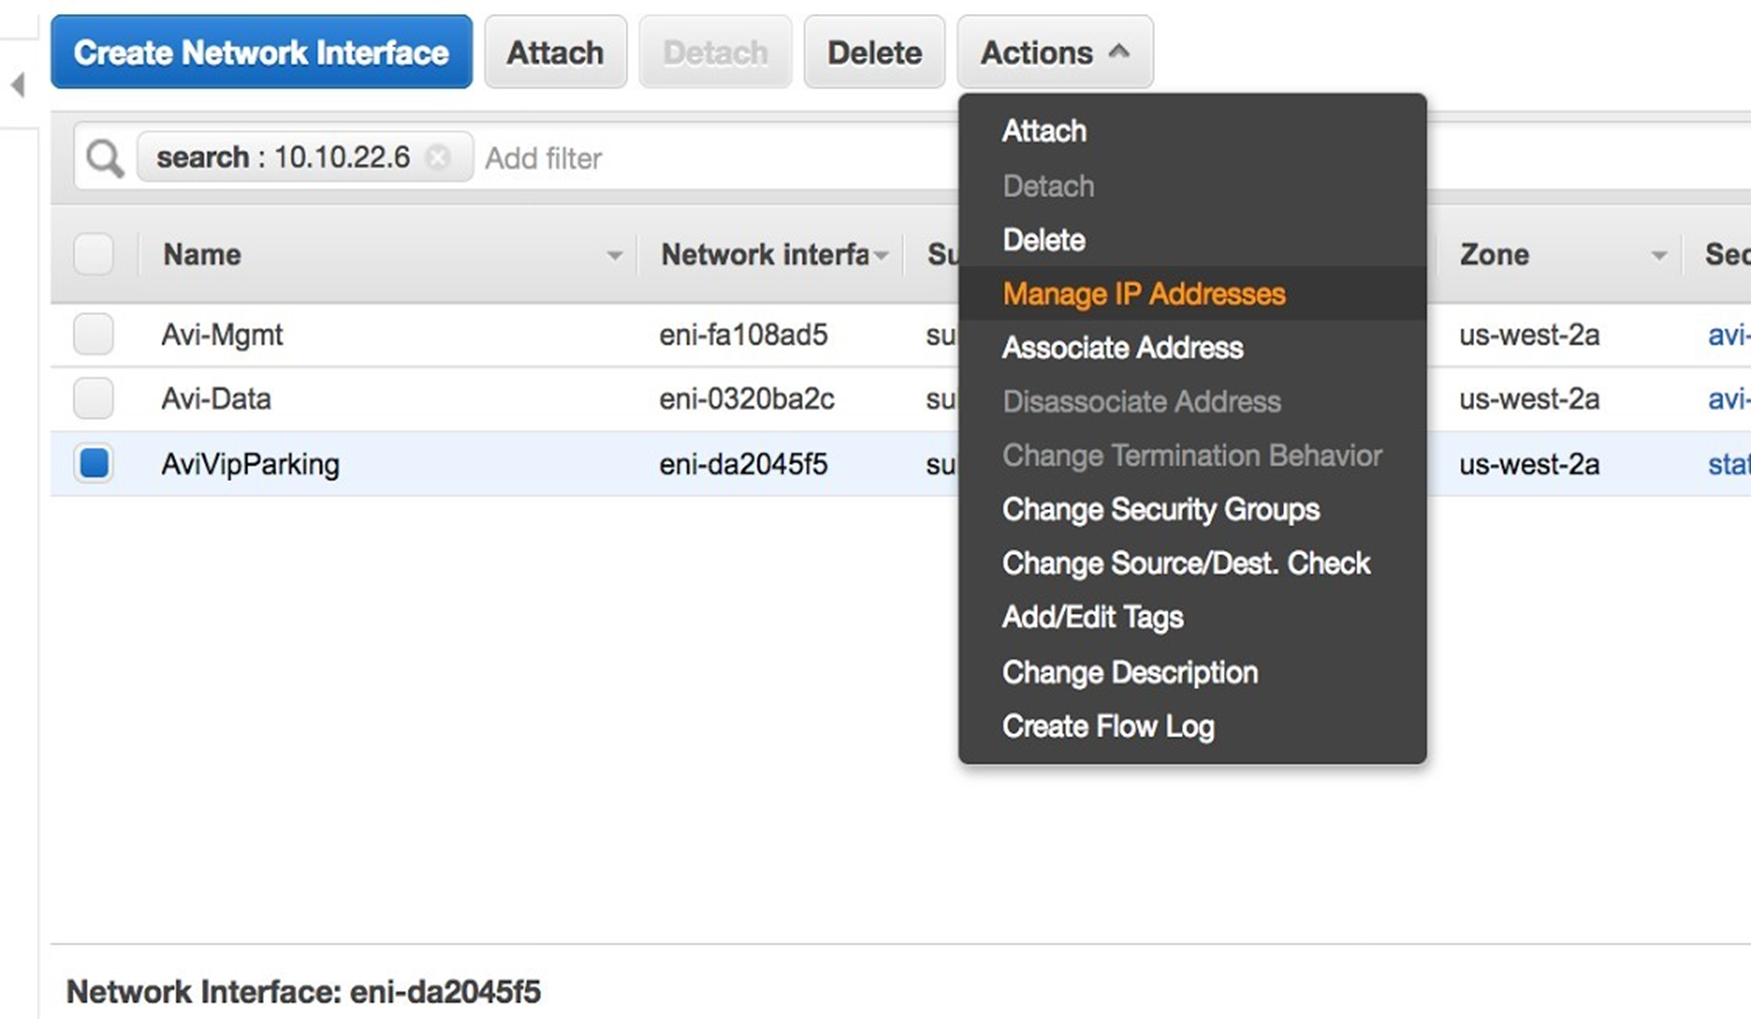
Once the virtual IP is assigned to the newly created VIP parking ENI on AWS, disable and re-enable the virtual service on NSX Advanced Load Balancer. To disable the virtual service, navigate to , choose the virtual service and click Disable. You can re-enable the virtual service, by selecting the same virtual service and clicking Enable.
Run a ping test to confirm if the virtual IP is reachable. The virtual service is expected to work with previously configured virtual service IP
10.144.3.52without any issue.
Workaround 2: Changes on NSX Advanced Load Balancer.
Use a new subnet for the virtual IP.
Delete and re-create a new virtual service with the same IP if there is a requirement for using the same subnet for the virtual IP.
