


In your data center, identify a host to be prepared as the reference host.
The first time the reference host starts up, ESXi associates the default rule with the reference host. In this procedure, we are adding a custom image profile ( ESXi and NSX VIBs) and associate the reference host with the new custom image. An image profile with the NSX-T image significantly reduces the installation time. The same custom image is associated with the target hosts in the stateless cluster.
Note: Alternatively, you can add only an
ESXi image profile to the reference and target stateless cluster. The
NSX-T VIBs are downloaded when you apply the transport node profile on the stateless cluster. See
Add a Software Depot.
Prerequisites
Ensure that the auto-deploy service and image builder service are enabled. See Using vSphere Auto Deploy to Reprovision Hosts.
Procedure
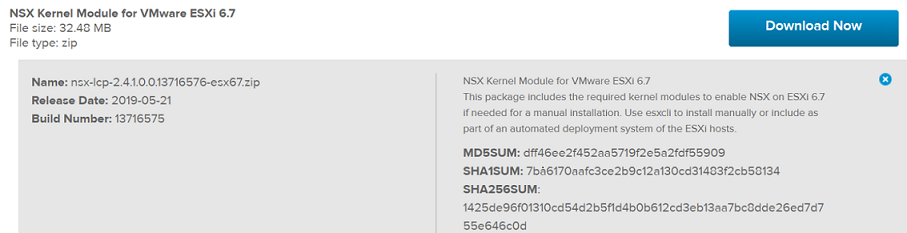
- Download the nsx-lcp packages.
- Log in to
https://my.vmware.com. - On the Download VMware NSX-T Data Center page, select the NSX-T version.
- In the Product Downloads page, search NSX-T Kernel Modules for a specific VMware ESXi version.
- Click Download Now to begin downloading the nsx-lcp package.
- Import nsx-lcp packages into the software depot.
- Log in to
- Create a custom software depot to clone previously imported ESXi image and nsx-lcp packages.
- Select the ESXi Image profile from the ESXi software depot created in the earlier step.
- Click Clone.
- In the Clone Image Profile wizard, enter a name for the custom image to be created.
- Select the custom software depot where the cloned image ( ESXi) must be available.
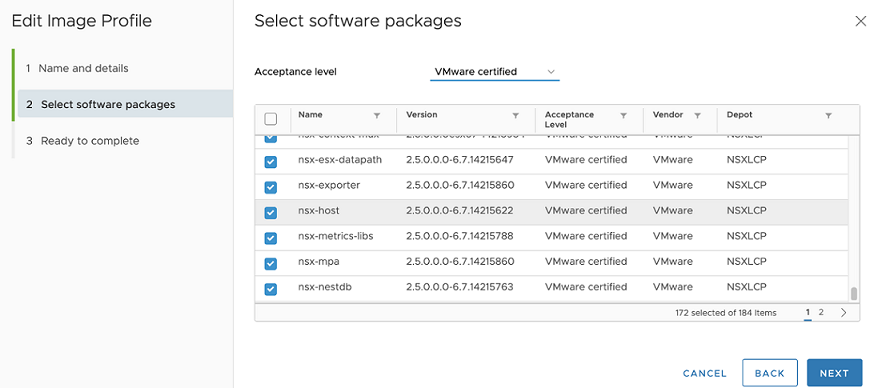
- In the Select software packages window, select the Acceptance level to VMware Certified. The ESXi VIBs are preselected.
- Identify and select the NSX-T packages manually from the list of packages and click Next.
- In the Ready to complete screen, verify the details and click Finish to create the cloned image containing ESXi and NSX-T packages into the custom software depot.
What to do next
Associate the custom image with the reference and target hosts. See Associate the Custom Image with the Reference and Target Hosts.
