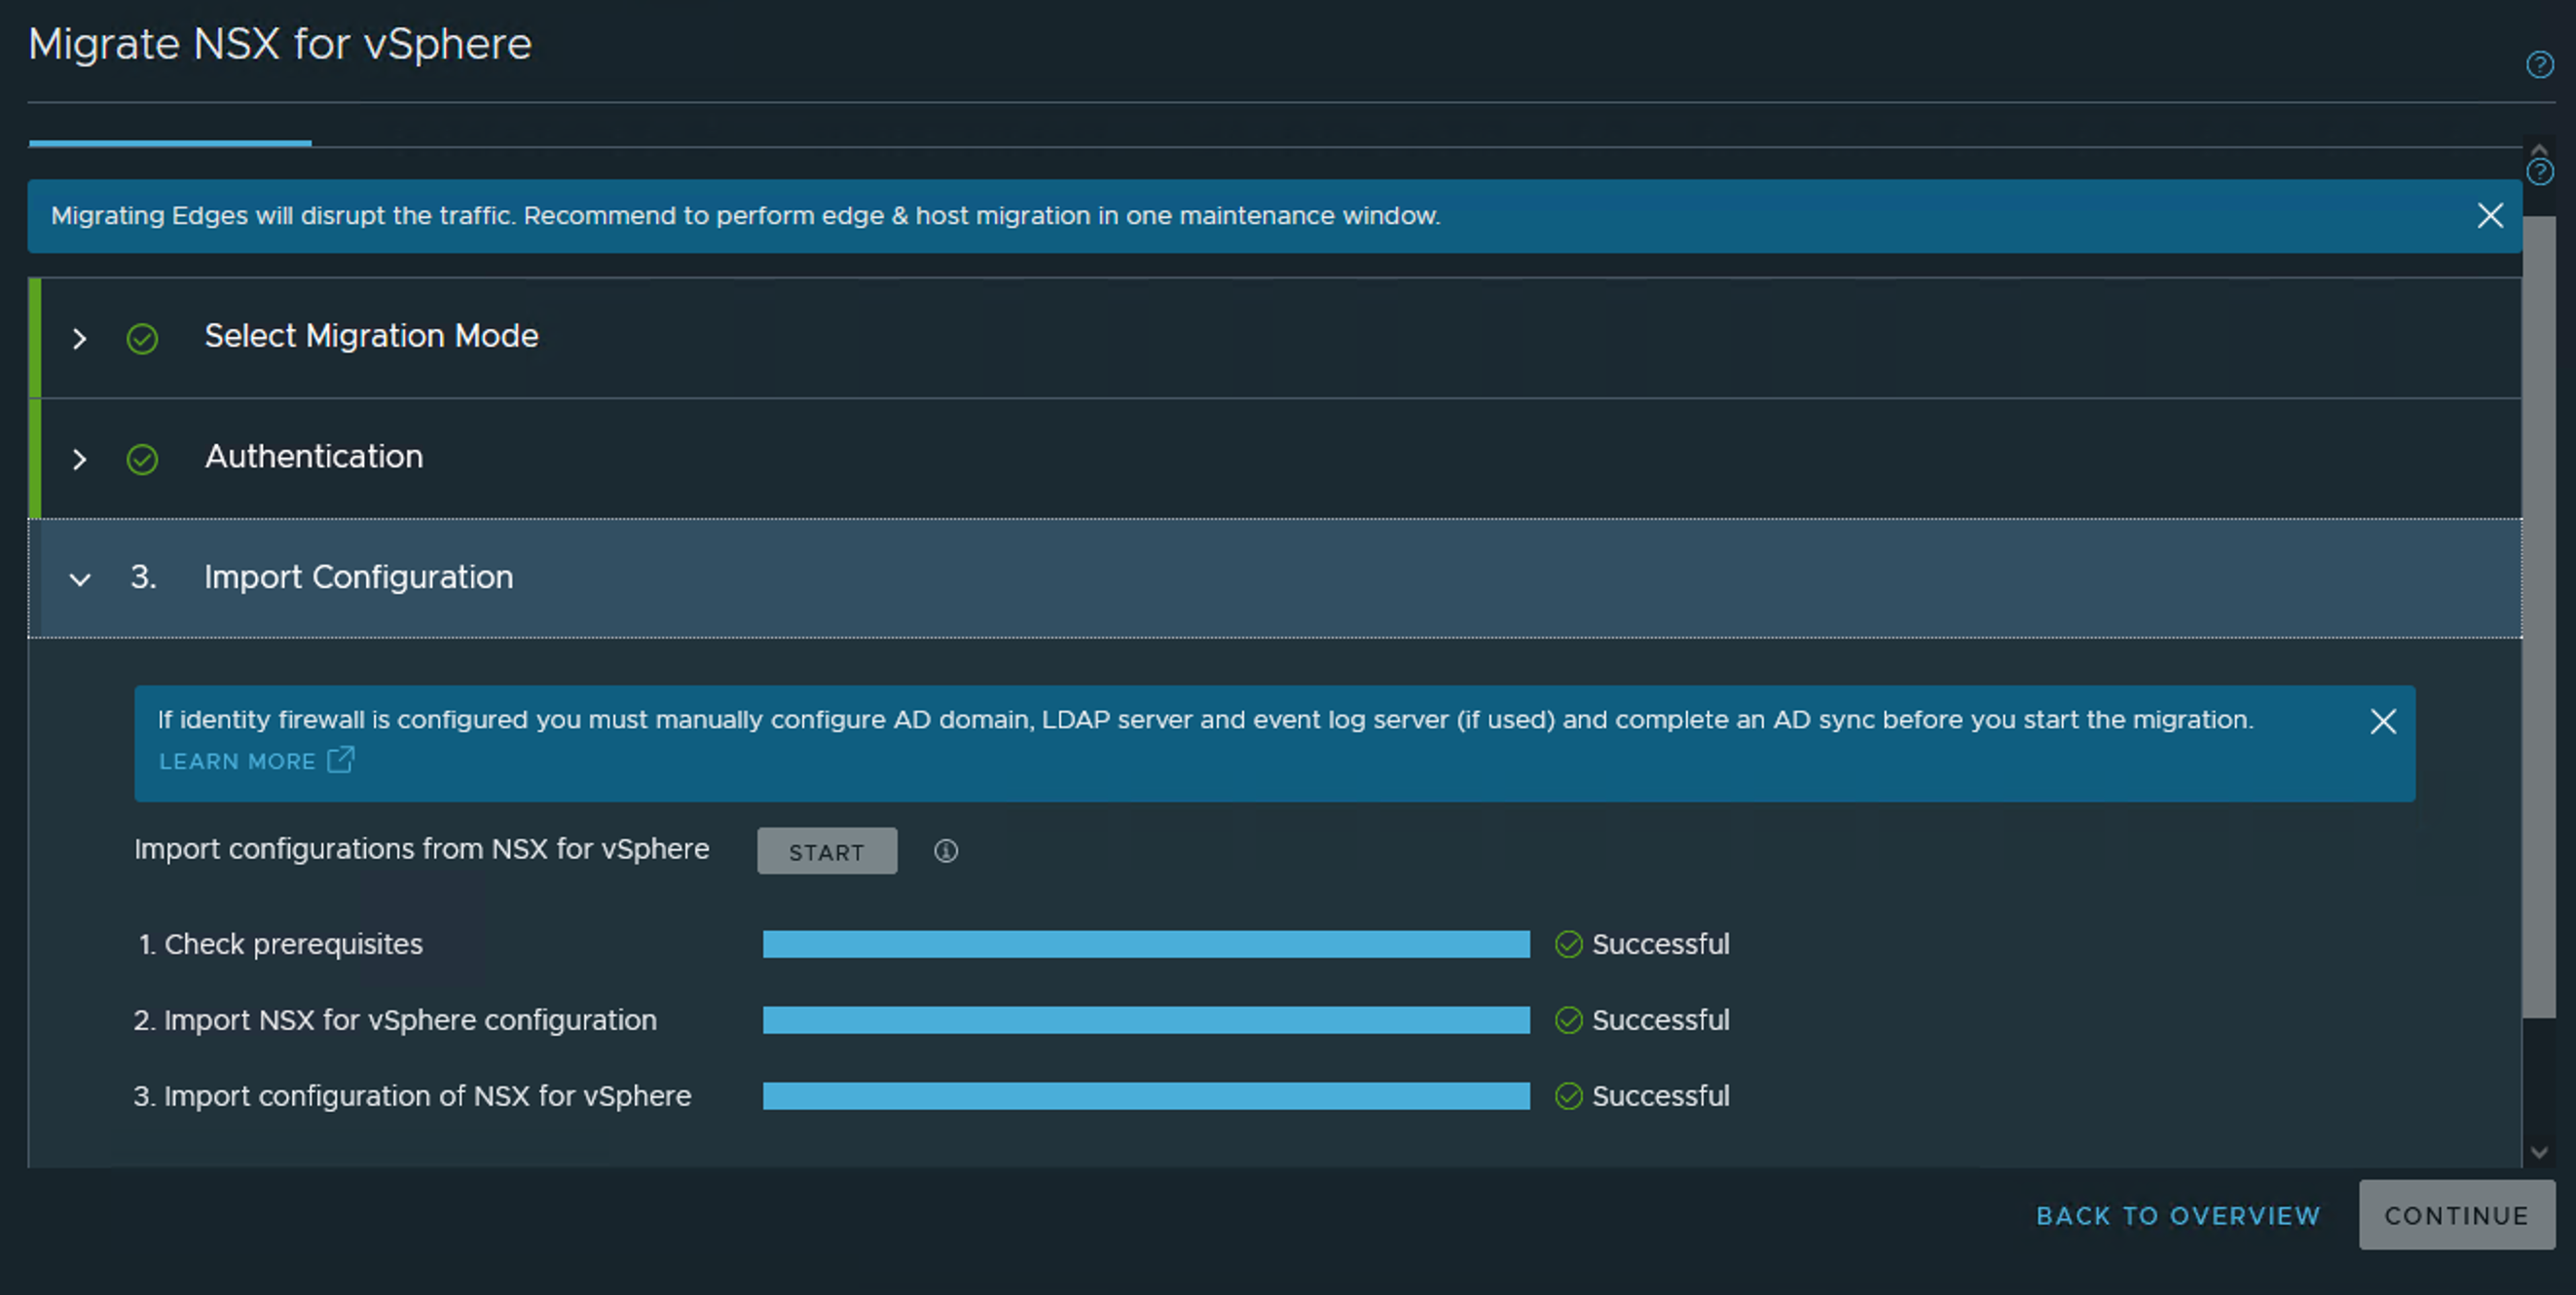
This step imports the configuration of the NSX-V environment.

In NSX-T 3.2.0 and 3.2.1, when migrating a single-site environment, the NSX-V load balancer will be migrated to NSX-T Advanced Load Balancer (ALB). Starting with NSX-T 3.2.2, The NSX-V load balancer will be migrated to an NSX-T load balancer.

Starting with NSX-T 3.2.1, you can migrate an NSX-V cross-vCenter environment to an NSX Federation environment in NSX-T. If you are migrating a cross-vCenter environment to NSX Federation, you must log in to the Global Manager to start the migration. Note that in NSX-T 3.2.1, when migrating a cross-vCenter environment, the NSX-V load balancer will not be migrated. Starting with NSX-T 3.2.2, The NSX-V load balancer will be migrated to an NSX-T load balancer.

Procedure

  1. From a browser, log in to NSX Manager or Global Manager as admin.
    Log in to Global Manager only if you are migrating a cross-vCenter environment to NSX Federation
  2. Navigate to System > Migrate.
  3. In the NSX for vSphere pane, click Get Started and select User Defined Topology.
  4. Select a migration mode and click Next..
    The options are:
    • Complete migration - Configurations, edges, hosts and workloads are migrated. The migration happens in-place with no need for additional hosts. This mode will migrate the NSX-V Load Balancer configuration to NSX-T Load Balancer.
    • Configuration migration - Only configurations are migrated. Workload VMs are not migrated. If you logged in to NSX Manager (and not Global Manager), this mode will migrate the NSX-V Load Balancer to NSX-T Advanced Load Balancer (ALB).
  5. Under Authentication, provide the required credentials.
    • If you are not migrating a cross-vCenter environment, provide the credentials for vCenter Server and NSX-V.
    • If you are migrating a cross-vCenter environment to NSX Federation, provide the credentials for the primary NSX-V and the NSX-T Global Manager. The list of NSX-V sites will then be listed. For each NSX-V site, provide the NSX-V credentials, select an NSX-T location, the vCenter Server for that location, and the credentials for that vCenter Server. Click Check Status to validate the information you provided.
  6. (This step is applicable if you are running NSX-T 3.2.0 or 3.2.1, and you logged in to NSX Manager (and not Global Manager) and if you selected Configuration migration in step 4) Under Advanced Load Balancing (ALB) Authentication, if you plan to migrate to ALB, set the LB Migration toggle to On and provide the credentials for the ALB appliance. Otherwise, set the LB Migration toggle to Off.
  7. Click Start to start the import.
  8. In the confirmation dialog, click Import and wait for the process to complete.
  9. If the status is Successful, click Continue to go to the next step.
  10. If the status is Failed, the details of the failure are displayed. Click Rollback to resolve the issues.

Results

If the NSX-V topology is imported successfully, you can click the View Imported Topology link to view the imported topology. However, the topology viewer might not work properly for a large-scale NSX-V environment.