After you migrate the Edge Services Gateways successfully, you can migrate the NSX-V hosts to NSX host transport nodes.

Prerequisites

  • Verify that Edge migration has finished and all routing and services are working correctly.
  • In the vCenter Server UI, go to the Hosts and Clusters page, and verify that all ESXi hosts are in an operational state. Address any problems with hosts including disconnected states. There must be no pending reboots or pending tasks for entering and exiting maintenance mode.

Procedure

  1. On the Migrate Hosts page, click Start.

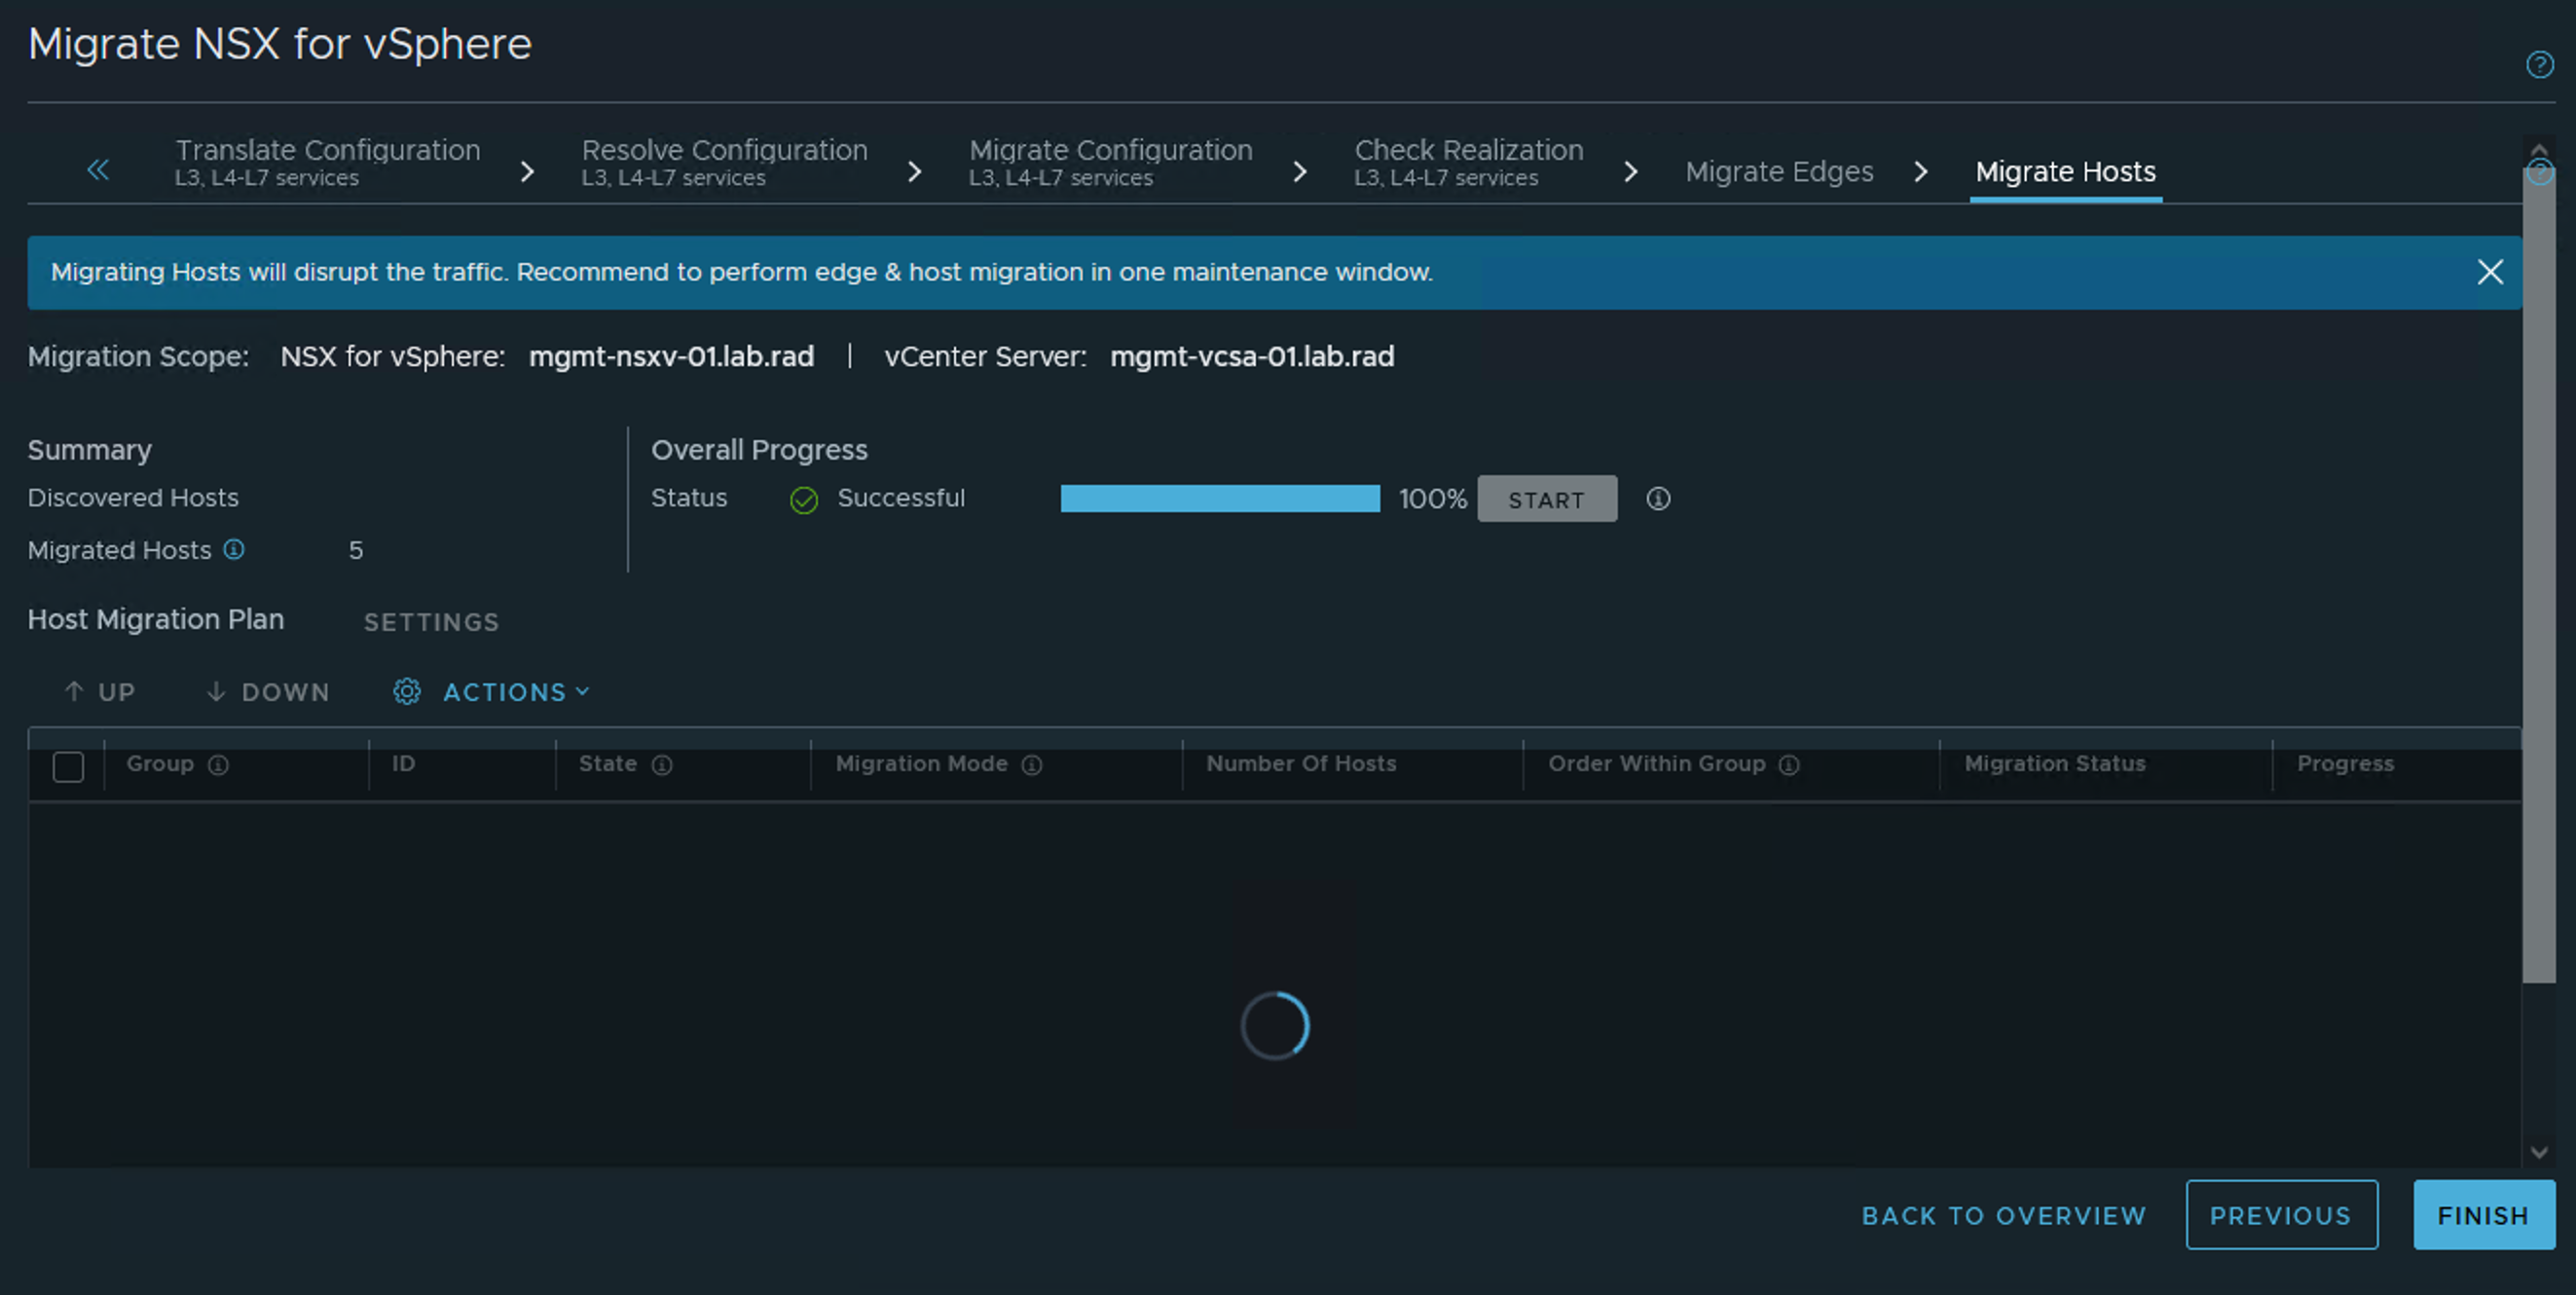
    If you selected the In-Place or Automated Maintenance migration mode for all hosts groups, the host migration starts. Note that in Automated Maintenance mode, Migration Coordinator will not reconfigure VMs that are powered off. After migration, you need to manually configure these VMs before powering them on.

  2. If you selected the Manual Maintenance migration mode for any host groups, you must complete one of the following tasks for each VM so that the hosts can enter maintenance mode.
    Option Action
    Power off or suspend VMs.
    1. Right click the VM and select Power > Power off , Power > Shut Down Guest OS, or Power > Suspend.
    2. After the host has migrated, attach the VM interfaces to the appropriate NSX segments and power on the VM.
    Move VMs using vMotion. Right click the VM and select Migrate. Follow the prompts to move the VM to a different host. Note that Migration Coordinator maintains security during migration by vMotioning VMs to specific ports that are protected by temporary rules. In the case of manual vMotion, the VMs will not be moved to those ports and there could be a security breach. To vMotion manually, the VMs must be migrated using vSphere API where the networking backing must point to the OpaqueNetwork ID corresponding to the NSX Segment when using NVDS or the VDS portgroup ID when using VDS 7. In both cases, the network device's externalId must be set to the the string "VM_UUID:vNIC_ID", where VM_UUID is the VM's instance UUID and vNIC_ID is the VM's vNIC index where the first vNIC is 4000.
    Move VMs using cold migration.
    1. Right click the VM and select Power > Power off , Power > Shut Down Guest OS, or Power > Suspend.
    2. Right click the VM and select Migrate. Follow the prompts to move the VM to a different host, connecting the VM interfaces to the appropriate NSX segments.
    Here is python code to specify an external-id for each vNIC in a VM and then vMotion the VM so that the vNICs will connect to an NSX segment of ID “ls_id” at the correct ports:
    devices = vmObject.config.hardware.device
    nic_devices = [device for device in devices if isinstance(device, vim.Vm.device.VirtualEthernetCard)]
    vnic_changes = []
    for device in nic_devices:
        vif_id = vmObject.config.instanceUuid + ":" + str(device.key)
        vnic_spec = self._get_nsxt_vnic_spec(device, ls_id, vif_id)
        vnic_changes.append(vnic_spec)
    relocate_spec = vim.Vm.RelocateSpec()
    relocate_spec.SetDeviceChange(vnic_changes)
    # set other fields in the relocate_spec
    vmotion_task = vmObject.Relocate(relocate_spec)
    WaitForTask(vmotion_task)
    
    def _get_nsxt_vnic_spec(self, device, ls_id, vif_id):
        nsxt_backing = vim.Vm.Device.VirtualEthernetCard.OpaqueNetworkBackingInfo()
        nsxt_backing.SetOpaqueNetworkId(ls_id)
        nsxt_backing.SetOpaqueNetworkType('nsx.LogicalSwitch')
        device.SetBacking(nsxt_backing)
        device.SetExternalId(vif_id)
        dev_spec = vim.Vm.Device.VirtualDeviceSpec()
        dev_spec.SetOperation(vim.Vm.Device.VirtualDeviceSpec.Operation.edit)
        dev_spec.SetDevice(device)
        return dev_spec

    For an example of a complete script, see https://github.com/dixonly/samples/blob/main/vmotion.py

    The host enters maintenance mode after all VMs are moved, powered off, or suspended. If you want to use cold migration to move the VMs to a different host before the migrating host enters maintenance mode, you must leave at least one VM running while you move VMs. When the last VM is powered off or suspended, the host enters maintenance mode, and migration of the host to NSX starts.

Results

After a host has migrated to NSX using In-Place migration mode, you might see a critical alarm with message Network connectivity lost. This alarm occurs when a vSphere Distributed Switch (VDS) 6.5 or 6.7 migrates to an N-VDS because the host no longer has a physical NIC connected to the VDS it was previously connected to. To restore the migrated hosts to the Connected state, click Reset to Green on each host, and suppress the warnings, if any.

If migration fails for a host, you can move its host group to the bottom of the list of groups. The migration of other host groups can proceed while you resolve the problem with the failed host.

If migration fails for a host, the migration pauses after all in-progress host migrations finish. When you have resolved the problem with the host, click Retry to retry migration of the failed host. If the host still fails to migrate, you can configure NSX on the host manually or remove the host from the system. In this case, at the end of the host migration step, the Finish button will not be enabled because of the host that failed to migrate. You need to call the REST API POST https://<nsx-mgr-IP>/api/v1/migration?action=finalize_infra (<nsx-mgr-IP> is the IP address of the NSX Manager where the migration service is running) using a REST API client (for example, postman or curl) to finish the migration, and then perform the post-migration tasks.

For information about troubleshooting other host migration problems, see Troubleshooting Migration Issues.

What to do next

If the migrated Security Policies use a third-party partner service, deploy an instance of the partner service in NSX. For detailed instructions, see: