


A compute manager, for example, VMware vCenter, is an application that manages resources such as hosts and VMs.
NSX polls compute managers to collect cluster information from VMware vCenter.
For more information about VMware vCenter roles and privileges, see the vSphere Security document.
Prerequisites
- Verify that you use the supported vSphere version. See Supported vSphere version.
- IPv4 communication with VMware vCenter.
- Verify that you use the recommended number of compute managers. See https://configmax.vmware.com/home.
- Decide the hashing algorithm type you want to use for stamping NSX Manager thumbprint in compute manager extension. SHA1 and SHA256 algorithm types are supported. The default is SHA1. If you use SHA256 there might be communication issues between WCP component in VC and NSX Manager.
- To set the hashing algorithm, run API PUT https://<nsx-mgr>/api/v1/fabric/compute-managers/thumbprint-hashing-algorithm
{
    "hashing_algorithm_type": "SHA1"
}
- To set the hashing algorithm, run API PUT https://<nsx-mgr>/api/v1/fabric/compute-managers/thumbprint-hashing-algorithm
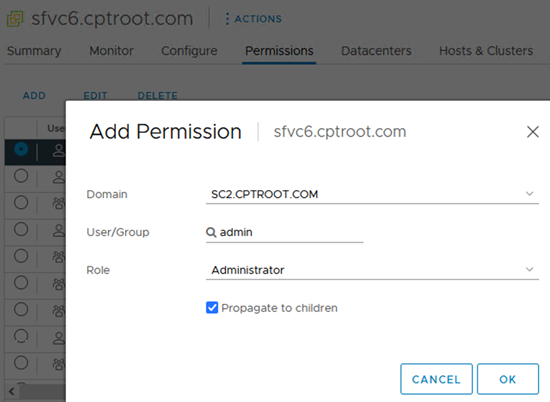
- Provide credentials of a VMware vCenter user. You can provide the credentials of VMware vCenter administrator, or create a role and a user specifically for NSX and provide this user's credentials. Go to the tab. Add global permissions to the newly created user and role and select Propogate to Children.
 Create an admin role with the following VMware vCenter privileges:
Global Cancel task Extension Register extension Extension Unregister extension Extension Update extension Host Configuration.Maintenance Host Configuration.NetworkConfiguration Host Local Operations.Create virtual machine Host Local Operations.Delete virtual machine Host Local Operations.Reconfigure virtual machine Network Assign network Permissions Reassign role permissions Resource Assign vApp to resource pool Resource Assign virtual machine to resource pool Sessions Message Sessions Validate session Sessions View and stop sessions Scheduled task Select all privileges Tasks Select all privileges vApp Select all privileges Virtual Machine. Configuration Virtual Machine Guest Operations Virtual Machine Provisioning Virtual Machine Inventory To use the NSX license for the vSphere Distributed Switch 7.0 feature, the VMware vCenter user must either be an administrator, or the user must have Global.Licenses privileges and be a member of the LicenseService.Administrators group.
Before you create a service account for the compute manager, add these additional VMware vCenter privileges to the admin user role:
Permissions Modify permission Permissions Modify role Service Account Management Administer VMware vSphere Lifecycle Manager ESXi Health Perspectives.Read VMware vSphere Lifecycle Manager Lifecycle Manager: General Privileges.Read VMware vSphere Lifecycle Manager Lifecycle Manager: Image Privileges.Read VMware vSphere Lifecycle Manager Lifecycle Manager: Image Privileges.Write VMware vSphere Lifecycle Manager Lifecycle Manager: Image Remediation Privileges.Write VMware vSphere Lifecycle Manager Lifecycle Manager: Settings Privileges.Read VMware vSphere Lifecycle Manager Lifecycle Manager: Settings Privileges.Write VMware vSphere Lifecycle Manager Lifecycle Manager: General Privileges.Write
Procedure
Results
It takes some time to register the compute manager with VMware vCenter and for the connection status to appear as UP.
You can click the compute manager's name to view the details, edit the compute manager, or to manage tags that apply to the compute manager.
After the VMware vCenter is successfully registered, do not power off and delete the NSX Manager VM without deleting the compute manager first. Otherwise, when you deploy a new NSX Manager, you will not be able to register the same VMware vCenter again. You will get the error that the VMware vCenter is already registered with another NSX Manager.
- Transport nodes are prepared using VDS that is dependent on the VC.
- Service VMs deployed on a host or a cluster in the VC using NSX service insertion.
- You use the NSX Manager UI to deploy Edge VMs or NSX Manager nodes on a host or a cluster in the VC.
If you try to perform any of these actions and you encounter an error (for example, installation failed), you can remove the VC if you have not successfully performed any of the actions listed above.
- Unprepare all transport nodes. If uninstalling a transport node fails, you must force delete the transport node.
- Undeploy all service VMs, all NSX Edge VMs, and all NSX Manager nodes. The undeployment must be successful or in a failed state.
- If an NSX Manager cluster consists of nodes deployed from the VC (manual method) and nodes deployed from the NSX Manager UI, and you had to undeploy the manually deployed nodes, then you cannot remove the VC. To successfully remove the VC, ensure that you re-deploy an NSX Manager node from the VC.
This restriction applies to a fresh installation of NSX as well as an upgrade.
