


This section provides the configuration workflow to prepare your environment using the NSX Distributed Security for protecting the virtual machines.
Prerequisites
You have deployed the NSX Manager and configured the valid licenses.
Configuration Workflow
Preparing your virtual environment for the NSX Distributed Security involves two main steps:
- Configure Compute Manager (vCenter)
- Prepare vCenter cluster (ESXi hosts) for the NSX Distributed Security
1: Configure Compute Manager (vCenter)
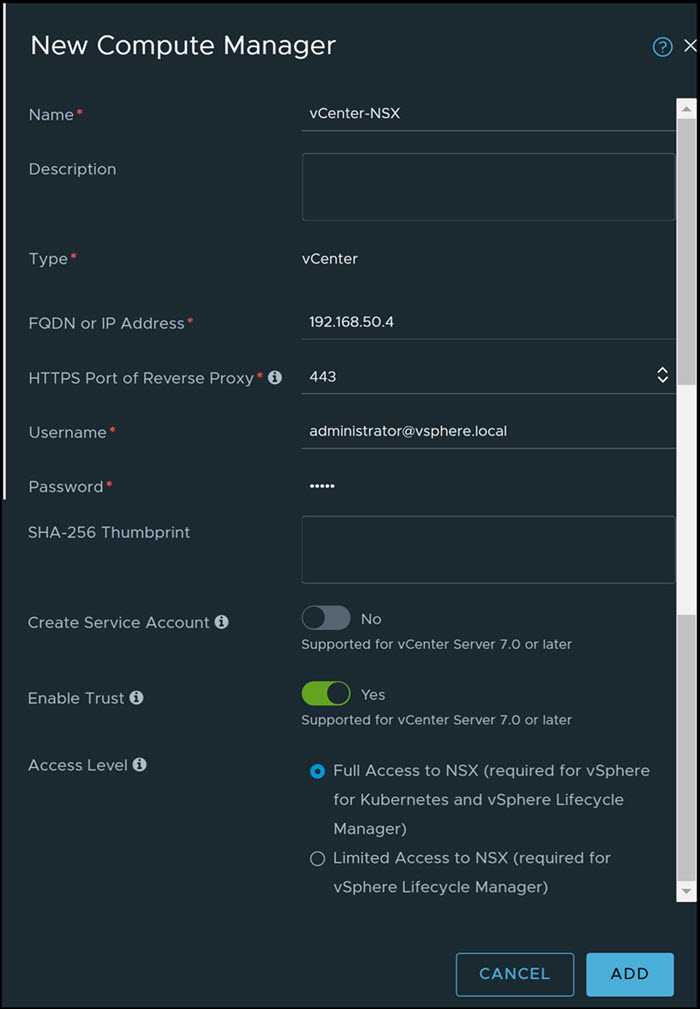
You must add VMware vCenter as a compute manager on NSX to view all the VMware vCenter host and cluster inventory. You can then leverage the available inventory to prepare ESXi hosts and clusters for NSX Security.
-
From your browser, log in to the NSX Manager appliance at https://<nsx-manager-ip-address> using the admin credentials.
- Register NSX with VMware vCenter from the . Add the VMware vCenter as a compute manager.
- Validate NSX registration in the VMware vCenter from the page. Click Refresh and view the connection status.
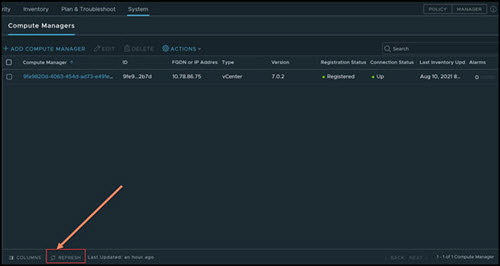
After the VMware vCenter registration is successful, you can view the configured VMware vCenter host cluster inventory from the NSX Manager User Interface (UI). On the NSX Manager UI, go to to view the inventory.
You can configure multiple VMware vCenters from the NSX Manager UI following these same steps for each of the VMware vCenter.
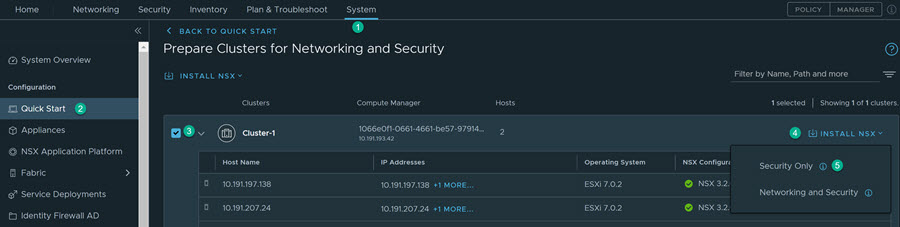
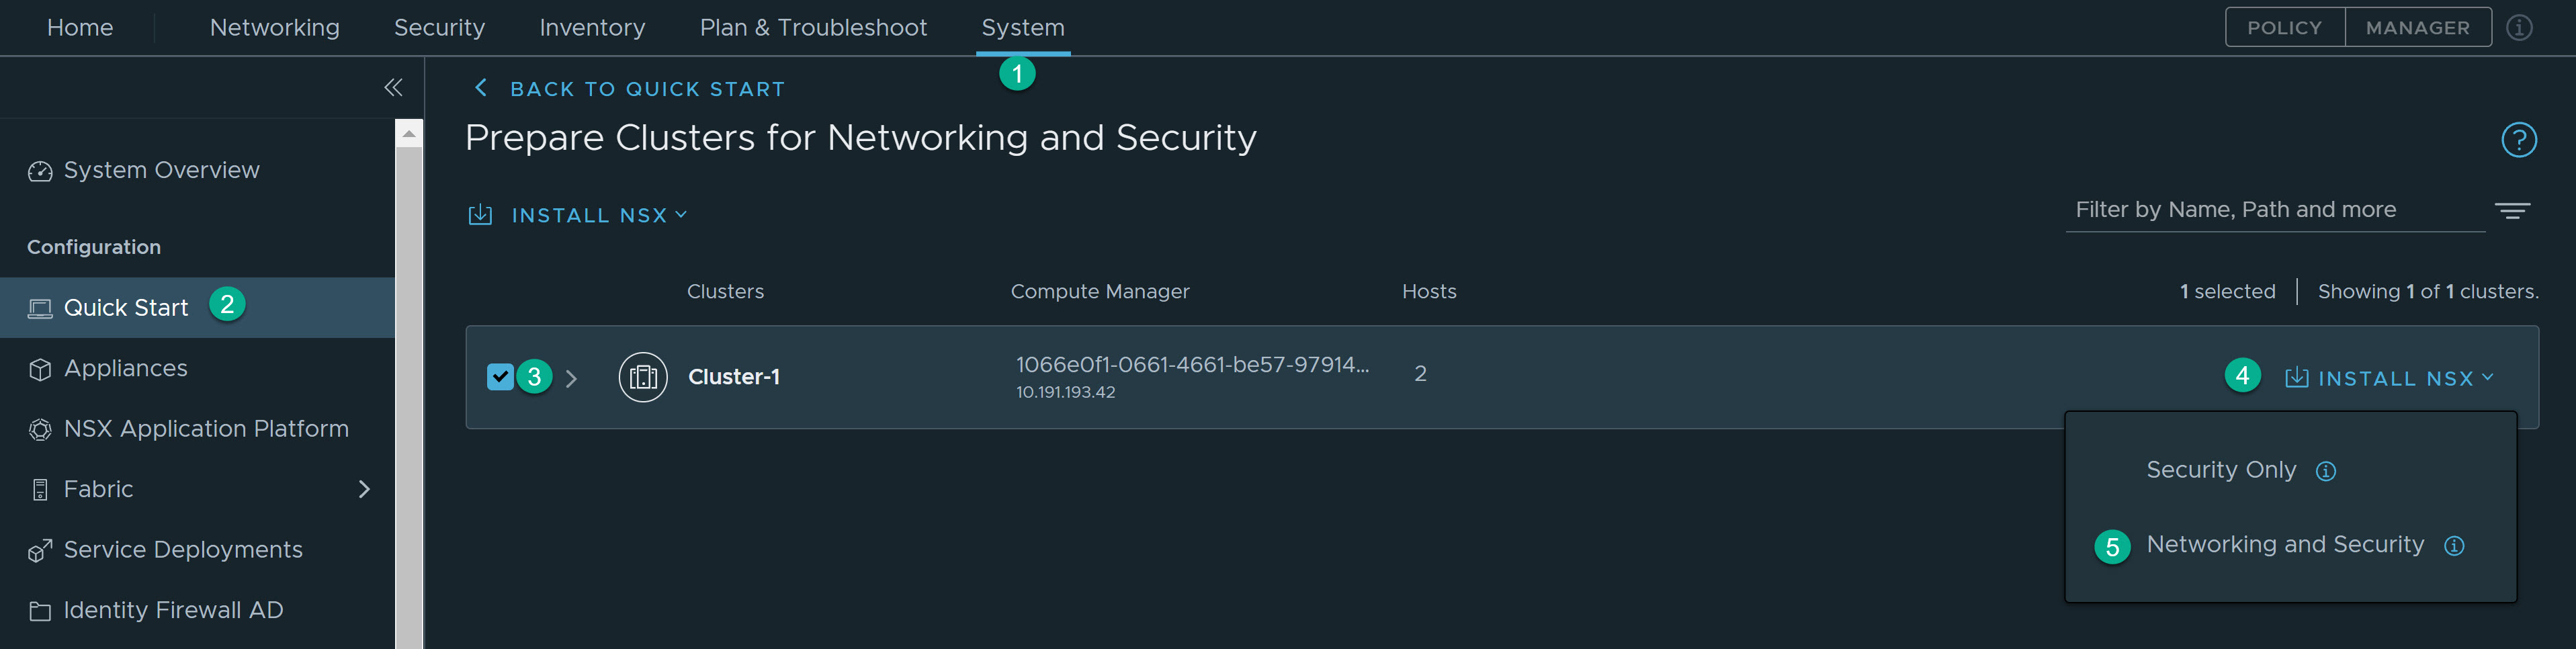
2: Prepare the vCenter Cluster (ESXi Hosts) for the NSX Distributed Security
NSX Distributed Security involves preparing VMware vCenter compute cluster of NSX. NSX supports two host preparation modes as follows:
- Security Only - Distributed Security for VDS port groups:
- Supports security for VMs connected to the native vCenter Distributed Virtual Port Groups (DVPG).
- Supports vSphere 6.7 and vSphere 7.0 Update1 or later.
- Does not support NSX networking for the workload within the NSX prepared VMware vCenter cluster.
- Workflow is supported only using the Quick Start wizard.
- Networking and Security - Distributed Security with NSX Networking:
- Supports NSX networking and distributed security for the workload within the NSX prepared VMware vCenter cluster.
- If VLAN connected workloads need distributed security, then you must move the workload to the NSX VLAN segments from DVPG.
- Workflow is supported using the Quick Start wizard or manually from the menu. This guide describes the quick start wizard. For manual workflow, refer to the NSX Installation Guide.
Based on your environment, select the required deployment method. The NSX environment can have a mix of NSX Security only prepared clusters and NSX Networking and Security prepared clusters. More details on each of the deployment modes are covered later in this section.
2.1: Security Only Host Preparation - Distributed Security for VDS Port Groups
After you configure the compute manager, you can prepare clusters of ESXi hosts only for distributed security. The hosts in your cluster must share VDS.
Procedure
- On the Prepare Clusters for Networking and Security card, click Get Started.
- In the dialog box, click Install.
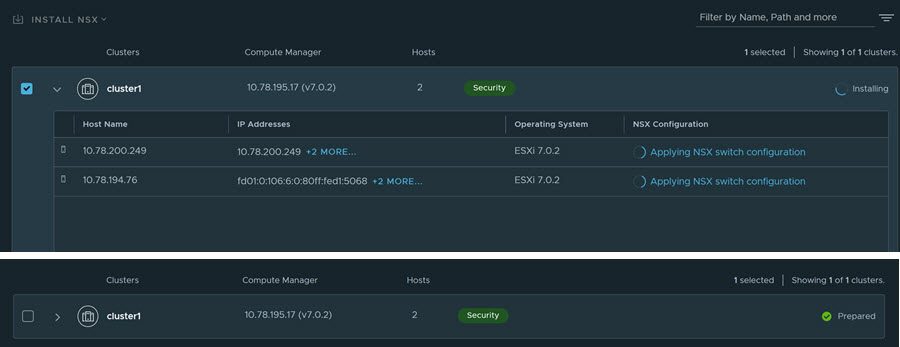
The NSX host preparation begins to install required software modules on the ESXi hosts.
The process takes a few minutes to complete. After the process is complete, the status changes to Success. The objects like transport node profile, transport zone, and distributed port groups are automatically created.
Results
On the NSX Manager UI, go to tab to view the DVPG inventory from the VMware vCenter.
On the NSX Manager UI, go to to view the virtual machine inventory from all ESXi hosts.
What to do next
You can now start configuring your policy for the workloads hosted on DVPG on the prepared VMware vCenter.
2.2: Networking and Security - Distributed Security with NSX Networking
After you configure the compute manager, you can prepare clusters of ESXi hosts for VLAN networking and distributed security together.
Procedure
- Click Install NSX and then select Networking and Security.
- Depending on your requirement, you can prepare the same cluster for both VLAN and Overlay networking or for one type of networking. With Overlay networking, each host switch is added with a TEP IP address, which is required for overlay networking.

Results
On the NSX Manager UI, go to the tab to view the virtual machine inventory from all the ESXi hosts.
For more information, see NSX Administration Guide.
What to do next
You can now start configuring your policy for the workloads hosted on the NSX segments on the prepared VMware vCenter clusters.
