After you meet the system requirements and the following prerequisites, you can use the NSX Manager UI to activate the NSX Malware Prevention feature.
Prerequisites
- NSX Application Platform must be successfully deployed on your NSX 3.2 or later environment and in a good state. See the Deploying and Managing the VMware NSX Application Platform documentation for details.
- You must have NSX Enterprise Administrator privileges.
- A valid NSX Data Center edition license, or, starting with NSX 4.0.1.1, an NSX Advanced or NSX Enterprise Plus license that supports Advanced Threat Prevention, is in effect for your NSX Manager session. For information about licenses that are required to run the NSX Advanced Threat Prevention solution, see the Security Licenses section in License Types.
Procedure
- From your browser, log in with Enterprise Administrator privileges to an NSX Manager at https://nsx-manager-ip-address.
- In the NSX Manager UI, select System and in the Configuration section, select NSX Application Platform .
- Navigate to the Features section, locate the NSX Malware Prevention feature card, and click Activate or anywhere in the card.
- In the NSX Malware Prevention activation window, select one of the available cloud regions from which you can access the NSX Advanced Threat Prevention cloud service.
The system uses the
NSX Advanced Threat Prevention cloud service to perform deeper analysis on detected threat events, perform alert correlation and visualization, and fetch periodic updates on those detected threats events. The regions displayed are the ones available to your
NSX location. If you previously activated the
VMware NSX® Network Detection and Response™ feature, the cloud region selected for that feature is the same region that is used for the
NSX Malware Prevention feature.
- Click Run Prechecks.
This precheck process can take some time as the system validates that the minimum license requirement is met and that it is eligible for use with the
NSX Advanced Threat Prevention cloud service. The system also validates that the selected cloud region is reachable.
- Click Activate.
This step can take some time.
Note: After activating or deactivating the
NSX Malware Prevention feature, the status of the other activated features that the
NSX Application Platform hosts can change to either
Partially Up,
Down, or
In Progress. This occurs because the
NSX features hosted on the
NSX Application Platform share several system services. This behavior is transient and the state of those
NSX Application Platform-hosted features are expected to come back to a normal state in 10–15 minutes.
Results
If the feature activation is successful, the
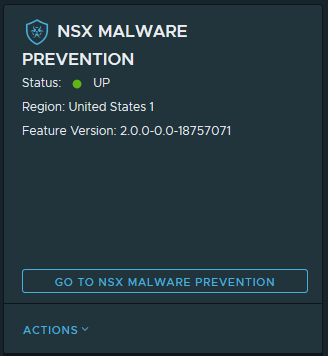
NSX Malware Prevention feature card, similar to the following image, displays the Status as
UP, information about the cloud region to which it is connected, and the version of the feature that is being used.

