Resources can be shared from the default space or from the project view, or both. From the default space, you can share resources with projects or NSX VPCs. From the project view, you can share resources with NSX VPCs within the same project.
Shared resources are available in a read-only mode in the projects or NSX VPCs with which they are shared.
Prerequisites
- Ensure that you have understood the concept of sharing resources. See Sharing NSX Resources.
- You must be assigned any one of these system-wide user roles to share resources from the default space to projects or NSX VPCs:
- Enterprise Admin
- Network Admin
- Security Admin
- You must be assigned any one of these user roles in a project to share resources from the project to NSX VPCs within the same project:
- Project Admin
- Network Admin
- Security Admin
Procedure
- From your browser, log in to an NSX Manager at https://nsx-manager-ip-address.
- To share resources from the default space to projects within the organization, do these steps:
- Ensure that you are in the Default view.
- Navigate to .
- To create a resource share, click Add Resource Share.
- Enter a name for the resource share.
- By default, the Allow Viewing Member Hierarchy toggle is turned on for the resource share.
When it is on, it means that the child members of all the objects that you add in this resource share will be visible to users in projects and NSX VPCs where this resource share is available. Visibility of child members is applicable to the following objects in the resource share:
- Groups
- Segments
If you want to turn on or turn off the visibility of the child members for each object individually in the resource share, you must create the resource share by using the API. The UI does not support this granular level of control.
For example, let us say that in step (g) of this procedure, you have added group A and segment B in the resource share. For group A, you want to turn on the visibility of the group members, but for segment B, you want to turn off the visibility of the child members of this segment, such as ports. To do this mixed configuration, you must create the resource share by using the API. Later, when you want to edit this resource share, you must preferably edit it with the API. The reason is that from the UI, the toggle gets applied to all the objects in the resource share.
- Click Set.
- In the Set Members window, select the objects you want to add in the resource share.
Note: Before adding segments in your resource share, make sure that you understand the typical use cases for sharing segments with a project. For more information, see Sharing NSX Resources.
- Click Apply.
- In the Shared With column, click Set, and then choose any one of these options:
Option Description Share with all Projects Select this option to share resources with all the projects in your organization. Share with selected Projects Select this option to share resources with specific projects in your organization. - (Optional) Click Next and turn on/off the toogle to share resources with all the NSX VPCs or none of the NSX VPCs in the selected projects.
The toggle is editable only when you select the Share with selected Projects option in the previous step. If you select the Share with all Projects option, the system will share resources with all the NSX VPCs in all the projects, by default. This default setting is currently not editable.
When you are sharing resources from the default space, the system does not allow you to choose specific NSX VPCs in the selected projects. If you want to share resources with specific NSX VPCs, you can switch to each project view and create the resource share in that view. To learn more, see the instructions in step 3.
- Click Apply, and then click Save.
- To share resources from a project to specific NSX VPCs within the same project, do these steps:
- Select a project from the Project drop-down menu.
- Navigate to .
- To create a resource share, click Add Resource Share.
- Enter a name for the resource share.
- Click Set.
- In the Shared With column, click Set, and then choose any one of these options:
Option Description Share with all VPCs Select this option to share resources with all the NSX VPCs in the project. Share with selected VPCs Select this option to share resources with specific NSX VPCs in the project. - Click Apply, and then click Save.
Example: Resource Share
Let us assume that an Enterprise Admin has shared a group from the default space with project-1 in your organization.
- Log in to NSX Manager with the credentials of any user that has access to project-1.
- Ensure that project-1 is selected from the Project drop-down menu.
- Navigate to .
- Click the Shared objects check box at the bottom of the Groups page.
By default, this check box is not selected.
For example:
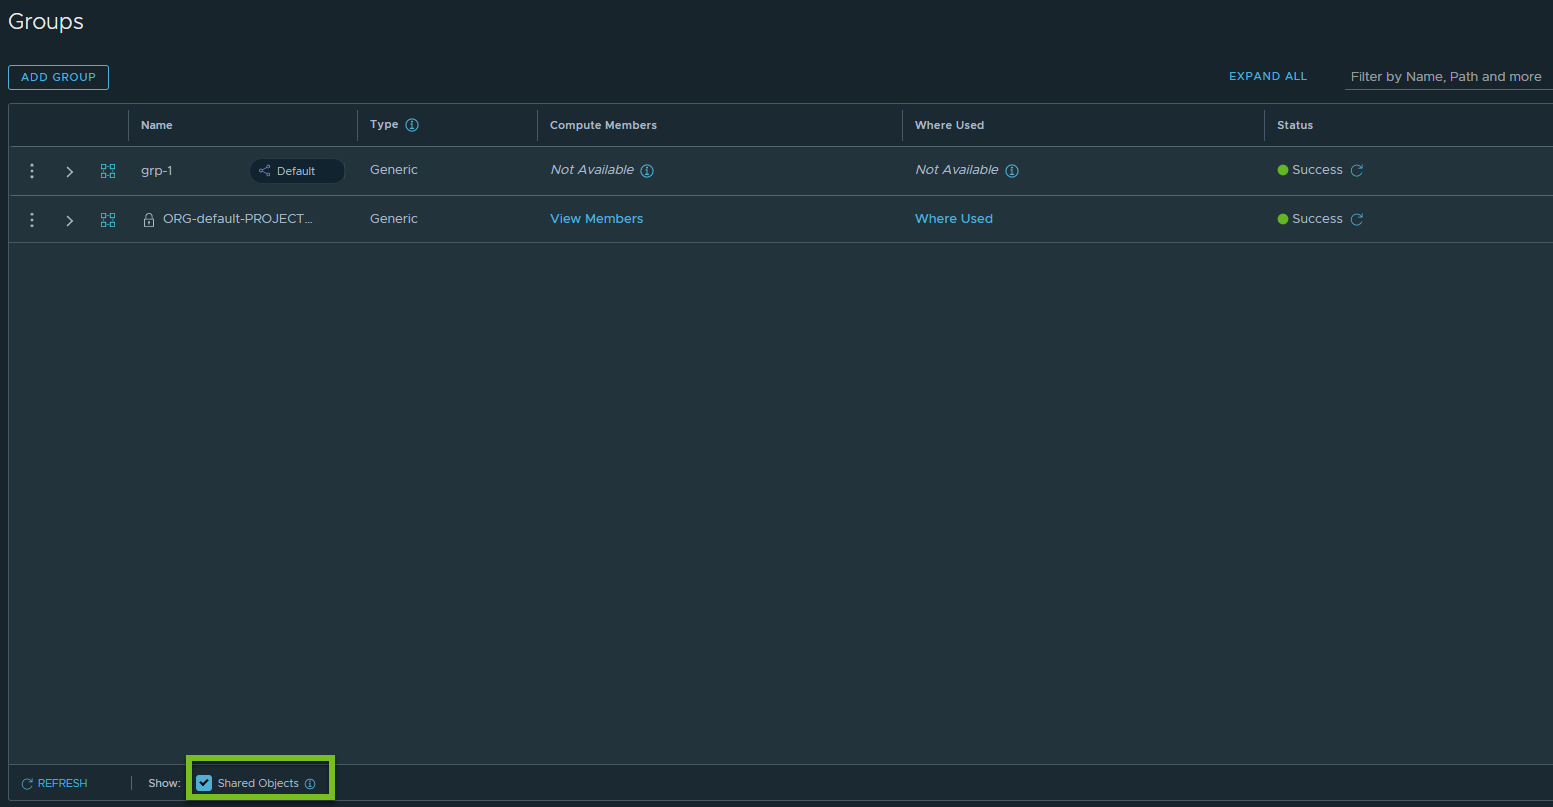
- Observe that the shared group is listed on the Groups page.
The following pill-shaped icon is displayed next to the group name to indicate that the group is owned by the default space and shared with the project.