


After meeting all the required deployment prerequisites, you can install the NSX Application Platform Automation Appliance using an OVA.
This OVA is a standard virtual appliance based on Photon OS for installing the NSX Application Platform Automation Appliance.
Procedure
- Enter your Broadcom support portal login credentials and click the
 (HTTPS Download) icon to access the NSX Application Platform Automation Appliance OVA file.
You can copy the download URL or download the OVA file to your local environment.
- Verify that your installation configurations are accurate and click Finish to begin the installation.

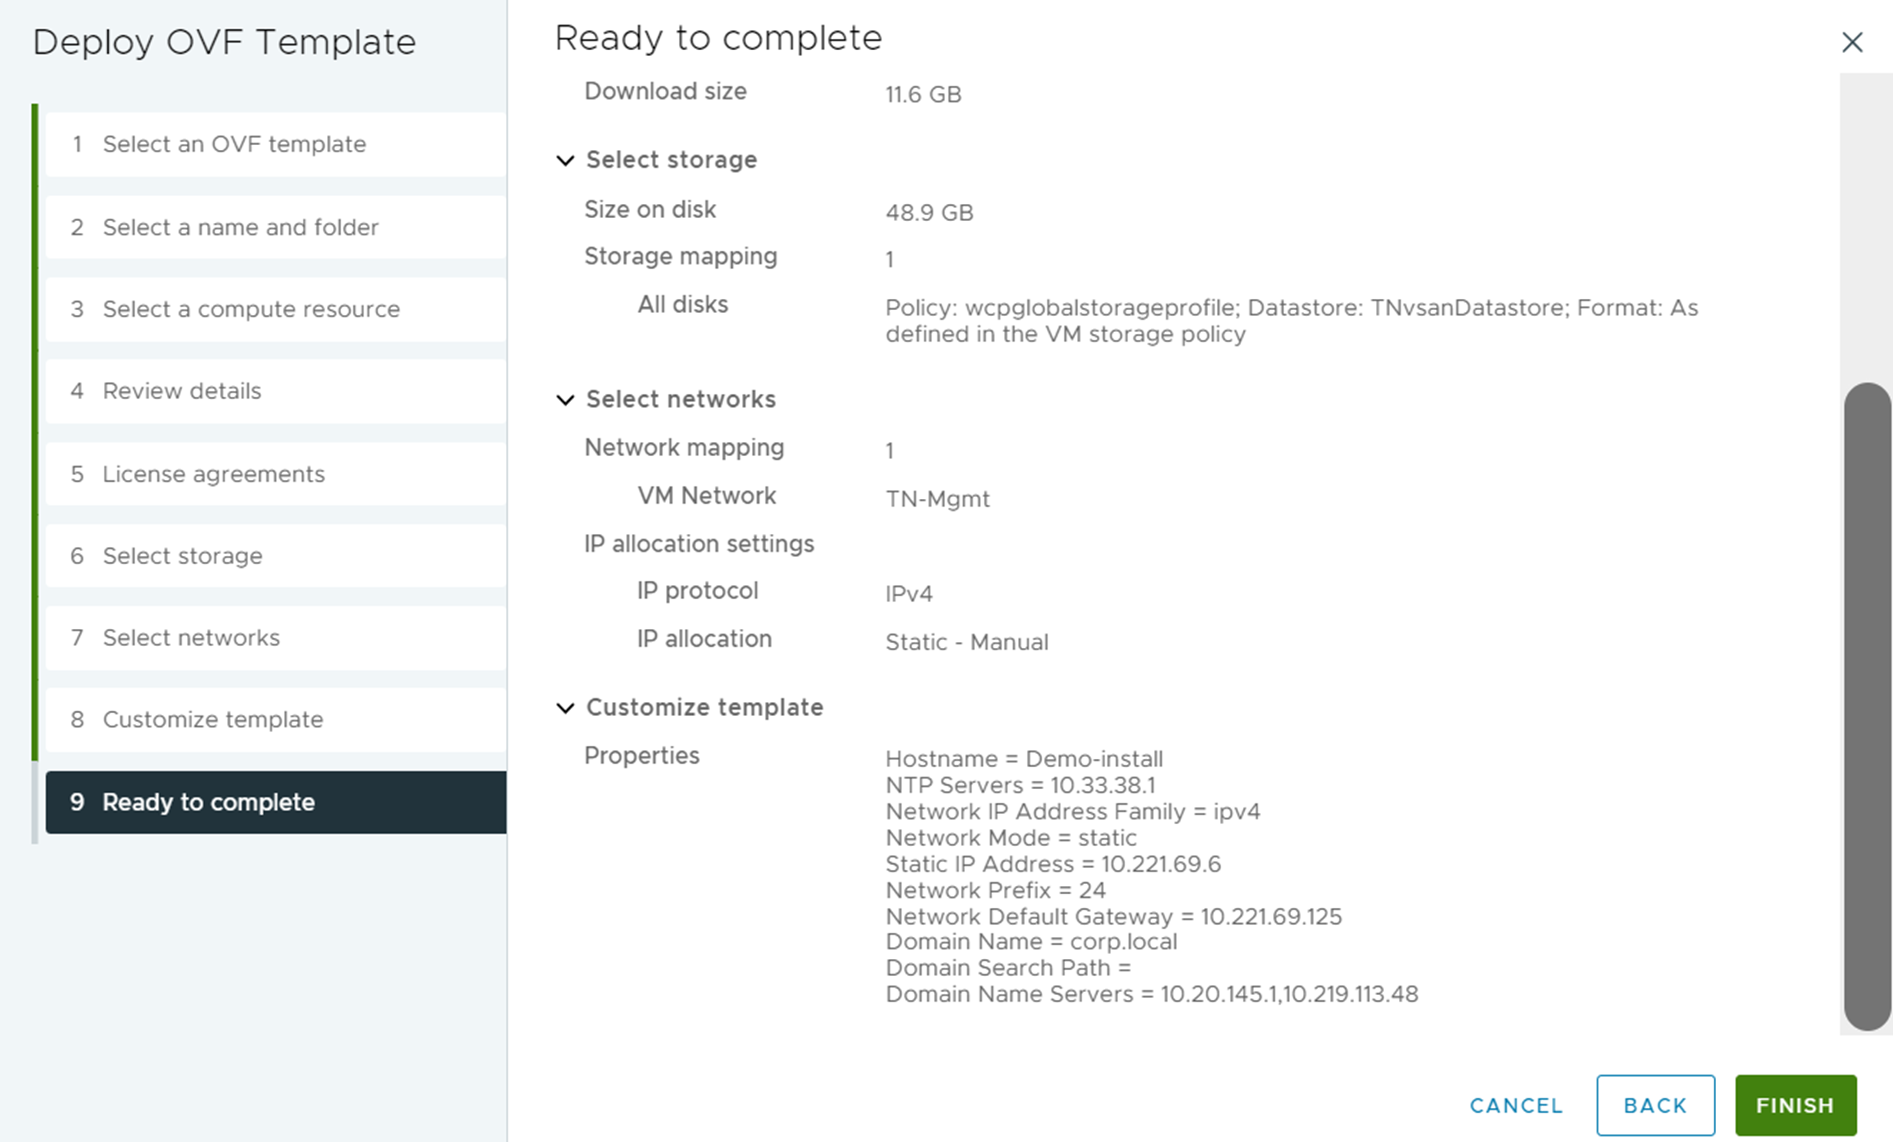 Depending on your environmental resources, the installation duration might vary.
 - At the bottom of the page, click the Recent Tasks tab and check your deployment status.
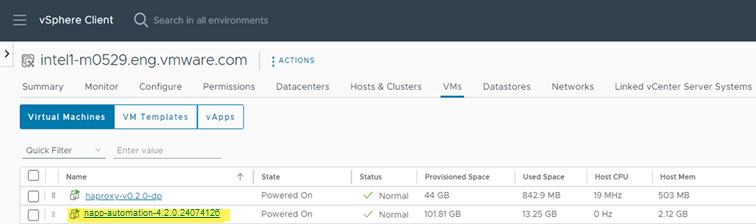
After the deployment is successfully complete, the newly created VM appears under the cluster and VMs section.
- Open a remote console to view the login screen and first boot initialization.
After the initialization process, your console screen refreshes, and the host name, and assigned IP address appear.
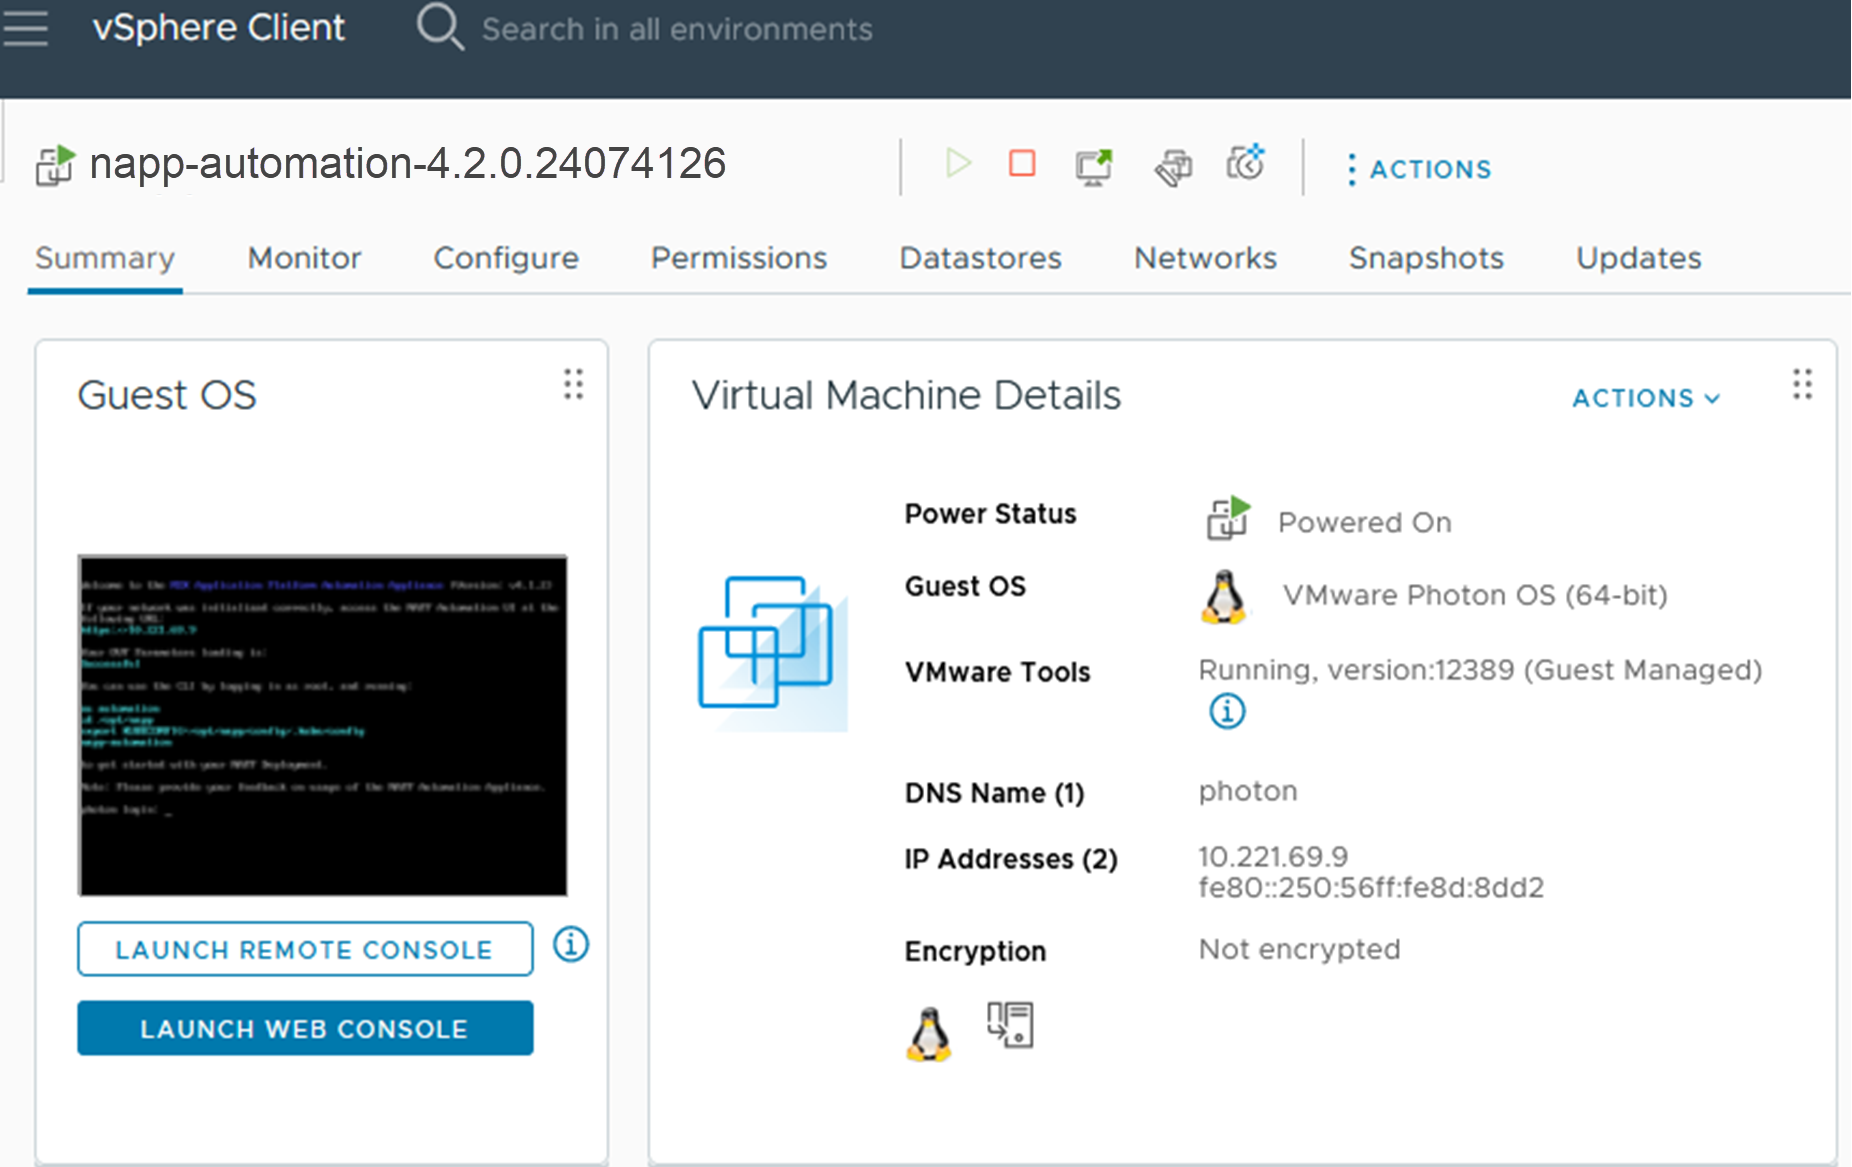 You can also see that the OVF parameters has successfully loaded in the first boot initialization.
Welcome to the NSX Application Platform Automation Appliance (Version: v4.2.0)
If your network was initialized correctly, access the NAPP Automation UI at the following URL:
https://10.221.69.9
Your OVF Parameters loading is:
Successful
You can use the CLI by logging in as root, and running:
su automation cd /opt/napp
export KUBECONFIG=/opt/napp/config/.kube/config
napp-automation
to get started with your NAPP Deployment.
Note: Please provide your feedback on usage of the NAPP Automation Appliance.
If the IP address configured during deployment is not assigned or you have connectivity issues, you can log in using the console to troubleshoot or redeploy the appliance if it is an external configuration issue.
What to do next
To install
Tanzu Kubernetes Grid and
NSX Application Platform, download specific Helm charts and Docker images from a container registry.
- If you are using a public registry with the required images and charts hosted on VMware, see Deployment Requirements for NSX Application Platform.
- If you cannot use the public registry, deploy and configure a private registry. See Deploy Private Harbor and Upload NSX Application Platform Artifacts.
