If you plan to install Harbor with a certificate from a public trusted CA, follow the procedures.
Procedure
- Obtain a CA certificate from your certificate vendor.
You need the SSL .pem files and the Server Key, which should match the Harbor server name.
- Log in to the vSphere Client with admin privileges.
- Navigate to the vSphere host cluster on which to install Harbor.
- Right-click the vSphere host cluster and select Deploy OVF template to start the installation wizard.
- Select Local file.
- Enter your Broadcom support portal login credentials and click the
 (HTTPS Download) icon to access the Harbor OVA file.
For more information on downloading software from the Broadcom support portal, see the
Knowledge Base article.
- Click Next.
- Enter a name, specify a data center folder location for the Harbor VM and click Next.
- Select a compute resource for the Harbor VM and click Next.
The compute resource cluster is usually the Management cluster.
- Review the Harbor appliance details and click Next.
- Accept the appliance EULA agreement and click Next.
- Select the data store storage configuration and disk file and click Next.
Ensure that the selected storage has enough capacity to store all NSX Application Platform containers and charts.
- Select a Harbor destination network to map the appliance vNICs to a destination port group and click Next.
Note:
The selected network must have connectivity on the required ports and protocols from Tanzu Kubernetes Grid and NSX Application Platform workload networks. See https://ports.esp.vmware.com/home/NSX.
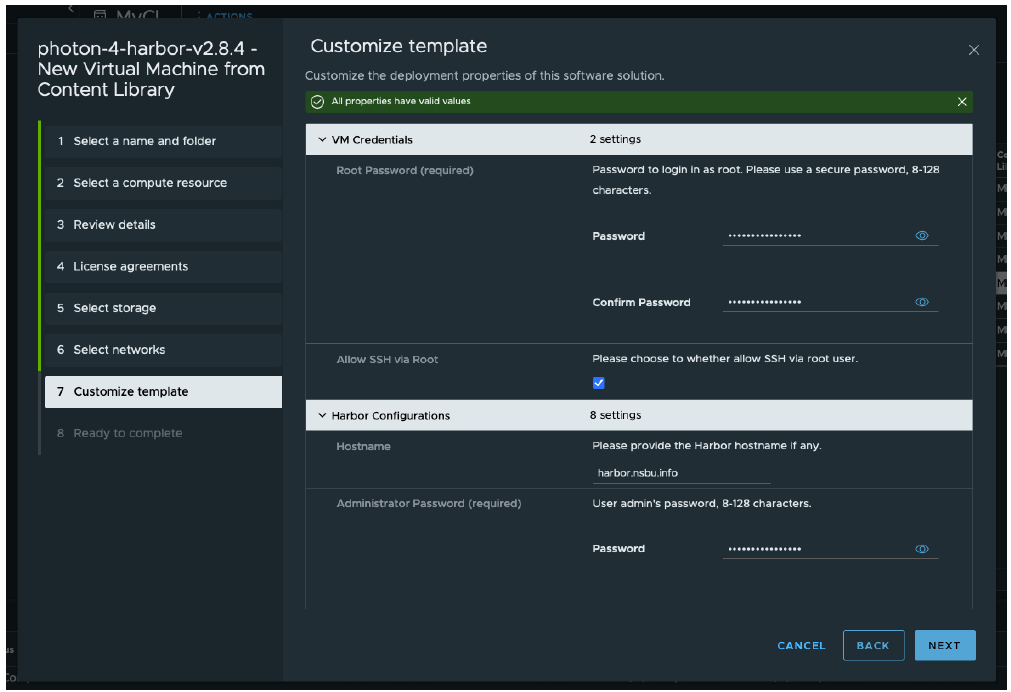
- In the Customize template step, complete the following steps.
- Enter the root password and administrator password.
- Optionally, allow SSH login for the root user.
- For the hostname, provide the correct FQDN (fully qualified domain name).
The hostname has a public top-level domain (such as .com or .info) and not a private top-level domain (such as .lab or .local).
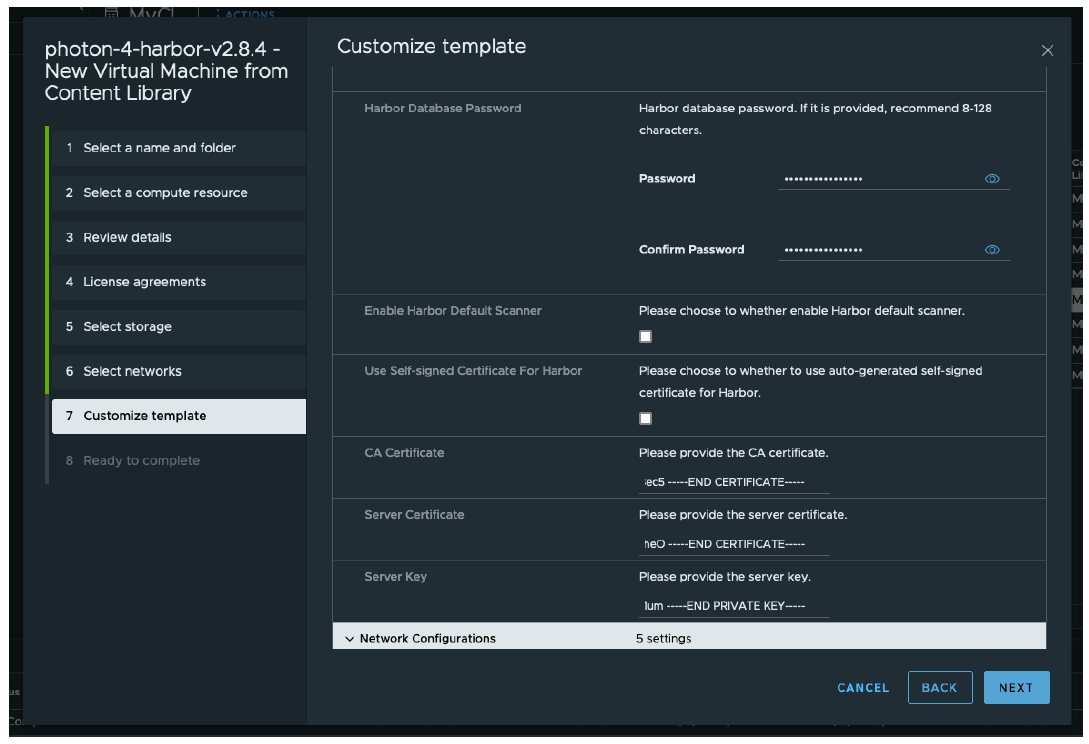
- Enter the CA and server certificates and the private key in PEM format.
The CA and Server certificates are the chain and full chain files from your Certificate Authority, while the Server Key is your private key file.
- Provide the network configuration information and accept the default Docker configurations.
- Click Finish to begin the installation.
Depending on your environmental resources, the installation might take 4-5 minutes to complete.
After the deployment is successfully complete, the newly created VM appears under the cluster and VMs section.
- Power on the VM and wait a few minutes for services to start.
- From your browser, go to
https://<FQDN of Harbor>.
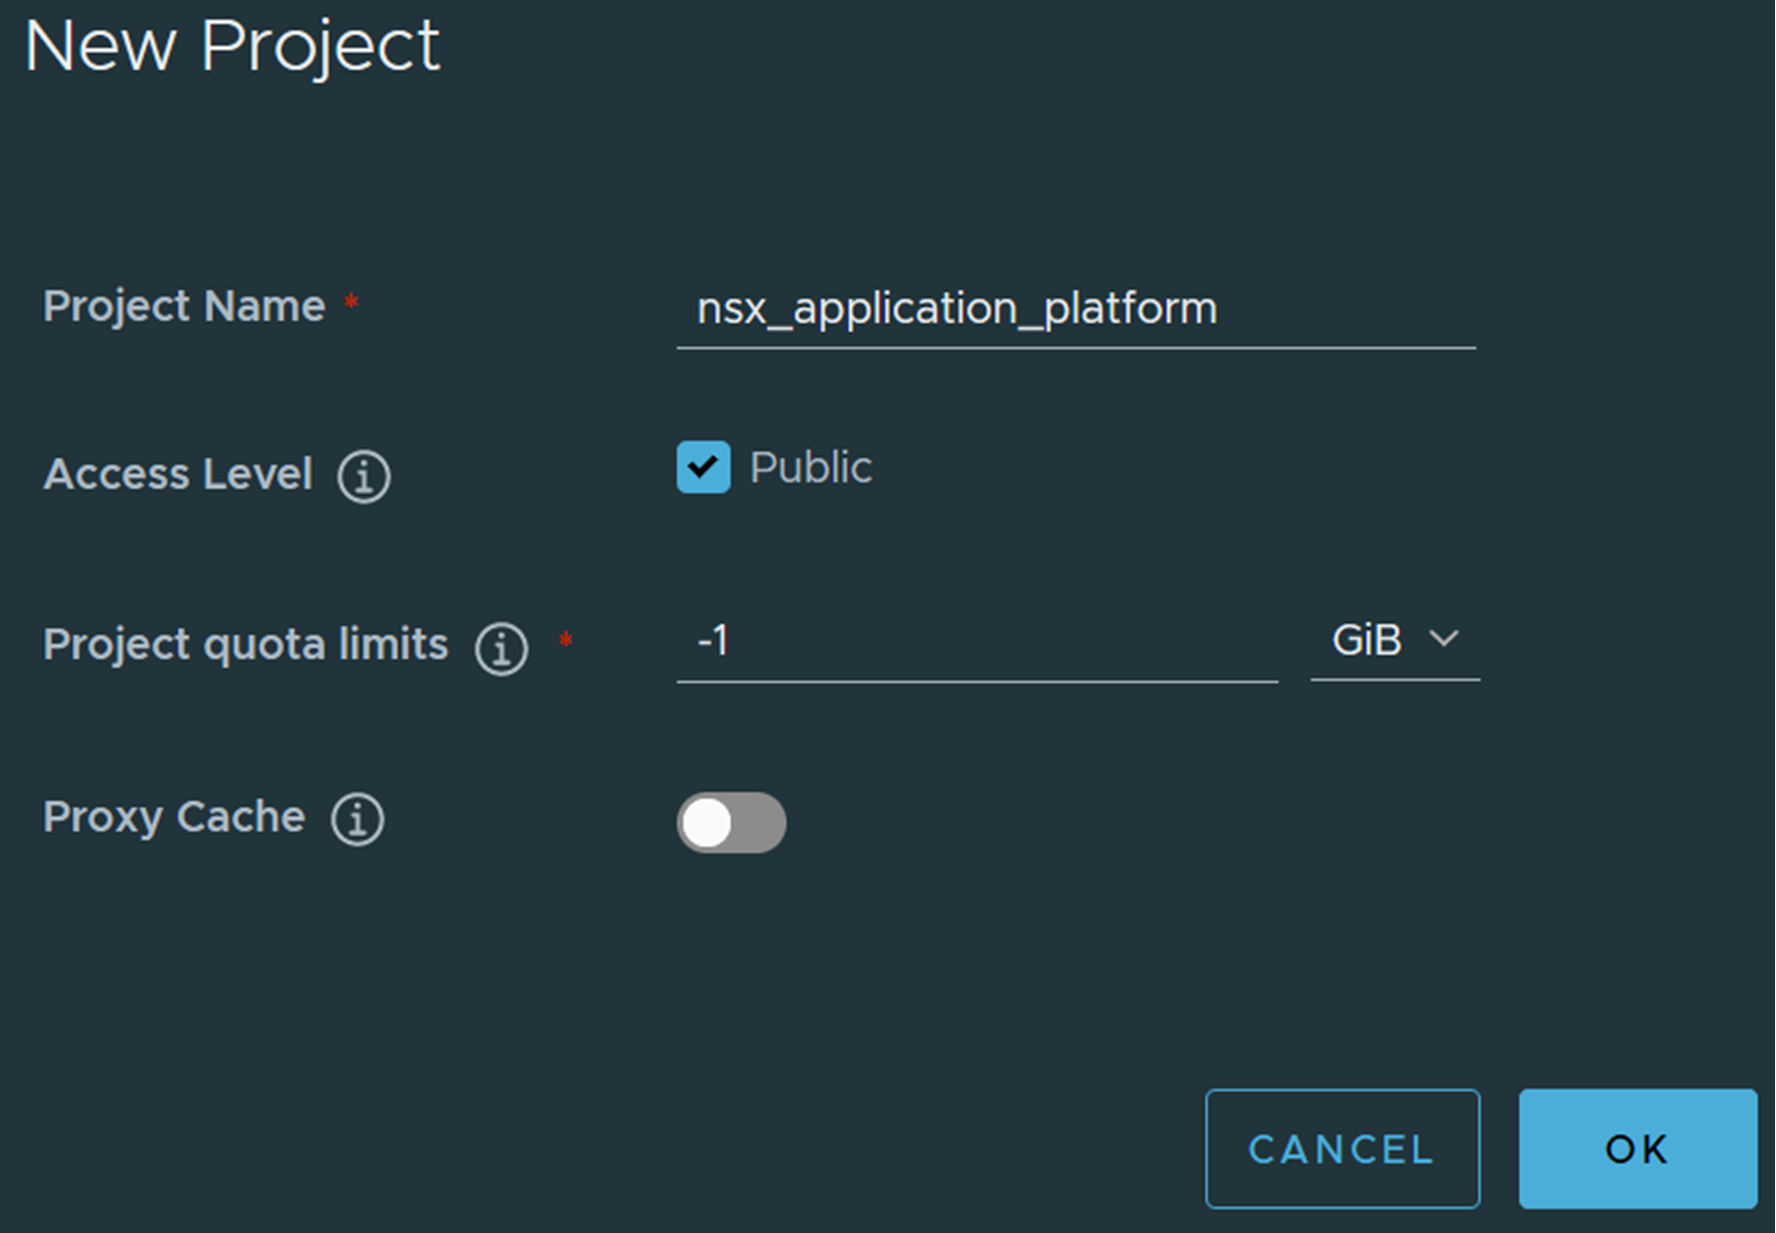
- Log in to Harbor and create a project called nsx_application_platform.
Select the Public check box for Access Level.