


To add a new role for a Customer, perform the following steps:
Procedure
- In the Enterprise portal, on the Global Navigation bar, expand the Enterprise Applications drop-down menu.
- Select Global Settings service.
- From the left menu, click User Management, and then click the Roles tab.
- Click Add Role.
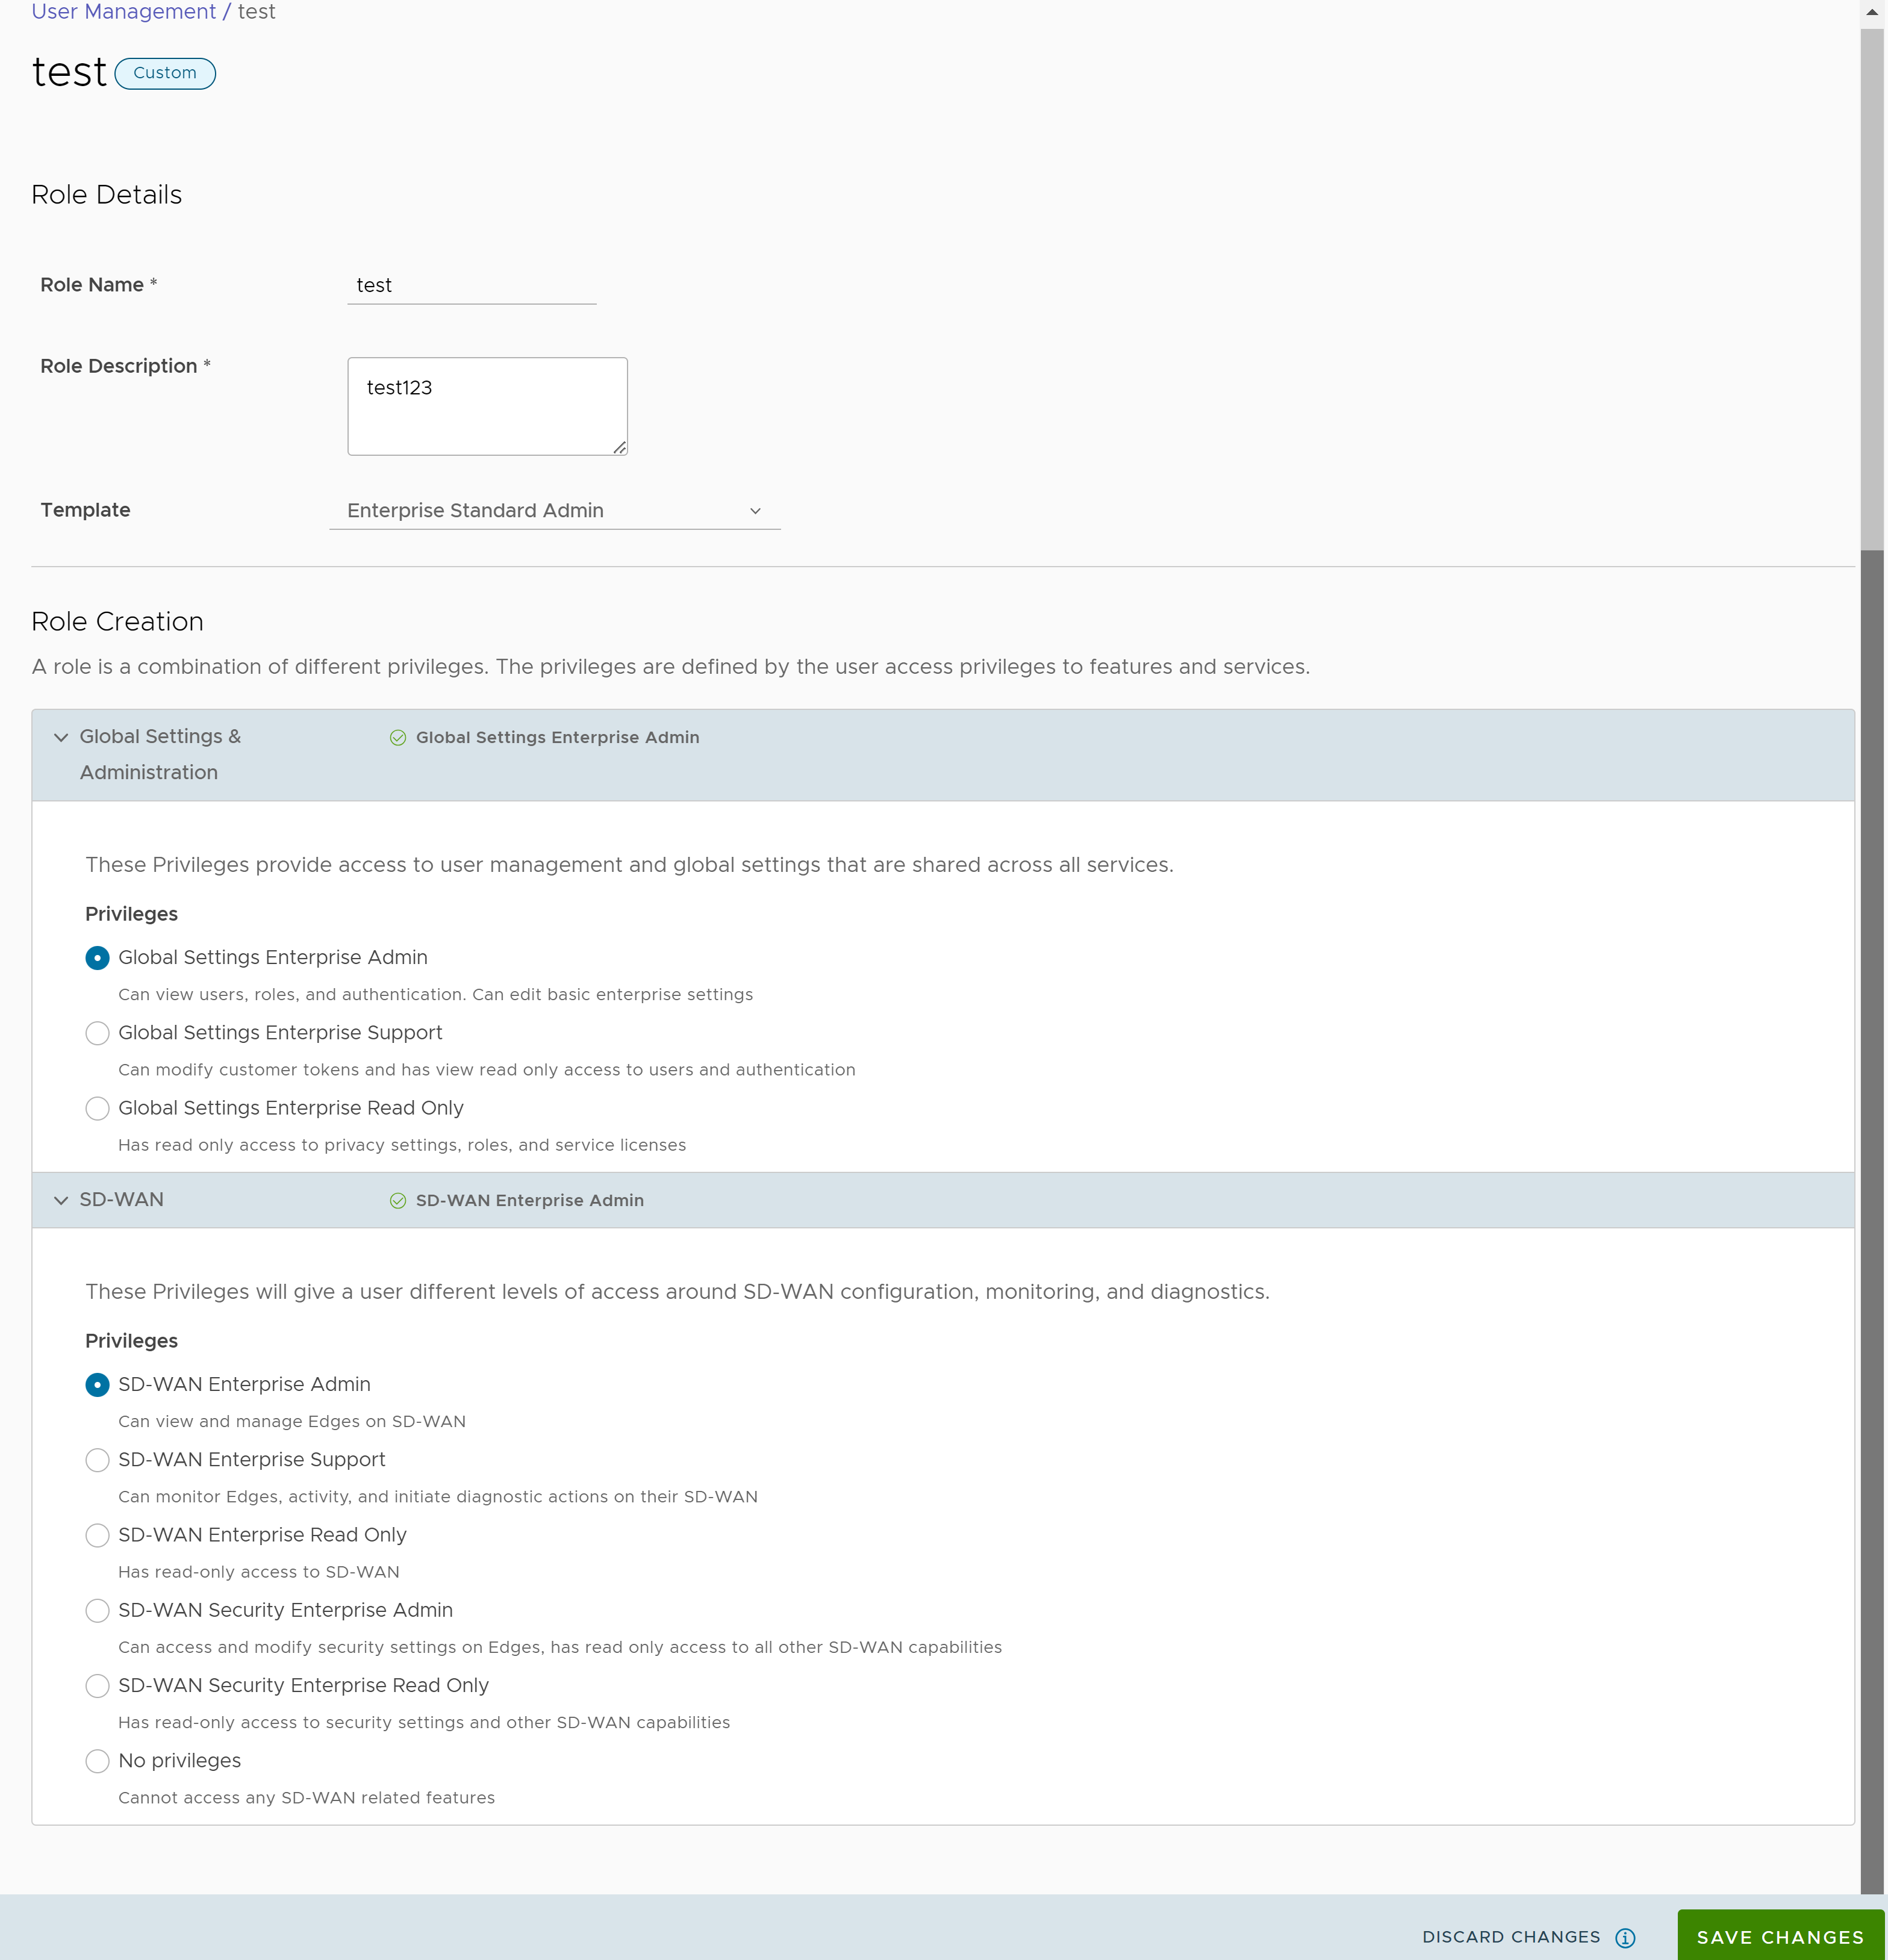
- Enter the following details for the new custom role:
Option Description Role Details Role Name Enter a name for the new role. Role Description Enter a description for the role. Template Optionally, select an existing role as template from the drop-down list. The privileges of the selected template are assigned to the new role. Role Creation Global Settings & Administration These privileges provide access to user management and global settings that are shared across all services. Choosing one of the privileges is mandatory. By default, Global Settings Enterprise Read Only is selected. SD-WAN These privileges provide the Enterprise Administrator with different levels of access around SD-WAN configuration, monitoring, and diagnostics. You can optionally choose an SD-WAN privilege. The default value is No Privileges. Note: The Role Creation section displays the privileges only for which the Customer has licenses. - Click Save Changes.
The new custom role appears in the User Management > Roles page. Click the link to the custom role to view the settings.
