This section describes how to create or select a network.
Steps Overview
The following steps are required for a Network configuration:
- Create a new Network or select an existing Network
- Configure Corporate Networks
- Configure Address Space
- Configure VLANs
- Configure Guest Networks
- Configure Address Space
- Configure VLANs
Create Network or Select Existing Network
If you are creating a new Network, on the Networks page, click New Network. As an alternative, you can select a predefined Network by clicking the name of the predefined Network. After a new installation, the VeloCloud Orchestrator has two predefined Networks: Internet Network and VPN Network.
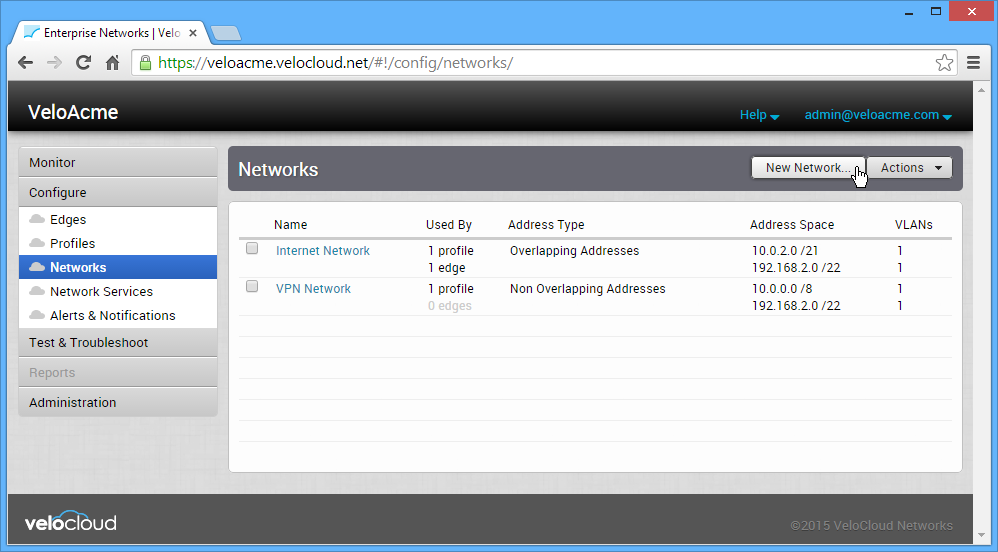
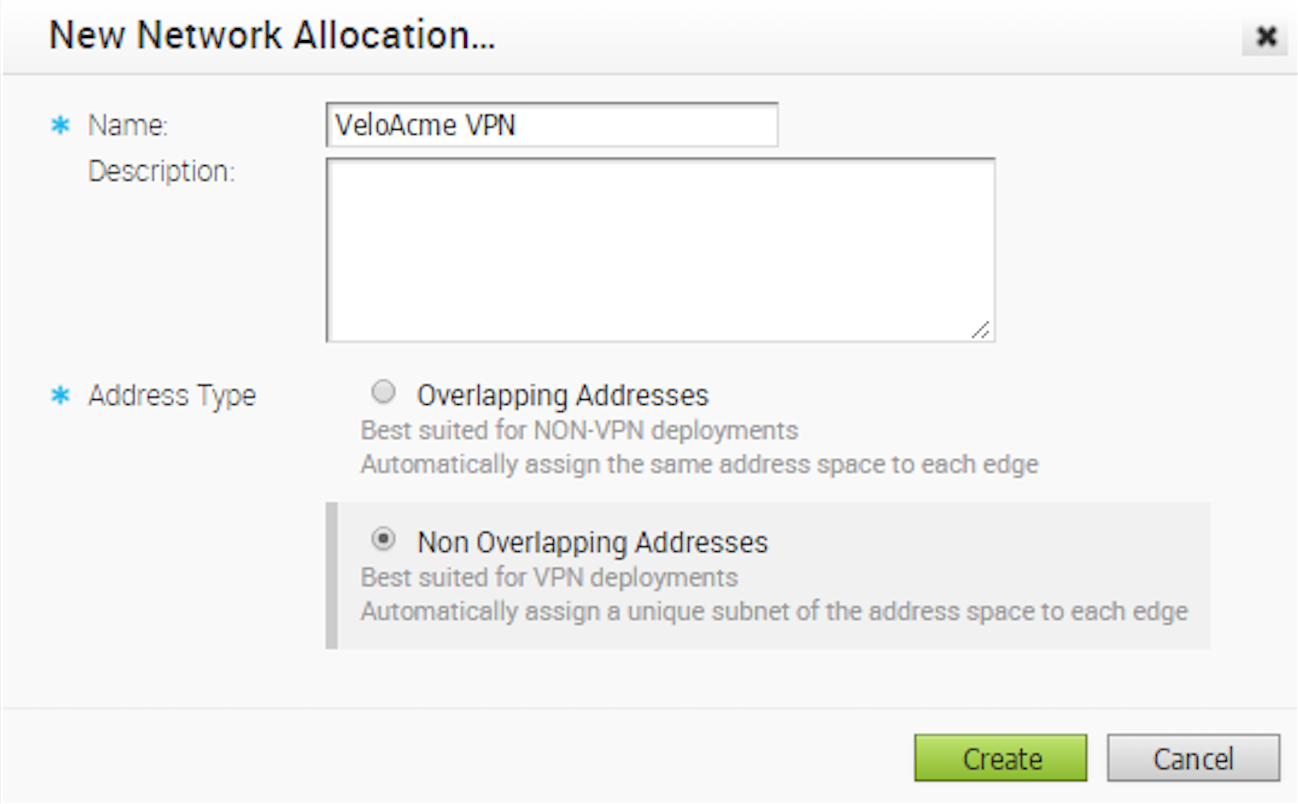
If you are creating a new Network, the New Network Allocation dialog is displayed (see the image below). In the New Network Allocation dialog, specify a Name, Description, and choose an addressing type.
Although the Address Type can be either Overlapping Addresses (where every VeloCloud Edge has the same address space) or Non Overlapping Addressing (where each VeloCloud Edge has a unique address block), we mandate Non Overlapping. For this example, we will call our new Network, VeloAcme VPN.
Overlapping Addresses
In order to enable branches with Overlapping IP to reach the common server in the hub or data center, or to enable data center users to reach servers in Overlapping IP branches, NAT on the Edge must be configured. You can define NAT for a single source local IP to map to one VPN IP address, or for a block of IP addresses to a block of VPN addresses with same prefix length.
- Enable VPN via NAT in the Overlapping Address Network setup.
- Configure NAT on the Edge level.
Configure Overlapping IP for VPN
To configure overlapping IP for VPN:
- Enable VPN via NAT in Overlapping Address Network setup.
- Go to Configure > Networks from the Navigation Panel.
- Click the New Network button.
- In the New Network Allocation dialog box:
- Type the network name in the Name textbox.
- If there is a description, type it in the Description textbox.
- In the Address Type area, choose the Overlapping Addresses dial.
- Click the Create button.

- Click the newly created network link in the Network screen.
- In the Networks screen, click the Allow VPN Via NAT checkbox if NAT on the Edge is required. See image below.
- Click the Save Changes button.

- In the Corporate Networks area, create a new VLAN or update an existing VLAN.

- If you are updating an existing VLAN, click the link of the VLAN to open the Corporate dialog box.
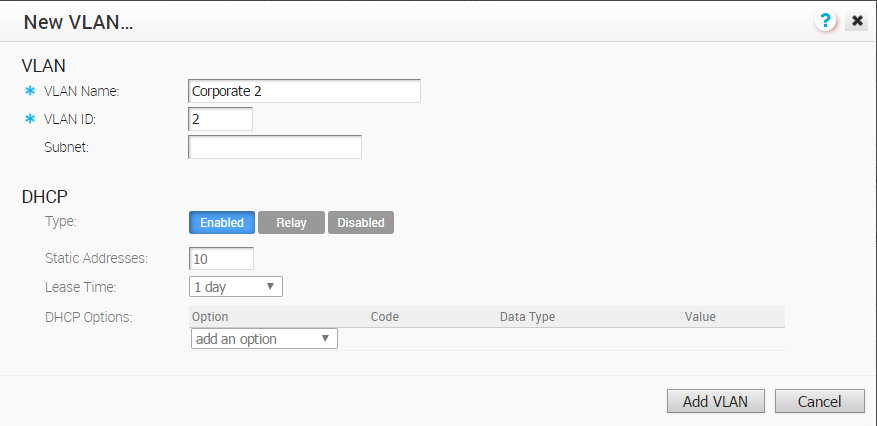
- If you are creating a new VLAN, click the New button in the VLANs area to open the New VLAN dialog box. (From the New VLAN dialog box, enter the VLAN Name and VLAN ID).
- Click the Add VLAN button.
- Whether you update an existing VLAN or you are creating a new VLAN, enter the Subnet in the Subnet textbox.
- If the Allow VPN via NAT is checked, define NAT on the Edge level (1:1 or use VPN IP Subnet blockpool). See section titled, Configure Edge Device.
Non-Overlapping Addressing
The summary of the new Network where non-overlapping addressing is shown in the following screen capture. In this Network definition, every edge will have a unique network address space. VeloAcme will also have some Edges that require communication between Edges using a VPN tunnel. This requires that each connection across all of the Edges must have a unique IP address.
VeloCloud Site VPN
Perform the follow steps for your VPN Corporate Network.
Configure Address Space
Enter the address space for the Corporate Network.
SaaS
The following screen capture shows a screen capture for a Corporate Network that uses overlapping addressing. Enter the address space that the Corporate Network will occupy on all Edges.

Non-VeloCloud Site via VPN
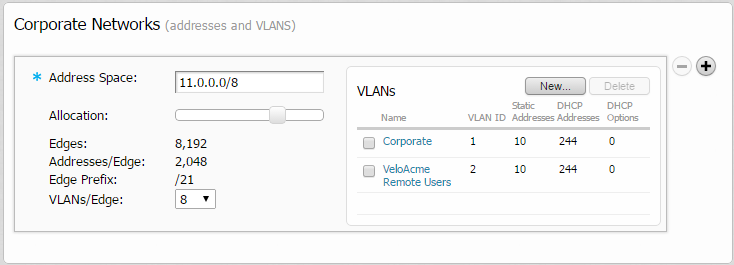
The following screen capture shows a screen capture for a Corporate Network that uses overlapping addressing. The address space was decided in the previous step when you create the network space and will be distributed across the number of Edges chosen using the Allocation slider. You can specify the number of Edges, the Addresses/Edge, and the Edge Prefix. The Allocation slider help you choose these values by calculating the values when all addresses are assigned across the number of Edges. This is the built-in IPAM IP address management for Edges to allocate LAN side subnet behind the Edge.
Configure VLANs
You can define as many VLANs as you like for the Corporate Network, but the Max VLANs value specifies the maximum number you can specify for use in a Profile or Edge.
Click the New button to create a new VLAN. The dialog below is presented. You can configure the VLAN Name, VLAN ID, and the DHCP configuration (see the screen capture below).
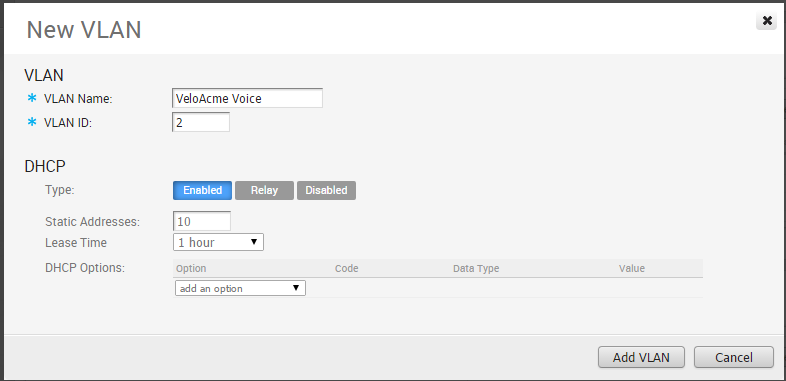
The following screen captures shows some examples for configuring DHCP options. Choose one of the following types:
| Type | Description |
|---|---|
| Enabled | The Edge is the DHCP server |
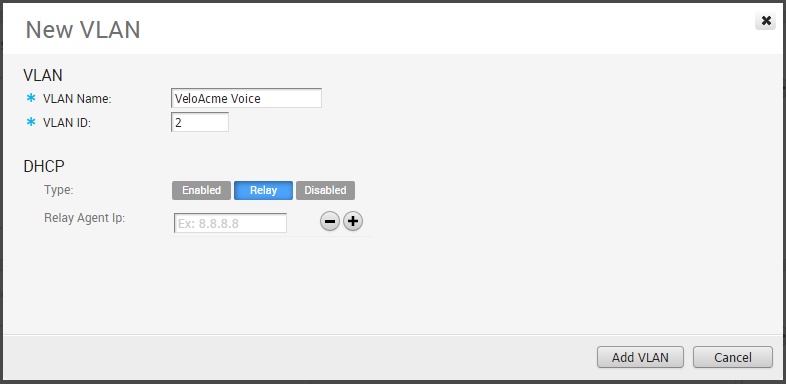
| Relay | The DHCP is at a remote location |
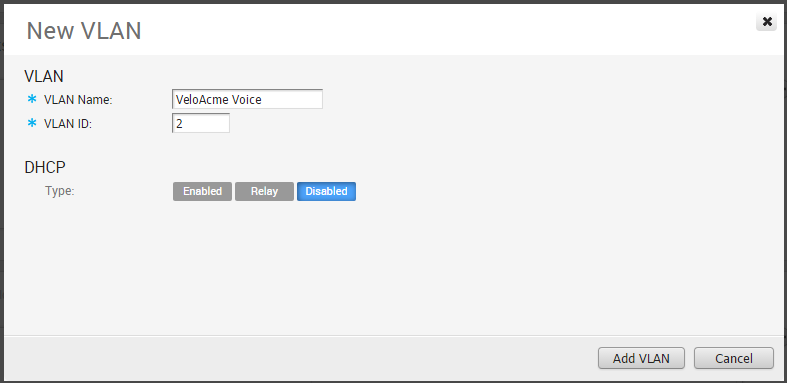
| Disabled | The DHCP is incapacitated |
When choosing Enabled, you can add one or more DHCP options where you specify predefined options or add custom options. The following screen capture shows an example configuration with one predefined and one custom DHCP option.
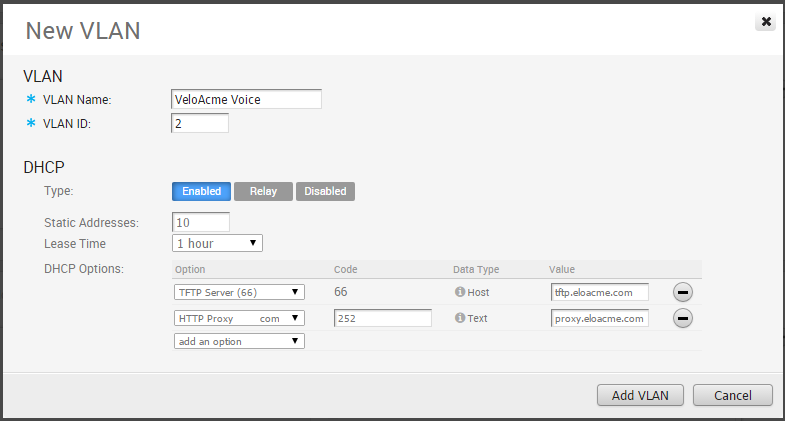
If you choose the DHCP type of Relay, you can specify the IP address of one or more Relay Agents (see the screen capture below).
If the DHCP type of Disabled is chosen, IP addresses are not provided by DHCP for this VLAN.
Click Add VLAN to complete the VLAN creation.
Configure Guest Networks
The Guest Network is an untrusted network that always uses an overlapping address space. It is completely segmented and on separate VRF as compared to corporate network. The Guest Network section (see screen capture below) defines the Address Space. You can define as many VLANs as you like for the Guest Network, but the Max VLANs value specifies the maximum number you can use in a Profile or Edge.
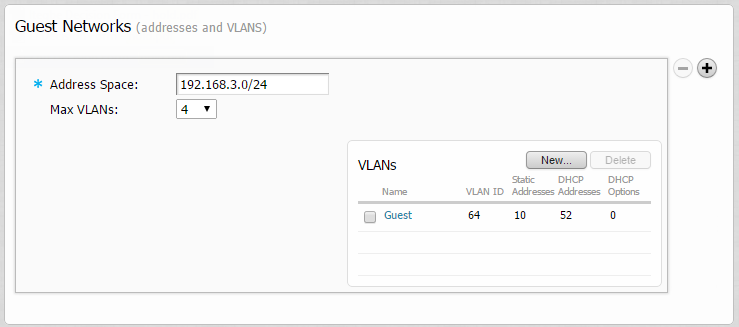
Configure Address Space
Enter the address space that the Guest Network will occupy on all Edges.
Configure VLANs
You can define as many VLANs as you like for the Guest Network, but the Max VLANs value specifies the maximum number you can use in a Profile or Edge. For VeloAcme, we used the default VLAN, Guest.
Our VeloAcme Network definitions are now complete and ready to be incorporated into our Profile and Edge Definitions.