


Domain Name System (DNS) is used to configure conditional DNS forwarding through a private DNS service and to specify a public DNS service to be used for querying purpose.
The DNS Service can be used for a public DNS service or a private DNS service provided by your company. A Primary Server and Backup Server can be specified. The public DNS service is preconfigured to use Google and Open DNS servers.
To configure DNS settings with the New Orchestrator UI:
- In the Enterprise portal, click the Open New Orchestrator UI option available at the top of the Window.
- Click Launch New Orchestrator UI in the pop-up window.
- The UI opens in a new tab displaying the monitoring and configuring options.
In the new Orchestrator UI, click the Configure tab.
To configure the DNS settings for a Profile:
- Click .
- The Profiles page displays the existing Profiles.
- Click the link to a Profile or click the View link in the Device column of the Profile. You can also select a Profile and click Modify to configure the Profile.
- The configuration options for the selected Profile are displayed in the Device tab.
- In the Routing & NAT category, click DNS.
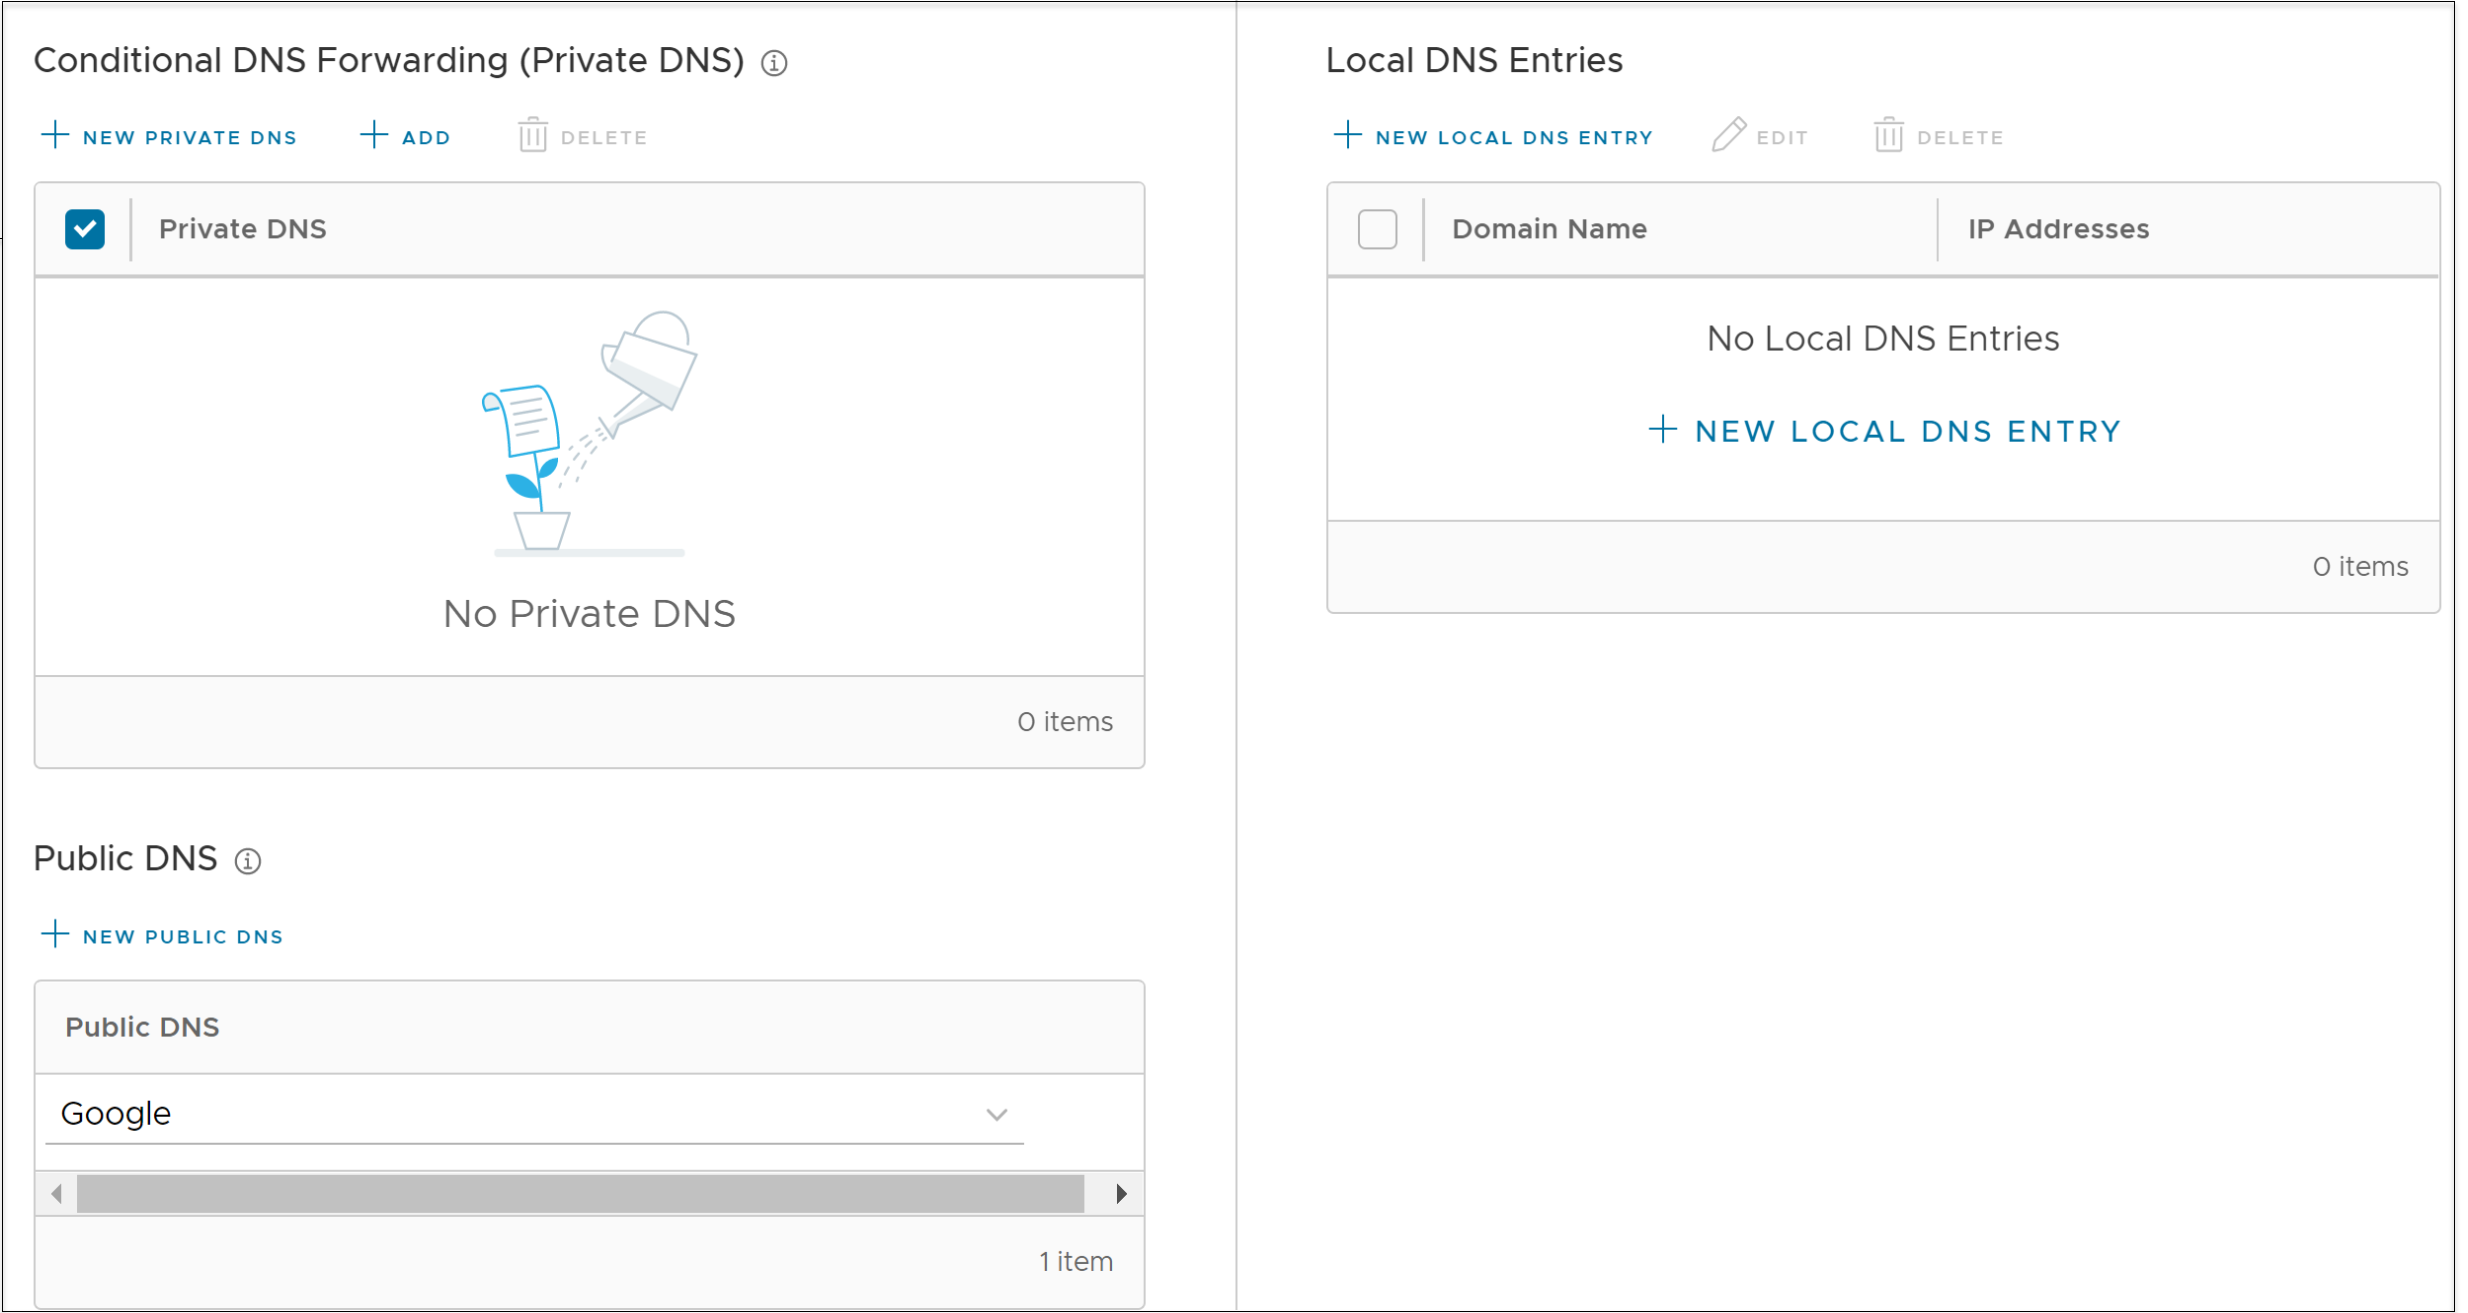
- In the Conditional DNS Forwarding (Private DNS) section, choose private DNS to forward the DNS requests related to the domain name. Click Add to add existing private DNS servers to the drop-down list.
- To add a new private DNS, click New Private DNS.
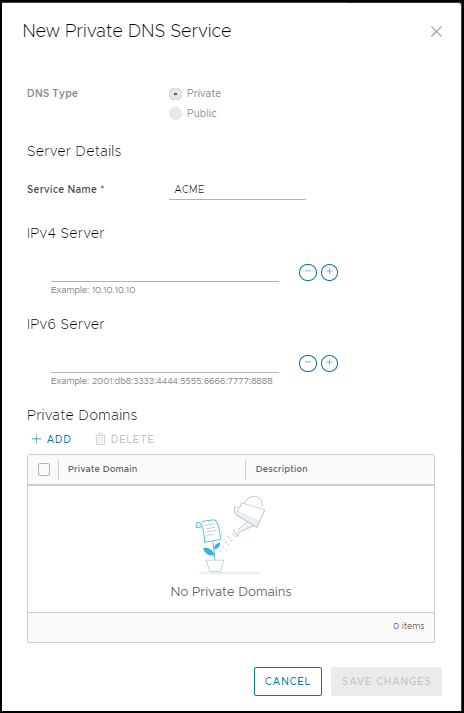
- Enter the following:
Option Description Service Name Name of DNS service IPv4 Server IPv4 address for IPv4 Server. Click the plus (+) icon to add more addresses. IPv6 Server IPv6 address for IPv4 Server. Click the plus (+) icon to add more addresses. Private Domains Click Add and enter private domain name and description. - Click Save Changes.
- In the Public DNS section, select a public DNS service from the drop-down list to be used for querying the domain names. By default, Google and Open DNS servers are pre-configured as public DNS.
- To add a public DNS, click New Public DNS.
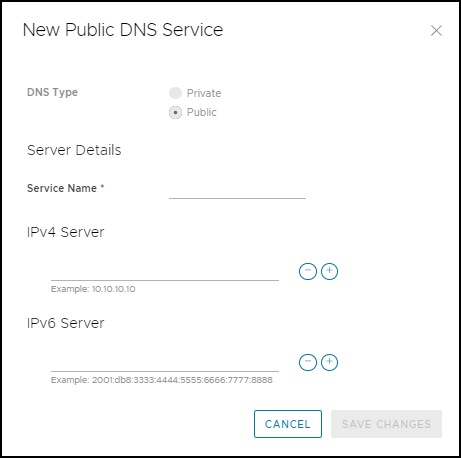
- Enter the Service Name, IPv4 Server Address, and IPv6 Server Address for the public DNS.
- Click Save Changes.
- After configuring the private and public DNS, click Save Changes in the Device page.
The DNS settings are applied to all the Edges associated with the Profile. You can choose to override the DNS Settings for an Edge.
- Click .
- The Edges page displays the existing Edges.
- Click the link to an Edge or click the View link in the Device column of the Edge.
- The configuration options for the selected Edge are displayed in the Device tab.
- In the Routing & NAT category, click DNS. The DNS settings configured for the associated Profile are displayed. If required, you can select the Override checkbox and modify the DNS settings.
- From the Source Interface drop-down list, select an Edge interface that is configured for the segment. This interface will be the source IP for the DNS service.
Note: When the Edge transmits the traffic, the packet header will have the IP address of the selected source interface, whereas the packets can be sent through any interface based on the destination route.
- After updating required settings, click Save Changes in the Device page.
