Describes how to create a Virtual WAN in Azure.
To create a Virtual WAN in Azure:
Prerequisites
- Ensure you have an Azure subscription. If not, create a free account.
- Ensure you have a resource group created to add the Virtual WAN.
Procedure
- Log in to your Microsoft Azure account.
The
Microsoft Azure home screen appears.
- Click All Services and search for Virtual WANs.
- Select Virtual WANs and click +Add.
The
Create WAN screen appears.
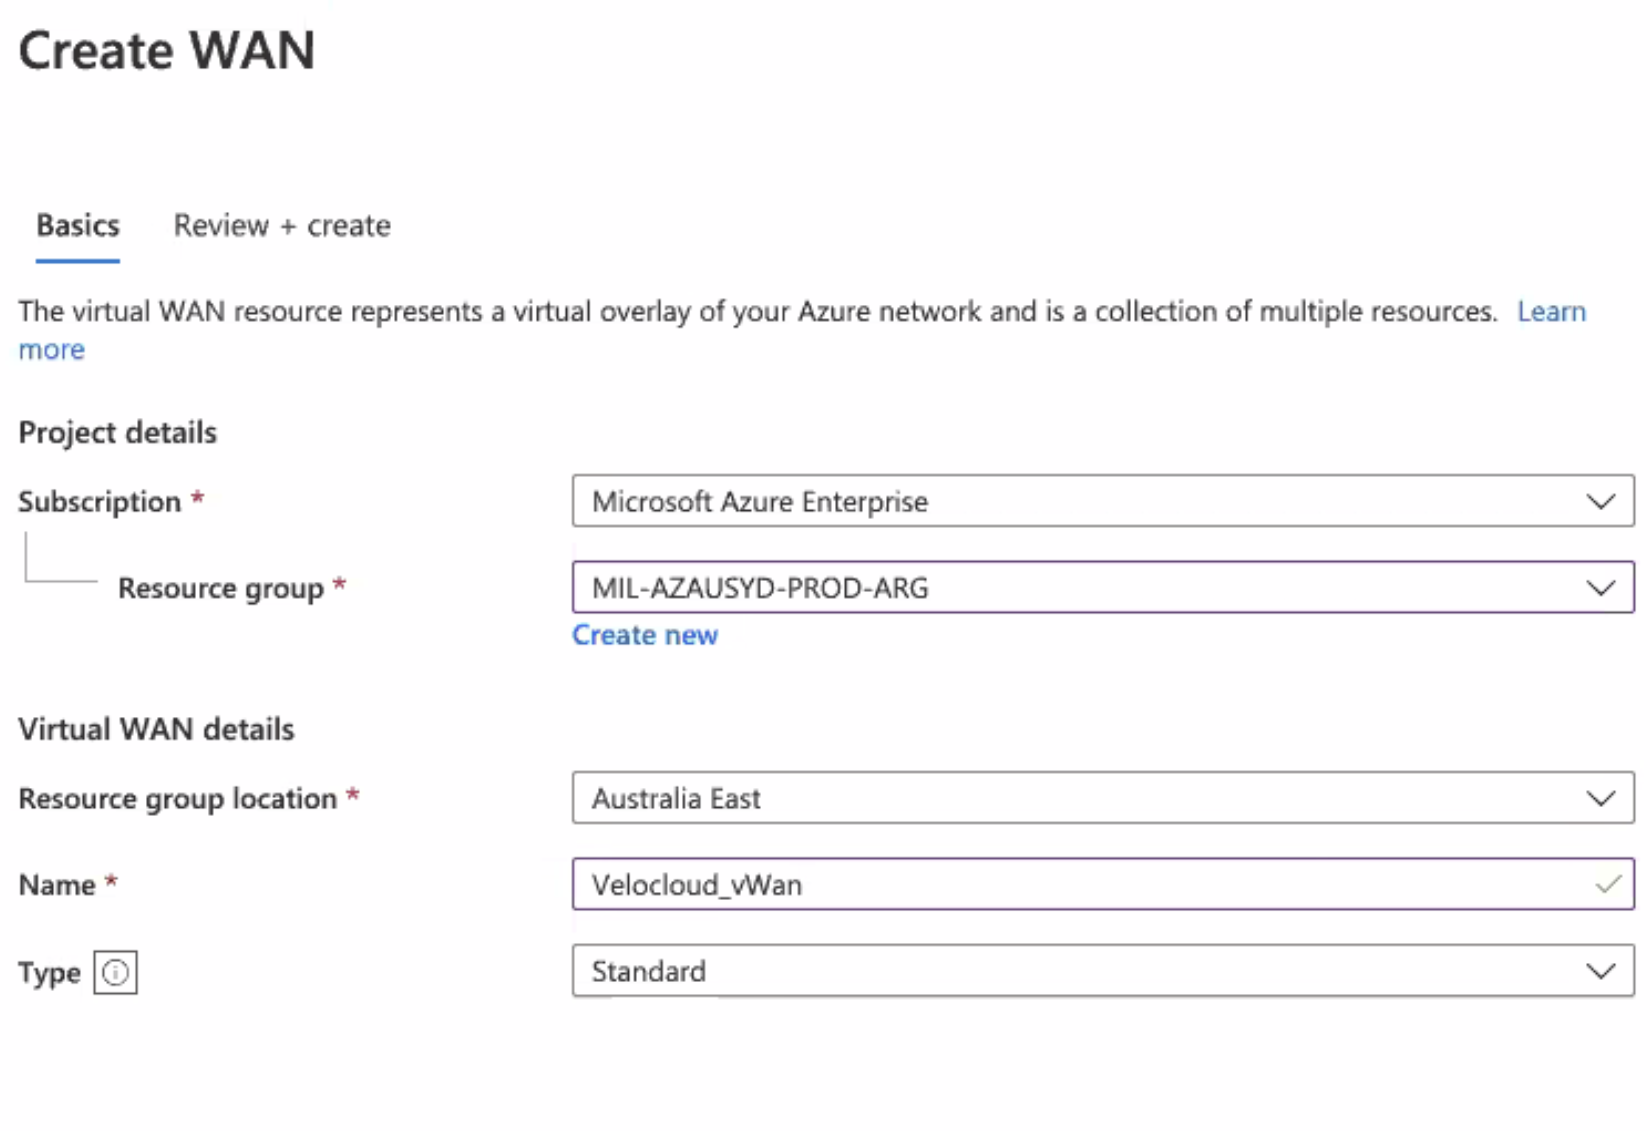
- From the Subscription drop-down menu, select your Microsoft Azure subscription.
- From the Resource group drop-down menu, select your resource group to add the Virtual WAN.
- From the Resource group location drop-down menu, select the location where the metadata associated with the Virtual WAN will reside.
- In the Name text box, enter a unique name for your Virtual WAN.
- From the Type drop-down menu, select Standard as the Virtual WAN type.
- Click Create.
Results
A Virtual WAN is created and appears on the Azure portal dashboard.
What to do next
Create Virtual Hubs. For steps, see Create a Virtual Hub.


