This section describes post-installation and installation verification steps.
If everything worked as expected in the installation, you can now login to the VM.
- If everything works as expected, you should see the login prompt on the console. You should see the prompt name as specified in cloud-init.

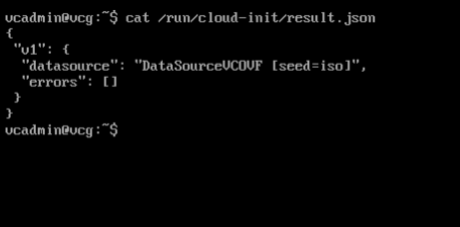
- You can also refer to /run/cloud-init/result.json. If you see the message below, it is likely that the cloud init runs successfully.

- Verify that the SD-WAN Gateway is registered with SD-WAN Orchestrator.

- Verify Outside Connectivity.

- Verify that the MGMT VRF is responding to ARPs.

- Optional: Deactivate cloud-init so it does not run on every boot.
Note: If you have deployed OVA on VMwarevSphere with vAPP properties, you must deactivate cloud-init prior to upgrading to versions 4.0.1 or 4.1.0. This is to ensure that the customization settings such as network configuration or password are not lost during the upgrade.
touch /etc/cloud/cloud-init.disabled
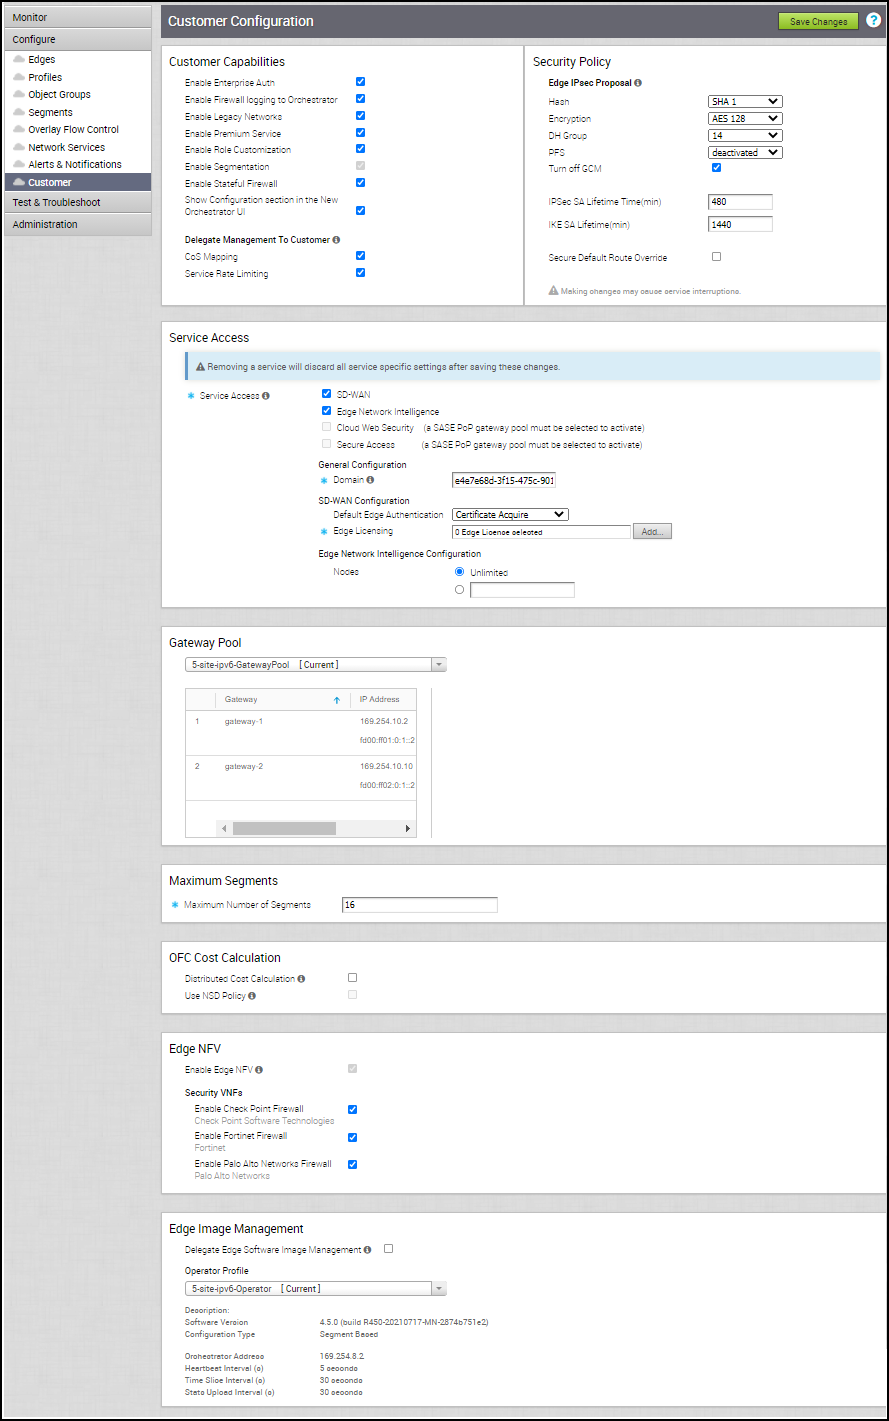
- Associate the new gateway pool with the customer.

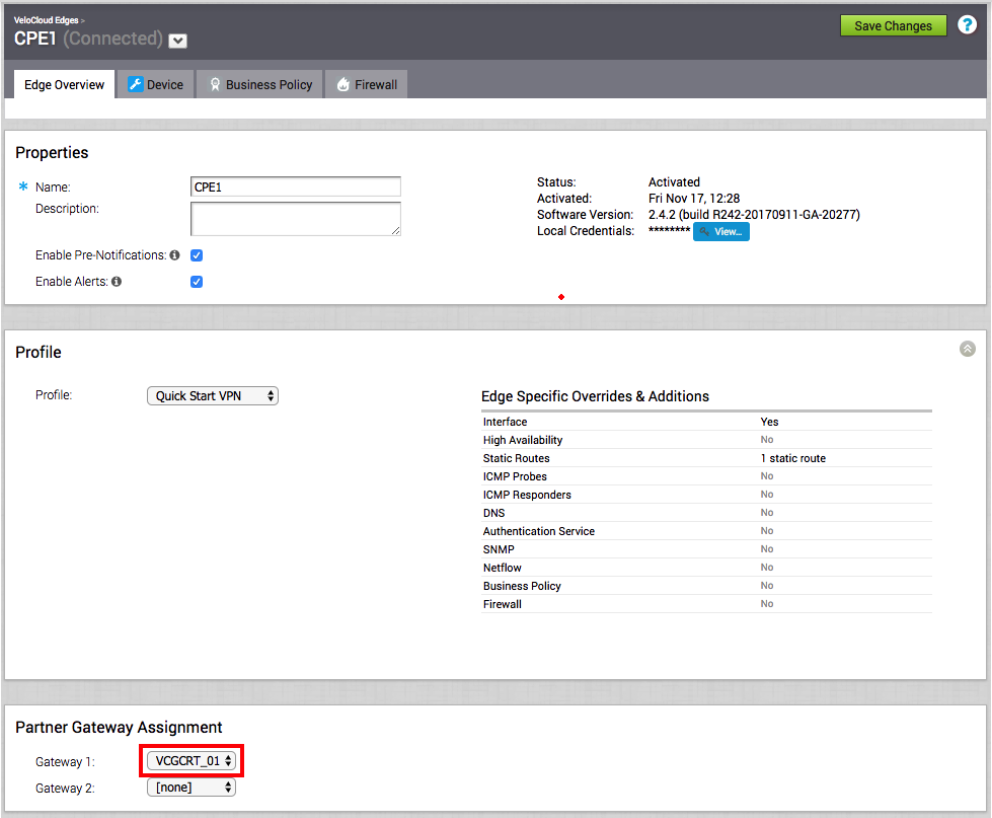
- Associate the Gateway with an Edge.

- Verify that the Edge is able to establish a tunnel with the Gateway on the Internet side. From the VMware SD-WAN Orchestrator, go to .

From the VMware SD-WAN Orchestrator, go to , and click Run to view the list of active paths.

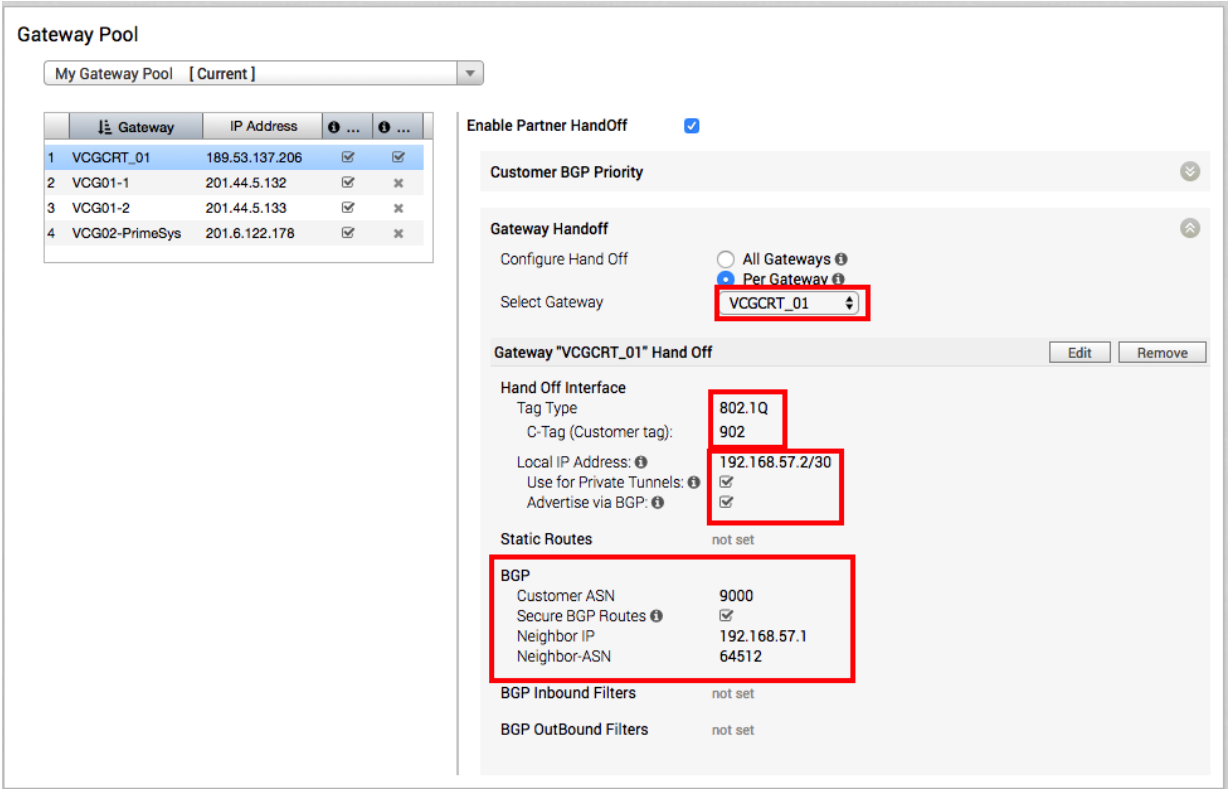
- Configure the Handoff interface.

- Verify that the BGP session is up.

- Change the network configuration.
Network configuration files are located under /etc/netplan.
Example network configuration (whitespace is important!) - /etc/netplan/50-cloud-init.yaml:network: version: 2 ethernets: eth0: addresses: - 192.168.151.253/24 gateway4: 192.168.151.1 nameservers: addresses: - 8.8.8.8 - 8.8.4.4 search: [] routes: - to: 192.168.0.0/16 via: 192.168.151.254 metric: 100 eth1: addresses: - 192.168.152.251/24 gateway4: 192.168.152.1 nameservers: addresses: - 8.8.8.8 search: []
echo 'network: {config: disabled}' > /etc/cloud/cloud.cfg.d/99-disable-network-config.cfg
Configure Handoff Interface in Dataplane
VMware SD-WAN Gateway Network Configuration
In the example featuring figure below (VRF/VLAN Hand Off to PE), we assume eth0 is the interface facing the public network (Internet) and eth1 is the interface facing the internal network (customer VRF through the PE).BGP peering configuration is managed on the VCO on a per customer/VRF basis under “Configure > Customer”. Note that the IP address of each VRF is configurable per customer. The IP address of the management VRF inherits the IP address configured on the SD-WAN Gateway interface in Linux.

A management VRFis created on the SD-WAN Gateway and is used to send periodic ARP refresh to the default Gateway IP to determine the next-hop MAC. It is recommended that a dedicated VRF is set up on the PE router for this purpose. The same management VRF can also be used by the PE router to send IP SLA probe to the SD-WAN Gateway to check for SD-WAN Gateway status (SD-WAN Gateway has stateful ICMP responder that will respond to ping only when its service is up). BGP Peering is not required on the Management VRF. If a Management VRF is not set up, then you can use one of the customer VRFs as Management VRF, although this is not recommended.
      "vcmp.interfaces":[
                   "eth0"
               ],
         (..snip..)

               "wan": [
                   "eth1"
               ],
Step 2: Configure the Management VRF. This VRF is used by the SD-WAN Gateway to ARP for next-hop MAC (PE router). The same next-hop MAC will be used by all the VRFs created by the SD-WAN Gateway. You need to configure the Management VRFparameter in /etc/config/gatewayd.
The Management VRF is the same VRF used by the PE router to send IP SLA probe to. The SD-WAN Gateway only responds to the ICMP probe if the service is up and if there are edges connected to it. Below table explains each parameter that needs to be defined. This example has Management VRF on the 802.1q VLAN ID of 1000.
| mode | QinQ (0x8100), QinQ (0x9100), none, 802.1Q, 802.1ad |
| c_tag | C-Tag value for QinQ encapsulation or 802.1Q VLAN ID for802.1Q encapsulation |
| s_tag | S-Tag value for QinQ encapsulation |
| interface | Handoff interface, typically eth1 |
      "vrf_vlan": {
          "tag_info": [
             {
                 "resp_mode": 0,
                 "proxy_arp": 0,
                 "c_tag": 1000,
                 "mode": "802.1Q",
                 "interface": "eth1",
                 "s_tag": 0
             }
          ]
      },
Step 3: Edit the /etc/config/gatewayd-tunnel to include both interfaces in the wan parameter. Save the change.
wan="eth0 eth1"
Remove Blocked Subnets
By default, the SD-WAN Gateway blocks traffic to 10.0.0.0/8 and 172.16.0.0/14. We will need to remove them before using this SD-WAN Gateway because we expect SD-WAN Gateway to be sending traffic to private subnets as well. If you do not edit this file, when you try to send traffic to blocked subnets, you will find the following messages in /var/log/gwd.log
2015-12-18T12:49:55.639  ERR     [NET] proto_ip_recv_handler:494 Dropping packet destined for
10.10.150.254, which is a blocked subnet.
2015-12-18T12:52:27.764  ERR     [NET] proto_ip_recv_handler:494 Dropping packet destined for
10.10.150.254, which is a blocked subnet. [message repeated 48 times]
2015-12-18T12:52:27.764  ERR     [NET] proto_ip_recv_handler:494 Dropping packet destined for
10.10.150.10, which is a blocked subnet.
[
            {
                        "network_addr": "10.0.0.0",
                        "subnet_mask": "255.0.0.0"
            },
            {
            "network_addr": "172.16.0.0",
            "subnet_mask": "255.255.0.0"
            }
]
[
]
Step 3: Restart the SD-WAN Gateway process by sudo /opt/vc/bin/vc_procmon restart.