While configuring business policies, you can select the existing object groups to match the source or destination. This includes the range of IPv4 and IPv6 addresses or port numbers available in the object groups.
For more information on business policies, see Create Business Policy Rules.
You can configure the business policies in Classic or New Orchestrator UI. The following procedure describes the configuration with Classic Orchestrator UI. To configure in New Orchestrator UI, see Configure Business Policies with New Orchestrator UI.
Procedure
- If required, you can select the Address and Port Groups for the destination as well.
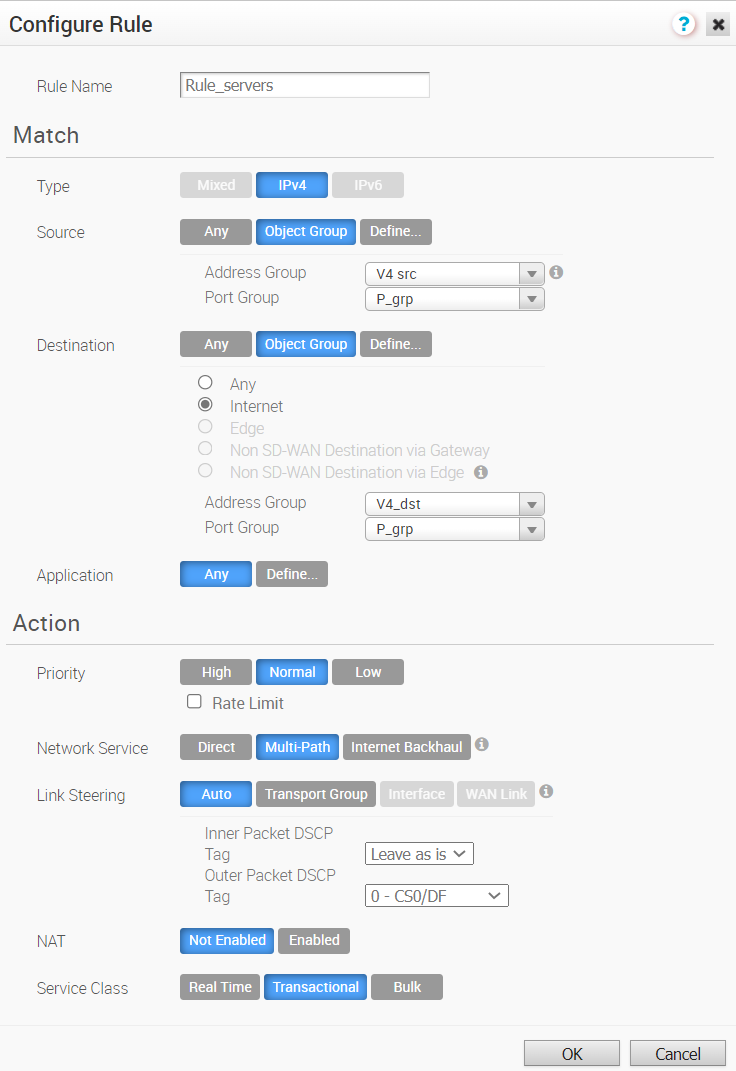 Based on Address Type selected, the behavior will be as follows:
- IPv4 Type Rule matches only the IPv4 addresses available in the selected Address Group.
- IPv6 Type Rule matches only the IPv6 addresses available in the selected Address Group.
- Mixed Type Rule matches both the IPv4 and IPv6 addresses in the selected Address Group.
Results
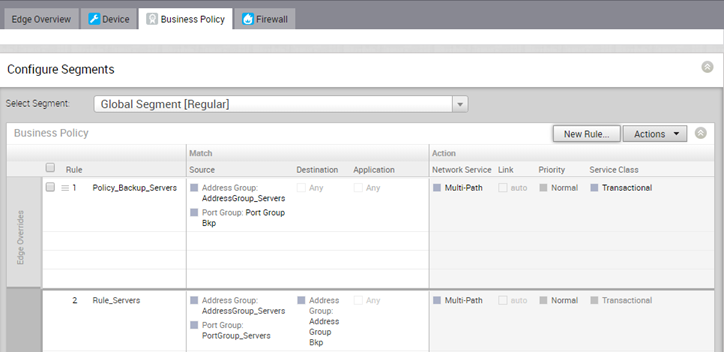
- Navigate to , select an Edge, and click the Business Policy tab.
- Click New Rule or .
- Define the rule with relevant object groups and other actions.
Edge-level Business Policy displays the policies inherited from profile and they are read only. If you want to override any Profile-level policy, then add a new rule. The added rule appears on top of the table and it can be manipulated by modifying or deleting, if needed.