


Domain Name System (DNS) is used to configure conditional DNS forwarding through a private DNS service and to specify a public DNS service to be used for querying purpose.
The DNS Service can be used for a public DNS service or a private DNS service provided by your company. A Primary Server and Backup Server can be specified. The public DNS service is preconfigured to use Google and Open DNS servers.
To configure the DNS settings for a Profile:
- In the SD-WAN service of the Enterprise portal, go to .
- The Profiles page displays the existing Profiles.
- Click the link to a Profile or click the View link in the Device column of the Profile. You can also select a Profile and click Modify to configure the Profile.
- The configuration options for the selected Profile are displayed in the Device tab.
- Scroll down to the Routing & NAT category and click DNS.
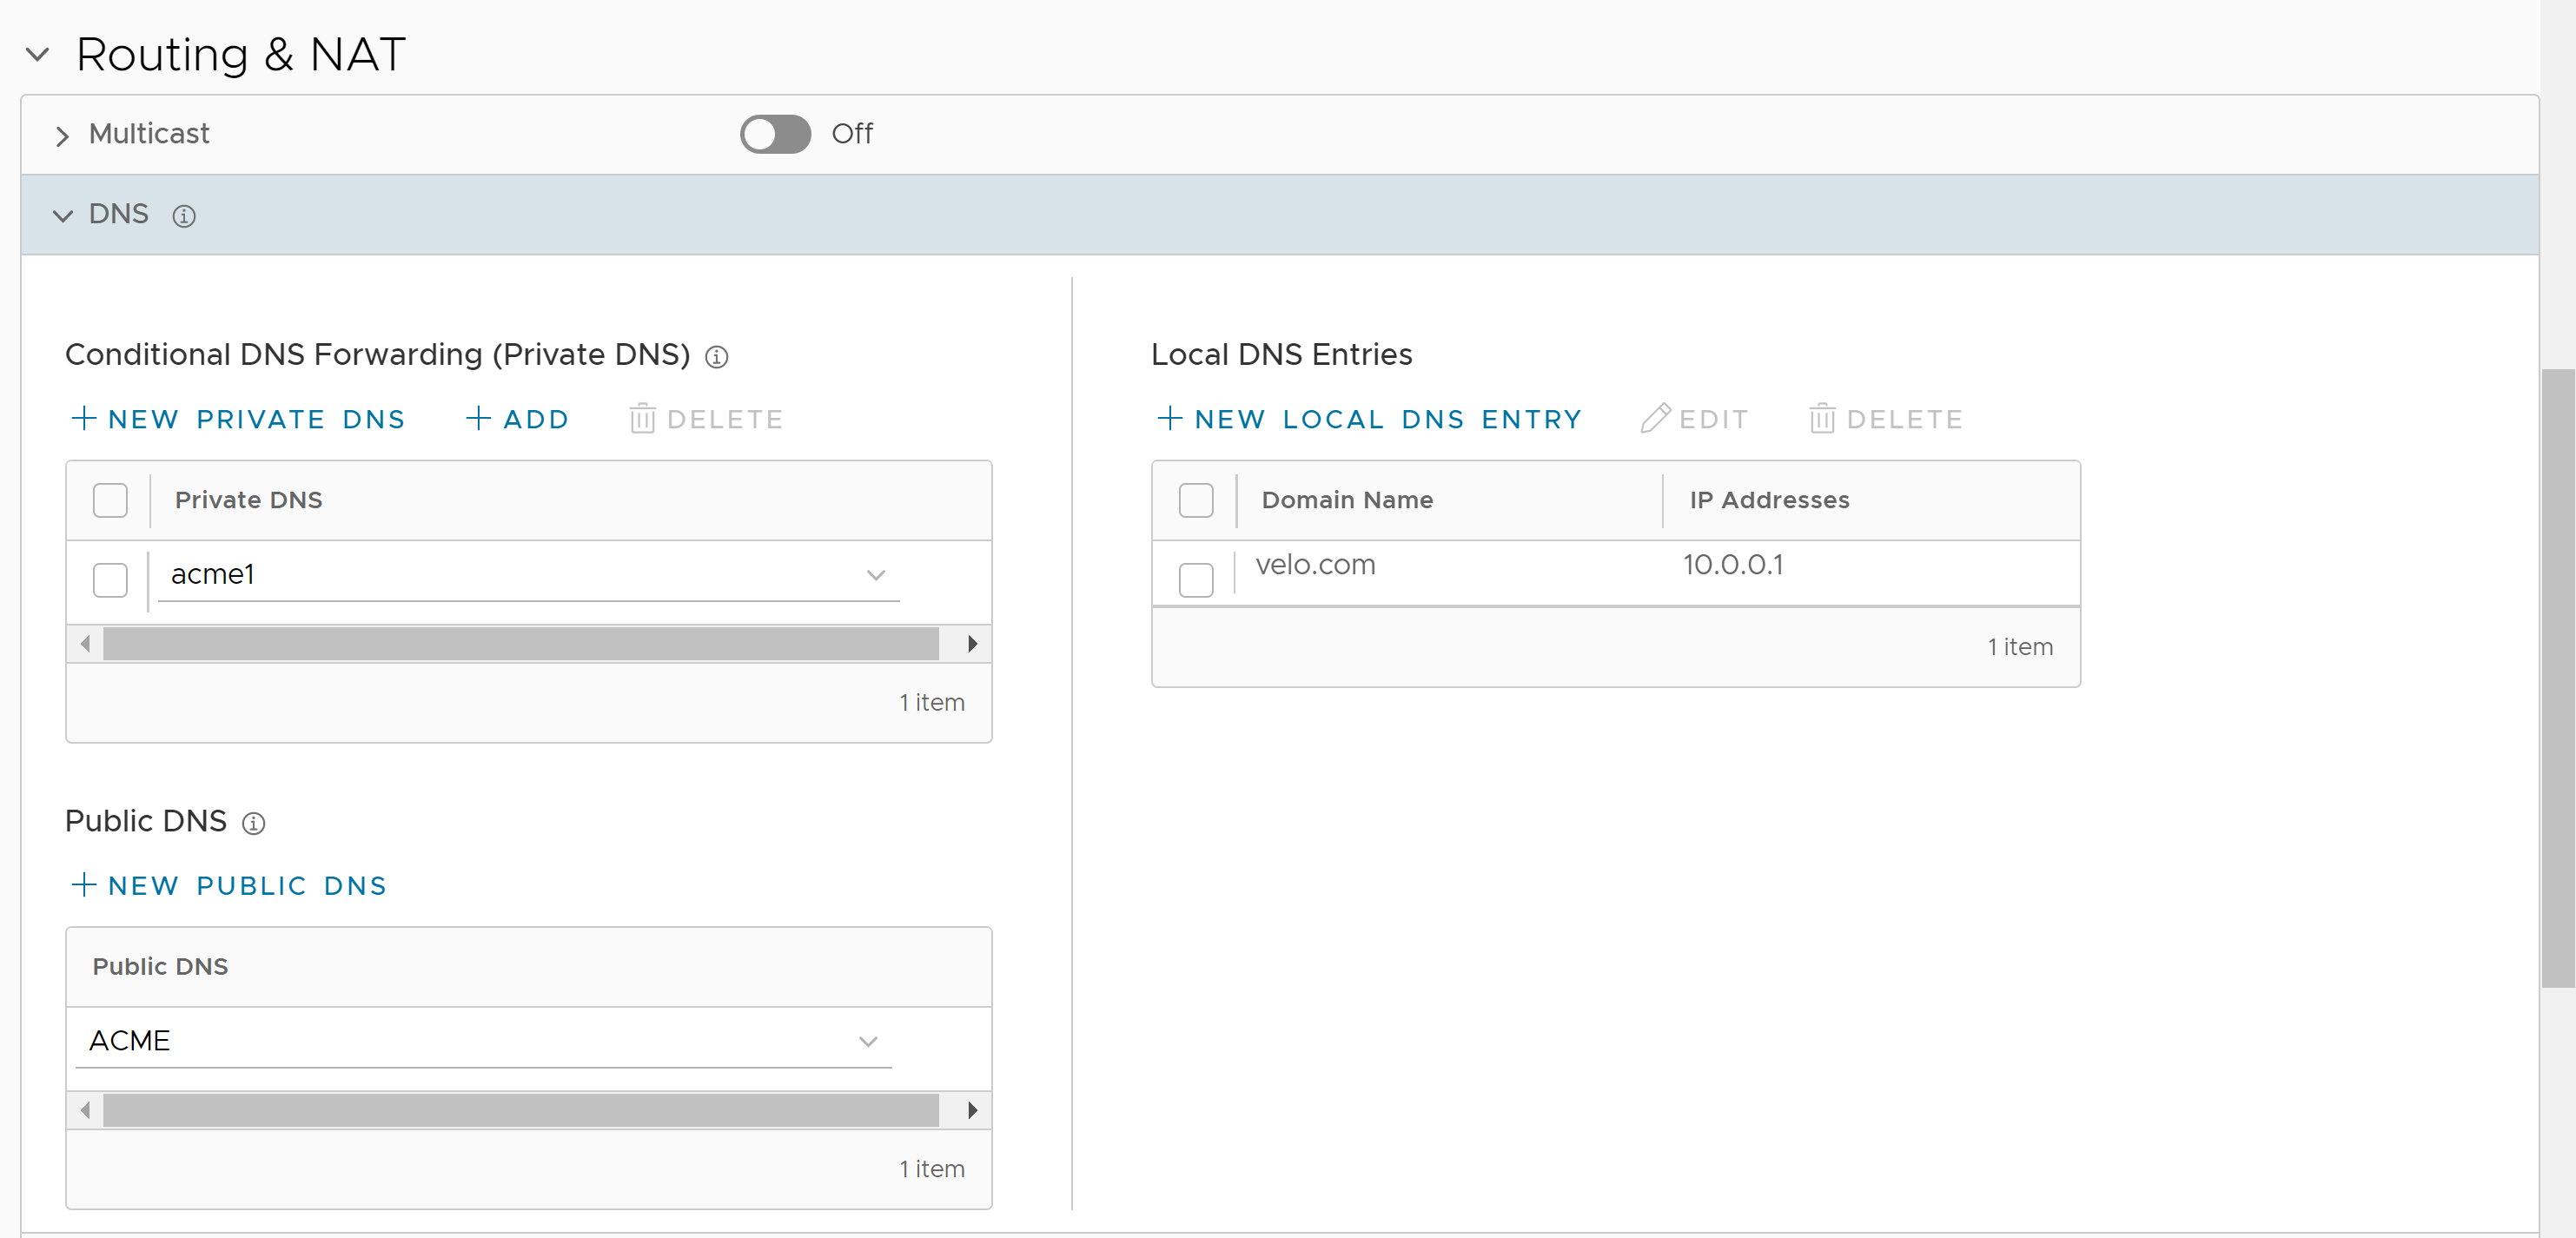
- In the Conditional DNS Forwarding (Private DNS) section, select Private DNS to forward the DNS requests related to the domain name. Click Add to add existing private DNS servers to the drop-down menu. Click Delete to remove the selected private DNS server from the list.
- To add a new private DNS, click New Private DNS.
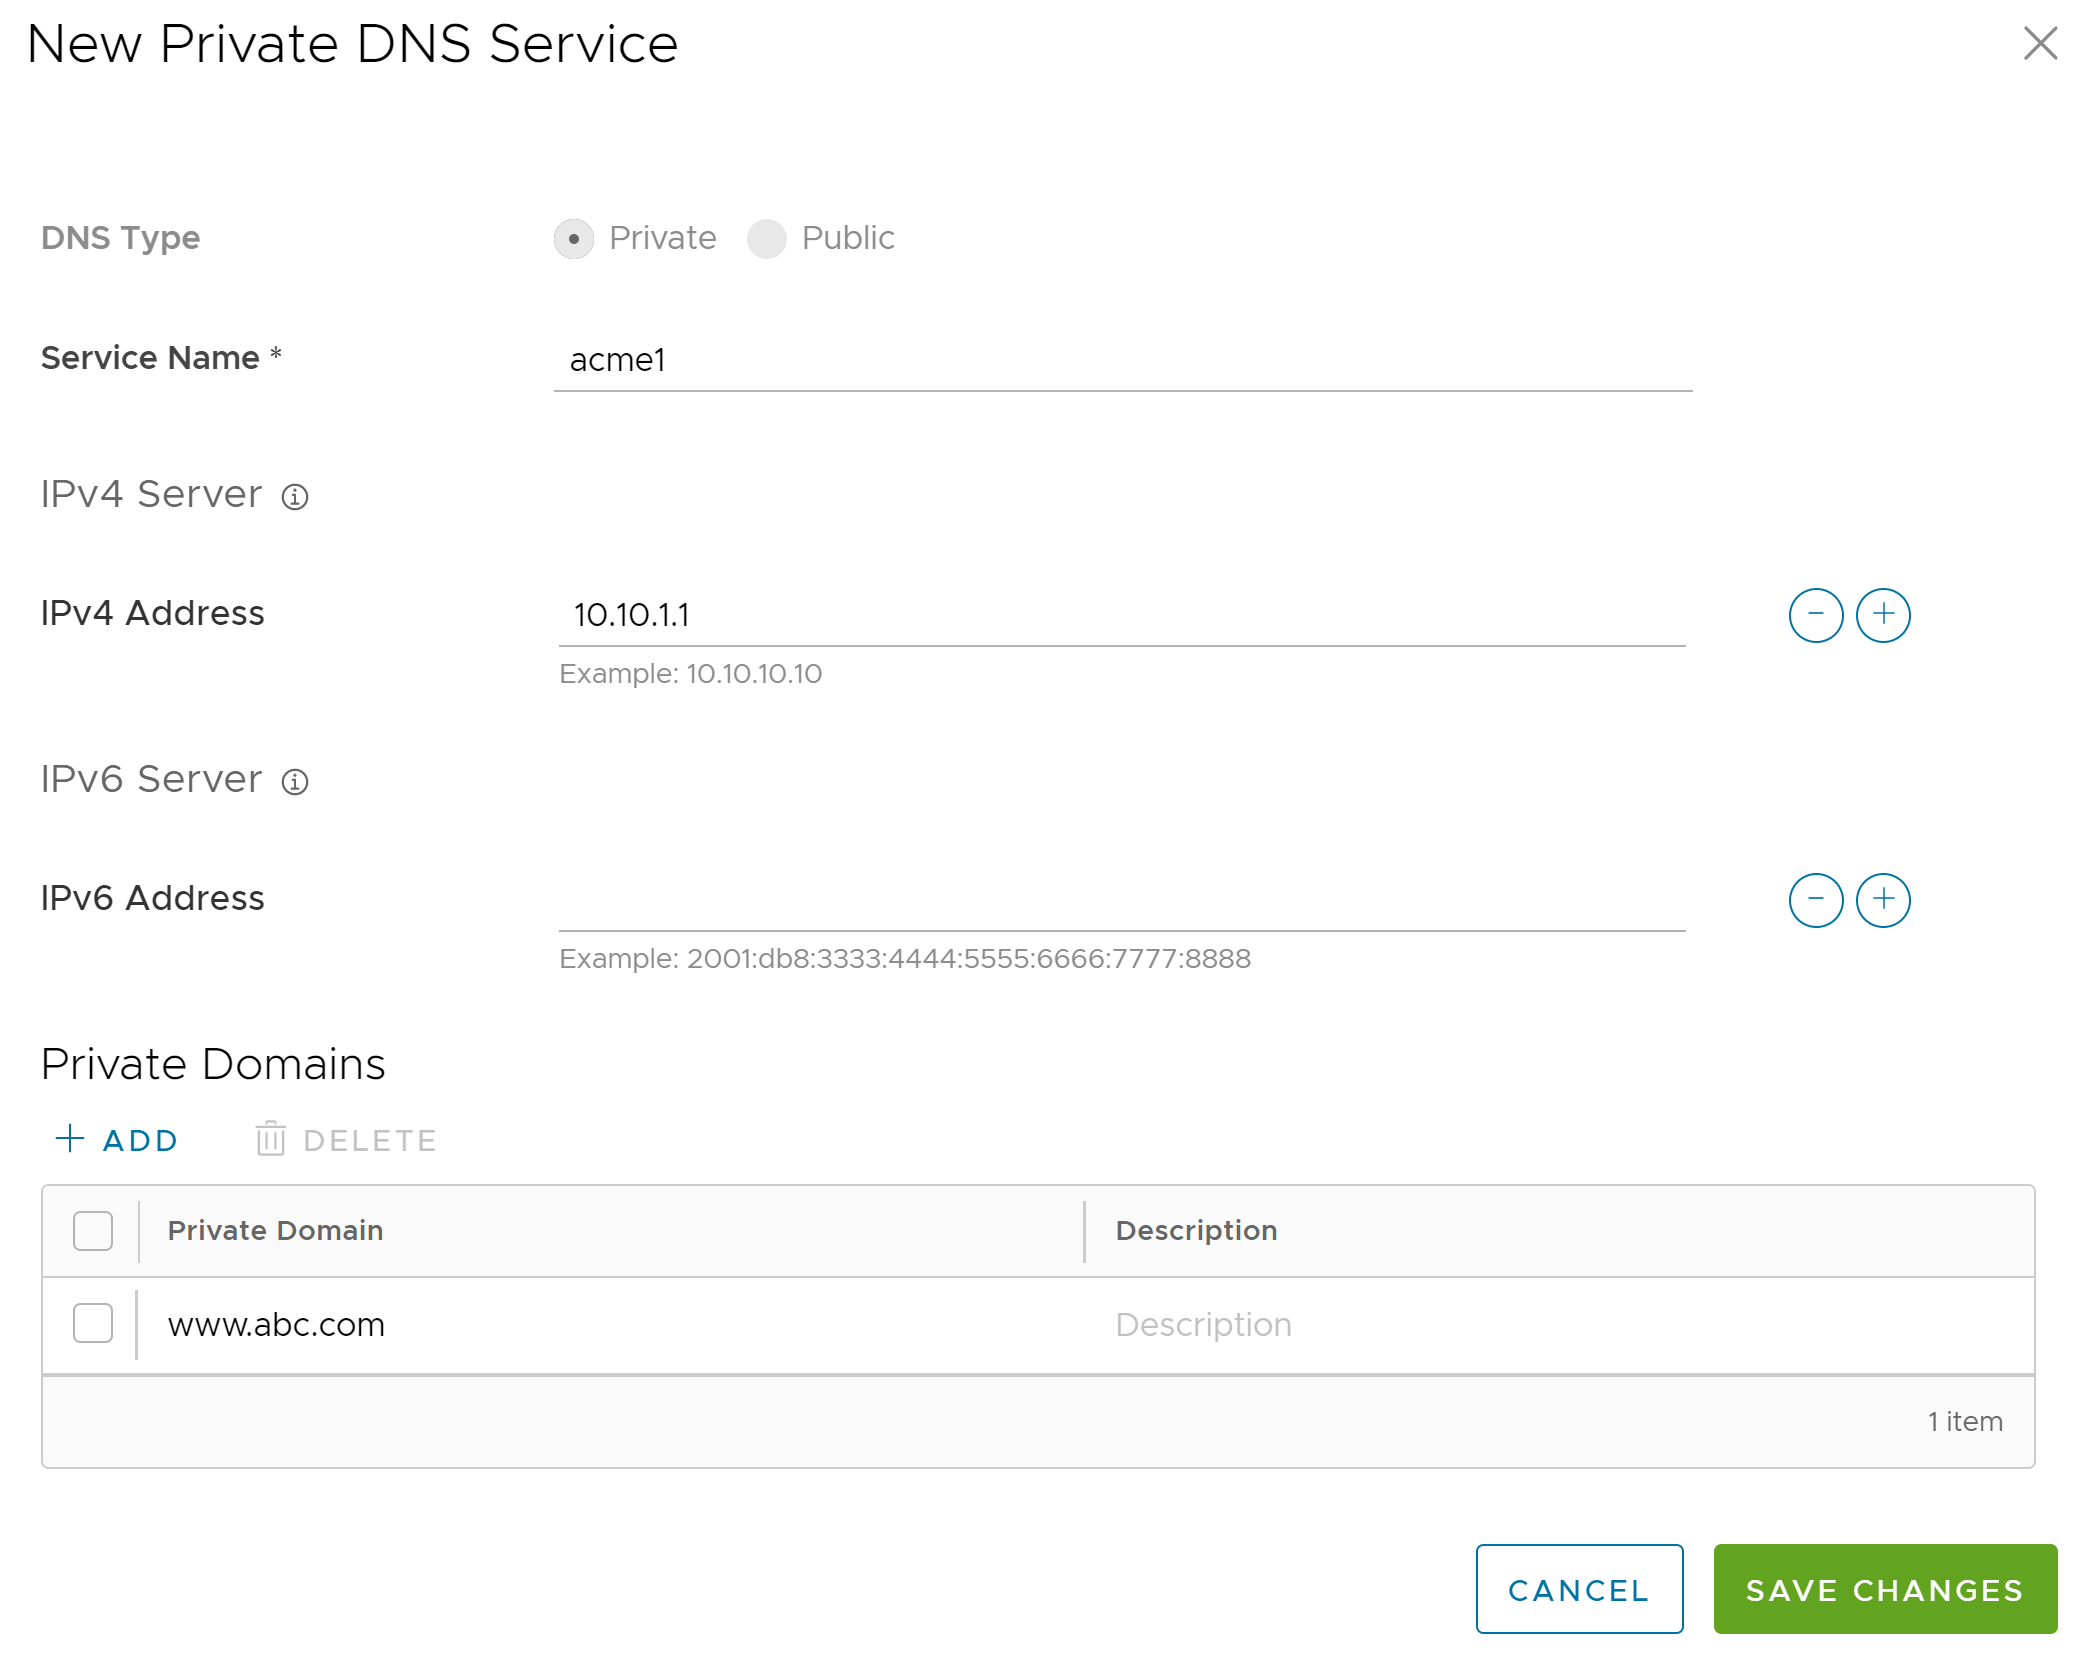
- Following are the available options:
Option Description DNS Type Displays Private by default. You cannot edit this option. Service Name Type the name of the DNS service. IPv4 Server Type the IPv4 address for IPv4 Server. Click the plus (+) icon to add more addresses. IPv6 Server Type the IPv6 address for IPv6 Server. Click the plus (+) icon to add more addresses. Private Domains Click Add, and then type the Private Domain name and description. - Click Save Changes.
- In the Public DNS section, select a public DNS service from the drop-down menu to be used for querying the domain names. By default, Google and OpenDNS servers are pre-configured as public DNS.
- To add a new public DNS, click New Public DNS.
Note: The Public DNS service is activated on a VLAN or a routed interface, if DNS Proxy is activated on the same VLAN or routed interface.
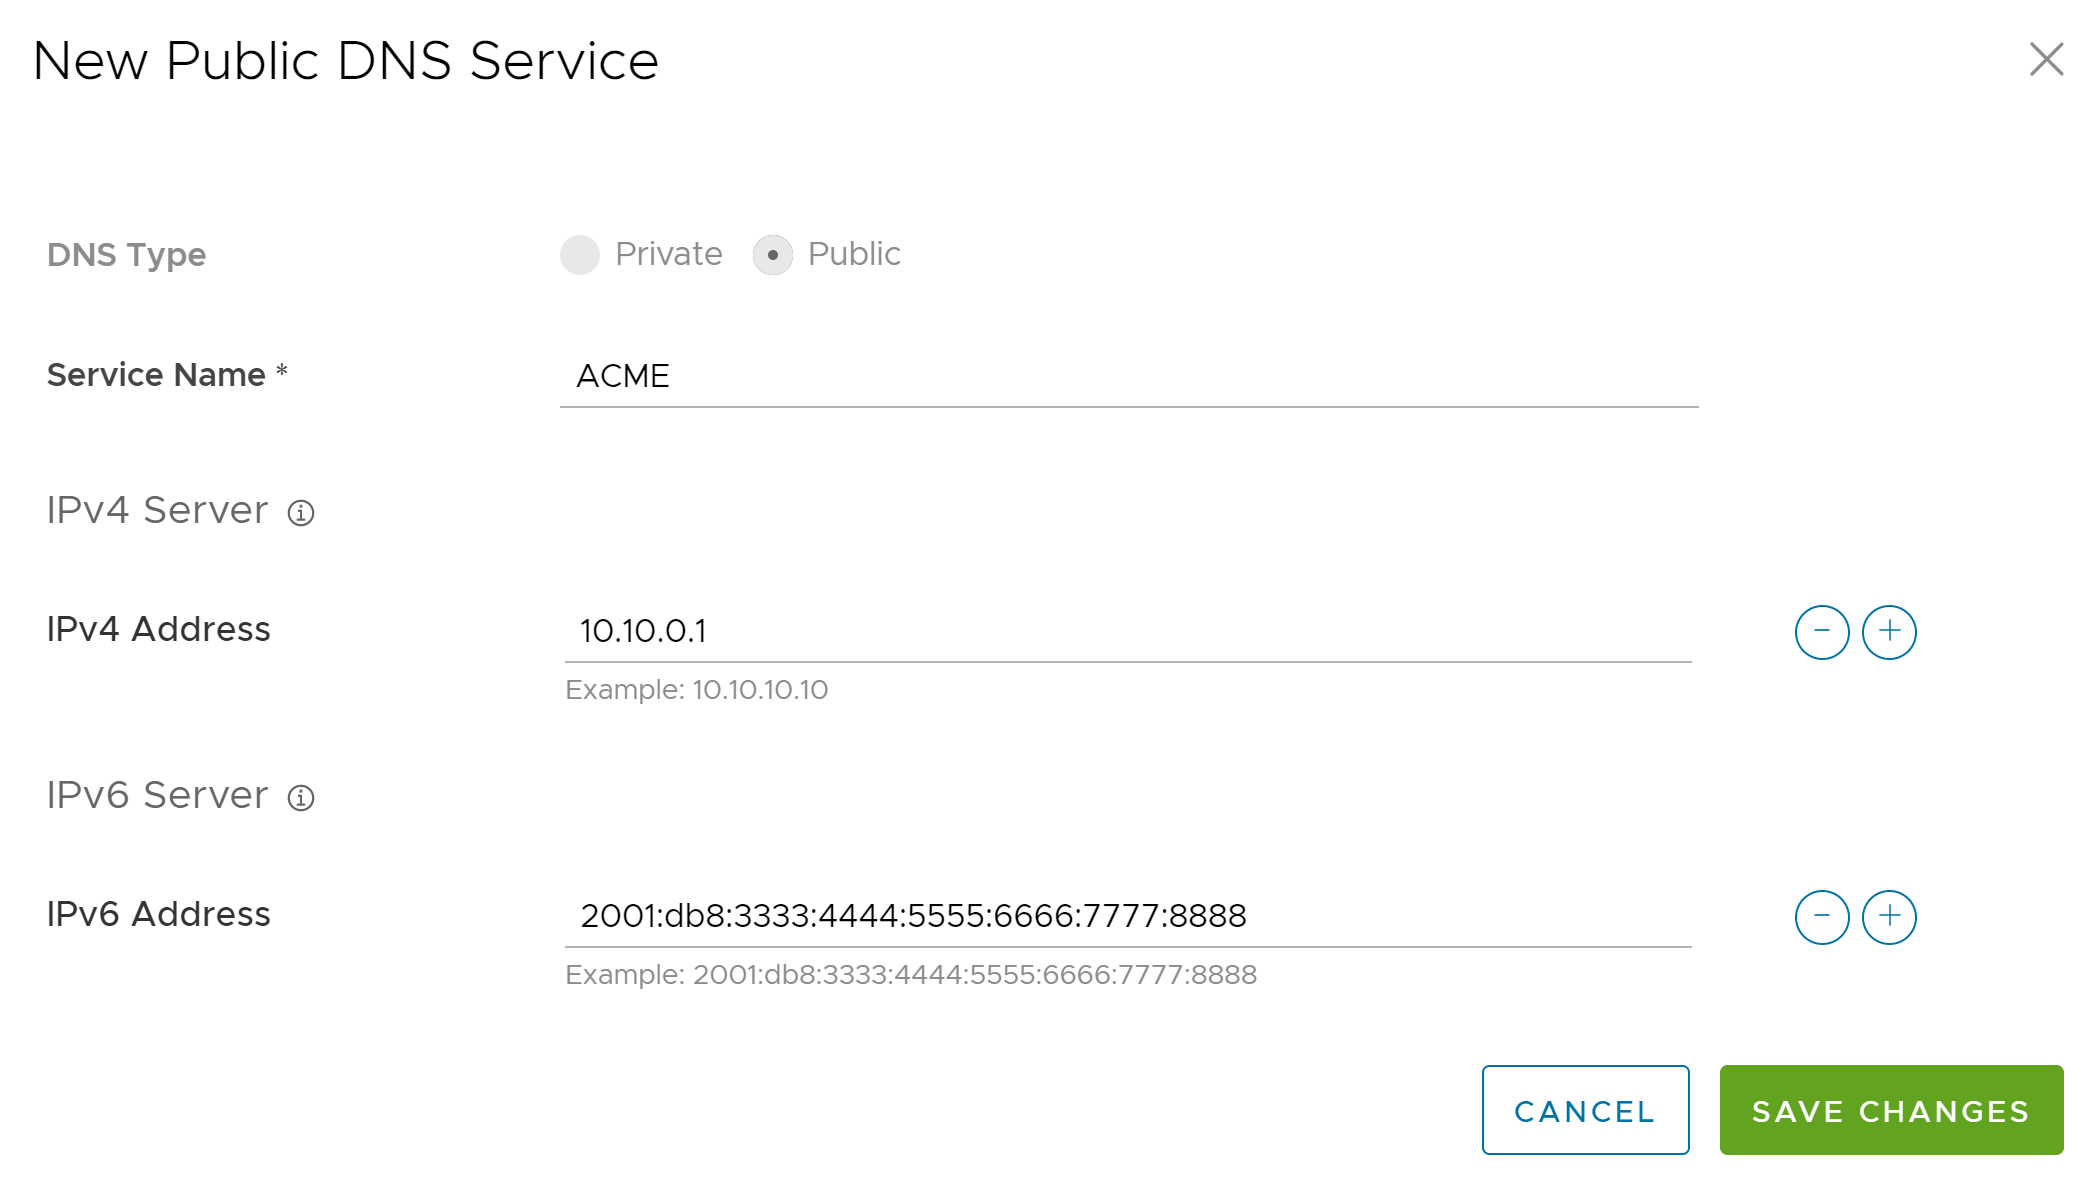
- Following are the available options:
Option Description DNS Type Displays Public by default. You cannot edit this option. Service Name Enter the name of the DNS service. IPv4 Server Enter the IPv4 address for IPv4 Server. Click the plus (+) icon to add more addresses. IPv6 Server Enter the IPv6 address for IPv6 Server. Click the plus (+) icon to add more addresses. - Click Save Changes.
- In the Local DNS Entries section, click Edit to edit an existing local DNS entry. Click Delete to remove the selected local DNS entry from the list.
- To add a new local DNS entry, click New Local DNS Entry.
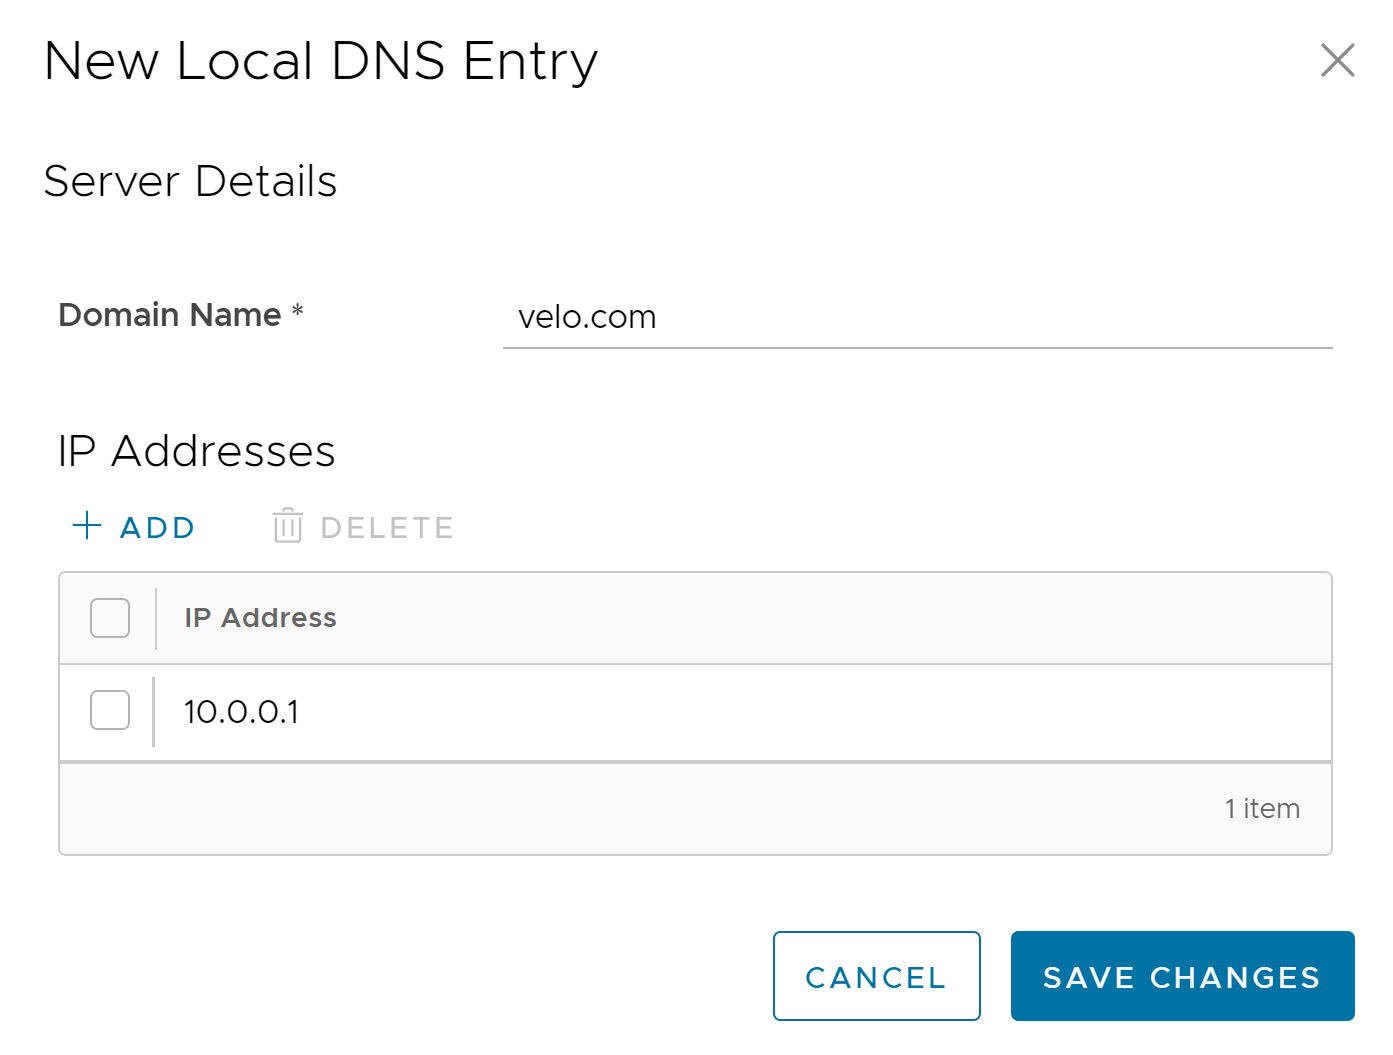
- Following are the available options:
Option Description Domain Name Enter the device domain name. IP Addresses Enter either an IPv4 or an IPv6 address. Add Click to add multiple IP addresses. Note: A maximum of 10 IP addresses can be added for each domain name.Delete Click to delete the selected IP addresses.
- Click Save Changes.
- After configuring the Private DNS, Public DNS, and Local DNS Entries, click Save Changes in the Device page.
