Procedure
- In the Orchestrator, ensure the Multi-Cloud Service (MCS) account is activated. You can verify that by checking the following system properties:
- session.options.enableMcsServiceAccount
- vco.system.configuration.data.mcsNginxRedirection
Note: Contact the EdgeOps team to activate the MCS account for your Orchestrator.
- For an Enterprise user, once the MCS account is activated, you can access the MCS service by clicking Cloud Hub from the Services drop-down menu available at the top of the Orchestrator UI.
The Cloud Hub service page appears.
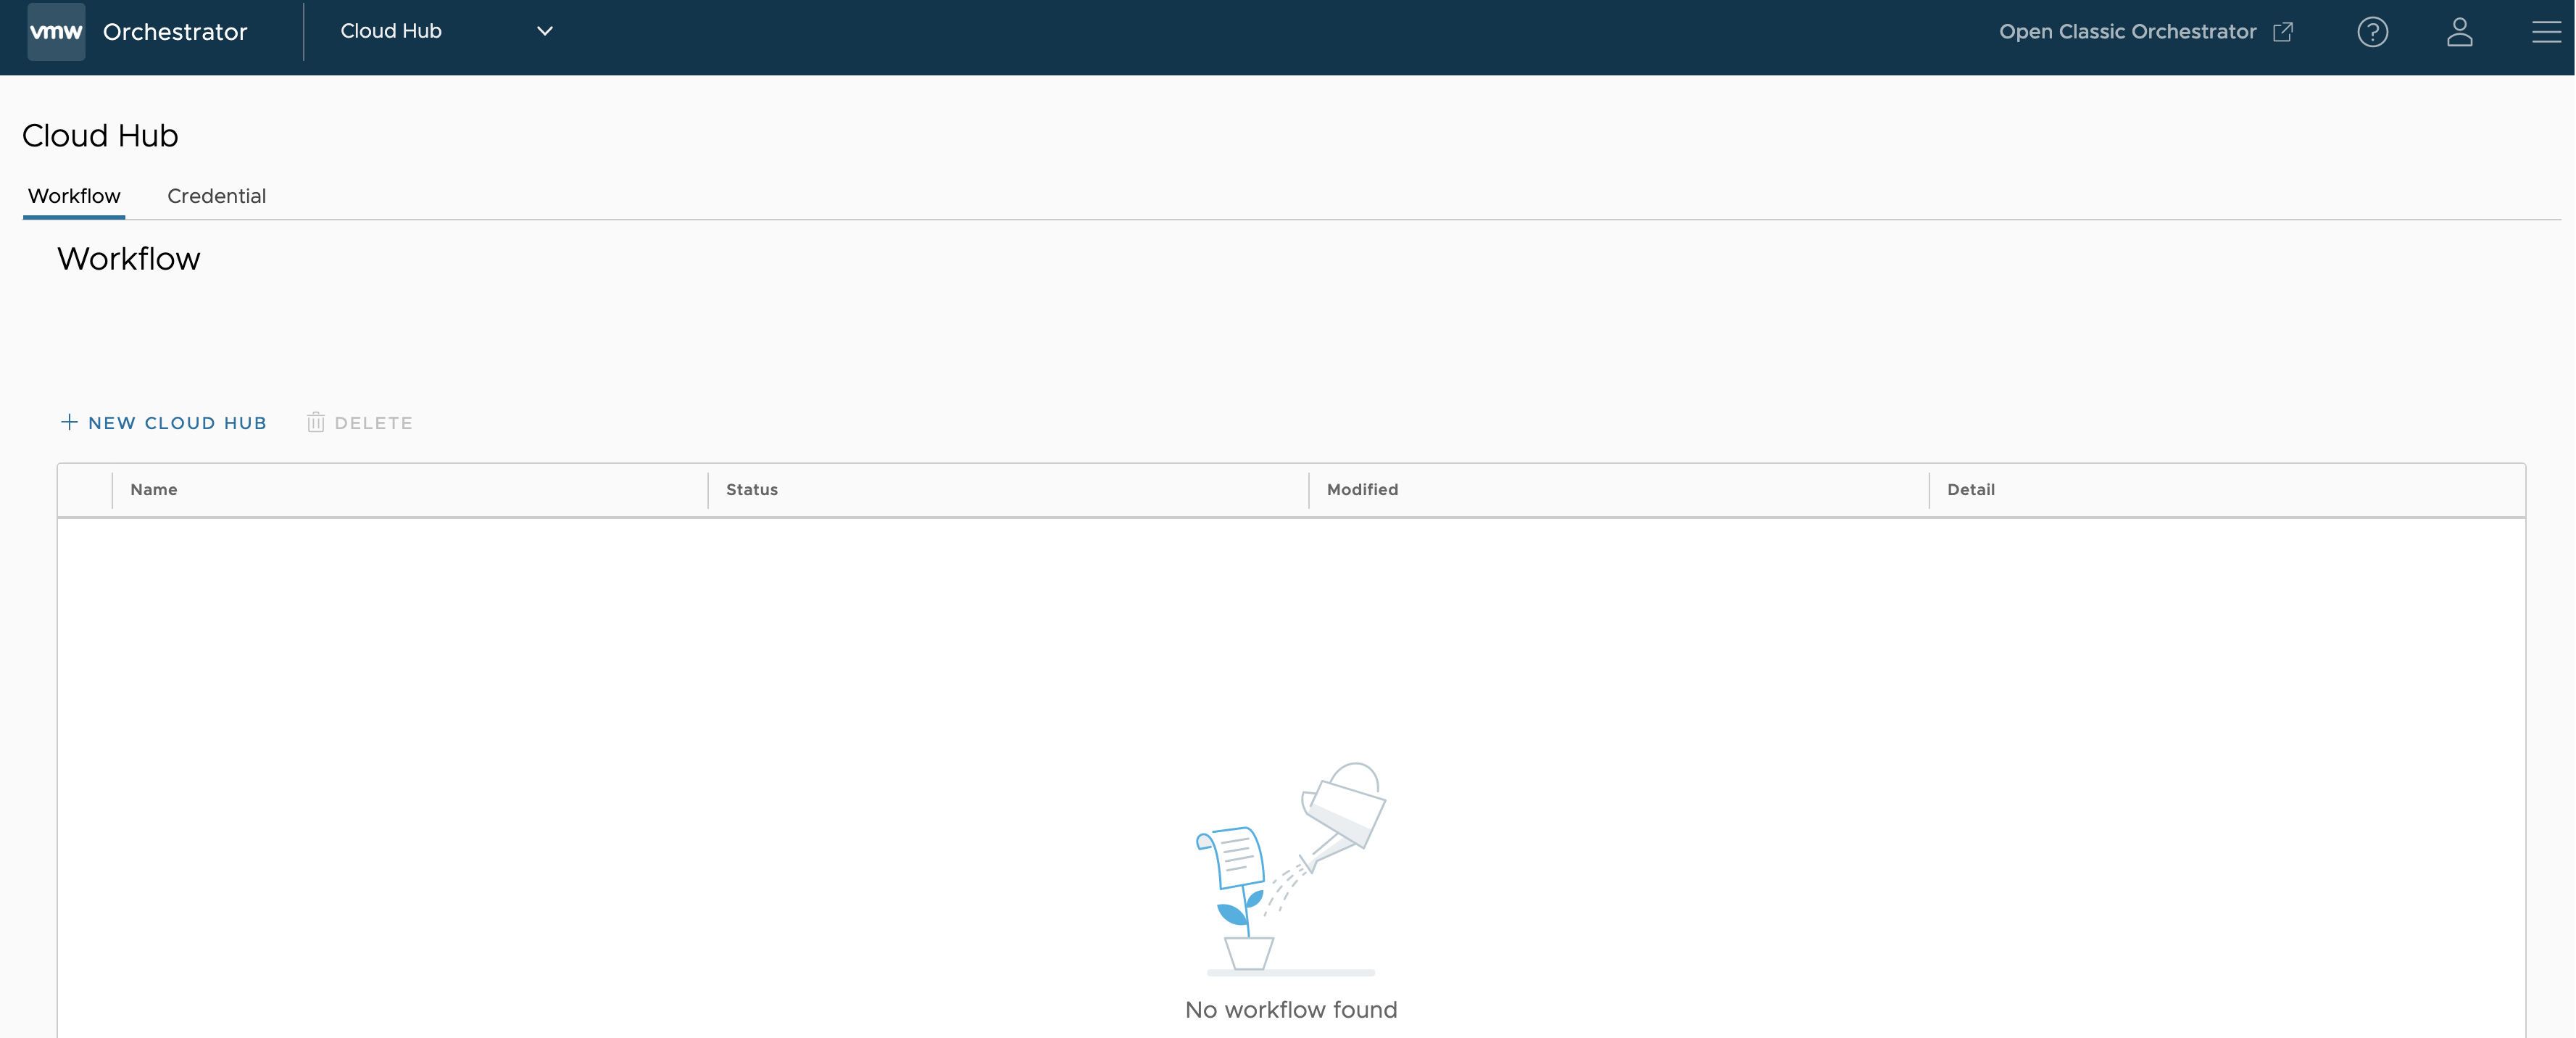
- To deploy a NVA Edge in vWAN HUB network, perform the following two steps:
- Create a new credential
- Create a new Cloud Hub
- To create new credential, click Configure > Credential > New Credential. Provide all the required details and click Create.
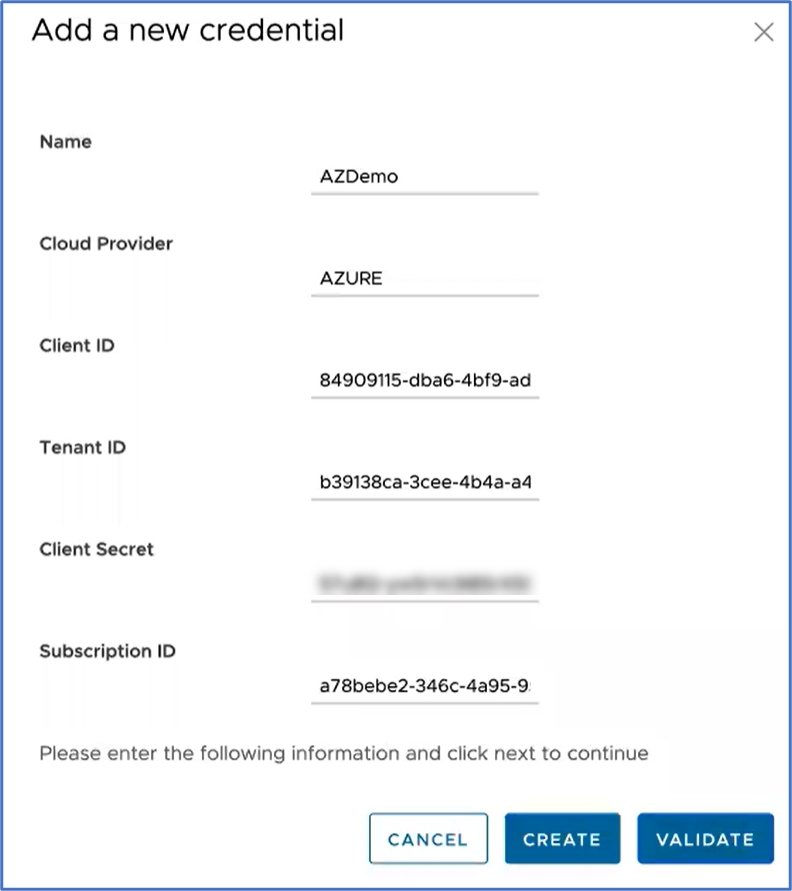
Field Description Name Enter a unique name for your Azure credential. Cloud Provider Select Azure as the Cloud Provider. Client ID Enter the Client ID of your Azure subscription. Tenant ID The ID for an Azure Active Directory (AD) tenant in the Azure portal. Enter the tenant ID to which your subscription belongs. Client Secret Enter the Client Secret of your Azure subscription. Subscription ID The ID for a subscription in the Azure portal. Enter the Azure Subscription ID which has the created Virtual WAN Hub to deploy Virtual Edges. For more information on how to retrieve IDs for a subscription in Azure portal, see How to create a new Azure Active Directory (Azure AD) application and service principal.
It is recommended for customers to create a custom role with the below permissions (JSON) to provide access to only the necessary resources for the CloudHub function."permissions": [ { "actions": [ "Microsoft.Resources/subscriptions/resourceGroups/read", "Microsoft.Resources/subscriptions/resourcegroups/deployments/read", "Microsoft.Resources/subscriptions/resourcegroups/resources/read", "Microsoft.Resources/subscriptions/resourcegroups/deployments/operationstatuses/read", "Microsoft.Resources/subscriptions/resourcegroups/deployments/operations/read", "Microsoft.Network/virtualWans/read", "Microsoft.Network/virtualWans/join/action", "Microsoft.Network/virtualWans/virtualHubs/read", "Microsoft.Network/virtualHubs/read", "Microsoft.AzureStack/linkedSubscriptions/linkedResourceGroups/linkedProviders/virtualNetworks/read", "Microsoft.Network/networkVirtualAppliances/delete", "Microsoft.Network/networkVirtualAppliances/read", "Microsoft.Network/networkVirtualAppliances/write", "Microsoft.Network/networkVirtualAppliances/getDelegatedSubnets/action", "Microsoft.Network/virtualNetworks/read", "Microsoft.Network/virtualNetworks/join/action", "Microsoft.Network/virtualNetworks/peer/action", "Microsoft.Network/virtualNetworks/write", "Microsoft.Network/virtualNetworks/subnets/join/action", "Microsoft.Network/virtualNetworks/subnets/joinViaServiceEndpoint/action", "Microsoft.Network/virtualNetworks/subnets/read", "Microsoft.Network/virtualNetworks/subnets/prepareNetworkPolicies/action", "Microsoft.Network/virtualNetworks/subnets/unprepareNetworkPolicies/action" ], "notActions": [], "dataActions": [], "notDataActions": [] } ] - To create a New Cloud Hub, perform the following seps:
Note: The Cloud Hub Workflow is tested only for the new Profile. So, it is recommended to create a new Profile before proceeding with the deployment of NVA Edge in vWAN HUB network.
- Navigate to Configure > Workflow and click New Cloud Hub.
The Cloud Credentials page appears.
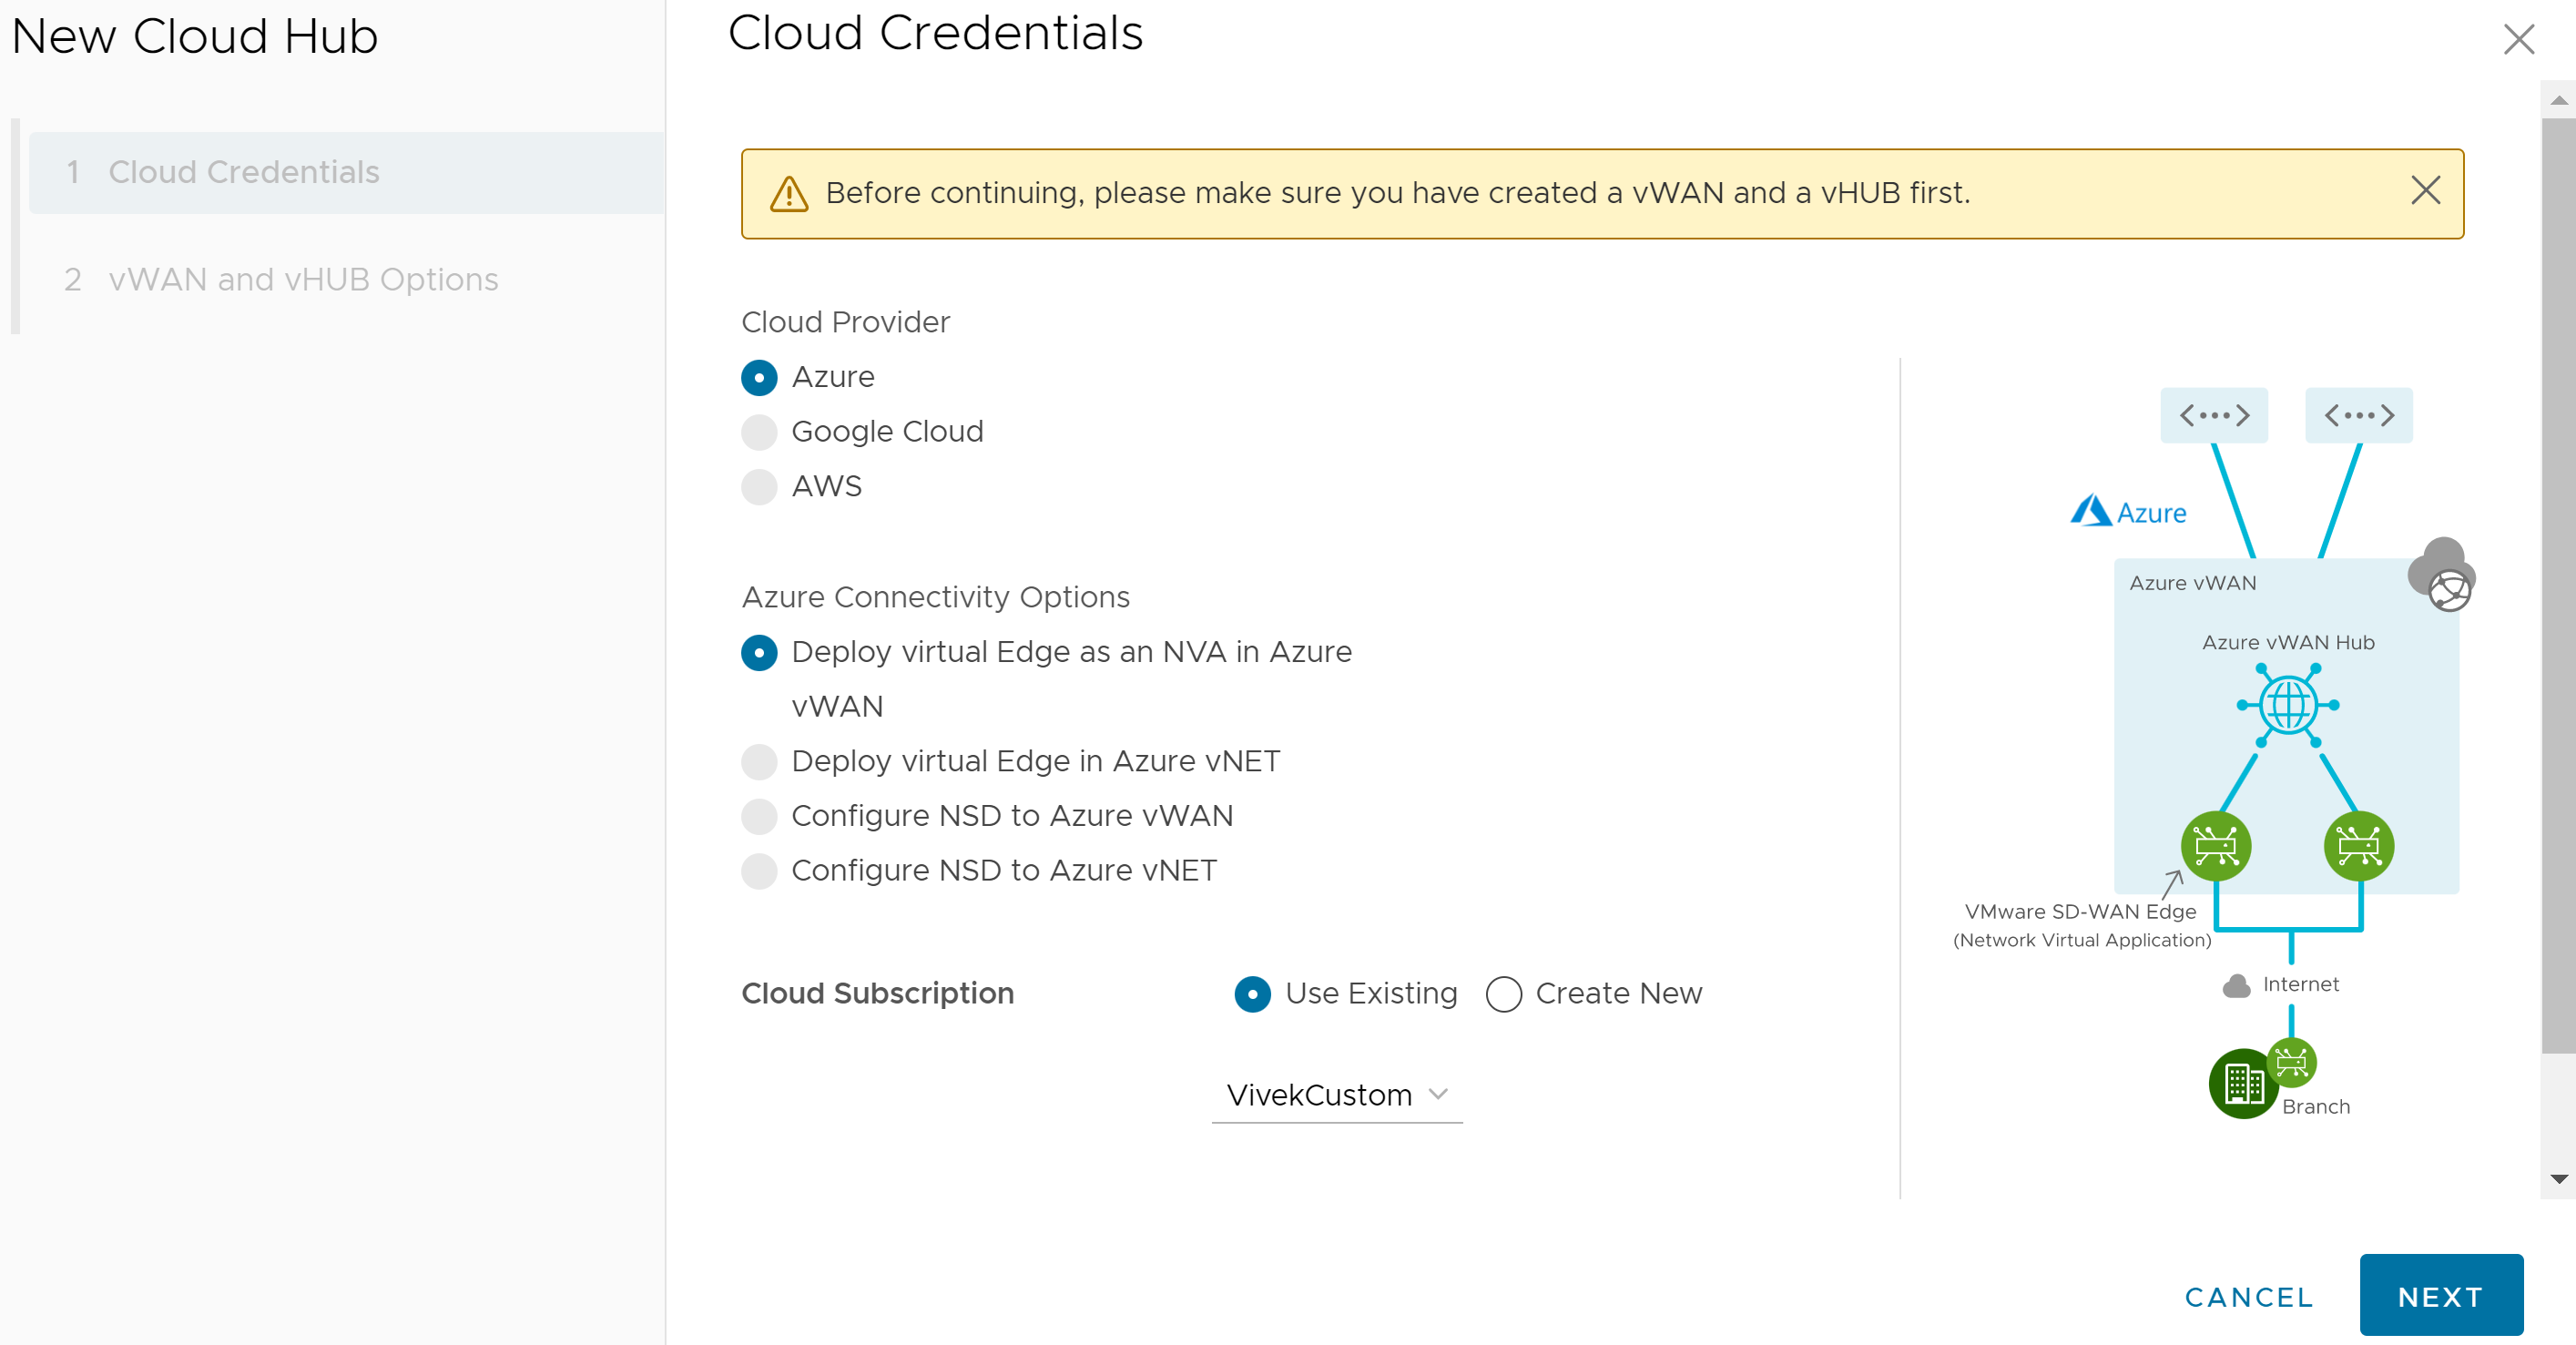
- Provide all the required Cloud Credentials details and click Next.
Field Description Cloud Provider Choose Azure as the Cloud Provider. Azure Connectivity Options Choose Deploy Virtual Edge as an NVA in Azure vWAN as the connectivity option between you Hub and vNet. Cloud Subscription You can use the existing cloud subscription or create a new subscription by clicking the Create New option. The vWAN and vHUB Options page appears.
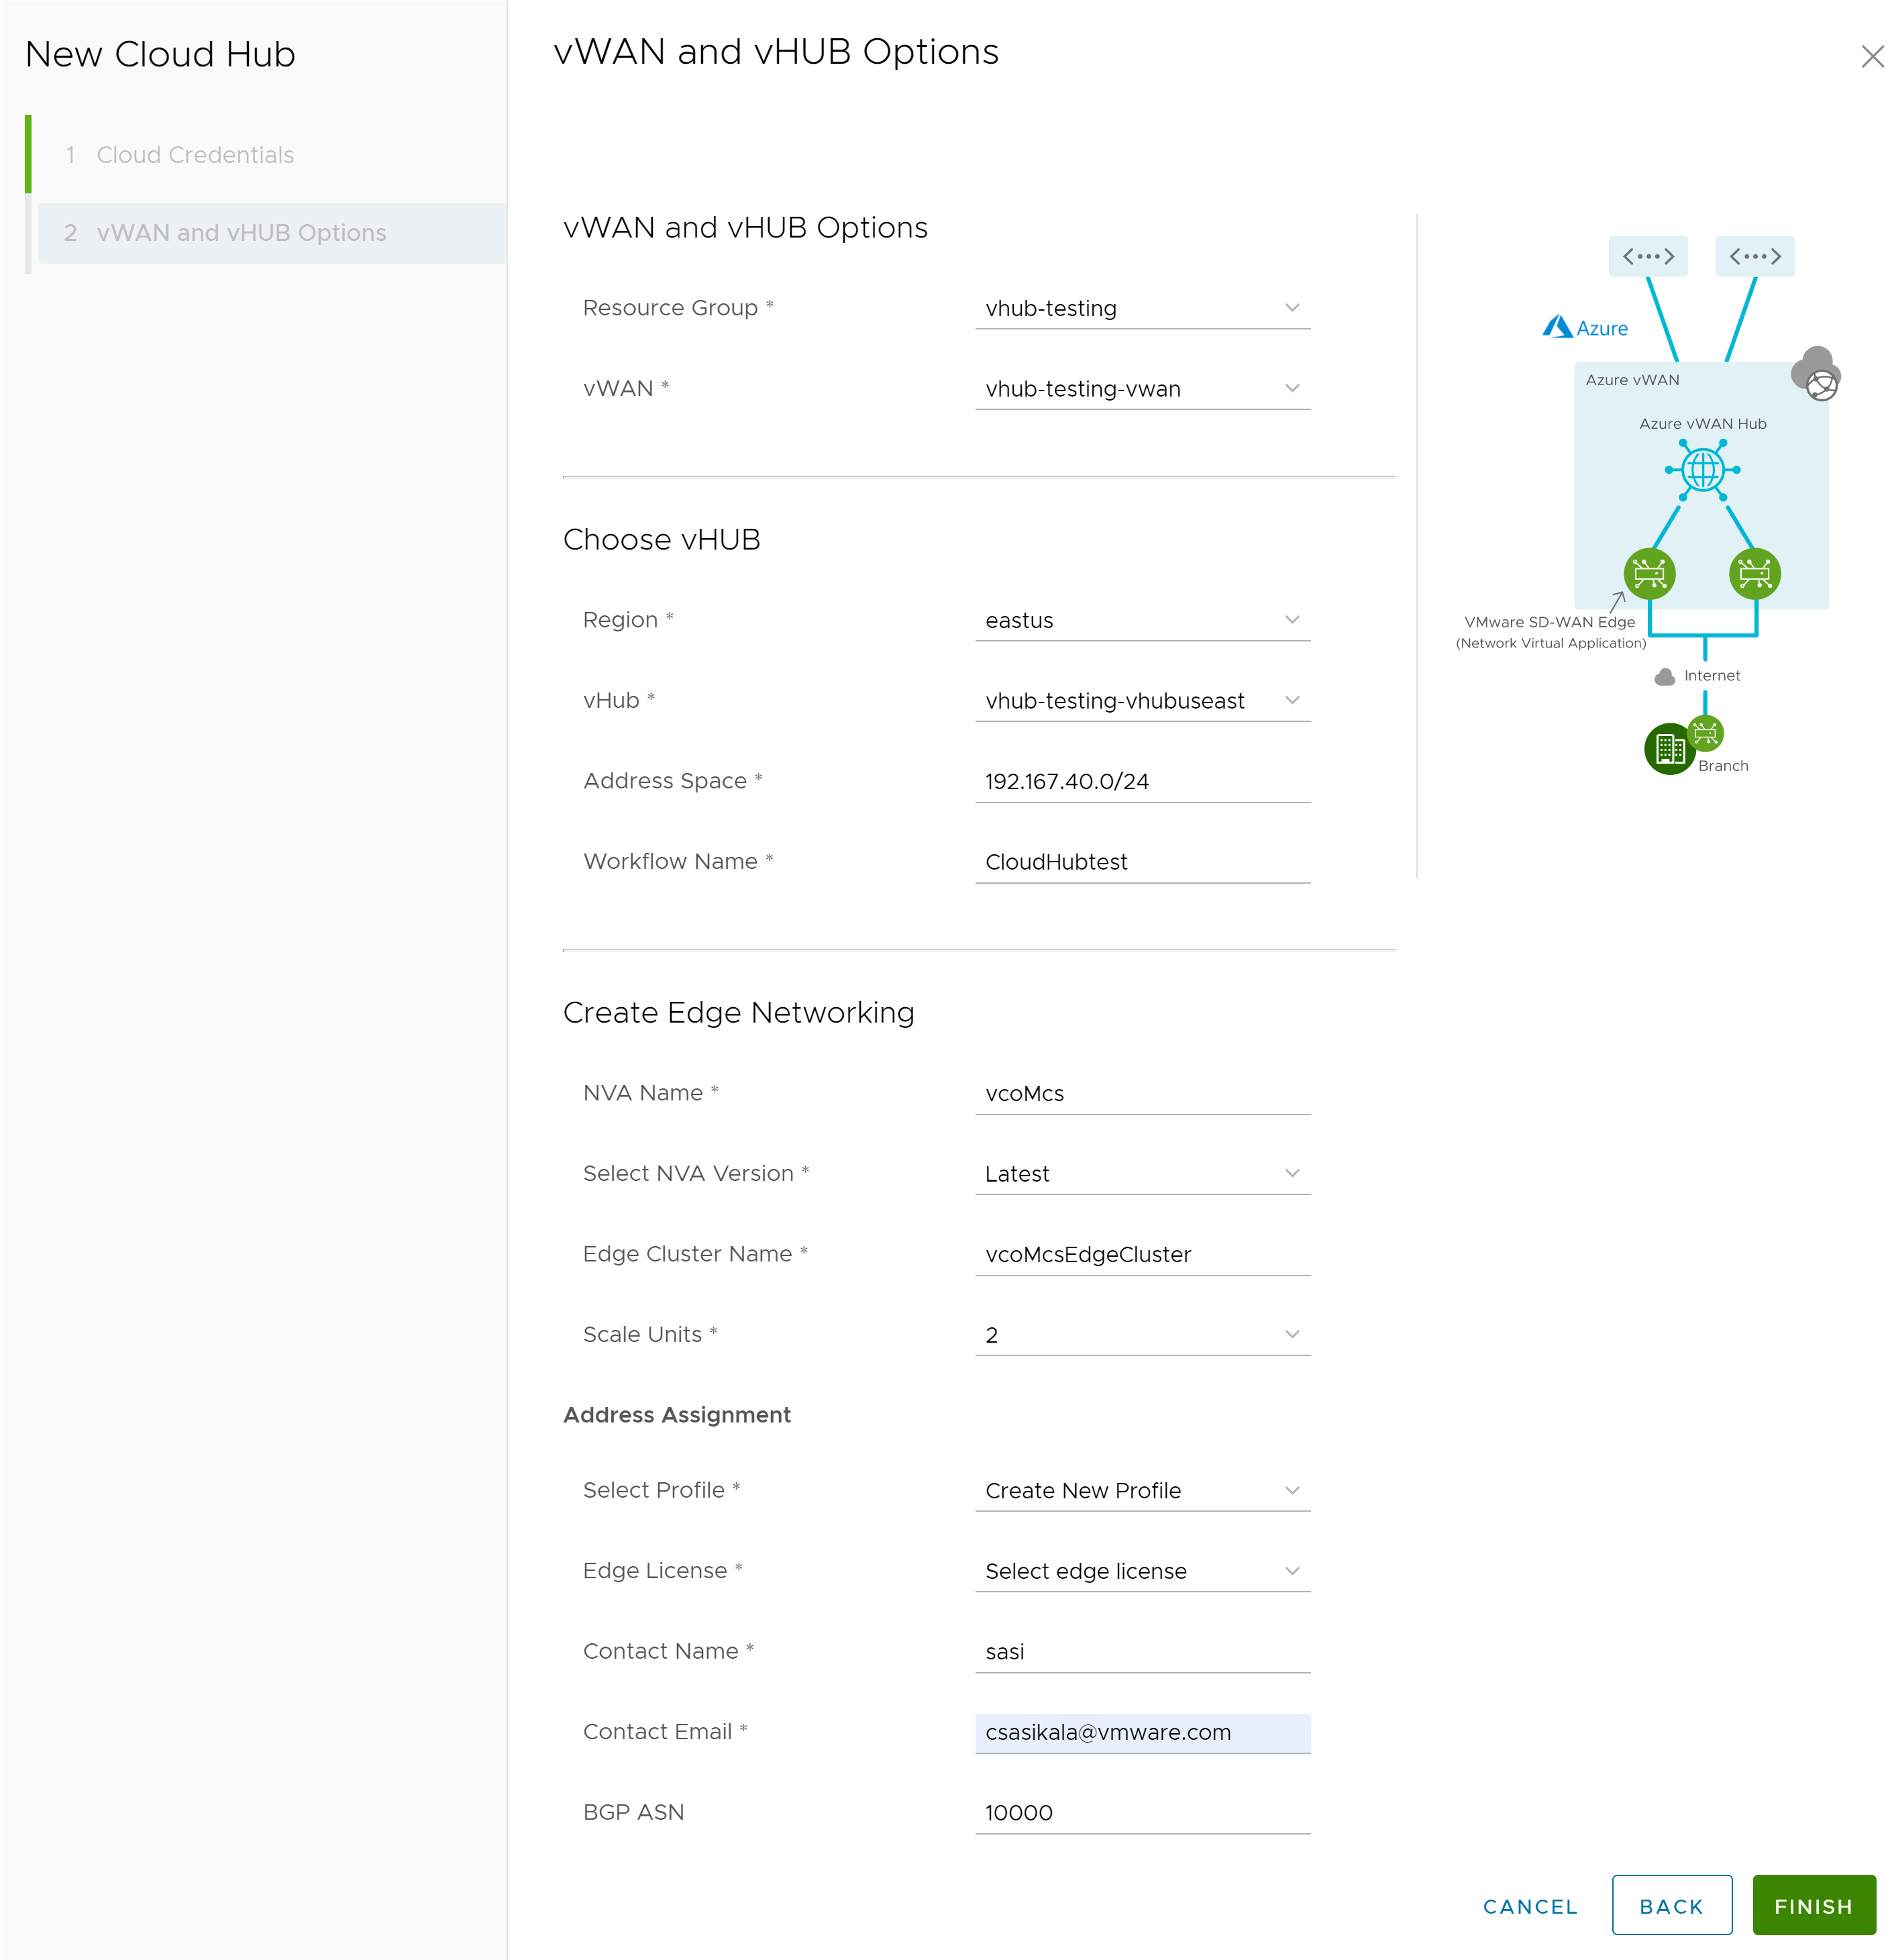
- Choose vWAN, vHUB, and provision Virtual Azure NVA Edge (with unique name) by providing all the required details.
Field Description Resource Group Select a resource group that you created on the Azure side. vWAN Select a Virtual WAN that you created on the Azure side. Choose vHUB Region Select the region in which you want to deploy the Virtual WAN Hub. Virtual Edges will be deployed in that Virtual WAN Hub. vHub Select a Virtual WAN Hub to deploy the virtual SD-WAN Edges. Address Space The hub's address range in CIDR notation. The minimum address space is /24 to create a hub. Workflow Name Enter the workflow name for the Virtual WAN Hub. Create Edge Networking NVA Name Enter a unique name for the Network Virtual Appliance (NVA) Edge device. Select NVA Version Select the NVA version. Edge Cluster Name Enter a unique name for the Edge Cluster. Scale Units A pair of Edges will be spun up. Scale Units can be 2, 4, or 10 which map to a Azure instance type. Select Profile Select a Profile to associate the Virtual Edge. Note: You can use the existing Profile or create a new Profile before deploying the Azure vWAN NVA Edges in Azure vWAN Hub.Edge License Select the Edge license associated with the Virtual Edges. Contact Name Enter a contact name. Contact Email Enter a contact email ID. BGP ASN Enter the ASN value that will be configured on the Virtual Edges in the VMware SASE Orchestrator. Note: The ASNs reserved by Azure:- Public ASNs: 8074, 8075, and 12076.
- Private ASNs: 65515, 65517, 65518, 65519, and 65520.
- Click Finish. The newly created Cloud Hub appears in the Workflow page.
- Under Detail column, click View to view the Event Details of the selected Cloud Hub.
Note: Currently there is no separate Monitor page for Cloud Hub service. You can use the Monitor page of the SD-WAN service for verifying the Edge actions and states.
- Navigate to Configure > Workflow and click New Cloud Hub.
- In the SD-WAN service portal, click Monitor > Edges to verify the Virtual Azure NVA Edge that you have provisioned/deployed with the Cloud Hub automation service are connected.
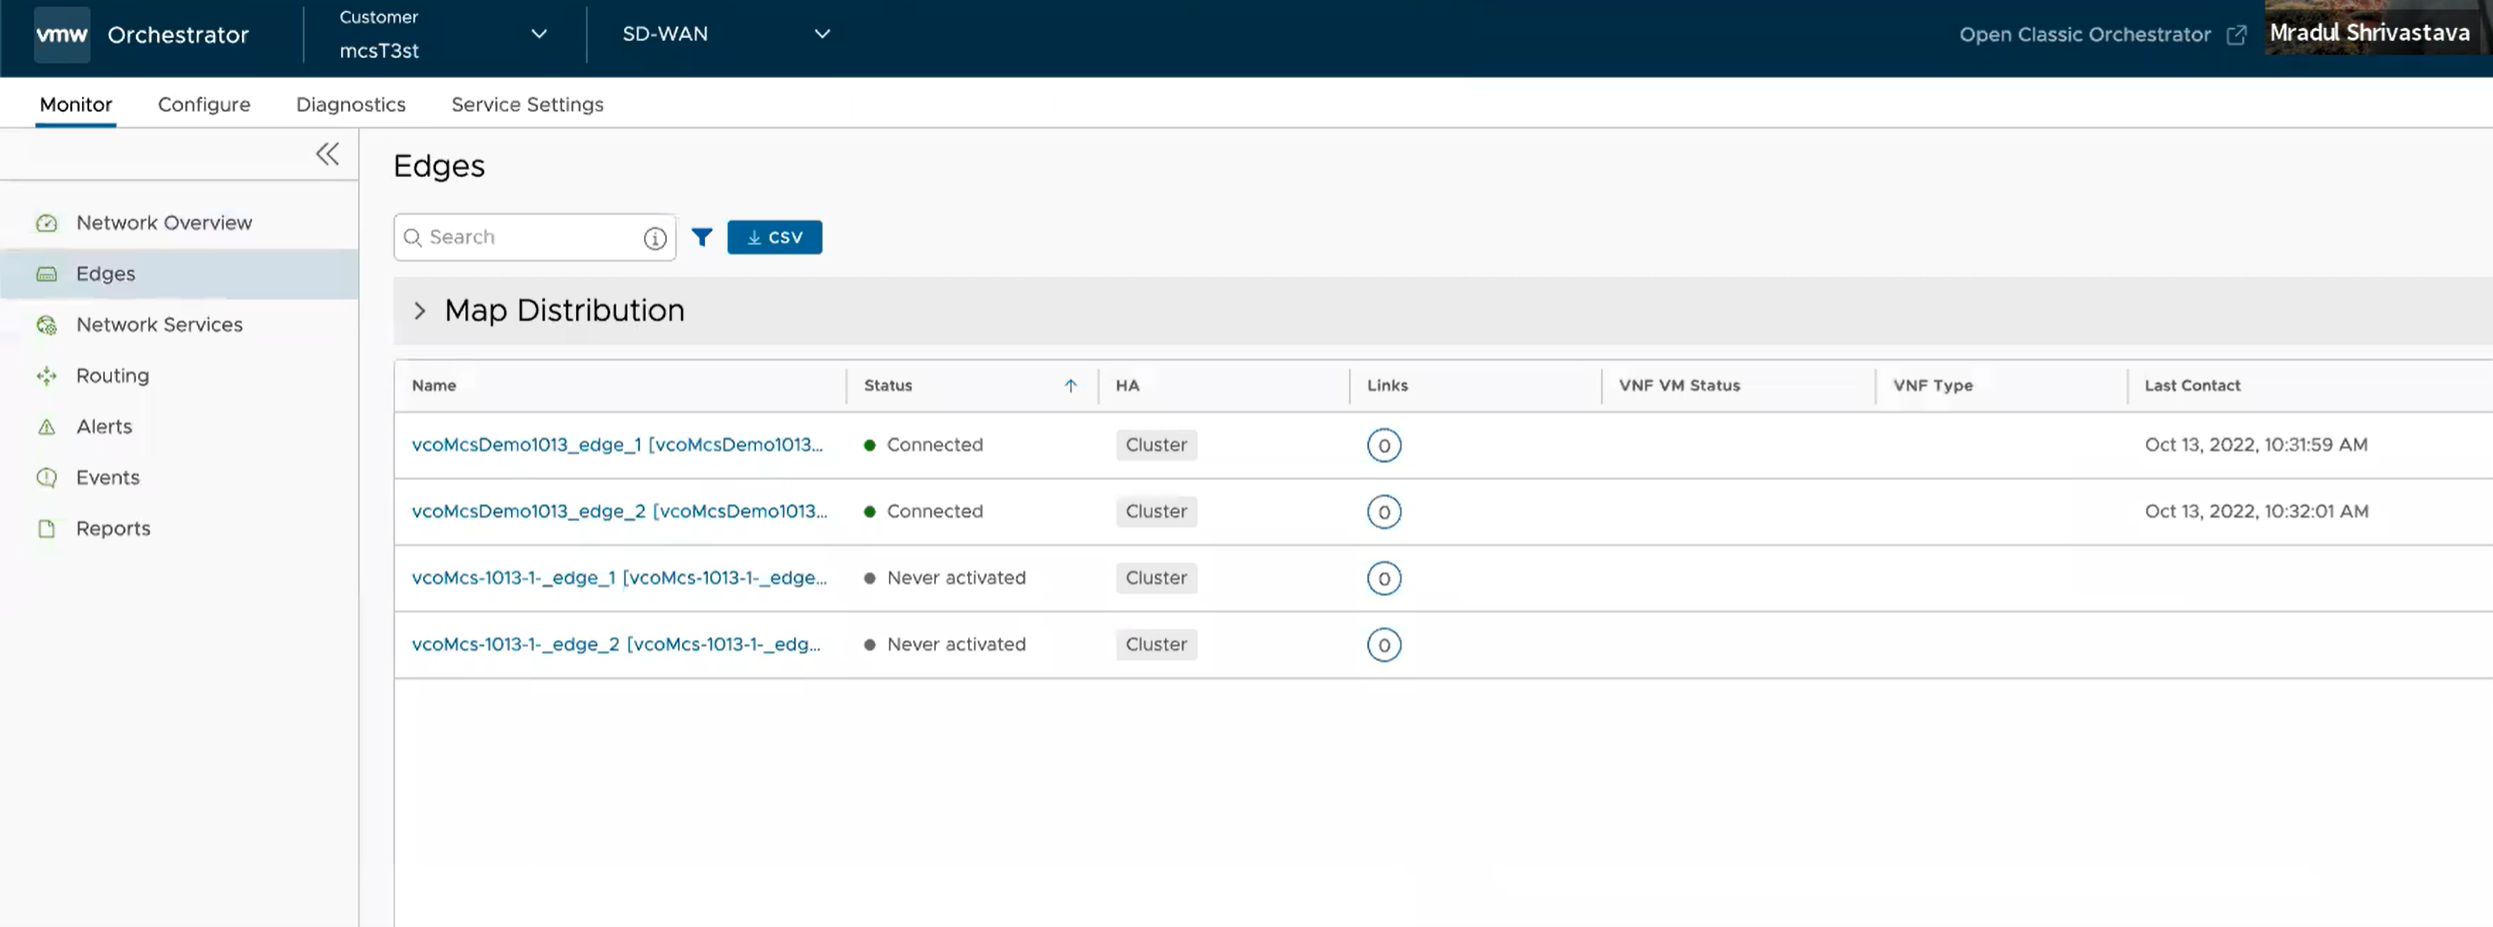
- To verify if the BGP sessions are established for the deployed Virtual Azure NVA Edge, click Monitor > Routing.
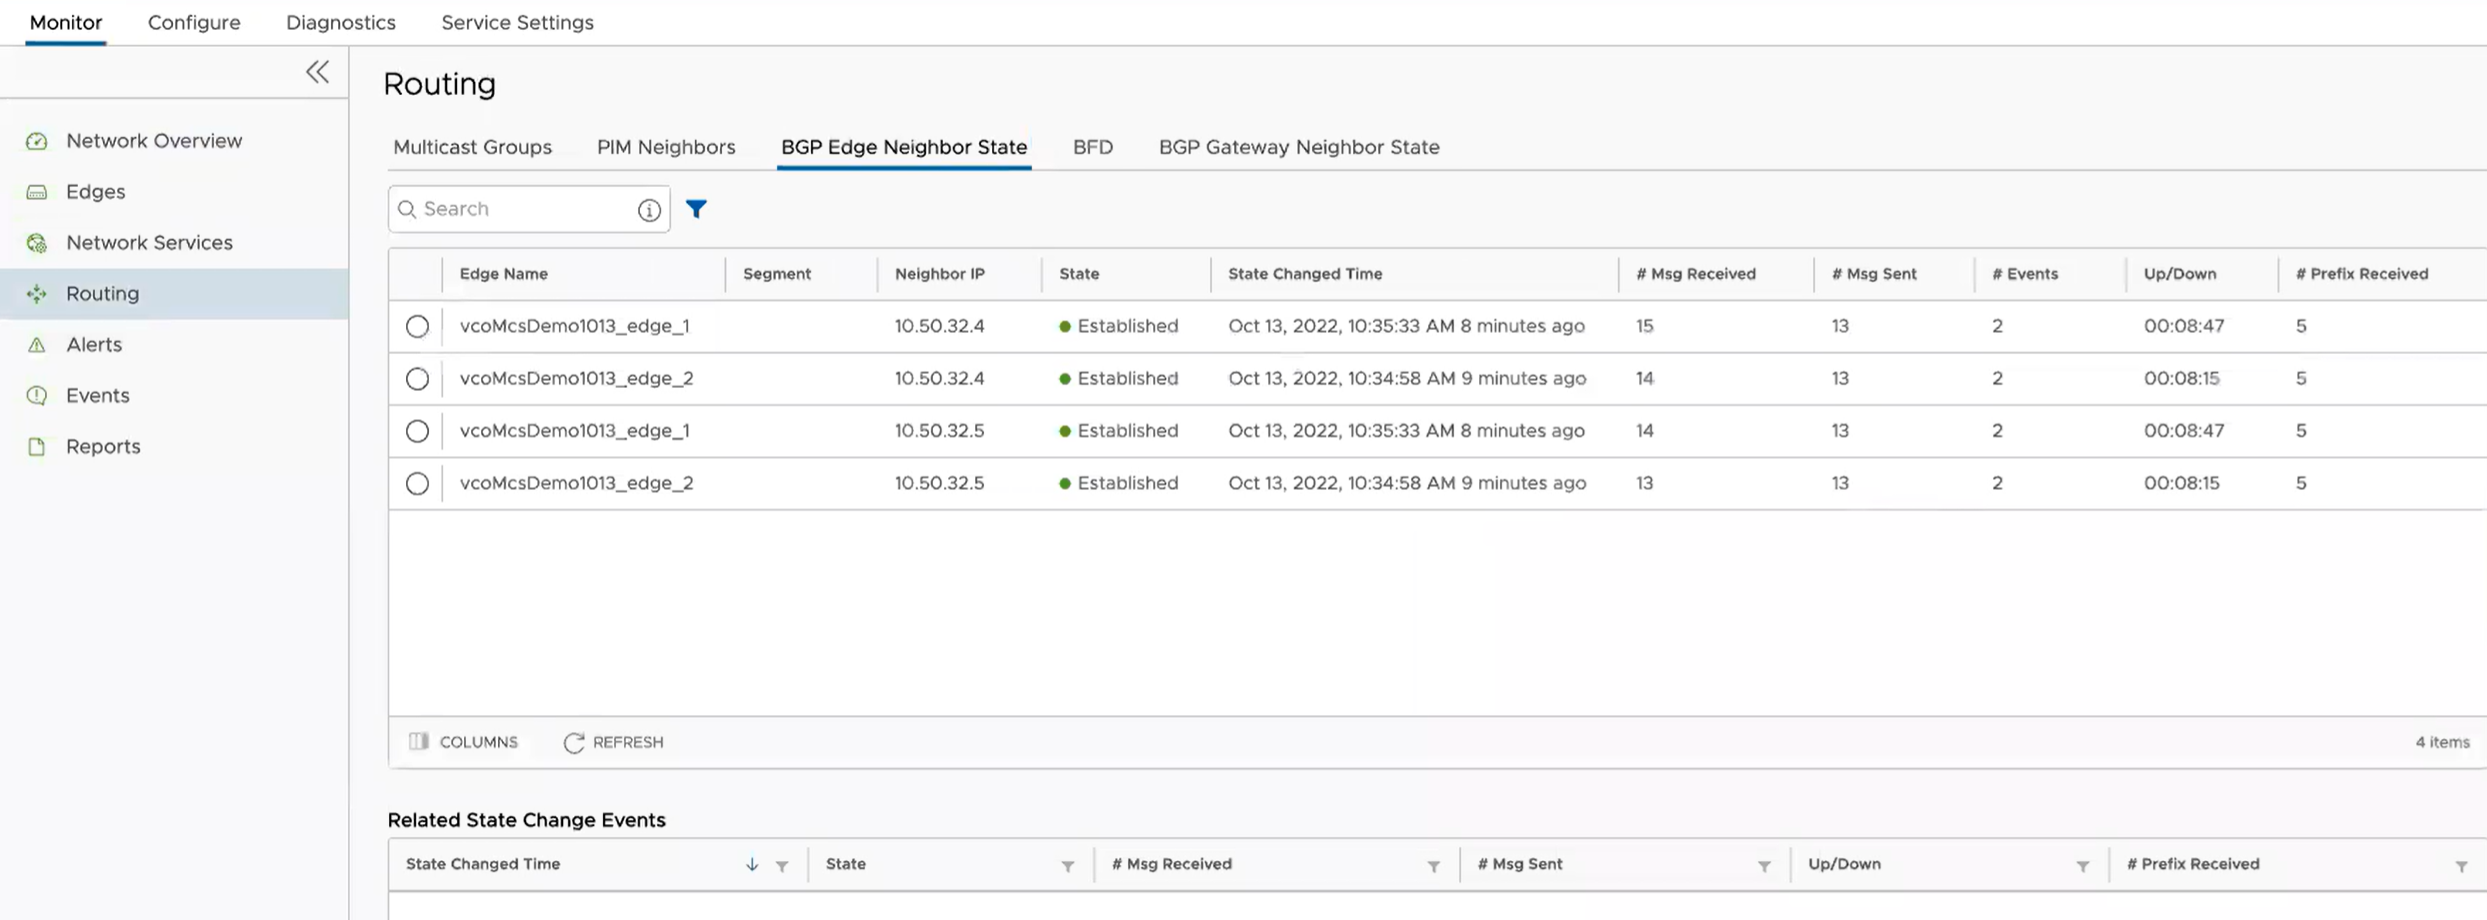 Important: Once the Virtual Edges are created, configure IP address for each of the Virtual Edges by navigating to Configure > Edges > Firewall > Edge Access and by adding the IP address "168.63.129.16" under the Allow the following IPs field.
 Note: You can perform this configuration on a Profile used by many or all of the Virtual Edges so you do not need to do it for each individual Virtual Edge.
For more details regarding this IP configuration, see https://docs.microsoft.com/en-us/azure/virtual-network/what-is-ip-address-168-63-129-16