


Describes how to install the SD-WAN Gateway OVA on VMware.
Note: This deployment is tested on ESXi versions 6.7, 6.7U3, and 7.0.
Important: When you are done with the OVA installation, do not start the VM until you have the cloud-init iso file and mount as CD-ROM to the
SD-WAN Gateway VM. Otherwise, you will need to re-deploy the VM again.
If you decide to use SR-IOV mode, then you can optionally enable SR-IOV on VMware. To enable the SR-IOV on VMware, see Enable SR-IOV on VMware.
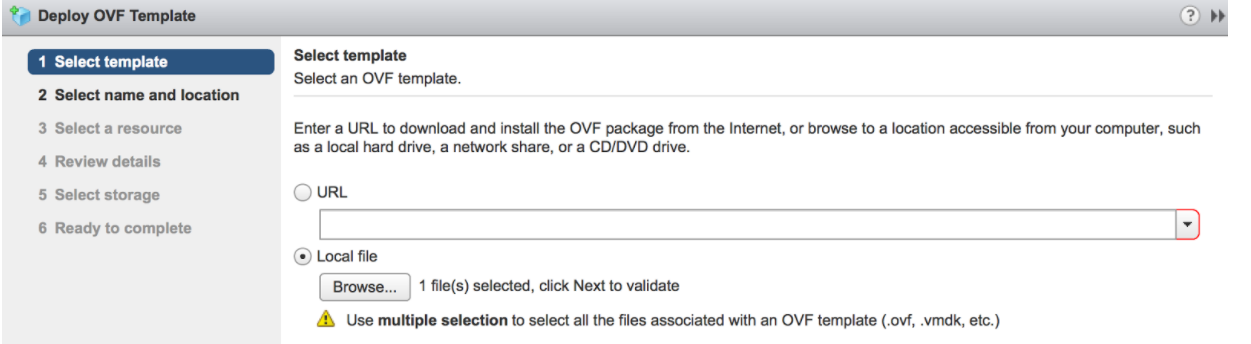
To install the SD-WAN Gateway OVA on VMware:
- Select the ESXi host, go to Actions, and then Deploy OVF Template. Select the SD-WAN Gateway OVA file provided by VMware and click Next.
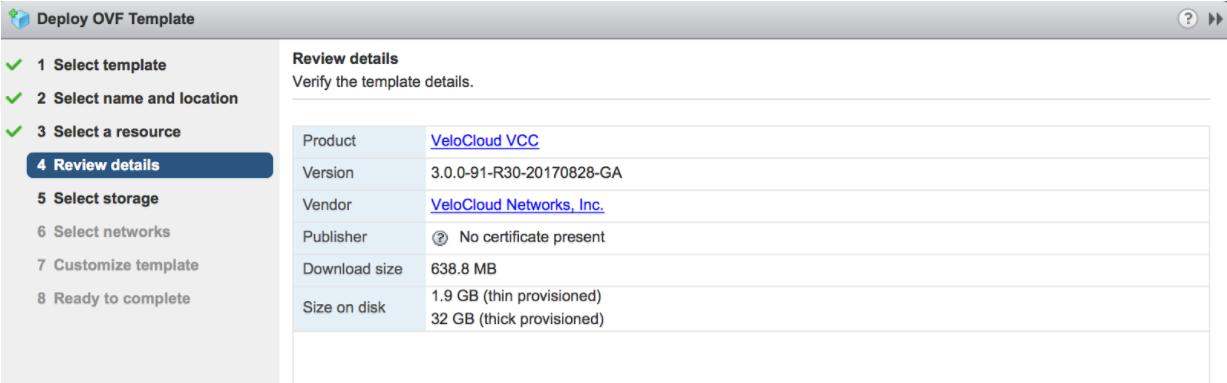
Review the template details in Step 4 (Review details) of the Deploy OVA/OVF Template wizard as shown in the image below.
- For the Select networks step, the OVA comes with two pre-defined networks (vNICs).
vNIC Description Inside This is the vNIC facing the PE router and is used for handoff traffic to the MPLS PE or L3 switch. This vNIC is normally bound to a port group that does a VLAN pass-through (VLAN=4095 in vswitch configuration). Outside This is the vNIC facing the Internet. This vNIC expects a non-tagged L2 frame and is normally bound to a different port group from the Inside vNIC. 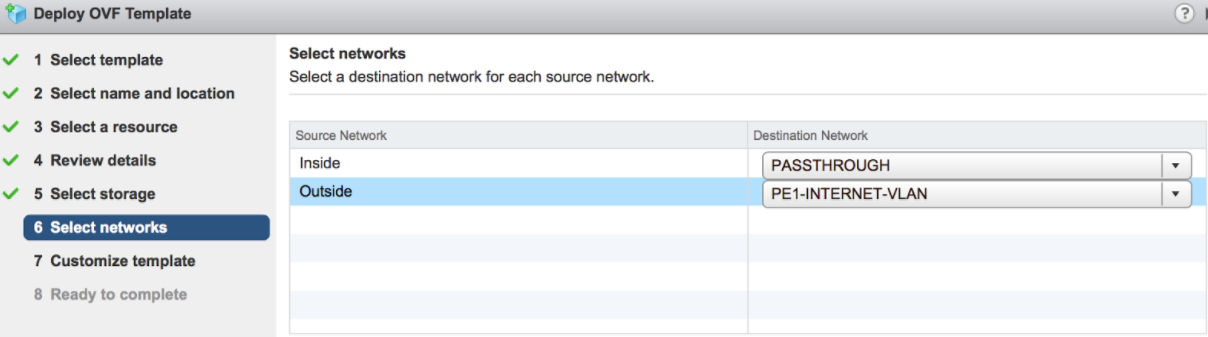
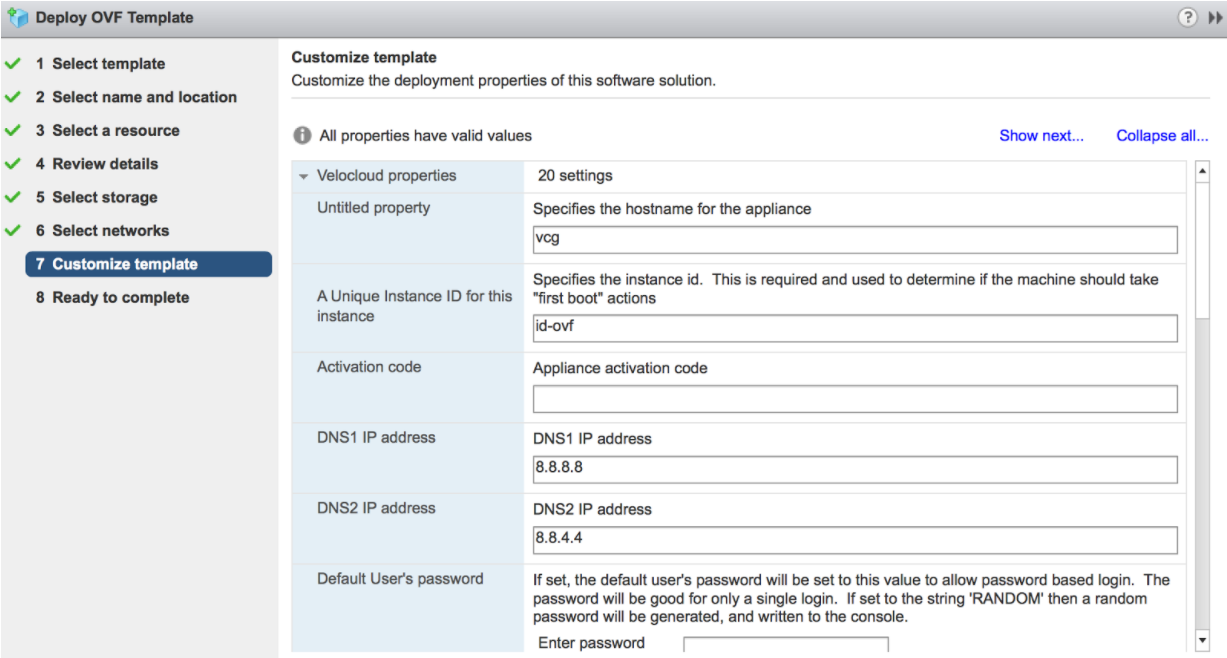
- For the Customize template step, do not change anything. This is when you use vApp to configure the VM. We will not use vApp in this example. Click Next to continue with deploying the OVA.
- Once the VM is successfully deployed, return to the VM and click Edit Settings . Two vNICs are created with adapter type = vmxnet3.
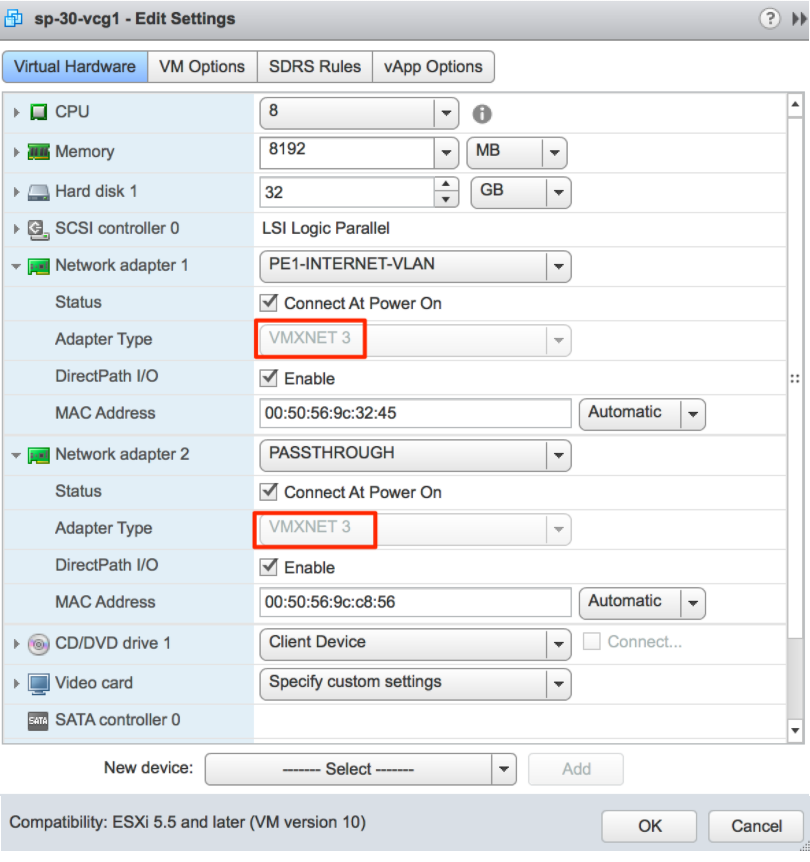
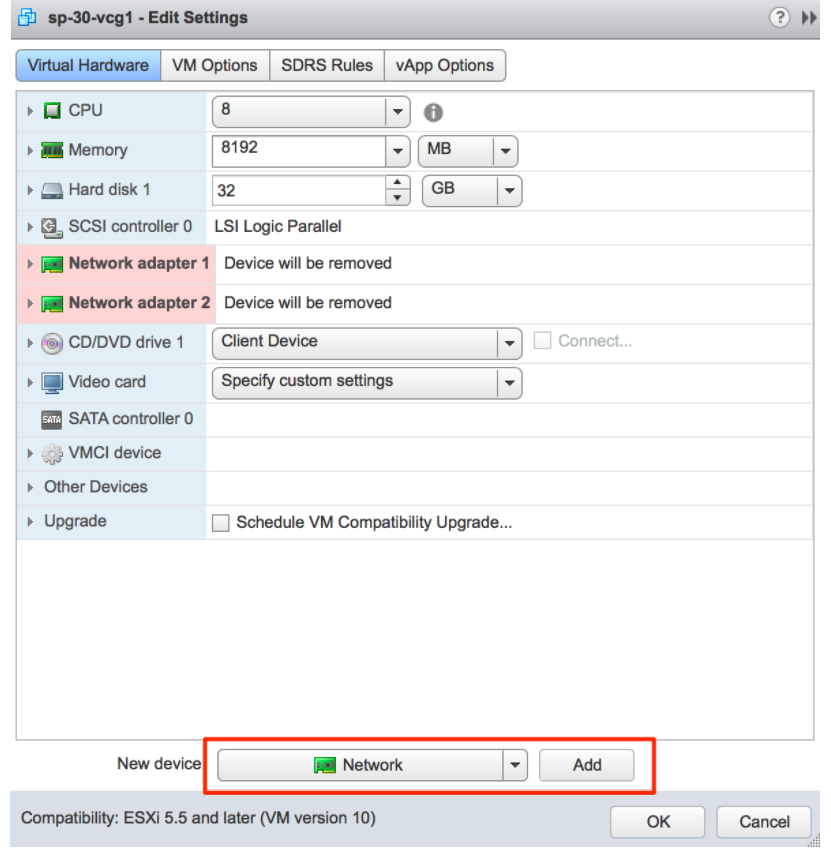
- (Optional for SR-IOV) This step is required only if you plan to use SR-IOV. Because the OVA by default creates the two vNICs as vmxnet3, we will need to remove the two vNICs and re-add them as SR-IOV.
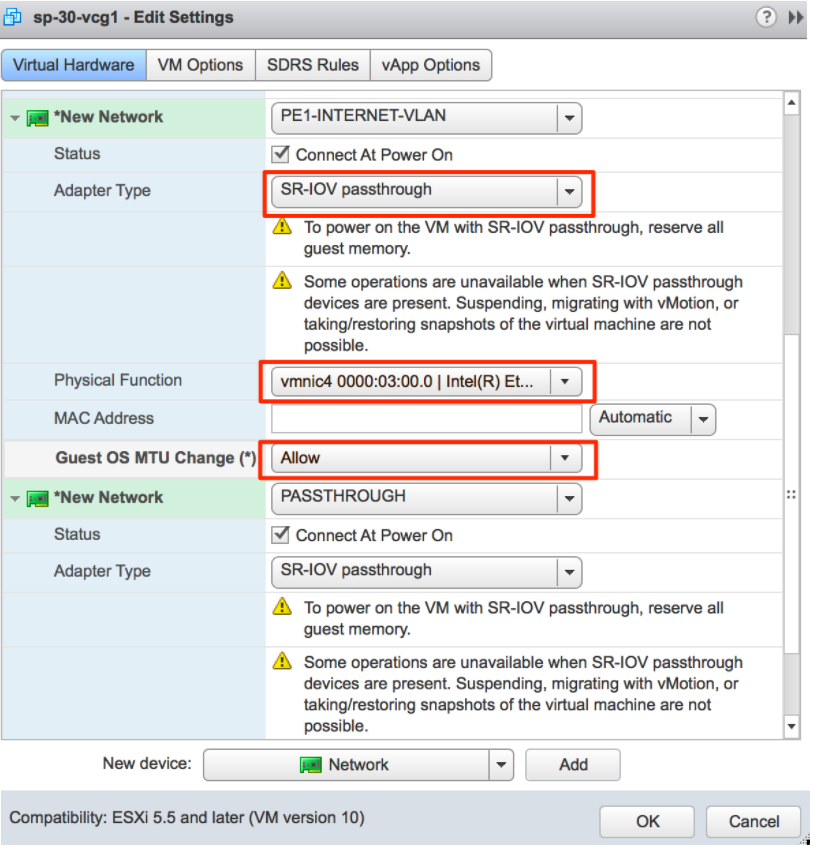
When adding the two new SR-IOV vNICs, use the same port group as the original two vmxnet3 vNICs. Make sure the Adapter Type is SR-IOV passthrough. Select the correct physical port to use and set the Guest OS MTU Change to Allow. After you add the two vNICs, click OK.
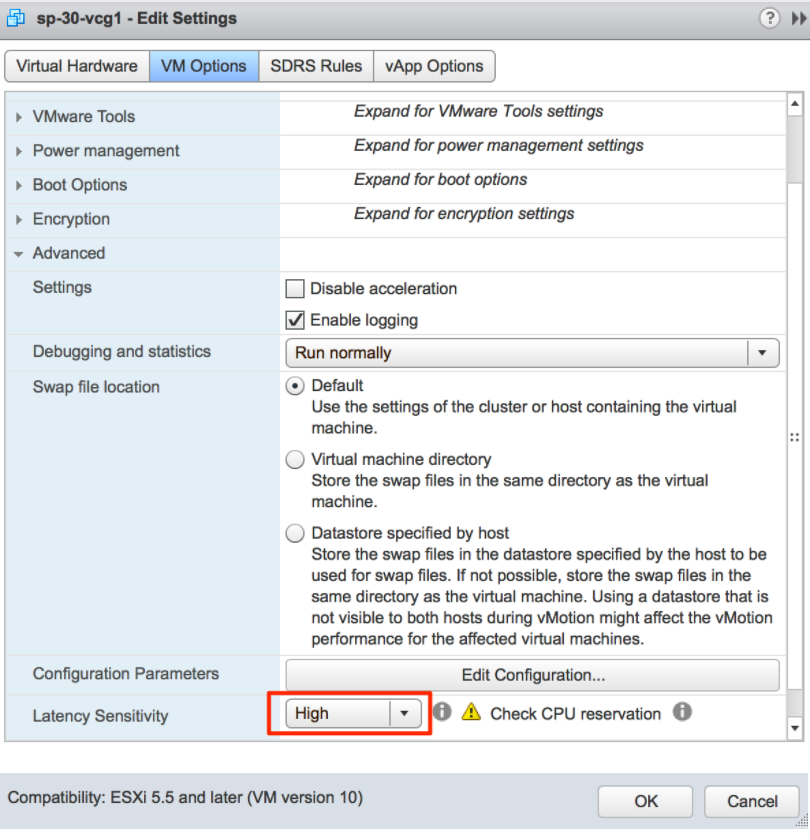
- As SD-WAN Gateway is a real-time application, you need to configure the Latency Sensitivity to High. For more information about how to configure the VM for real-time application, see https://www.vmware.com/content/dam/digitalmarketing/vmware/en/pdf/techpaper/latency-sensitive-perf-vsphere55-white-paper.pdf.
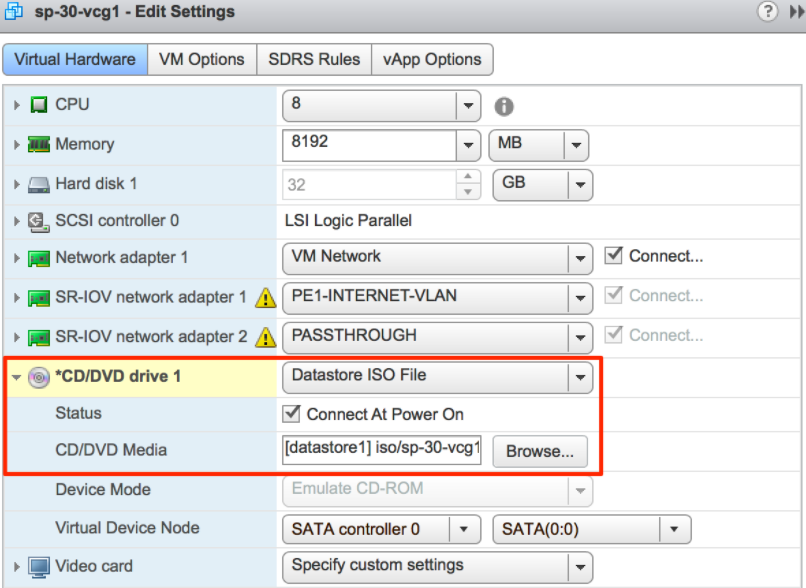
- Refer to Cloud-init Creation. The Cloud-init file is packaged as a CD-ROM (iso) file. You need to mount this file as a CD-ROM.
Note: You must upload this file to the datastore.
- Start the VM.
